Tutorials
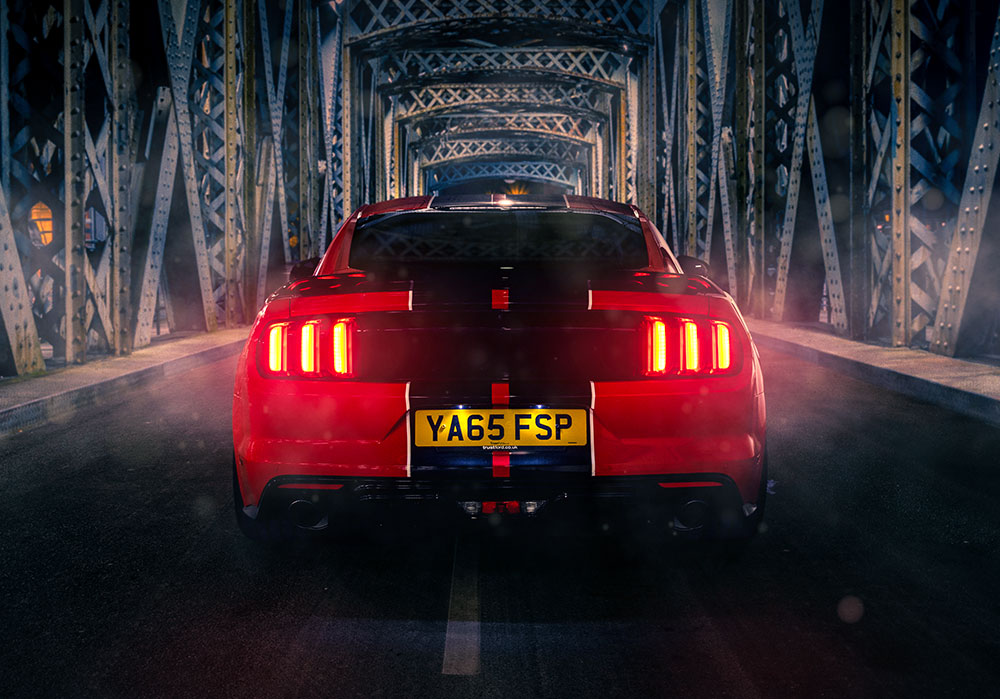
I’ve enjoyed processing some photos of my car lately, using various editing and compositing techniques to enhance the flat and boring images that come out of the camera into vibrant automotive portraits. Today I’ll show you the process I went through to transform a rear-end shot of my Mustang in a rather uninspiring location of the local supermarket car park, into a much improved version with a dramatic backdrop, punchy colours and atmospheric lighting effects.
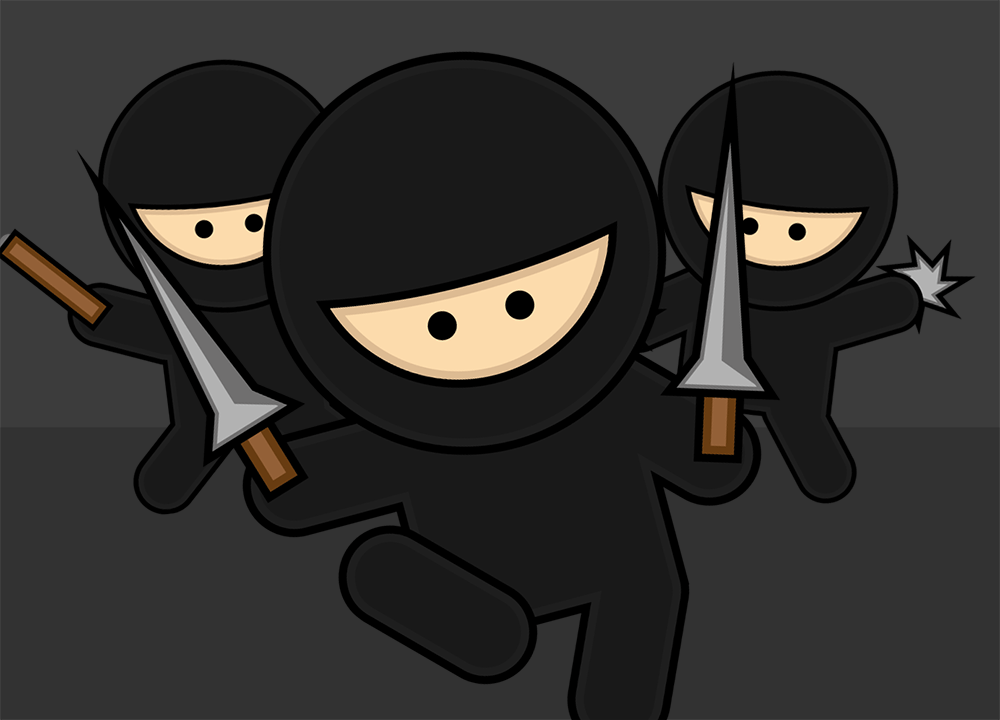
In today’s Illustrator tutorial we’ll be making a group of cute, but extremely dangerous Ninja characters in Adobe Illustrator, using basic shapes and flat colours to give the artwork a stylised illustrative look. This is an ideal topic for beginners, since we’ll be using a range of basic Illustrator tools and techniques.
Have some fun transforming yourself, your family members or your work colleagues into a bobblehead style caricature with this step-by-step tutorial for Adobe Photoshop. We’ll make use of Photoshop’s image manipulation techniques to exaggerate the features of a portrait photograph to give it a funny cartoon-like appearance. Since we’re using a photograph as the source, rather than illustrating the caricature by hand, it retains degree of realism and retains a strong resemblance to the subject.
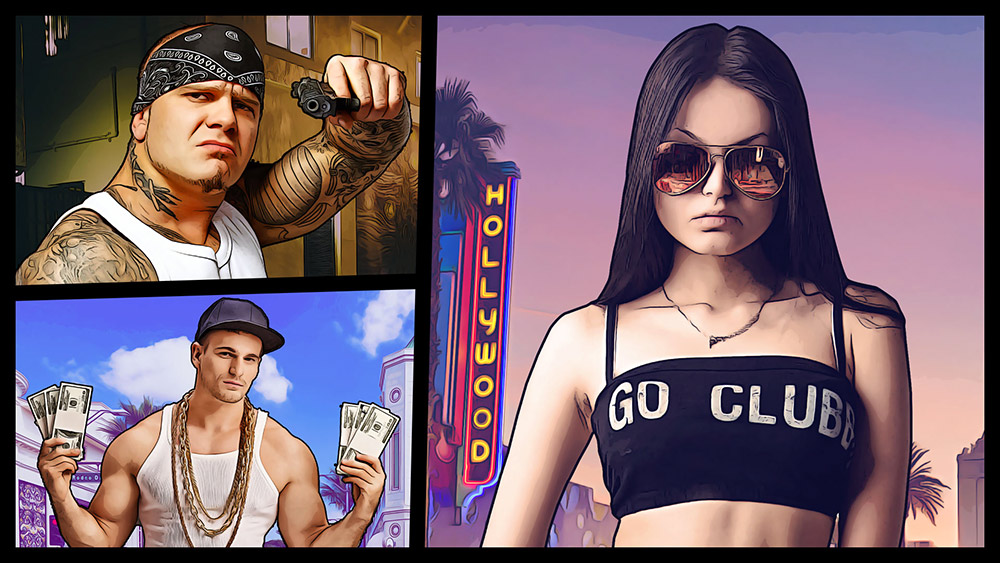
In today’s video tutorial we’re going to look at creating a photo effect inspired by the loading screens and cover artwork of the Grand Theft Auto 5 (GTA) game, which feature a life-like illustration style of the characters but with a clear digitally painted appearance. Due to the nature and theme of the game, the effect works best when combined with pictures of gangsters, fast cars and scantily dressed ladies against the city streets. While the originals were likely painted from scratch, we’ll use stock photos as the source of the effect, which will then be transformed with the help of a cocktail of Photoshop filters.
2019 is just around the corner, so it’s that time of year when I look back at the last 12 months of uploads to my Spoon Graphics YouTube Channel and share my top 10 most popular video tutorials from 2018. Channel stats on the whole are down slightly from last year, by between 15-30% in Views and Subscriber growth. This time last year I’d just about reached 200,000 subscribers, and almost a year on I’m almost at 250,000. It’s not quite the explosion from 100,000-200,000 in 2017, but it’s nice to know my channel is still steadily growing. Here’s an overview of my best performing uploads. Which ones were your favourite?
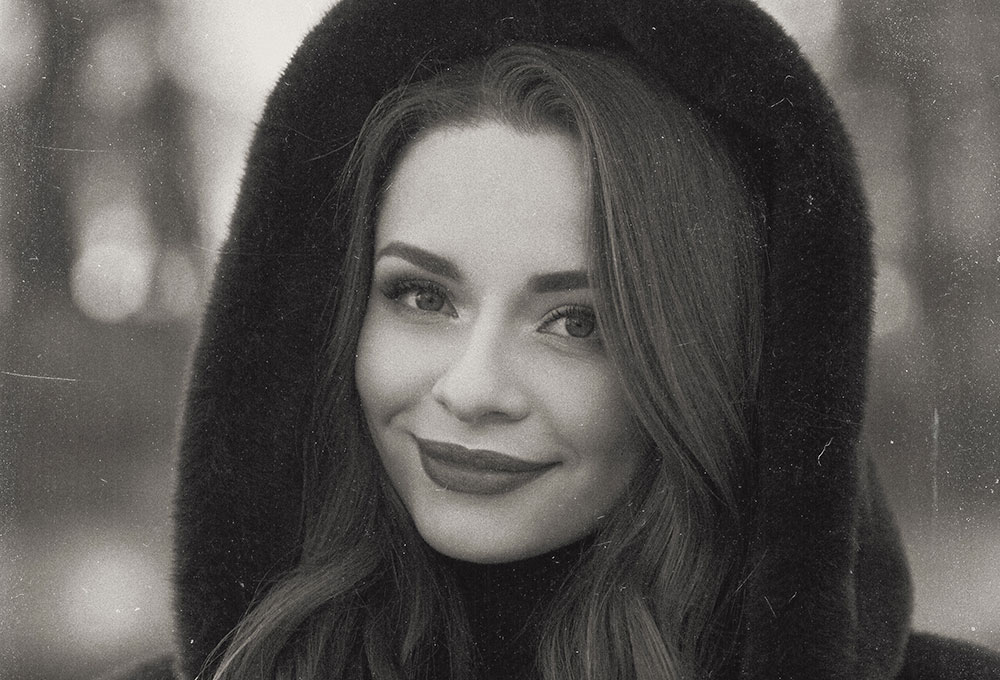
In today’s Adobe Photoshop tutorial I’m going to show you 5 tips to add authentic looking black and white analog film effects to your photos. While modern digital cameras produce vastly superior images with crisp colourful pixels, photographers still love the nostalgia of old film-based cameras and the character of the photographs they produce, especially the beautiful mood and tones of black and white film stock. It takes a lot of practice and experience to master analogue photography, plus there’s a lot of messy work with various chemicals involved to develop traditional photographic film, but Photoshop has some great built-in tools that you can use to transform your digital pictures into realistic looking film based shots. It just requires a basic understanding of how analogue pictures are made, so you can then find ways to mimic the appearance with Photoshop adjustments.