Tutorials
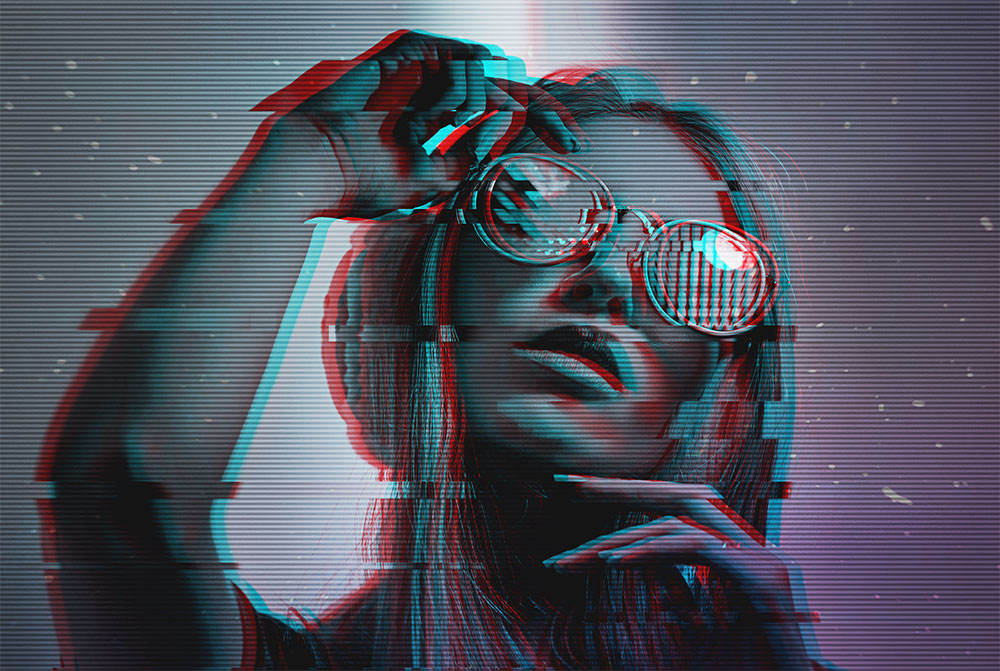
In today’s Adobe Photoshop tutorial we’re going to have some fun creating a trendy glitch effect, that we’ll apply to a photo some accompanying text. The effect combines digital distortions such as screen tearing, RGB splitting and scanlines to simulate the visual errors associated with digital video footage. Much like how analogue effects help to give your artwork a retro look, this glitch effect helps to achieve a modern or futuristic high-tech vibe.
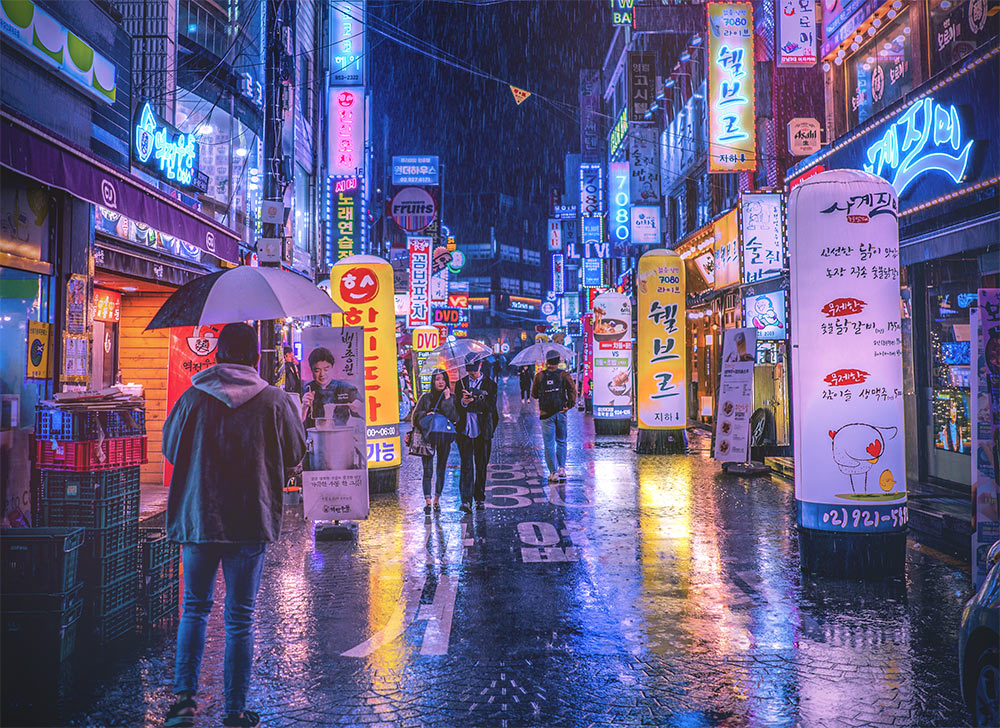
The cyberpunk aesthetic is commonly associated with densely populated, futuristic cities illuminated by bright neon signs and advertisements. Follow these steps in Adobe Photoshop to transform a regular street photograph into a neon-noir scene by applying heavy colour grading with bright blues and hot pinks, as well as neon sign effects to create a colourful yet moody atmosphere within the image.

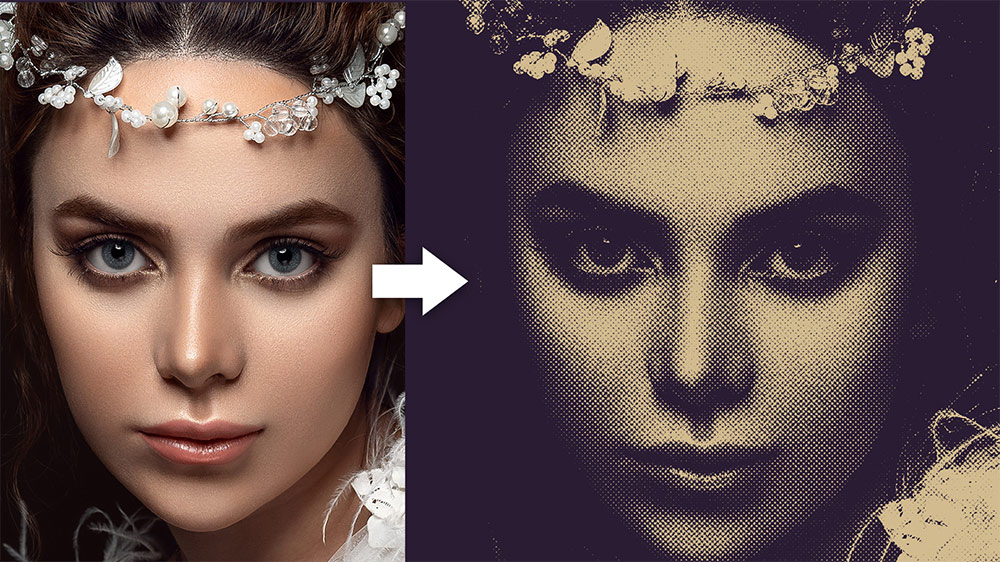
In today’s Photoshop video tutorial I’m going to show you a series of filters and adjustments you can apply to your artwork to give it an old, aged print effect. The aesthetics of low-cost printing methods in the mid-20th Century is associated with retro comics, magazines and matchbook prints. Ink bleed, misregistration and visible halftone dot patterns are all side-effects of cheap offset printing on cheap paper stock, but those visual traits that were once defects from the printing process are now desired effects to give modern artwork the appearance of a retro print. Follow these steps in Adobe Photoshop to turn your crisp digital designs into nostalgic retro prints. We’ll add filters that replicate the appearance of high ink absorption with irregular edges and bleeding corners, convert all colours into halftone screens, separate and offset the black areas as if the printing plate is misaligned, then we’ll finish off the effect with worn ink and paper textures to add the fine details of pulp grain and distressed areas where the print has worn away.
In today’s Adobe Illustrator video tutorial, I’ll show you how to create a retro text effect with colourful concentric stripes. Illustrator’s Offset Path command produces the basic effect, but we will eliminate the tedious process of adding each outline individually with the help of an Action, so you will be able to fill an entire poster with this retro stripe effect within seconds.
In today’s Photoshop video tutorial I’m going to show you a combination of filters that produce distressed halftone effects, which gives an image a high-contrast, newsprint-style appearance. The main effect is made of halftone dots, but I’ll also show you some additional tweaks you can apply to produce other pattern effects too, like the kind of engraved illustration style you find on bank notes.
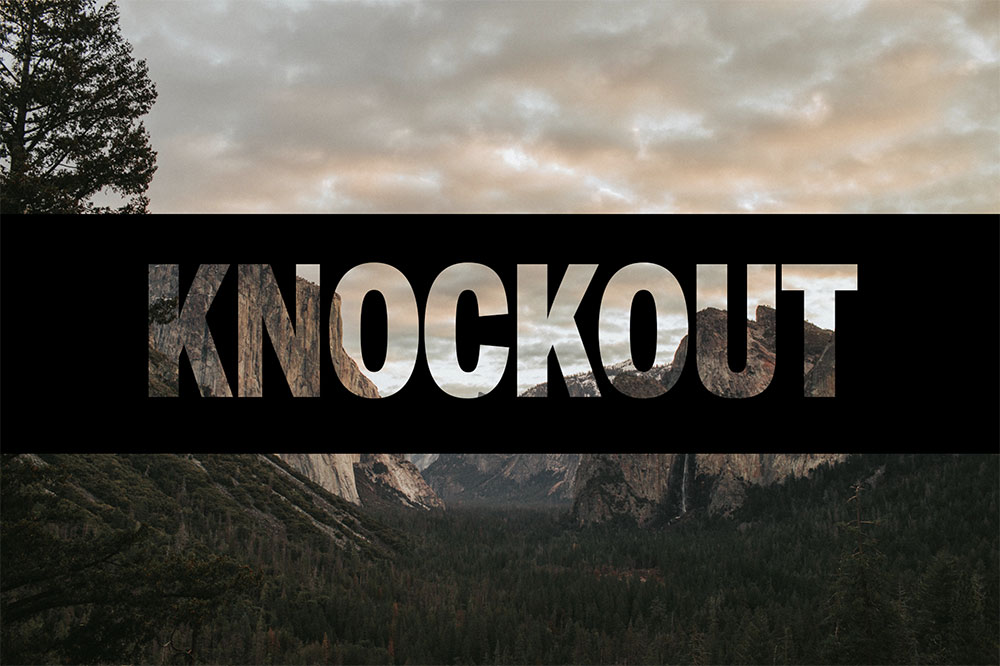
No matter how long you have been a Photoshop user, there are always new tips and tricks to learn! I recently came across a new technique that has transformed the way I work. This method doesn’t use any new tools, in fact I’m pretty sure the feature has been a part of Photoshop for over a decade, yet I only discovered it recently. The feature is an Advanced Blending option within the Layer Styles window named ‘Knockout’. As its name suggests, it ‘knocks-out’ the contents of a particular layer from the layers below. Read on to find out how this feature works, and how I now use it as a replacement to Layer Masks or Clipping Masks in some design scenarios.