No matter how long you have been a Photoshop user, there are always new tips and tricks to learn! I recently came across a new technique that has transformed the way I work. This method doesn’t use any new tools, in fact I’m pretty sure the feature has been a part of Photoshop for over a decade, yet I only discovered it recently. The feature is an Advanced Blending option within the Layer Styles window named ‘Knockout’. As its name suggests, it ‘knocks-out’ the contents of a particular layer from the layers below. Read on to find out how this feature works, and how I now use it as a replacement to Layer Masks or Clipping Masks in some design scenarios.
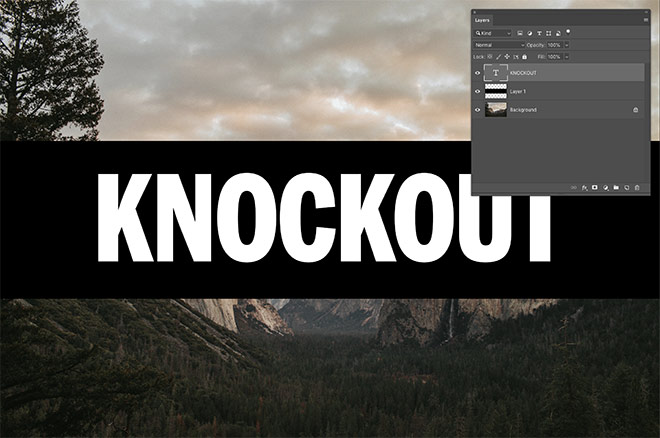
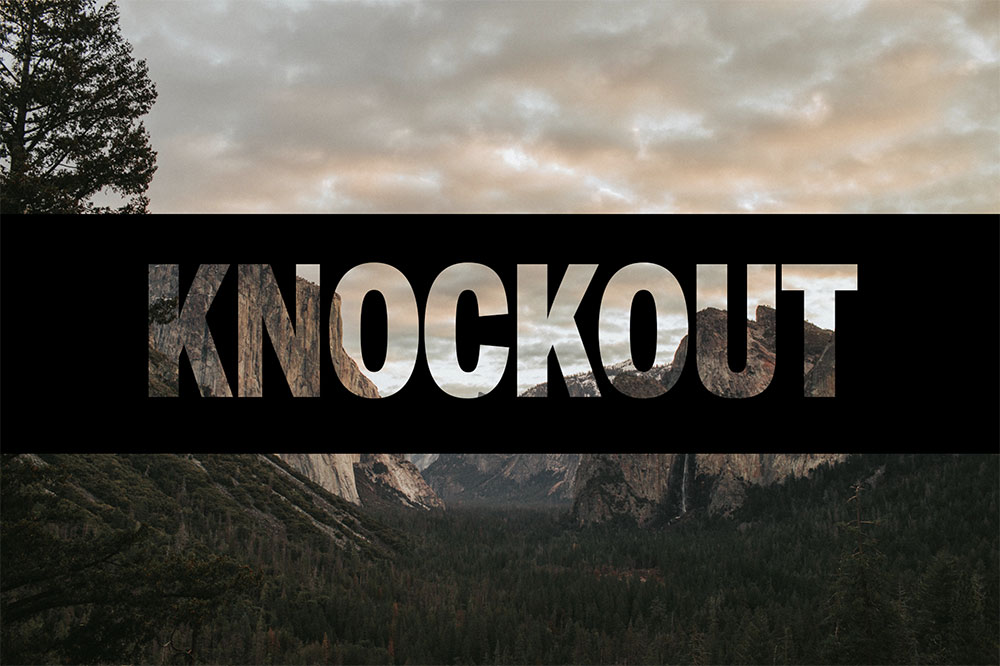
This document structure provides a great example of how the Knockout feature works. You have a background photograph, a solid colour banner, then a text element on top. The goal is to ‘punch-out’ the text from the banner to allow the background photo to show through.
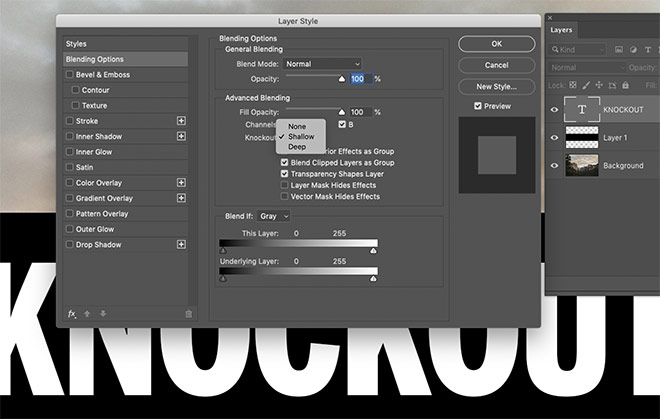
Double-click the text layer to open the Layer Style window. In the main Blending Options settings, you will see the menu for Knockout, with three options of None, Shallow, and Deep. Choose Shallow for now.
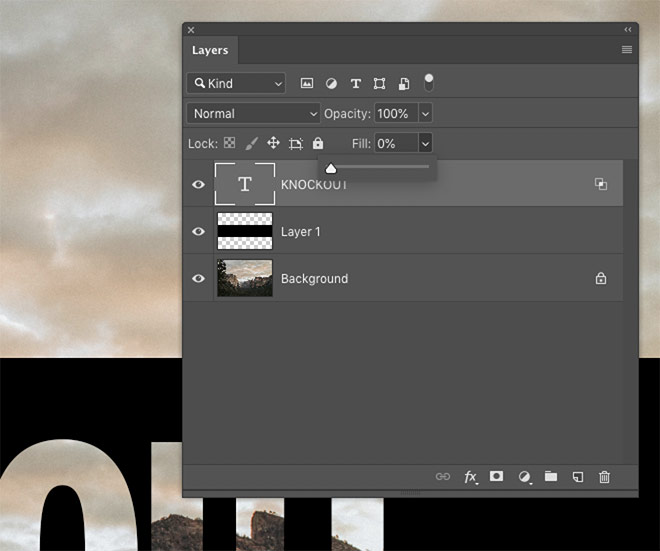
The knockout effect won’t be visible until the contents of the layer are hidden. This can be done by changing to a blending mode that renders the pixels invisible (ie. Multiply for white text), or by simply reducing the Fill to 0%.
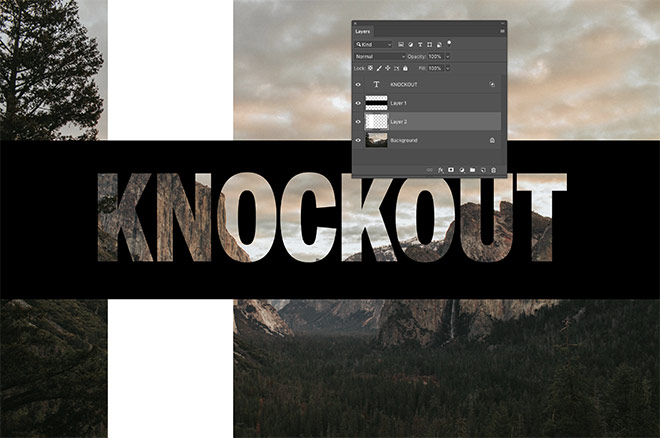
The outline of the text is now ‘knocked out’ of not only the black banner directly underneath, but also any other layers until it reaches the Background layer.
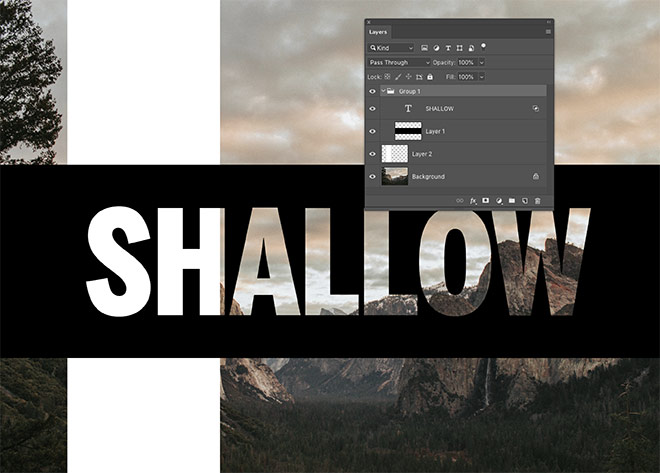
The difference between the Shallow and Deep Knockout options is when contained within a Group, the Shallow option will only knock-out any layers within the same group, whereas Deep will knock-out all layers regardless of layer grouping.
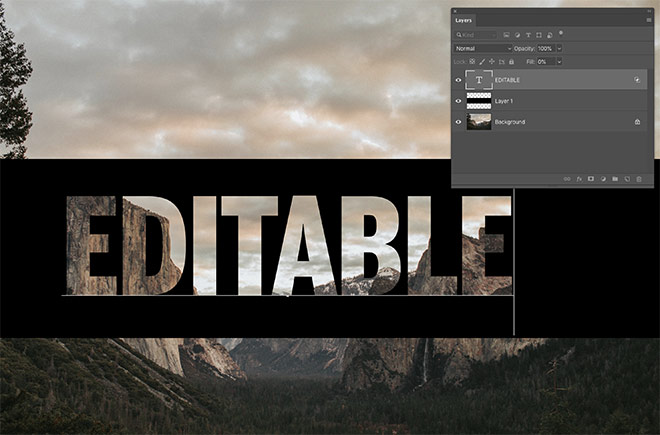
One huge benefit to this knockout method when used with text is the effect is automatically updates whenever the text element is edited.
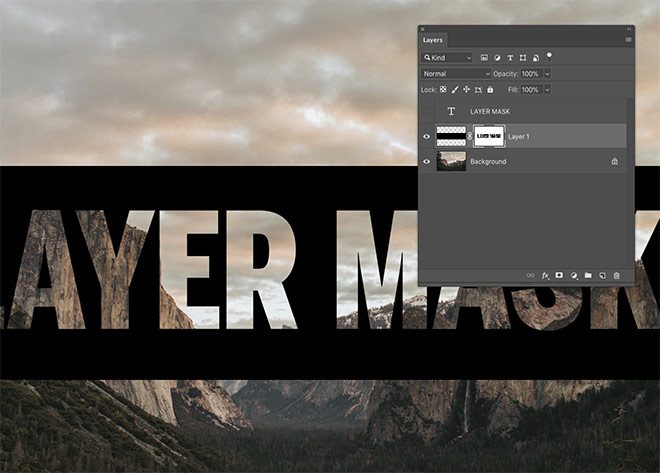
The technique I previously used to create this effect made use of a Layer Mask. This method lacks the ability to edit the text after it has been filled within the mask. It is also difficult to apply several knockout layers with the option of removing just one, without having to rebuild the entire effect.
Example Usage: Easily add texture effects
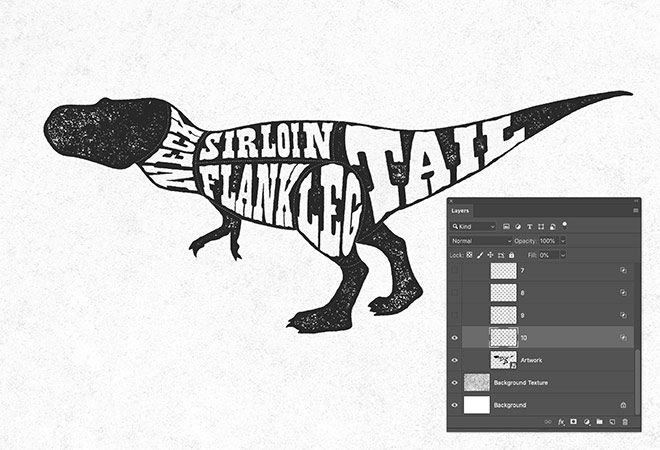
My favourite use of Knockout is to apply texturing effects to my artwork, without using a Layer Mask. This method allows you to easily overlay several texture layers to either pick and choose between them, or layer up multiple textures at once. You can see this in action within my free Ink Stamp Texturizer download.


Looking forward to learning more
i like this
Great tip! Thanks for sharing and the in-depth explanation! I’m looking forward to using this in the near future.
using PS cc 2019 and I can’t get the effect to work. Wonder what I am doing wrong.
Mind blown! It didn’t work for me at first until I read on, and reduced the fill on the text layer to 0%. Then BAM! Thank you, Chris!
I didn’t realize at first the text layer and the color band layer have to be together in a group folder. (cc 2019 — it works)
Looking forward to trying this out – got a few ideas in my head that I could add it to!
This is one feature I haven’t explored much! Will, now! Thank you!
Amazing! I’ve literally just worked on a project where this would have saved a lot of time… Looking forward to using this in the future. Thanks!
This didn’t work for me either. PS 2020 crashed 3 times.
Nice tutorial but I guess I miss something. My setup: Background image, solid color rectangle shape and text. All on separate layers as shown in your tutorial. When setting the layer as described, my text stays white or will get transparent without any shine through… :(
I’m using PS2020… Any idea?
Did you try grouping your solid colored rectangle layer and text layer together. I had the same problem until I put the two layers in a group.
Update: Only works (for me) if I put the text layer and the solid color in a group. Without that it’s not working the way it’s shown here… Happy now… :)
Thanks Chris!
I am working with CS6 and it works
Great effect. Easy to do with outlining etc but this method keeps it editable. Superb tip. Cheers.
I saw you use this in your Cereal Box tutorial. Thank you so much for explaining in more detail how this works. I can’t wait to try it out
This is will be a HUGE help. Thank you for sharing!
very very very thanks
Great idea but not working in CC2019. I’ve done it as a single layer and as a group and no luck. Something must be missing here.
It finally worked as a group, just took awhile to process it. Thanks for the tip!
This is great! Can’t wait to try it.
Mind blown, Amazing!!