Tutorials
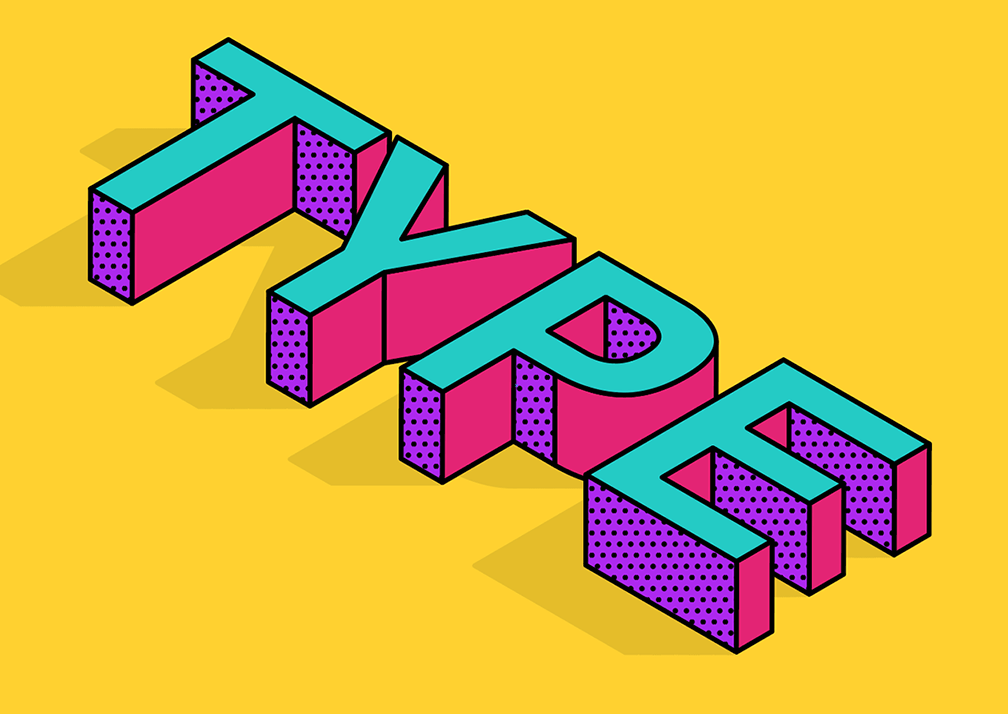
In today’s Adobe Illustrator tutorial we’re going to create a vibrant piece of vector artwork featuring three dimensional type from an isometric viewpoint. This isometric type effect is commonly combined with bright colours to produce a fun design style. Adobe Illustrator is the perfect tool to create such an effect; the 3D Extrude & Bevel tool easily generates an accurate isometric layout, then the artwork can then be broken down into individual vector shapes for easy customisation with colourful fills and detailed patterns.
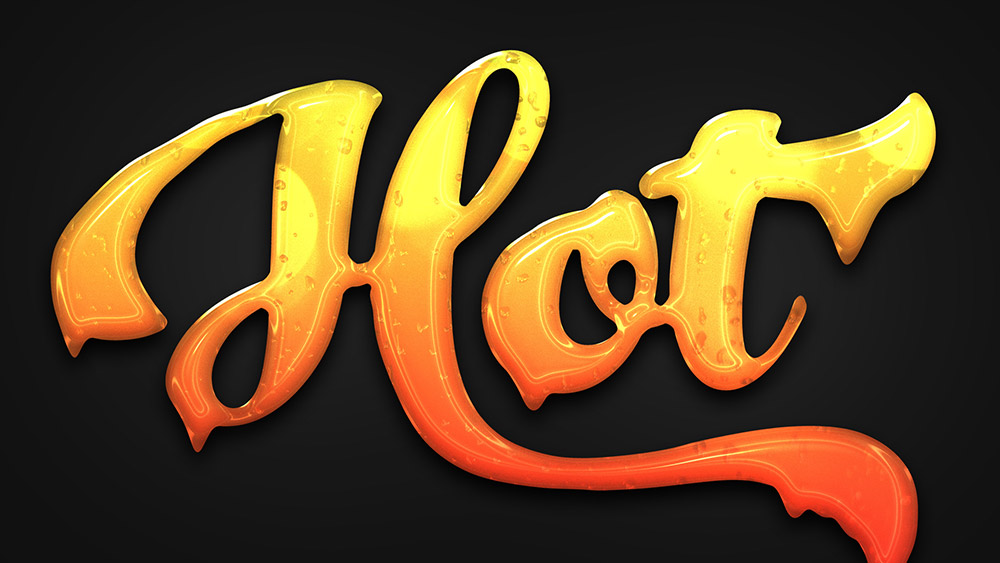
Last week I showed you how to create a slimy text effect in Adobe Illustrator, so I thought I’d cover a similar topic this week but in Photoshop instead. The vector Illustrator artwork is quite flat, whereas you can achieve much more realism with gradients and filters in Photoshop. The effect we’ll be producing in this tutorial is a glossy text effect made out of some kind of gooey yellow substance!
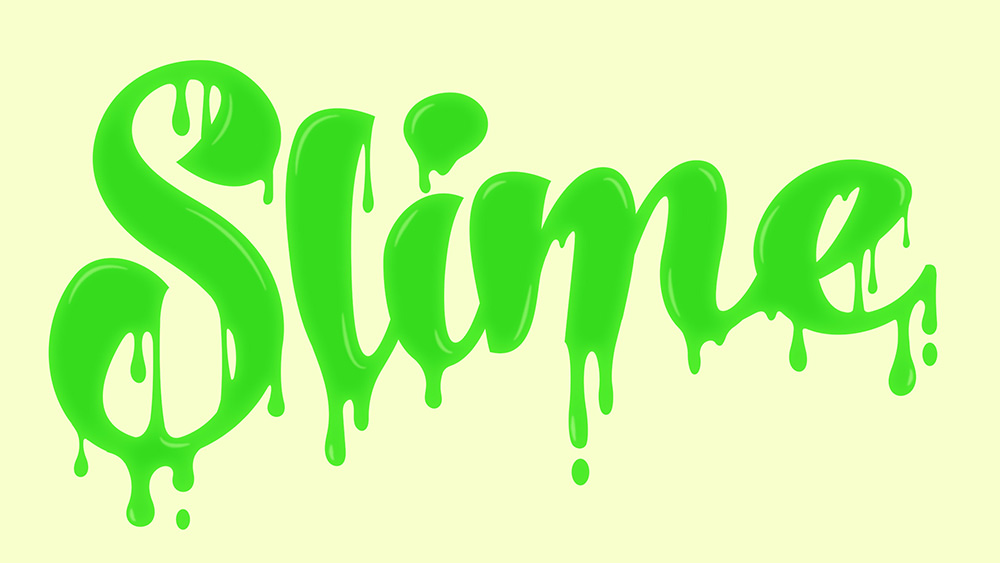
In today’s Adobe Illustrator tutorial we’re going to have some fun creating a gooey slime effect with some custom type. You could apply this to your own hand lettering pieces, but I’m going to be using a ready made font, which I’ll be customising with the vector drip shapes. Once the outline is complete, we’ll then add some bright colours to make the ooze radioactive, then use a simple trick with the brush tool to draw some highlights.
The topic I wanted to talk about in today’s Photoshop video tutorial is creating the trendy ‘matte’ look within your photos. The thing is, creating the effect literally takes seconds. So instead, I’m going to show you FIVE ways to create a matte effect in Photoshop! There’s a range of tools you can use, each with a slightly different workflow, so hopefully by showing all these different techniques you’ll be able to take home the one you find the most straight forward or memorable.
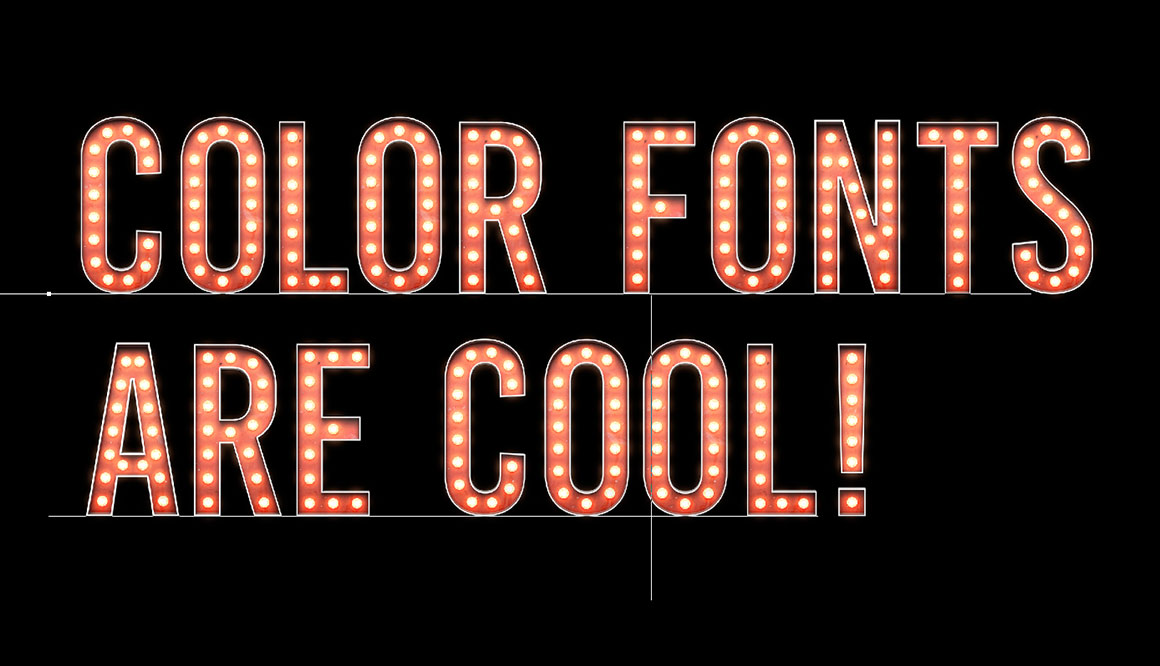
Last month I posted a brief overview and roundup of Color Fonts, the latest development in the world of typography. Unlike traditional fonts, Color Fonts contain full colour graphics for each character, which means creative text styles can now be typed out directly in Photoshop and Illustrator, without the need for any additional effects to be applied. The people behind Fontself reached out to me and asked if I’d like to try out their tool for creating custom Color Fonts, so in today’s tutorial I’ll take you through the process of how I created my first Color Font with ease, using the Fontself extension for Adobe Photoshop.
It’s always fun making character illustrations, but even more so when that character is based on an actual person! Cartoon style avatars are commonly used for their balance between resembling the person they’re representing, whilst retaining some anonymity. In today’s tutorial we’ll use the vector tools in Adobe Illustrator to produce a simple avatar character with a line art style and flat colours. We’ll build the character in such a way that it’s somewhat modular, where multiple personas can be built from one basic foundation.