
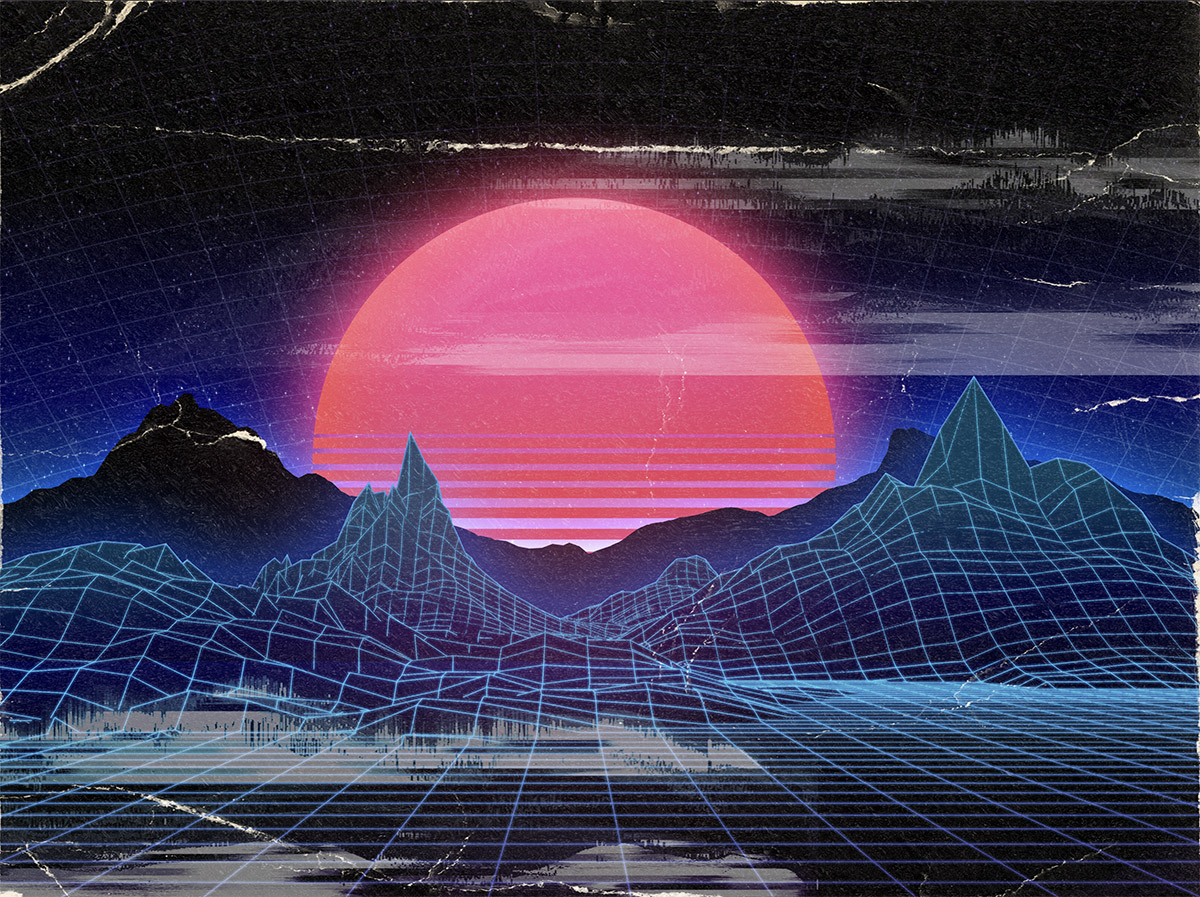
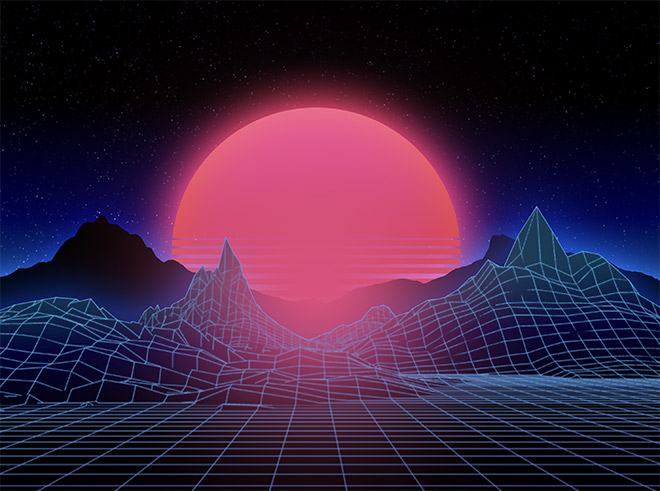
Sci-fi landscape scenes featuring Tron-style grids, mountain scenes, and a vibrant sunrise is a popular aesthetic that is associated with art and design from the 80s. This retro-futuristic style has remained in trend thanks to the retrowave/synthwave music movement, which has helped to bring back the visual elements from 80s arcades, action movies, fashion and pop culture. In today’s tutorial I will show you an easy way to create your own retro landscape scenes with the help of a huge 80s inspired toolbox named NeonWave. Download a free sample containing all the assets you need to easily construct this surreal sci-fi scene with vivid colours.
Watch the video
Subscribe to the Spoon Graphics YouTube Channel
The artwork I will be creating in this tutorial has been made using just a handful of items from NeonWave. You can download all the assets you need to follow along with this free sample pack. It contains all the ready-made mountain graphics, grid layouts, glitch graphics and abstract textures I used to create this scene. I’ll show you how to compose the elements, produce complementary elements from scratch, and apply the all-important lighting effects directly in Photoshop.
Download the Free NeonWave Sample Pack
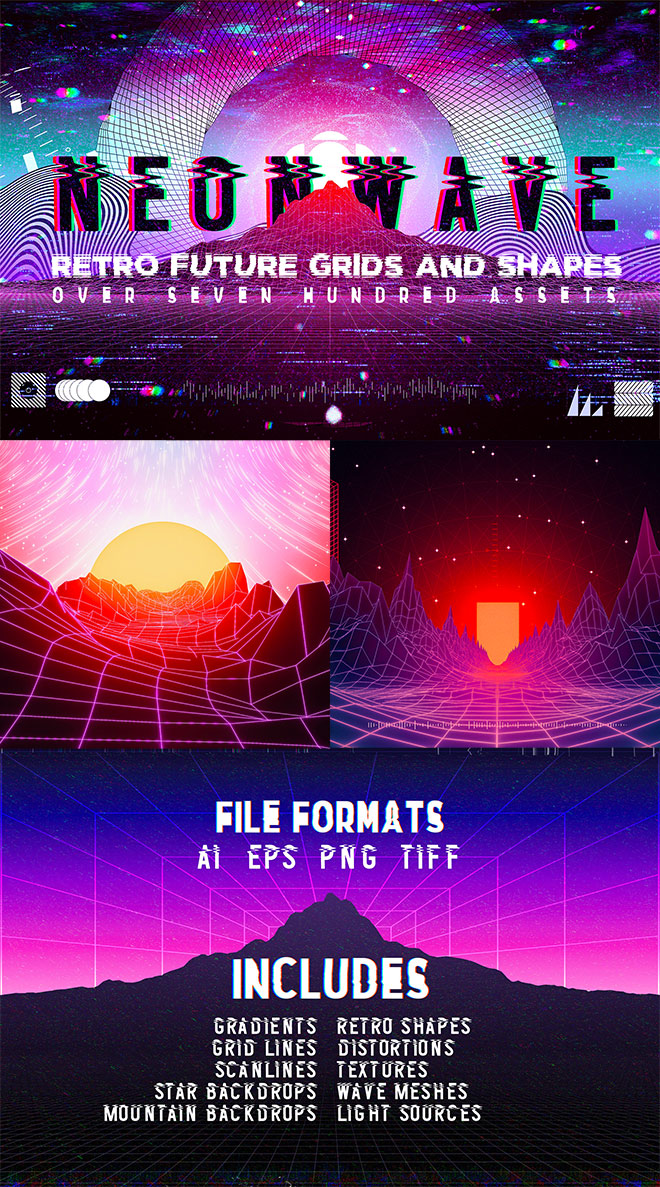
NeonWave is a huge collection of over 700 assets that make it easy to construct retro-futuristic 80s style landscapes. It contains a variety of useful graphics, including grid forms, polygonal landscape renders, mountain silhouettes, spectrograph distortions, abstract shapes, and much more! With this kit you can simply drag and drop a selection of assets to compose a rad-looking scene in minutes. Throw in some colourful layer style effects and you have the perfect artwork for an album cover, flyer, or just a fun piece of visual art. Spoon Graphics readers can knock 10% off the price tag with the code SPOONGRAPHICS.
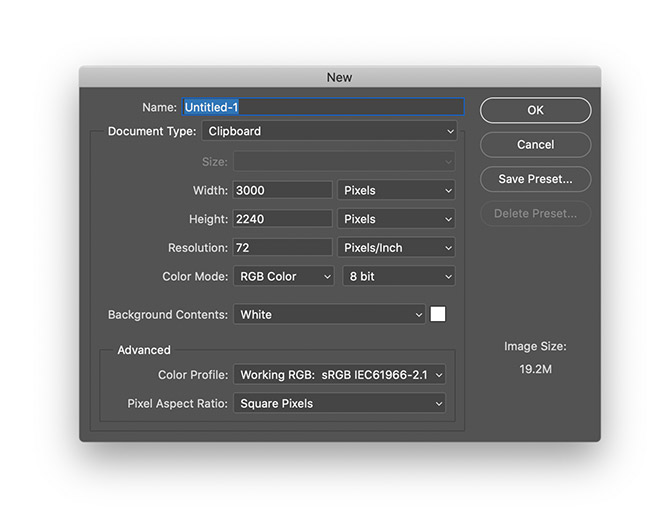
Begin by opening Adobe Photoshop and create a new document. I’m using a document size of 3000x2240px, but your dimensions may vary depending on the final use of your artwork. Even though the brightest of RGB colours can’t be reproduced in print, you might as well start with an RGB document to achieve the most vibrant hues possible, before converting to CMYK later if you’re working on a design for print.
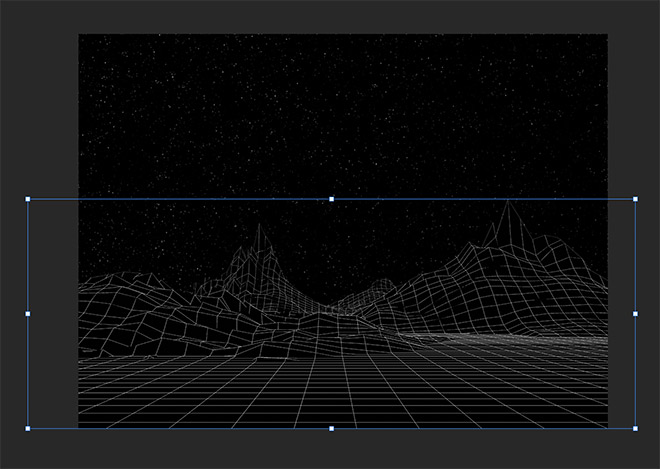
Open the Starry Background file and paste it into the document to generate an interesting background. Drag in the NeonWave Render graphic and use the CMD+T (CTRL+T on Windows) shortcut for Transform to scale it to size. In seconds we’ve already created what would have taken hours to model and render a 3D landscape scene thanks to the ready-made assets in the NeonWave kit.
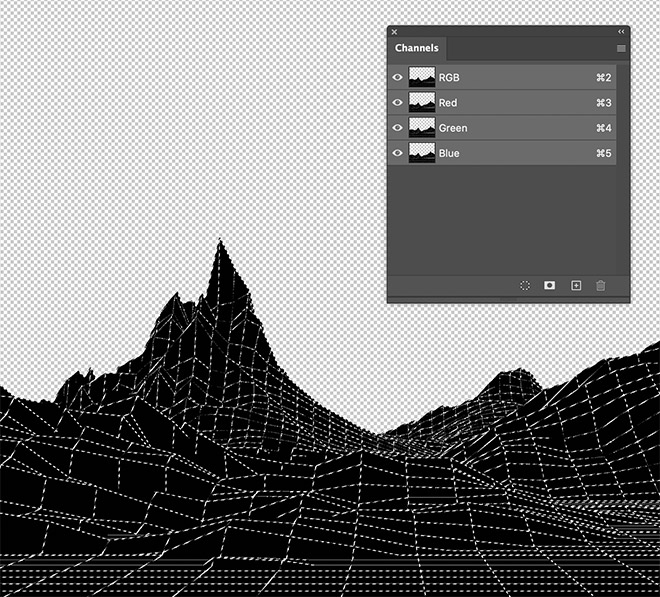
In order to make a selection of just the white grid lines so we can apply some lighting effects, turn off the visibility of the other layers, then open the Channels panel. Hold the CMD key (or CTRL key on Windows) and click the thumbnail of any channel to loads its selection. Back in the Layers panel, create a new layer and fill this selection with white with the CMD+Backspace shortcut. Reduce the fill of this layer to 0%.
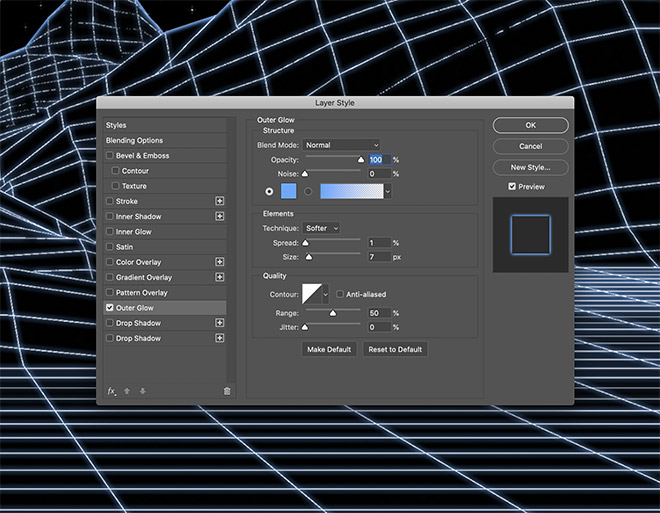
Double-click the white gridlines layer to apply an Outer Glow layer style. Select a bright blue (#5ba8ff), then configure the size to around 7 pixels, just enough to generate a soft glow effect from all the fine lines.

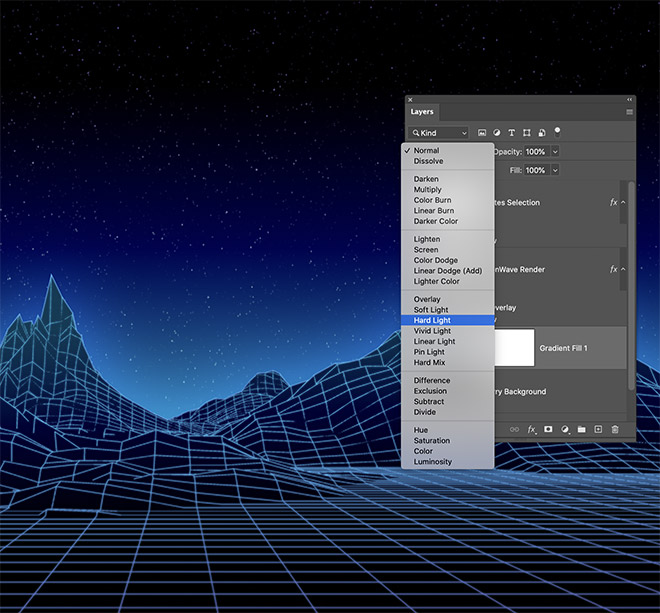
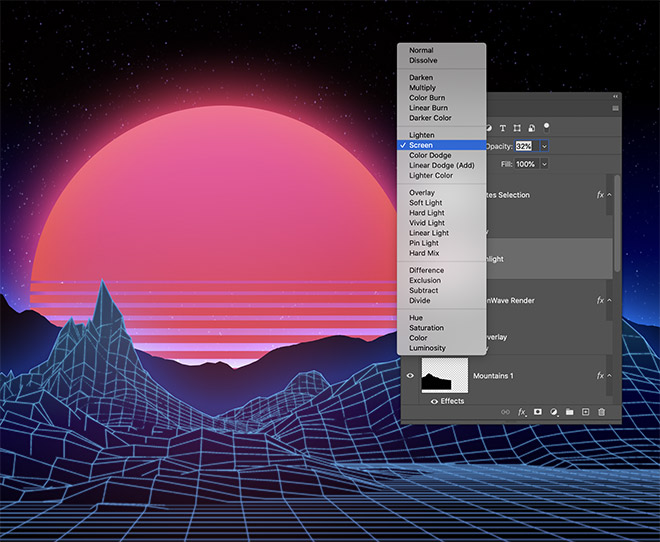
Apply some layer styles to the mountains layer. Start with a Gradient Overlay between a purple and light blue hue, I’m using #472468 and #009dab. Set the mode to Hard Light to allow the colours to interact with the landscape graphic.
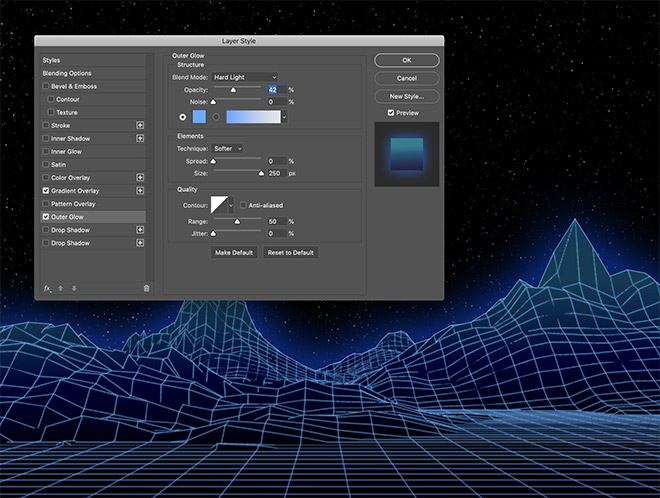
Add an Outer Glow effect next. Configure the settings with maximum Size, but change the Blend Mode to Hard Light and reduce the opacity to tone down its impact so the glow isn’t too intense.
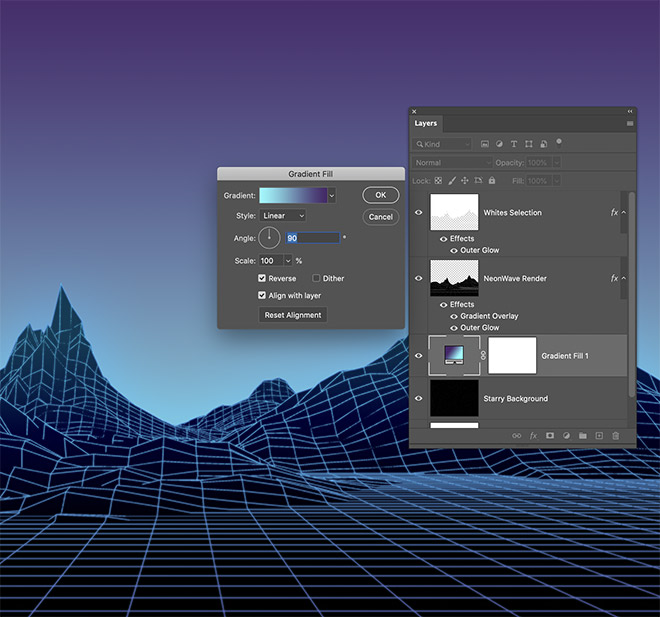
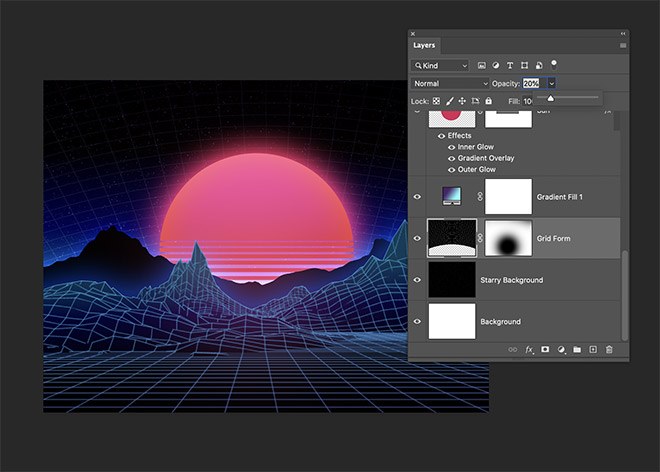
Add a Gradient Fill adjustment layer and drag it above the starry background, but below the mountains in the layer stack. Use the same purple to light blue colours, but reversed so the bright glow emits from behind the mountains.
Change the blending mode of the Gradient Fill layer to Hard Light to allow the starry background to show through, and the colours to interact to create a vibrant glow effect.
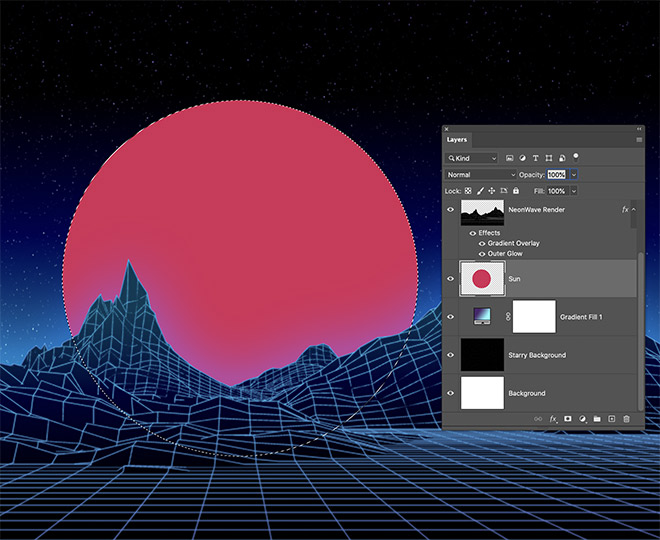
While the full NeonWave kit does include some useful light source graphics, let’s use some simple Photoshop tools to draw our own. Create a new layer above the Gradient Fill but below the mountains, then draw a circle with the Elliptical Marquee tool. Fill it with a reddish-pink of #d72a57.
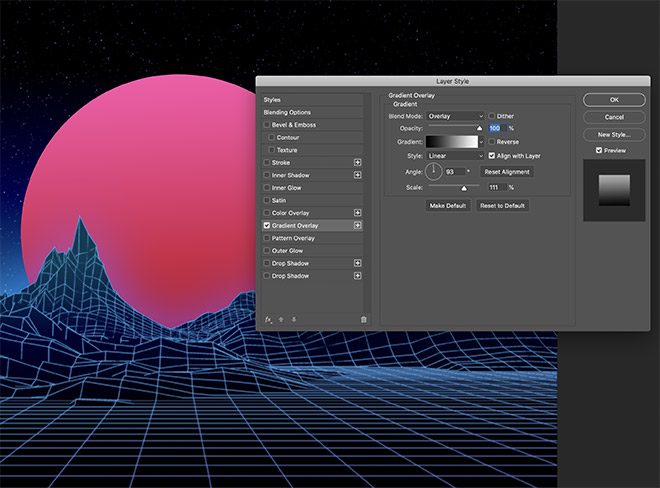
Apply some layer style effects to enhance the appearance of the sunrise, starting with a Gradient Overlay using the default black to white gradient, but with the blend mode set to Overlay.
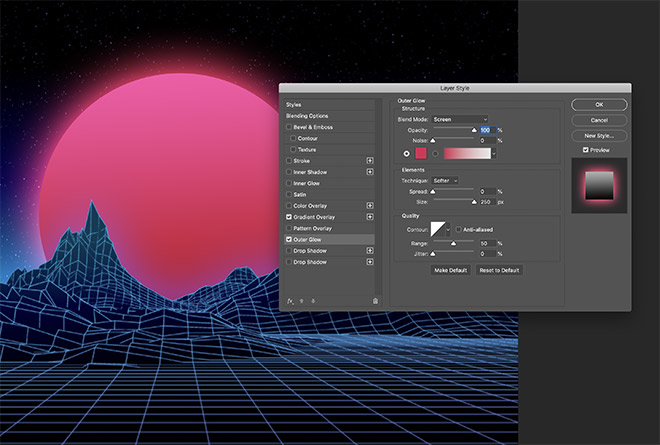
Add an Outer Glow effect next. Configure the settings to Screen with the same #d72a57 colour as the main sunrise fill, then set the Size to maximum to generate a soft, luminous glow.
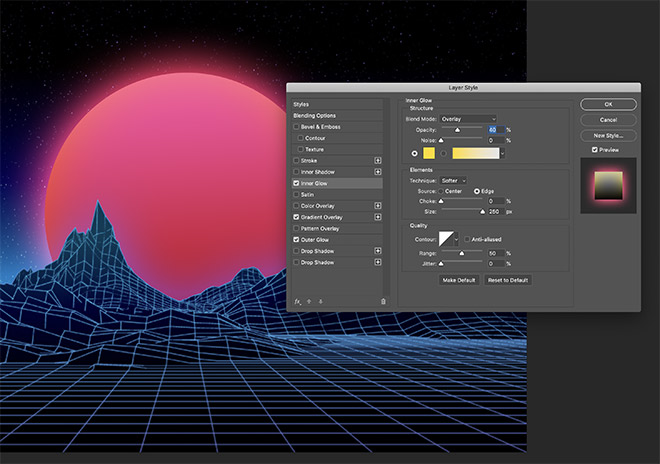
Set up an Inner Glow effect using a bright yellow colour (#ffdc18). Using the Overlay blending mode will allow the yellow to interact with the reds and pinks to add a warm colour cast. Reduce the opacity to adjust the colours.
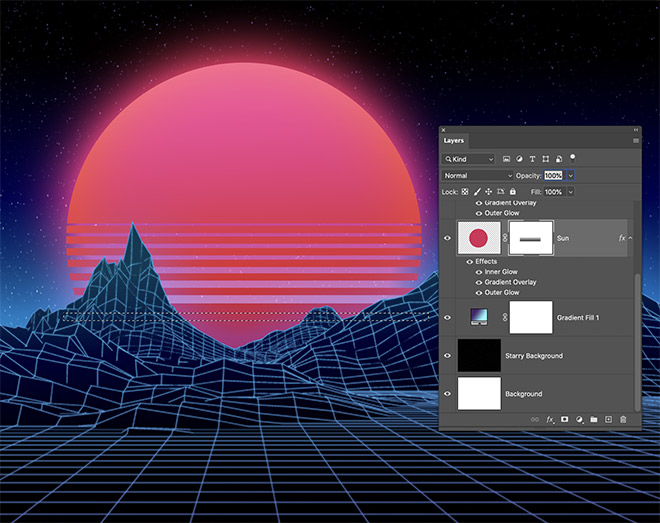
Add a Layer Mask to the sunrise layer, then use the Rectangular Marquee tool to draw a thin selection across the circle shape. Fill this area with black to erase the selection. Carefully draw and fill several more selections, each getting incrementally taller.
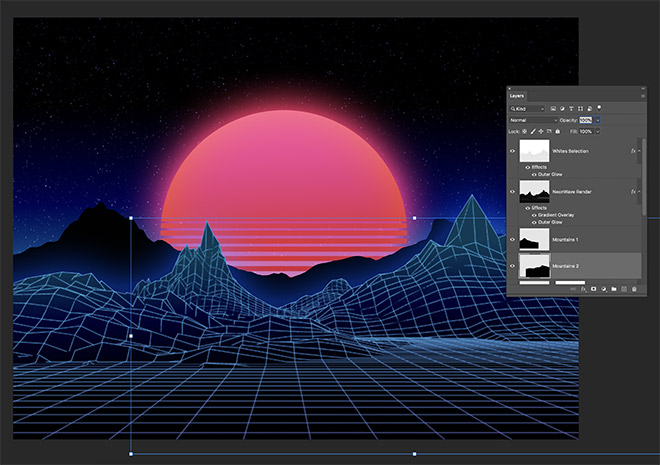
Open the two mountain silhouette images and copy/paste each one into the main document. Use the CMD+T shortcut to resize and position the mountains in front of the sun, but behind the grid landscape.
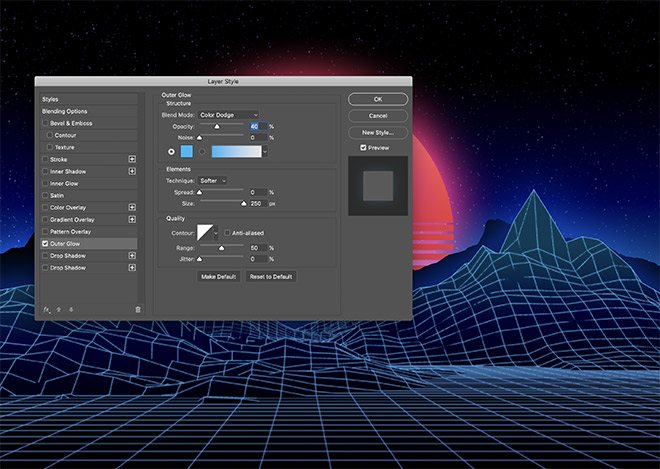
The Outer Glow effect from the grid landscape adds a nice blue glow to the silhouette mountains, but give each mountains layer its own Outer Glow effect to add more ambience to the scene. I’m using a bright blue (#1fb7f6) with the Colour Dodge blend mode to creating a vibrant glow. Reduce the opacity to fine tune the intensity.
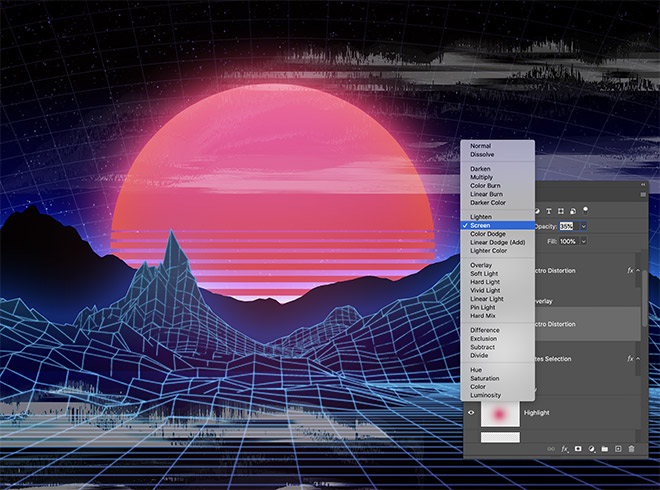
Create a new layer above the mountains and sunrise layers, then sample a reddish-pink hue from the sunrise shape. Use a larger, soft brush tip to dab a single spot of colour in the centre of the scene.
Set the blending mode of this layer to Screen with reduced transparency to add a subtle ambient glow effect.
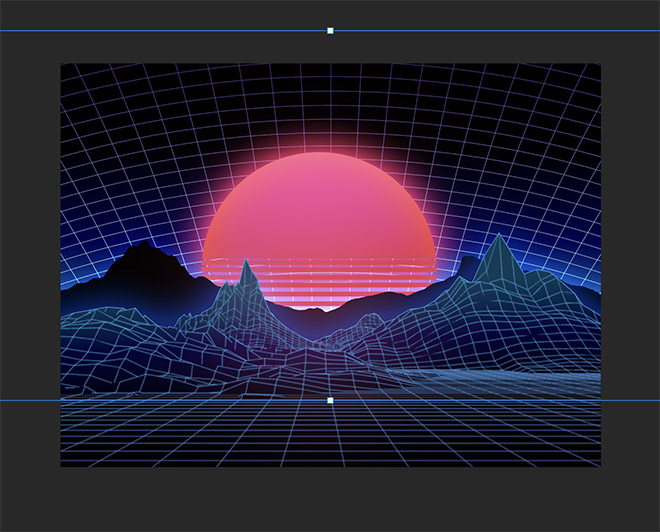
Open the Grid Form graphic into Photoshop and place the image near the bottom of the layer stack, just above the starry background. Scale and position this graphic so the grid lines extend from the horizon.
Reduce the opacity of the Grid Form layer to around 20%, then apply a layer mask and fade out the top and bottom to eliminate any hard lines.
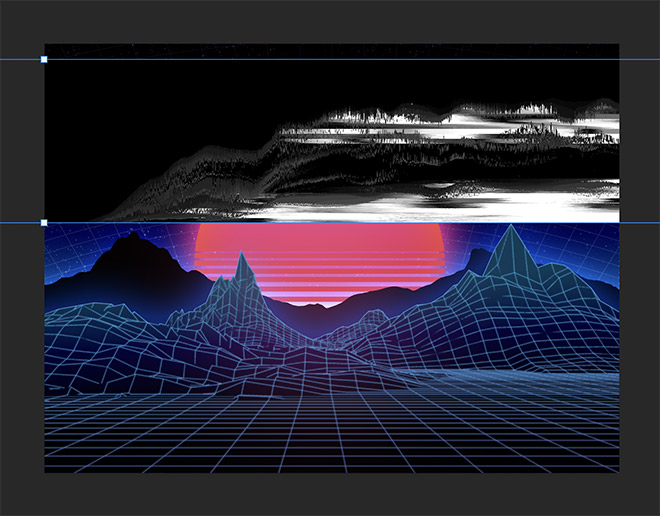
The Spectro Distortion graphics can be distorted further by squashing and stretching the proportions with the Transform shortcut.
Set the blending mode to Screen to make the black background transparent, leaving just the white glitch graphics, then reduce their prominence with the Opacity slider.

The NeonWave kit also includes a variety of noisy Spectro Distortion graphics. These images can be used to add texture to your artwork. Place the image at the top of the layer stack, then use the CMD+U shortcut to adjust the Hue/Saturation.
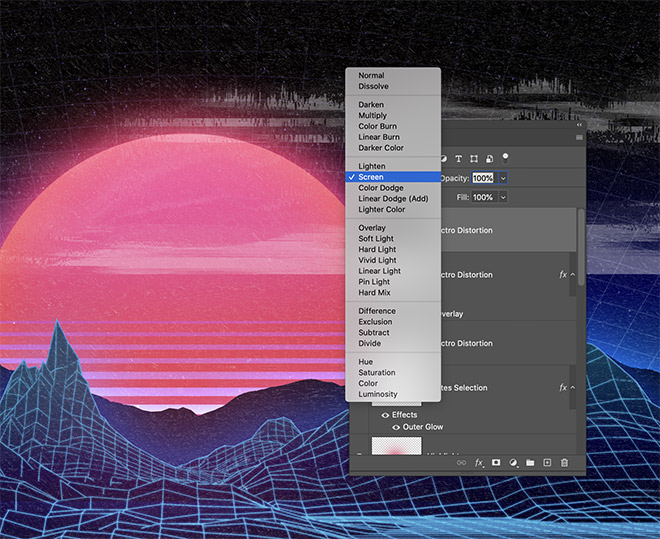
Completely desaturate the image, then change the blending mode to screen to apply the noisy grain effect to your artwork for an aged retro look.
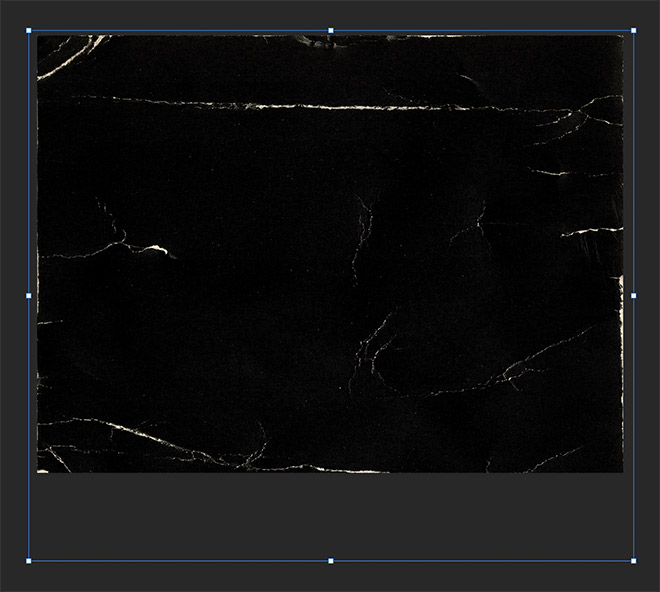
This kind of artwork is also perfect suited to my 80s Retro Cover Art Textures! Download the texture provided in the free sample I offer to add one final retro texture effect to your artwork. Here I have scaled the texture to crop the main border, leaving a small amount of damage to the edges of the design. Set the blending mode to screen to make your artwork look like an old, damaged VHS tape or computer game box.
The final result is a rad 80s inspired retro landscape scene complete with vibrant neon colours. The NeonWave kit makes it easy to build artwork in this style with a huge selection of assets you can quickly drag and drop into place. A few finishing touches in Photoshop such as layer style effects and texture overlays really help to enhance the artwork and complement the retro wave style.
10% off with the code: SPOONGRAPHICS

That’s pretty cool! Thank you!
Wow n Wow…..that is the only word slipping from my mouth.It looks what I m fascinated for…
It worked. Thank you.
Very creative, keep up the good work.
Can I make this in illustrator?
PS.
I love this blog and I already subscribed to your youtube channel! =^ – ^=
Hi, Chris. Thanks for inspiration. get well soon.
Excellent piece of information which has helped me to get rid of so many misconceptions. Keep sharing the high quality content.