This post was originally published in 2015
The tips and techniques explained may be outdated.
If you’re a designer who just loves creating ‘stuff’, Adobe Illustrator should be your favourite tool! Armed with just a few tools and techniques you can use Illustrator’s range of shape tools to construct cool vector illustrations of anything. In today’s tutorial I’ll take you through my design process of creating a simple illustration of a water gun. The entire design is made from Illustrator’s basic tools, then the Live Paint tool is used to add colour. I’ll also show you some handy techniques to apply popular effects to replicate some of the popular illustration styles often seen on Dribbble.

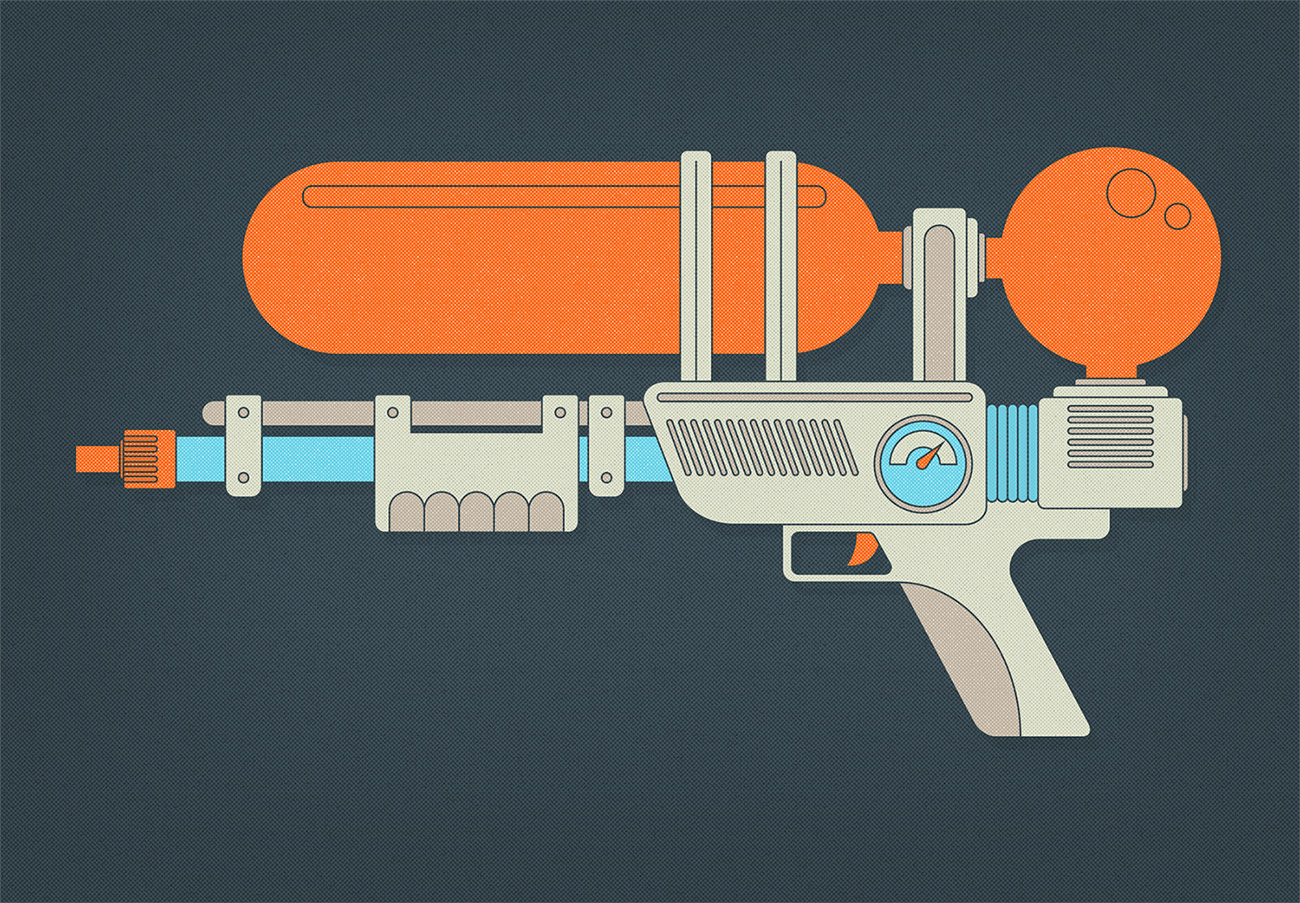
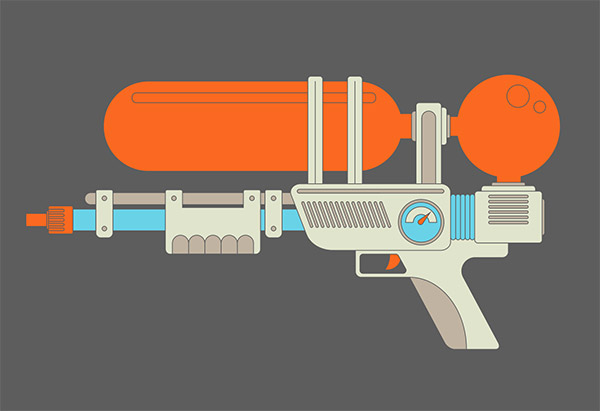
The subject I’ll be using for this tutorial is a super soaker style water gun, just because they’re cool! That’s one of the wonders of Illustrator, there’s no limit to the types of random vector graphics you can create. The entire illustration is made with simple shapes such as rounded rectangles and circles, then colour is applied with the help of Illustrator’s Live Paint tool.

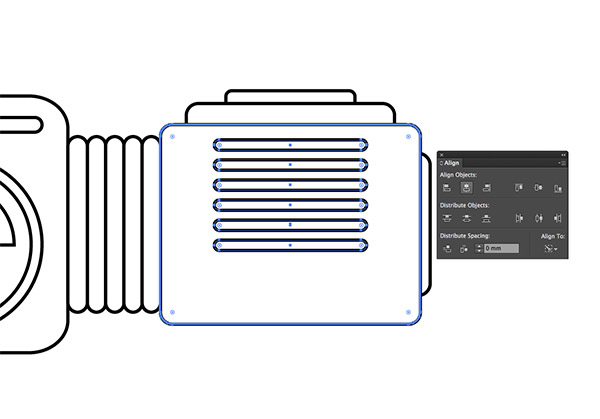
Open up Adobe Illustrator and create a new document. Grab the Rounded Rectangle tool and begin overlapping a few shapes of various sizes to represent the nozzle of the water gun. Use the cursor keys to adjust the corner radius before releasing the mouse, then make sure all the shapes are aligned horizontally using the relevant button in the Align panel.
Max out the corner radius to form a sausage shape and overlap it over the larger piece of the nozzle. Hold ALT and Shift while dragging the shape to form a duplicate. Press the shortcut CMD+D multiple times to repeat the transformation and produce a series of evenly spaced shapes.
Make a selection of all the sausage shapes and press CMD+G to Group them. Add the larger rectangle to the selection, then hold ALT while clicking the excess areas with the Shape Builder tool to delete them.
Give the larger rectangle an extra click to make it the key object, then use the Align Panel to make sure the shapes sit centrally along the vertical axis.
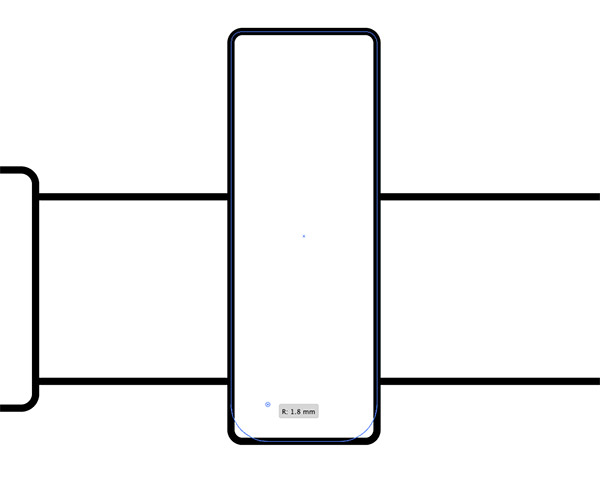
Draw a long rectangle to form the barrel of the water gun, then add another rounded rectangle. Draw a selection around the lowermost points with the Direct Selection tool, then adjust one of the small circular icons to alter the corner radius. If this icon doesn’t appear, turn on Live Corners under the View > Show Corner Widget menu.
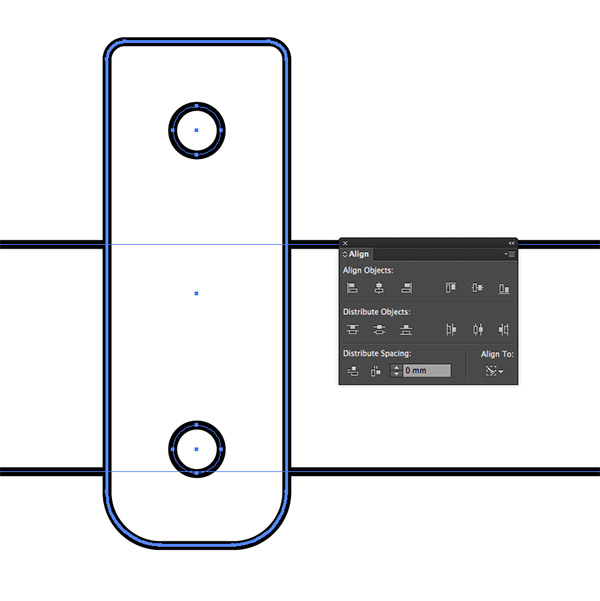
Draw a small circle to add a little detail, then duplicate it and position it at the other end of the rectangle shape. Use the Align panel to centre them up, remembering to select the rectangle as the key object.
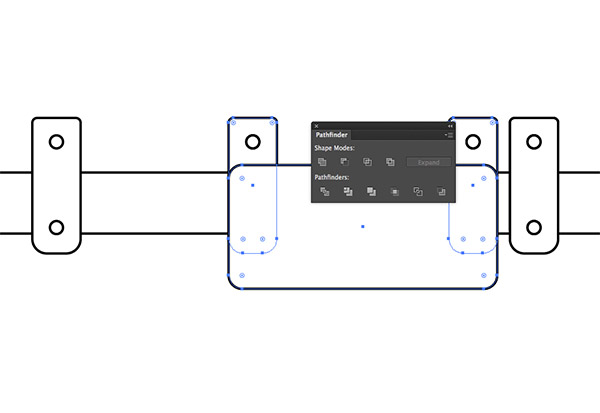
Select the rectangle and two circles, then hold ALT & Shift and drag a few duplicates further down the barrel. Draw a larger rounded rectangle between two of them to form the pump handle. Select and merge these shapes with the Unite button from the Pathfinder panel.
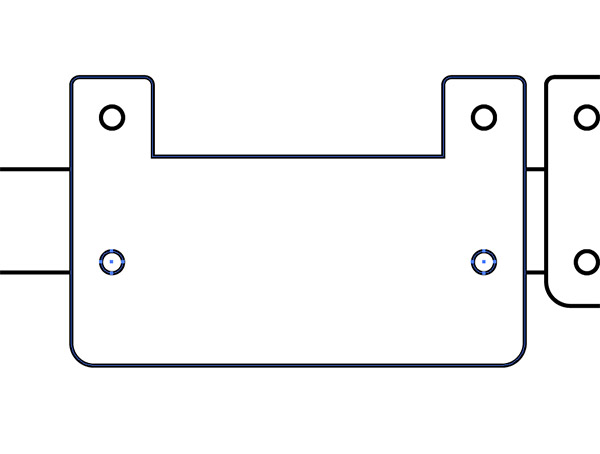
Use the shortcut CMD+[ or right click and choose Arrange > Send Backward to place the item back underneath the circle shapes in the stacking order. Select and delete the two lower circles.
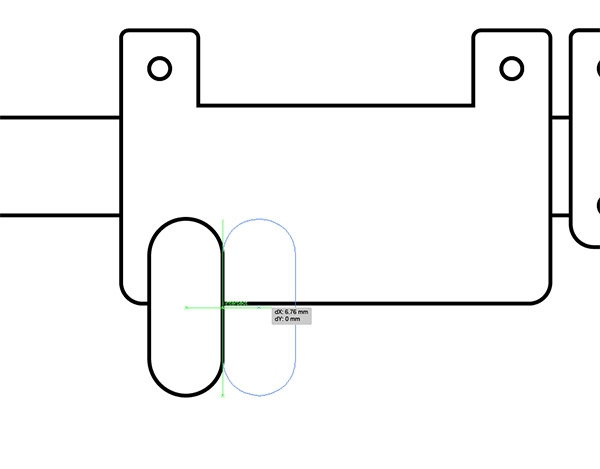
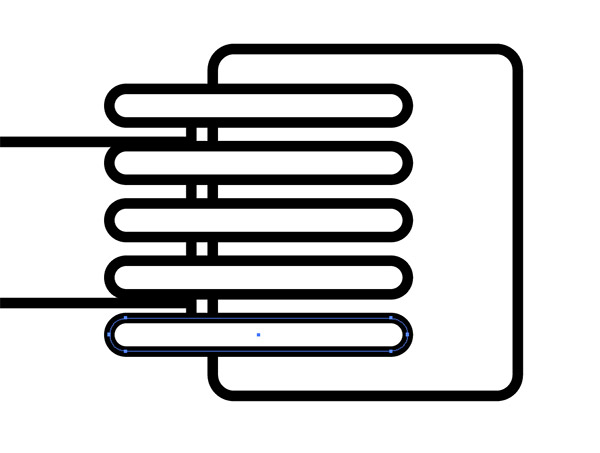
Max out the corner radius while drawing a rounded rectangle and overlap a fat sausage shape over the bottom portion of the handle. Turn on Smart Guides (View > Smart Guides), then use the green tooltips to perfectly align a duplicate while dragging with the ALT and Shift keys.
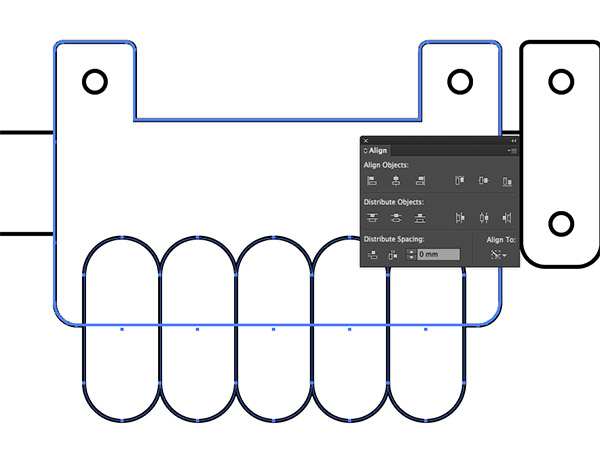
Press CMD+D multiple times to form a series of shapes, then shift-click to add the larger rectangle to the selection. Click this shape again to make it the key object, then align the shapes centrally with the Align panel.
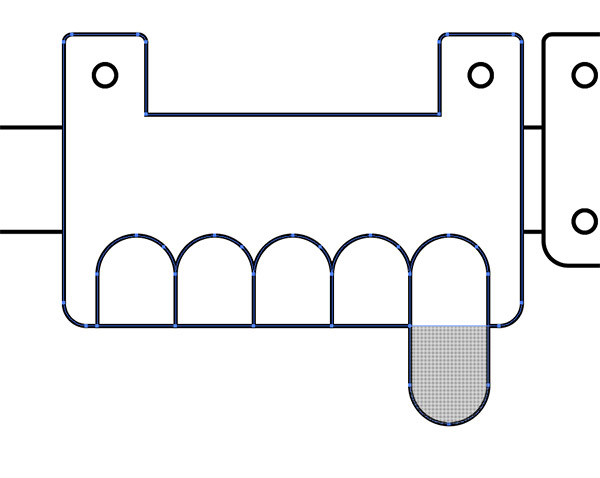
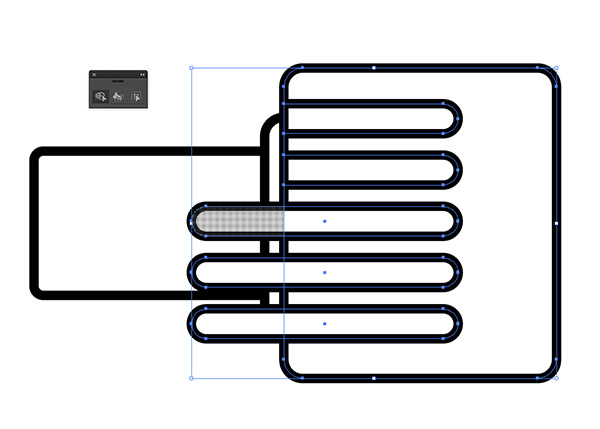
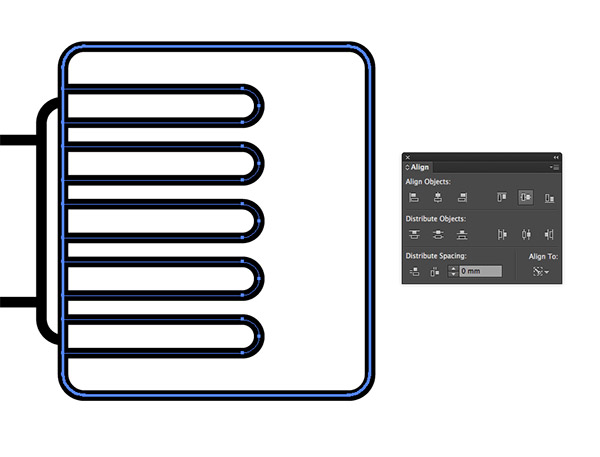
With all the shapes still selected, use the Shape Builder to delete the unwanted segments. Remember to hold the ALT key in order to remove an element.
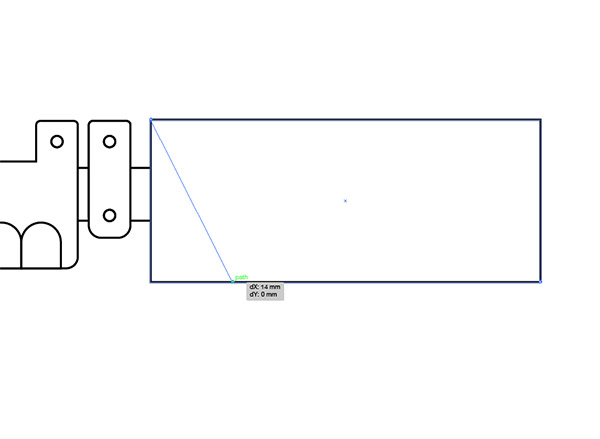
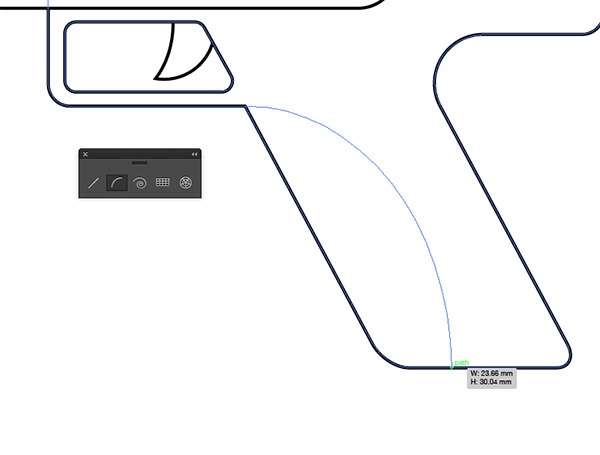
Near the end of the barrel, draw a normal rectangle. Use the Direct Selection tool to drag the lower left corner inwards. Hold Shift to maintain a straight lower edge.
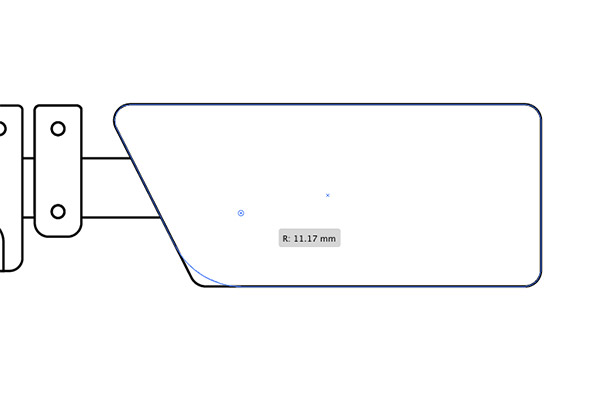
Click in the middle of the shape to bring up the corner widgets and round them off. While all four corners are selected, the radius will apply to them all. Deselect the shape, then select a point from just the lower left corner and enlarge the radius of this corner individually.
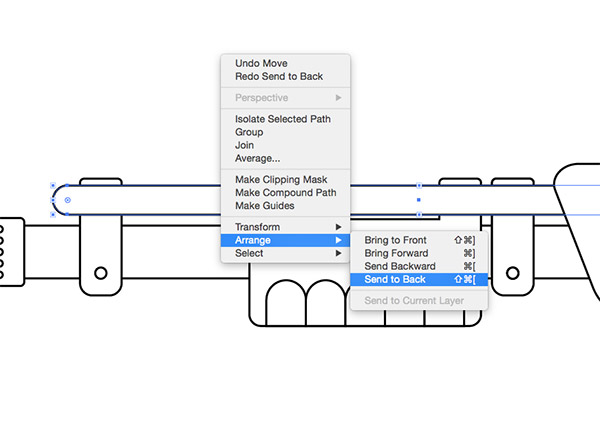
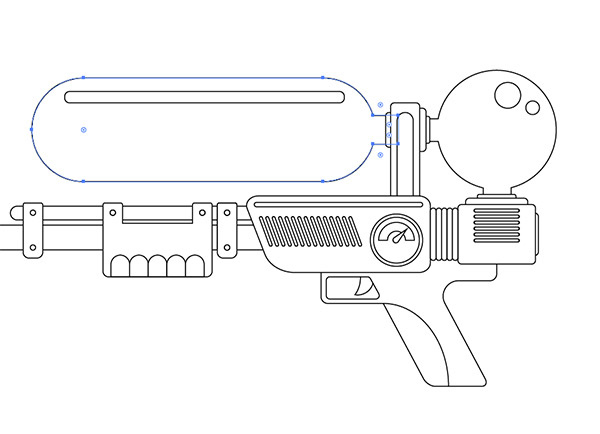
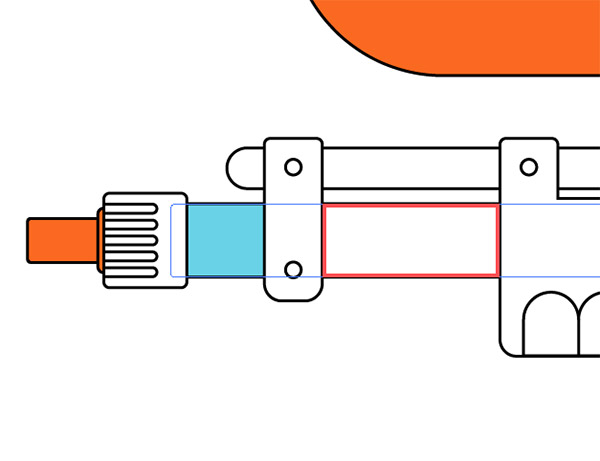
Draw a long, thin rounded rectangle with maximum corner radius above the barrel, intersecting the other pieces. Send this item to the bottom of the stack.
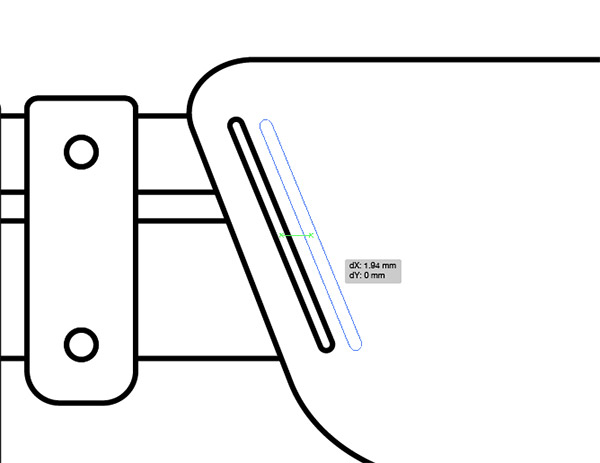
Add some detail to the main body shape by drawing a small rounded rectangle. Rotate it to match the angle of the parent shape, then hold ALT & Shift to drag out a duplicate. Use the CMD+D shortcut to form a series of shapes.

Draw a series of concentric circles in some empty space within the water gun body area by using the Copy (CMD+C) and Paste in Front (CMD+F) commands, then scale each duplicate down while holding the Shift and ALT keys. Add a rectangle to intersect the two inner circles, then use the Shape Builder tool to delete out the various pieces to leave an arch shape.
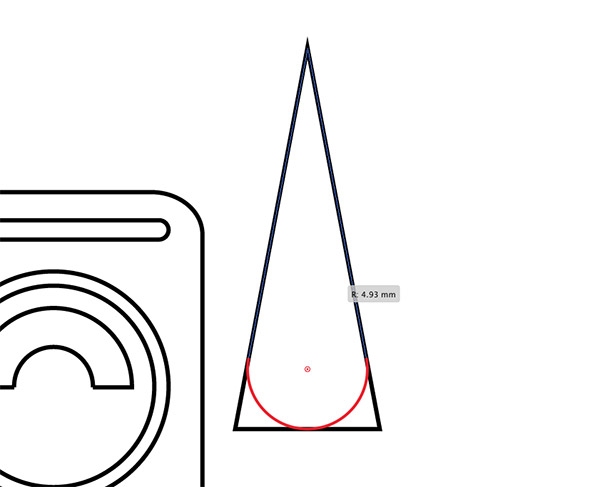
Use the Polygon tool to draw a triangle by reducing the number of sides with the cursor keys while dragging out the shape. Move the uppermost point vertically with the Direct Selection tool while holding the Shift key, then select the bottom two points and adjust the corner widgets to round them off.
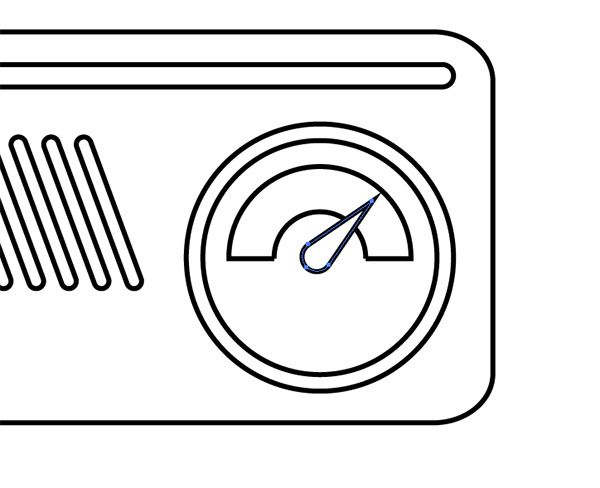
Scale, rotate and position the shape to finish off the gauge illustration within the water gun body.
Use the same selection of techniques to continue building the water gun. The more elements that are added, the more detailed the illustration will be.
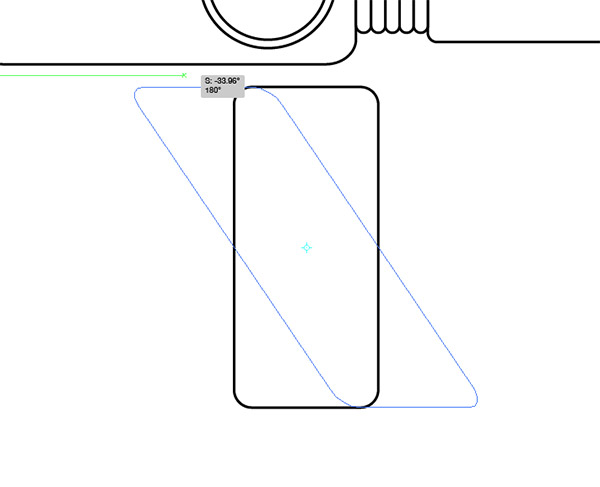
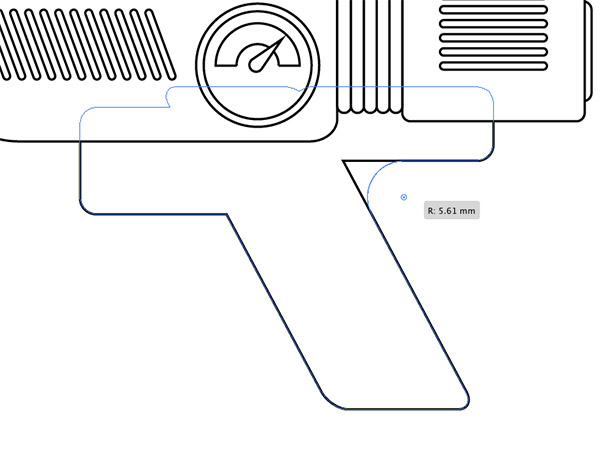
Draw a rounded rectangle as the base for the handle, then use the Shear tool to adjust the angle. Hold Shift while dragging to keep the horizontal edges inline.
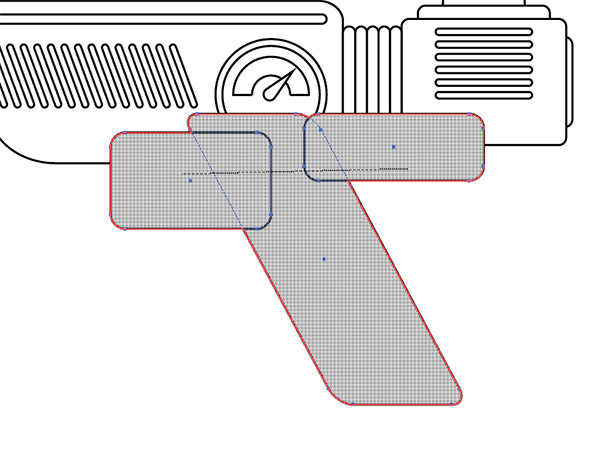
Position the rectangle into place on the illustration, then use a bunch of shapes to build up the trigger and handle area. These shapes can be merged with the Pathfinder panel, or by clicking and dragging with the Shape Builder tool.
Select the point of the corner on the right with the Direct Selection tool and adjust the corner widget handle to create a round edge.
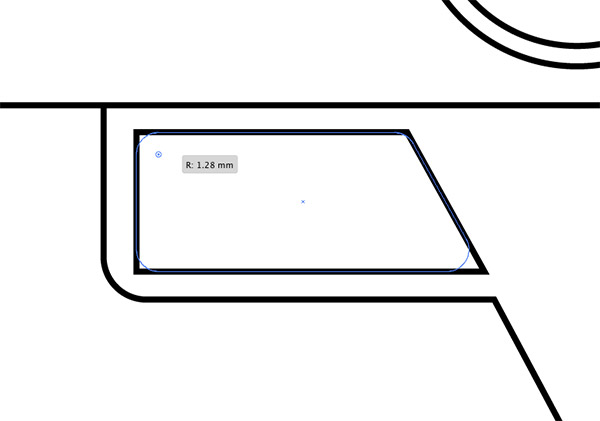
Draw a normal rectangle to form the trigger guard. Move the top right point inwards to match the angle of the grip, then add round corners to all four sides.
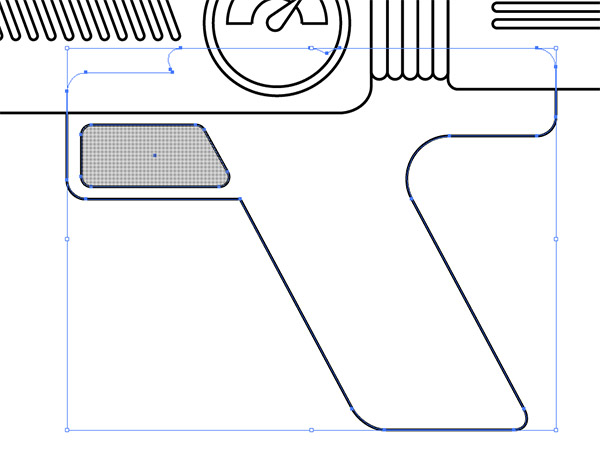
Select this trigger shape and the main grip, then hold ALT and punch out the area using the Shape Builder tool.
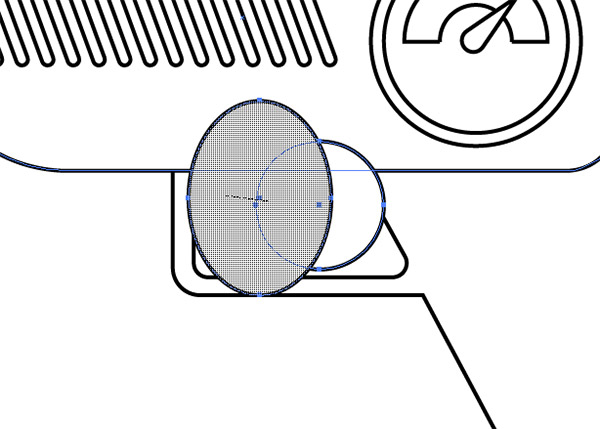
Overlap a couple of circles to form a trigger, then use the Shape Builder to trim away the excess to leave the desired shape. Send the item to the bottom of the stack with the shortcut CMD+Shift+[ or right click and choose to Arrange > Send to Back.
Add a little detail to the grip using the Arc tool. Use the Smart Guide tooltip to draw the path from the corner point and extend it to the bottom of the grip.
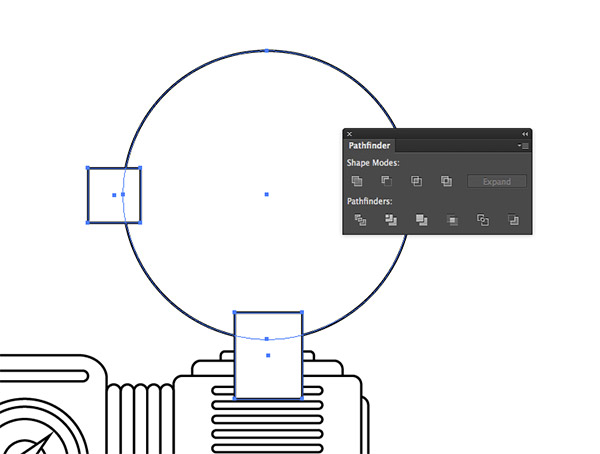
Draw a large circle and overlap a couple of rectangles. Merge all these shapes together with the Pathfinder, or Shape Builder tool.
Continue illustrating the elements of the water gun using the same techniques. Remember to use the Align panel to keep everything lined up.
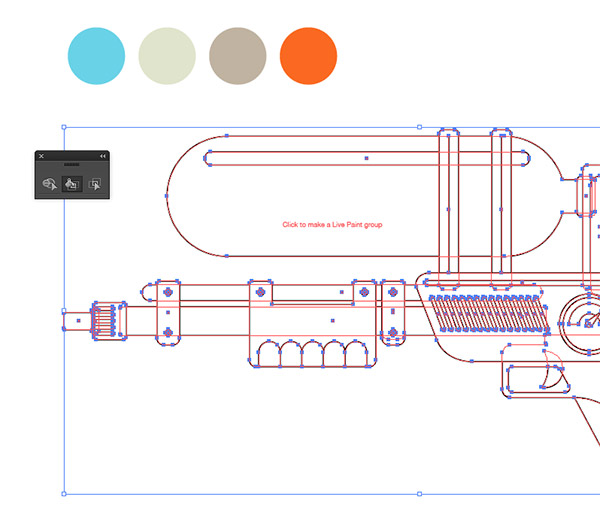
Fill a few temporary shapes with colours to form a palette for your illustration. Draw a selection around all the artwork then activate the Live Paint tool. Click on the artwork to form a Live Paint Group.
Deselect everything, then pick the first colour from the temporary swatch shapes with the Eyedropper tool. Switch back to the Live Paint tool and click on the various areas to apply this colour. Toggle between the eyedropper and Live Paint tool to apply the other colours to the illustration.

Due to the way the illustration was created with overlapping shapes, some areas will need multiple clicks to fill all the individual pieces.
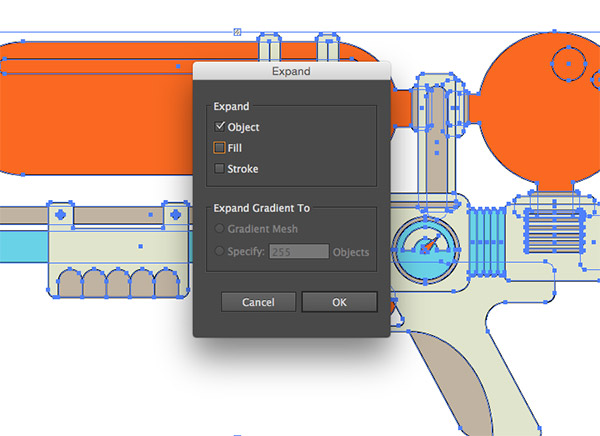
Once the entire illustration is coloured, go to Object > Expand, then select just the Object checkbox. This will convert the Live Paint sections into filled shapes. The tutorial could end here, but let’s create a popular outlined effect…
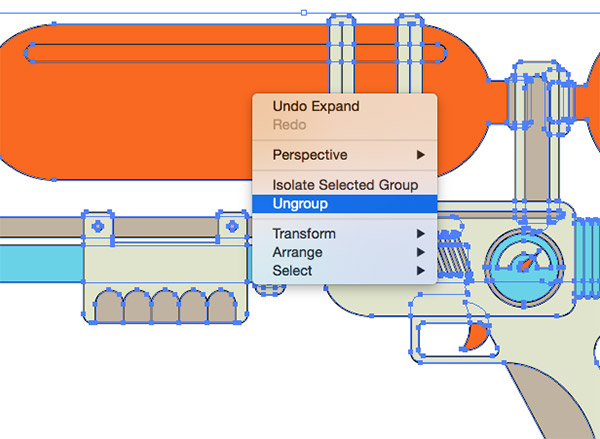
Right click and select Ungroup a couple of times, until the Ungroup option is no longer available to completely break the elements apart.
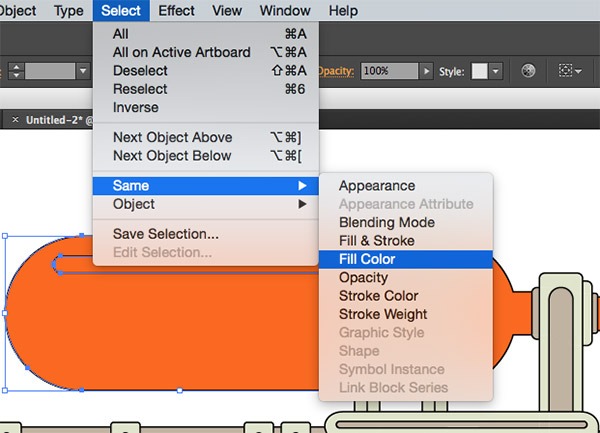
Click one of the elements, then go to Select > Same > Fill Color to make a selection of all the same colour shapes.

Click the Unite button from the Pathfinder window to combine all these shapes of the same colour into one object.
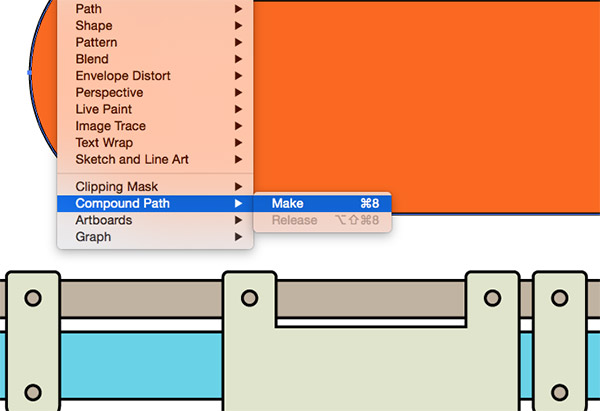
Press CMD+8 to form a Compound Path, or go to Object > Compound Path > Make. This is a crucial step when using with the Pathfinder panel with multiple objects.
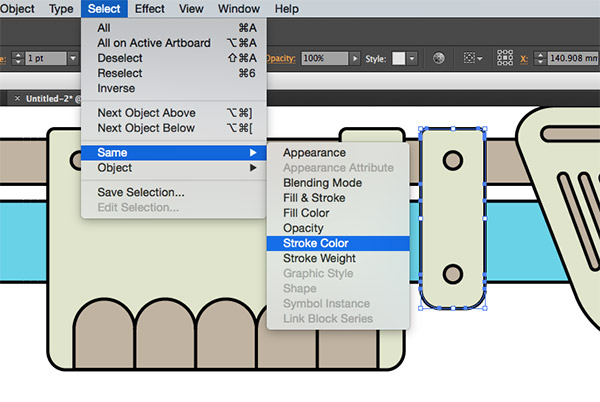
Repeat the process of selecting the same fill color, Uniting and forming a Compound Path for all the other shapes, then select part of the black outline and choose Select > Same > Stroke Color.

With all the black strokes selected, go to Object > Expand and choose just the Stroke option to convert these strokes into filled shapes.
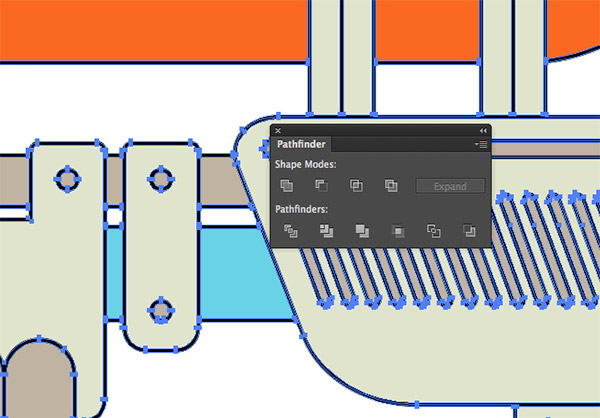
Click the Unite button from the Pathfinder window to merge all the individual outline pieces into one continuous shape. Copy this shape to the clipboard, we’ll need it again in a second!
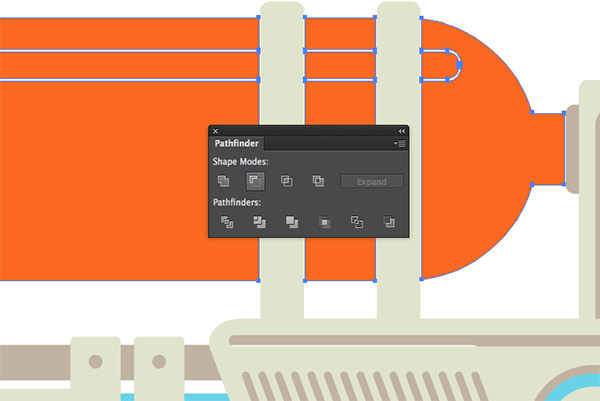
Shift and click one of the coloured objects to add that entire group of shapes to the selection, then choose the Minus Front option from the Pathfinder to cut away the outline from these shapes. Press CMD+F to paste the black outline back in, then repeat the process with the other coloured elements.

Once the outline has been trimmed from the illustration, it leaves gaps which allow whatever background colour to show through and results in a cool stylised look!
Our work in Illustrator is now complete. These same techniques can be used to create stylish illustrations of any subject. The flat vector appearance looks great, but I always like to add some finishing touches in Photoshop.
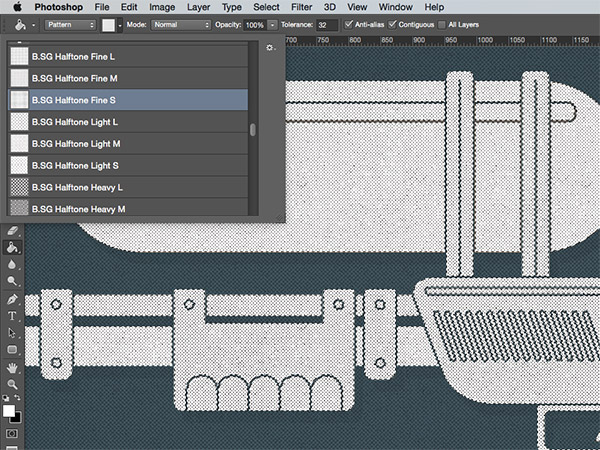
Paste the artwork into a new Photoshop document, then download and install my free distressed halftone patterns. CMD+Click the thumbnail of the vector artwork layer to loads its selection, then fill the area with a halftone pattern on a new layer.

Invert the colours (CMD+I), then change the blending mode to Screen to render the black background area transparent to leave white halftone dots.
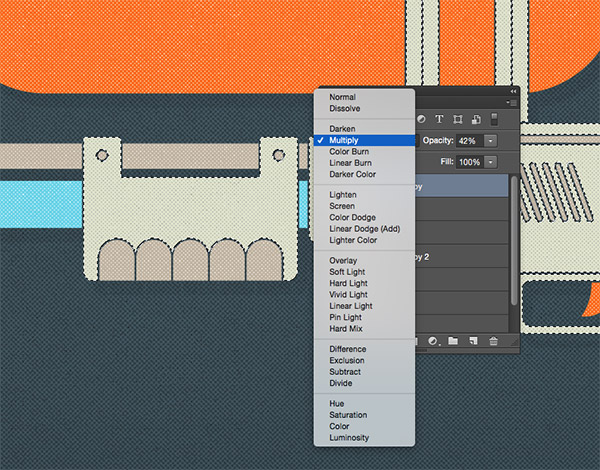
In some areas of the illustration where there’s a lighter colour, black halftones works better. Use the Magic Wand to make selections and fill a new layer with a halftone pattern, then change the blending mode to Multiply.
That completes our vector illustration project. I hope these tips and techniques help you produce illustrations of any subject for your future projects. With just a selection of simple shapes and Illustrator’s powerful tools, you can create anything!
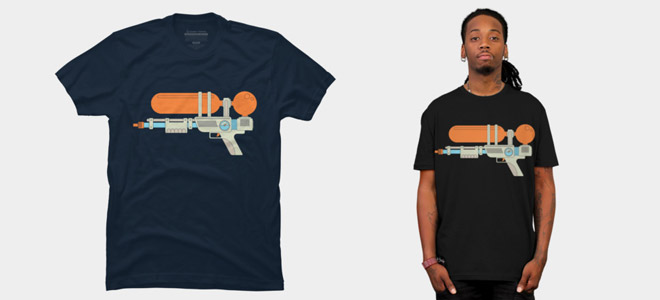
Love this design? Get the T-shirt!

This is a nice tutorial & i really think this is helpful.
Thank you, thank you very much! I’ve been looking for a tutorial like this for a while. And thank you in general for all your tutorials and tips. Greetings from Colombia!
Hey, thanks for the tutorial! Just one question – why did you go to photoshop for the last step? Couldn’t you have possibly done all the halftone patterns in illustrator? Or can you tell me whats the difference between adding halftones in illustrator and photoshop?
Thanks in advance!
I could certainly have added the halftones in Illustrator, but Photoshop is much more powerful when it comes to textures. Plus, I currently only have my distressed halftone patterns available in PS format.
I’m going to start work on a set specifically for Illustrator as my next free design resource though, so keep an eye out for them!
When I first saw this illustration, I thought to myself, “I already know how to do that!”. But I started reading it and ended up learning some great little refinements to my methodology AND the use of the Live Paint tool, which I had never bothered to learn.
Thanks, Chris, you have made me a better designer.
Great tutorial on making vector illustrations! It can be a bit daunting when you start out, but vectors are a huge asset once you learn to use them. Thanks for sharing this!
Bravo Chris, awesome tutorial
Really this is one of the finest tutorial ever i see. Everything openly explained to follow in a simple way.. Thanks Chris and wish you all the best!!
Could this be done in PS?..What are your views on doing the entire thing in PS?
The part that I put in the picture (on the website box) does not work