
This post was originally published in 2016
The tips and techniques explained may be outdated.
In today’s tutorial I’m going to take you through the process of creating a blueprint effect in Adobe Photoshop. If you don’t fancy spending hours construcing a technical drawing from scratch, this is a great technique for faking it. We’ll use some built in Photoshop filters to produce the basic outlines from a source photograph, then mix in some grid patterns and textures to enhance the realism.
The realism of this blueprint effect tutorial all depends on the base images you have to work with. For best results, use pictures of your subject from the front, side and top, combined into one document. Authentic blueprints are drawn as exact plans, whereas a photograph will always include unwanted details, perspective, and reflections. Wireframe 3D renders or vector illustrations can be used directly without any Photoshop adjustments, but in this tutorial I’ll show you how to create this example based on a photograph of a house.

Open up your base image in Adobe Photoshop. This particular house photograph is a free image named House Lights Turned On.
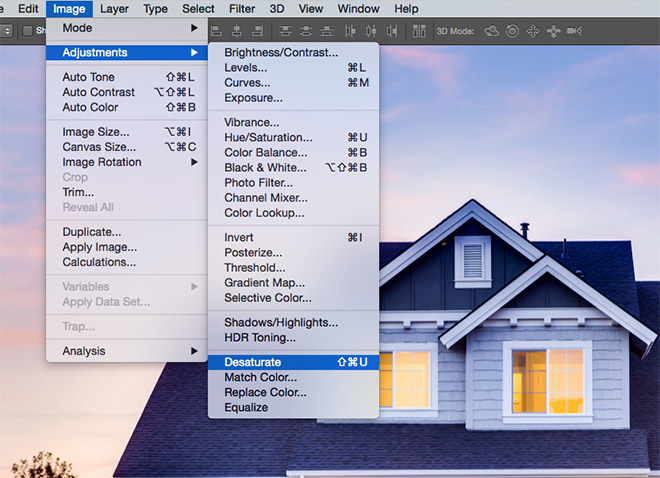
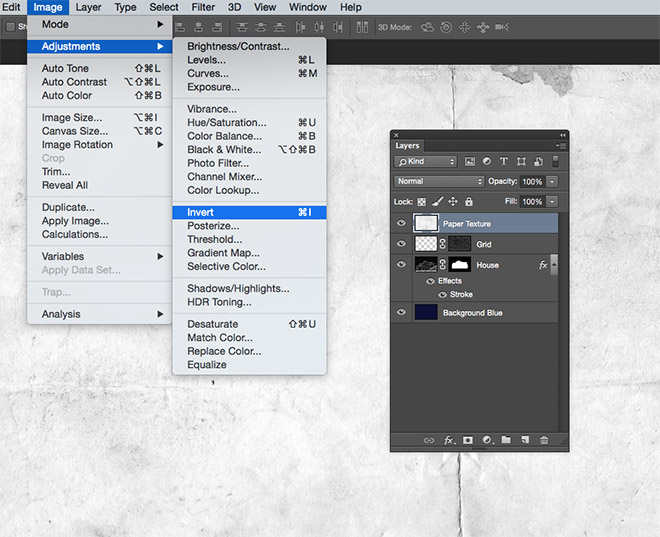
Go to Image > Adjustments > Desaturate to remove the colour from the image, making it black and white.
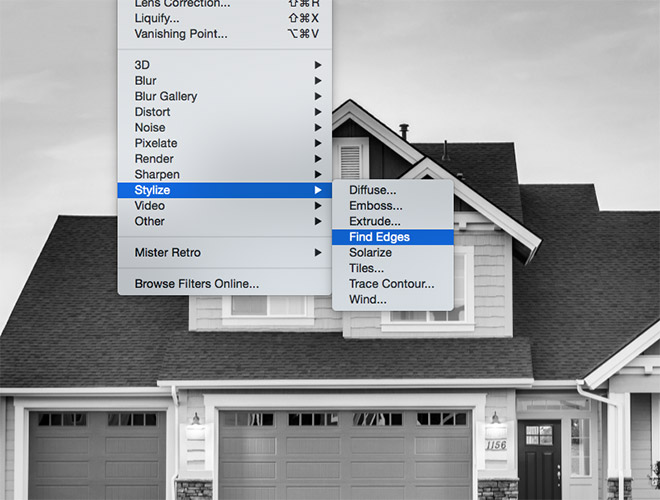
Then go to Filter > Stylize > Find Edges to generate the basic outlined look that forms the blueprint effect.
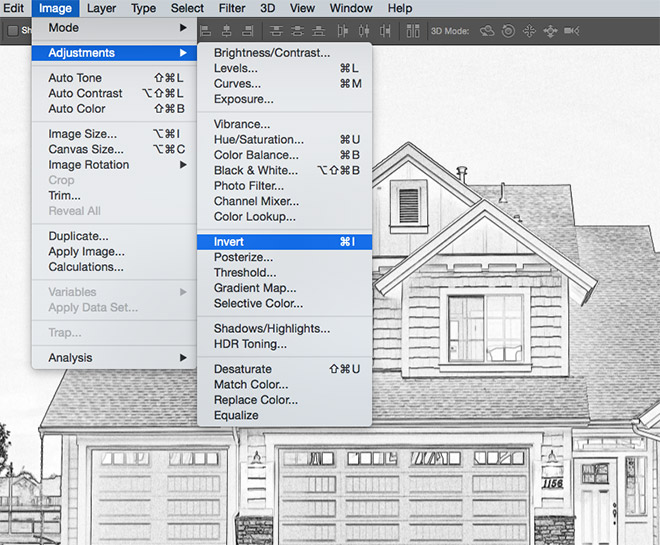
Blueprints are mostly recognised as a light coloured drawing against a dark blue background, so go to Image > Adjustments > Invert to switch the colours around.
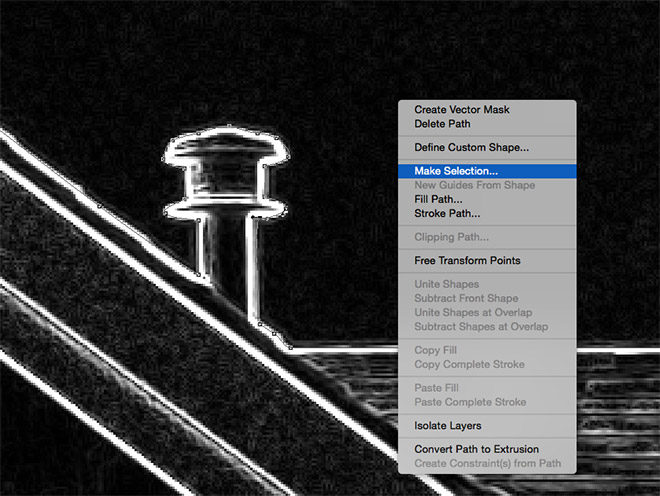
A photograph will include unwanted objects in the surrounding areas that we don’t want to be part of the blueprint drawing. Use the Pen tool to trace around the subject, then right click and select Make Selection.
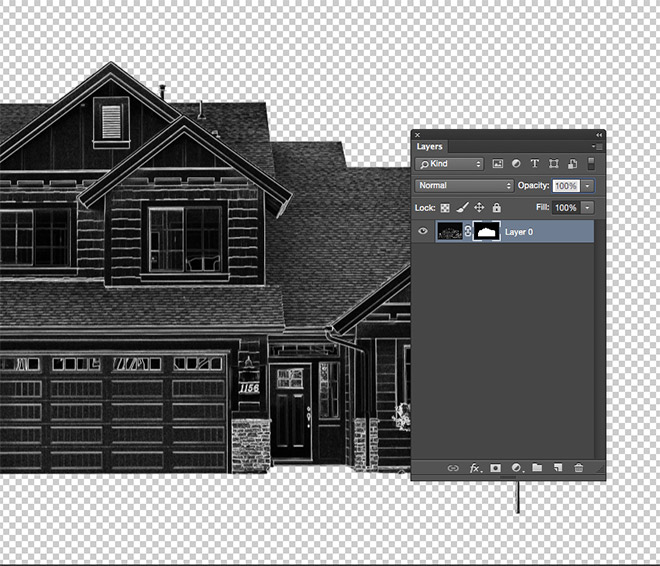
With the selection active, click the Layer Mask icon at the bottom of the Layers panel to isolate the subject against a transparent background.
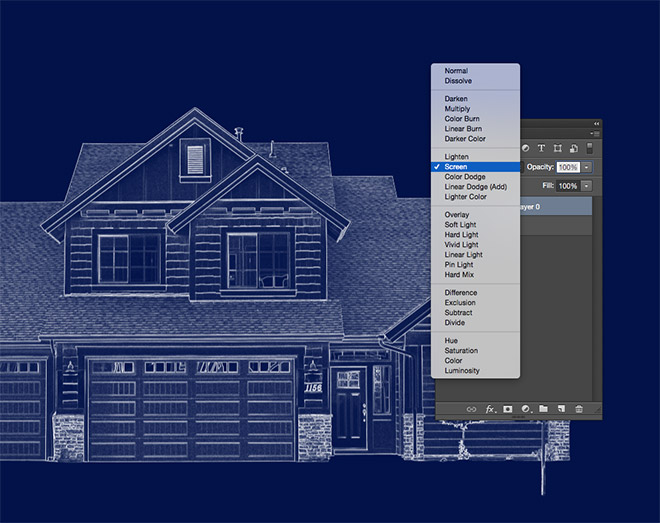
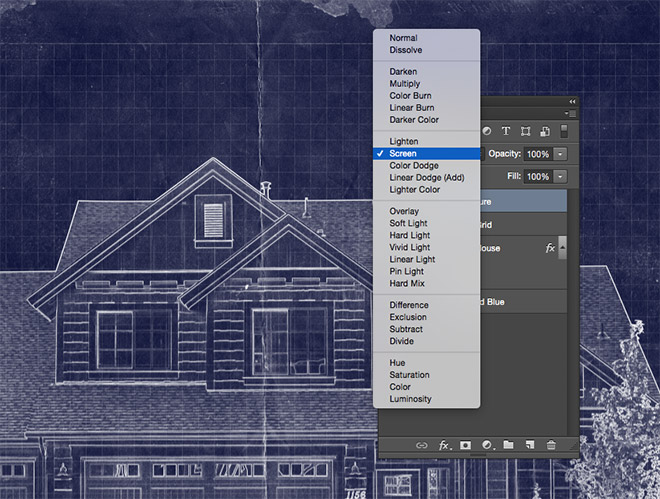
Create a new layer and drag it below the main image layer. Fill this layer with a dark blue, such as #051340. Change the blending mode of the image layer to Screen to render the black background transaprent, leaving just the white outline against the blue background.
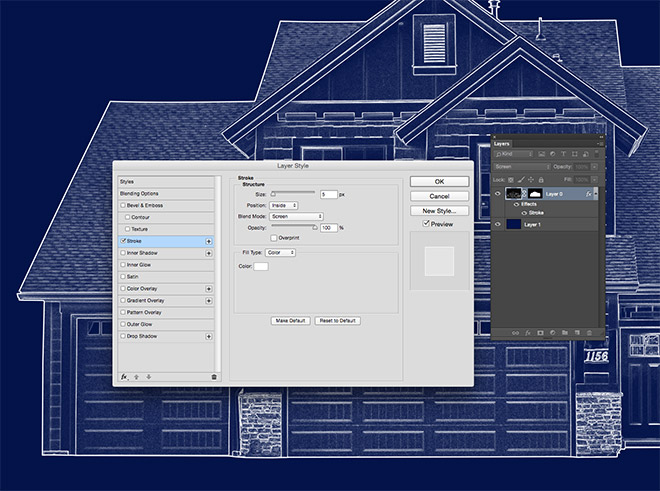
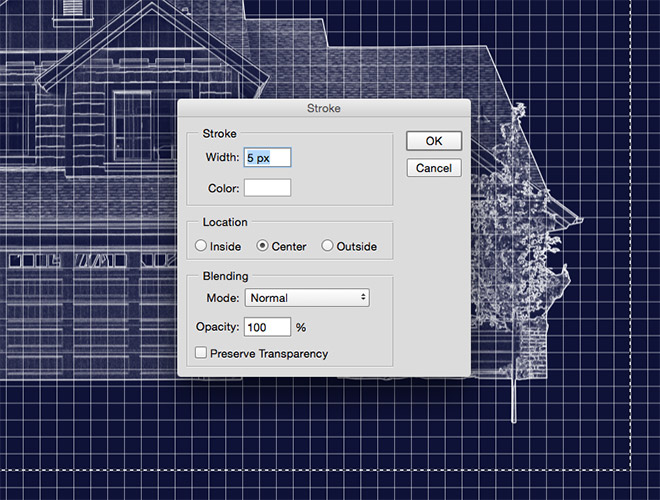
Double click the image layer and add a Stroke Layer Style. Change the settings to 5px, Inside, Screen and 100% opacity.
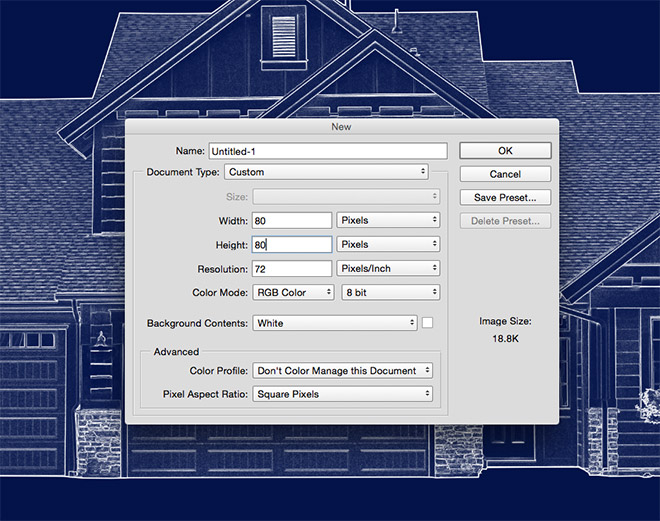
In order to add a grid to the blueprint, we first need to make a pattern swatch. Create a new document at around 80x80px in size. This size may vary depending on the scale of your document. Draw a quick marquee over your image to represent a grid square and note the size.
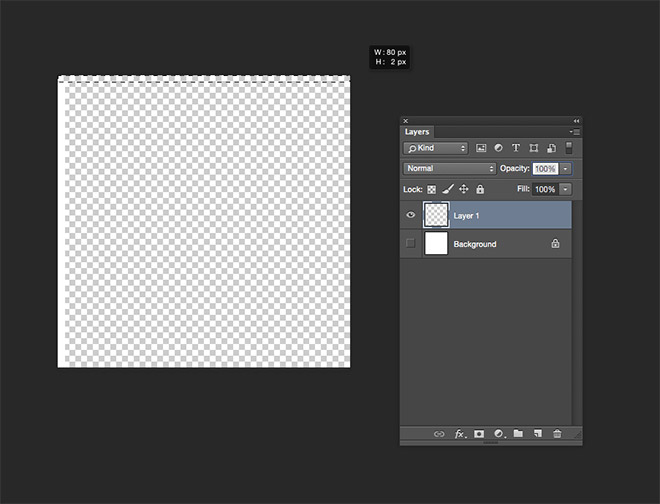
Add a new layer and turn off the visibility of the background in this new document. Use the marquee tool to draw a thin 2px strip along the left and top edges, then fill them with white.
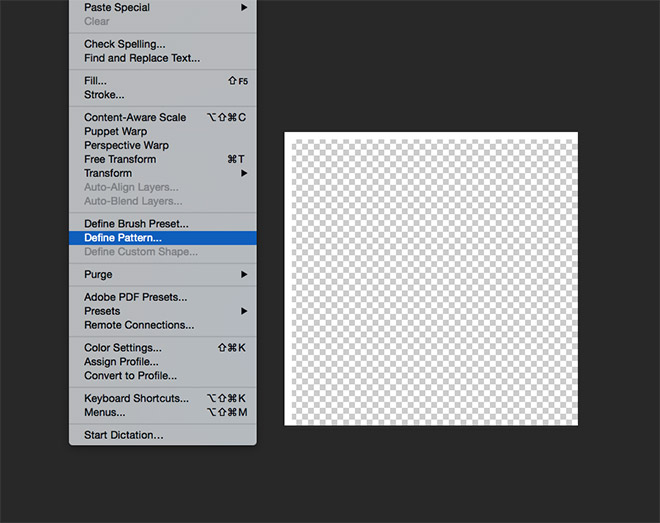
Press CMD+D to Deselect, then go to Edit > Define Pattern. Give it a descriptive name such as 80x80px Grid Pattern.
Close the document and return to the blueprint effect. Create a new layer and select the Fill tool. Change the dropdown menu in the header from Foreground to Pattern, then choose the newly created swatch. Click anywhere on the canvas to apply it to the layer.
Use the marquee tool to draw a selection around the main image that lines up perfectly with the grid pattern. Right click and select Stroke, then enter 5px in the options, along with the colour white and Center.
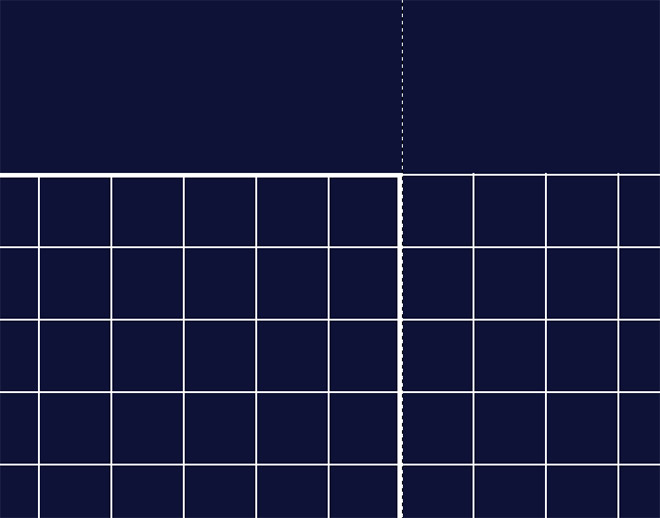
Zoom in and draw selections with the marquee tool that capture the grid pattern around the edges up to this thicker stroke, then hit the delete key to remove them.
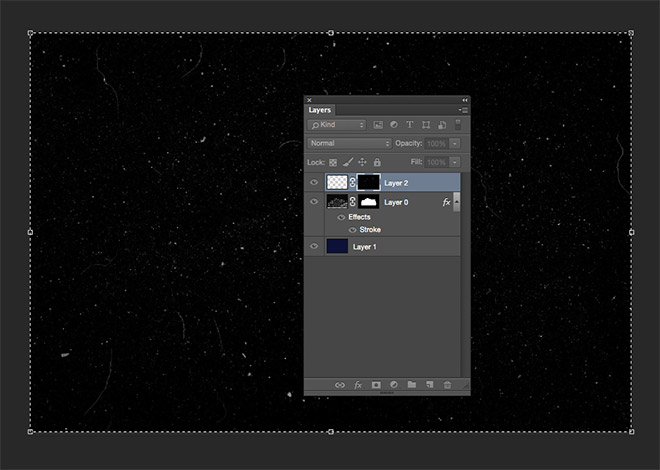
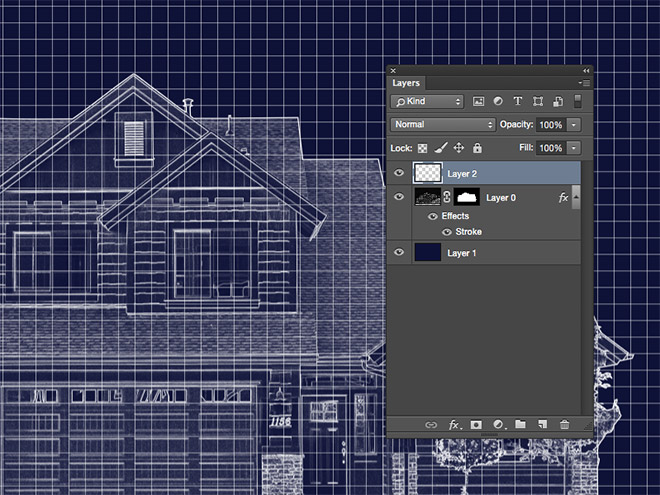
Add a layer mask to this grid pattern layer. Hold the ALT ley while clicking the mask to edit its contents. Download and open one of my Dust and Scratches Textures, then paste it directly into the mask. Scale and rotate it to fit.
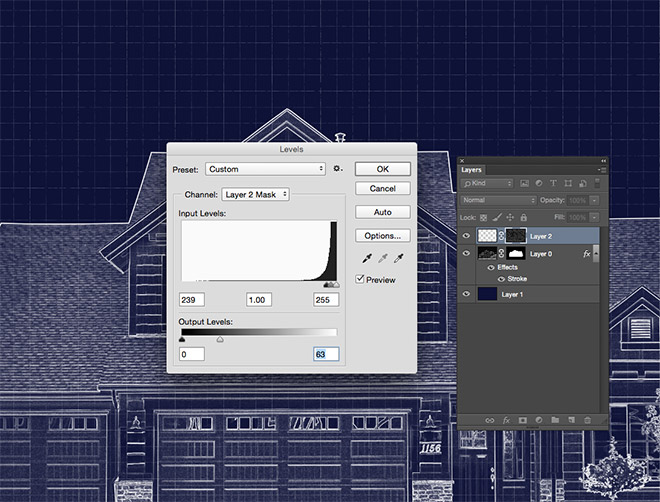
Click with the Selection tool to escape from the mask editing mode back to the main document, then with the mask still selected, press CMD+L to open the Levels. Move the sliders towards the right to boost the contrast to the extreme, then move the white Output Levels slider to the left to bring back the grid pattern until it appears subtly over the image.
Finish the effect off with a dirty paper texture, like one of the royalty-free paper textures from Bashcorpo. Paste it into the document, rotate and resize, then desaturate and Invert the paper texture image.
Change the blending mode to Screen to allow the grungy paper texture to interact with the blue background to enhance the realism of the blueprint effect.
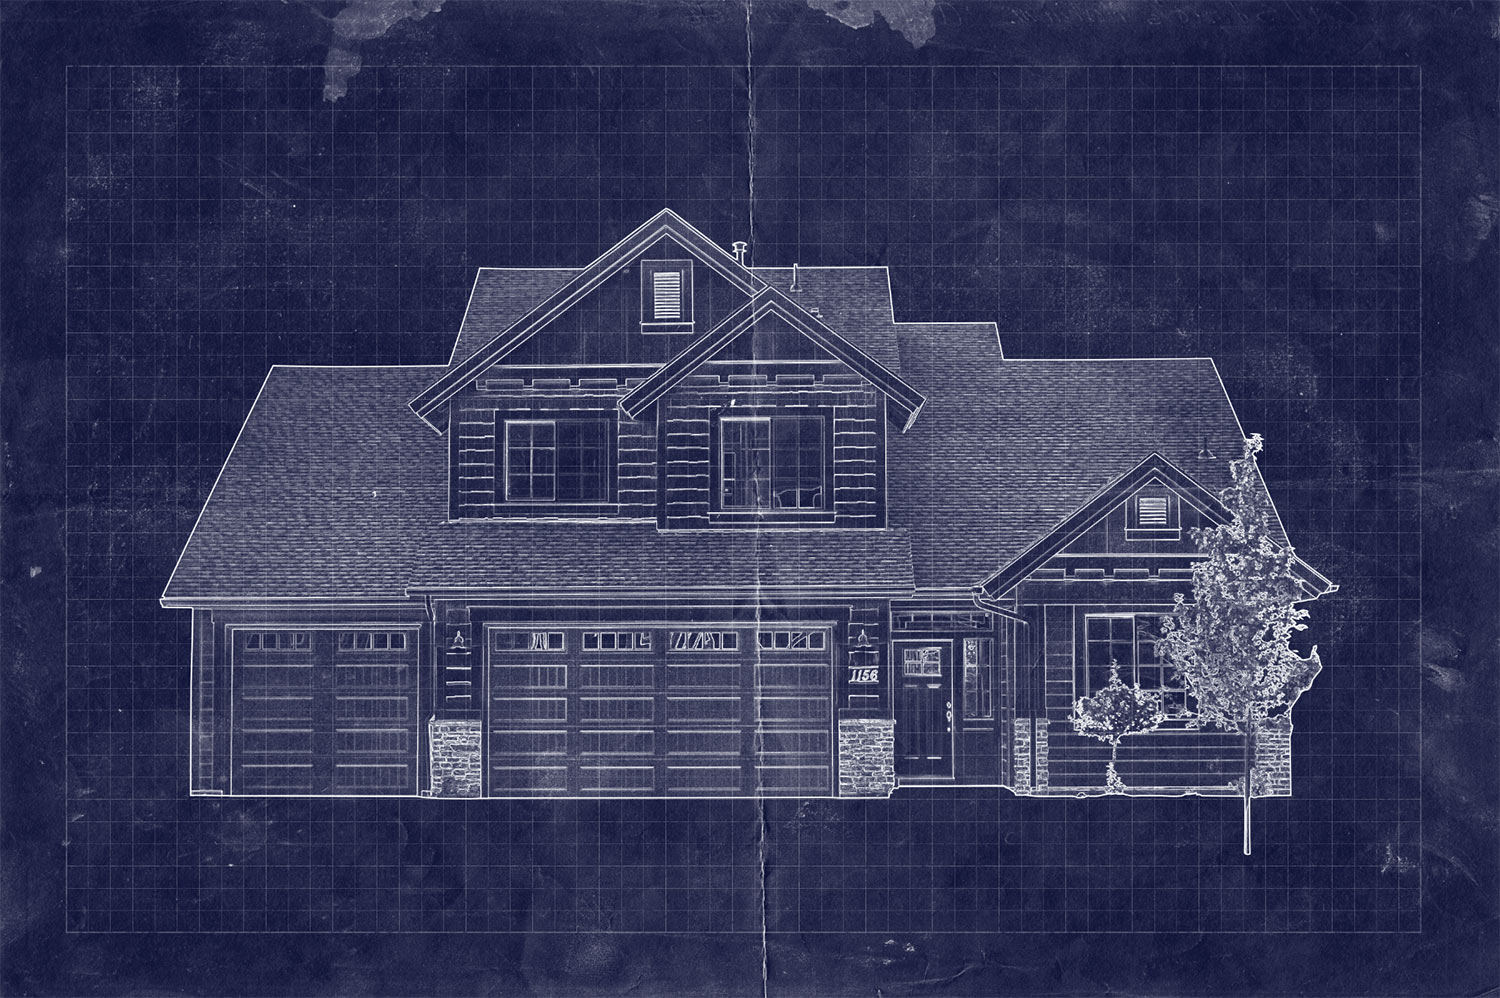
The final result is a great looking blueprint effect with a hand drawn appearance, along with a subtle grid pattern, creases, stains and folds that add to the realism.

Thank you so much! This is such a wonderful tutorial, very well explained and easy to follow. You know when you need something, and it comes to you in just the right time? This tutorial was that to me, so thank you so much for taking the time to do it!
I’m really glad the tutorial helped just at the right time for you! :) Thank you
that’s a great tutorial. Thank you so much
Thanks!
Thx! This is great.
Thank you
This is so cool looking! Thank you very much!
Just as an aside, I knew an artist who would set blueprint paper down outside, lay stuff on it, or pose on it, until it ‘developed’ an image. She created art this way and it was awesome!
Thank you, again!
Su
Thank you Su! Sounds like a very interesting technique!
Great work, Chris, I’ll try it with a human figure “Vitrubius” style!!
Great!
Beauty design.
Thank’s Chris
This tutorial is right up my alley. I am a residential designer and just started writing blog posts about the residential design process. This technique will be a great option for my post featured image. Thank you very much.
Have you ever done anything where you can convert an image to a silkscreen / block print look? I tried, but not getting exactly what I’m looking for. Any feedback would be greatly appreciated.
Thanks for your comment Craig! I will take a look at your request and see what I can do.
Chris,
Tried this out when I got home today. Took a bit longer than I had hoped, but it turned out great! Thanks for sharing this! I am going to post in on my Instagram page for people to check out. If you would like to check it out, my Instagram page is oldestyle_design_co
Hi Josh, I took a look at your post on Instagram and it looks great! Thanks for the shout out too, much appreciated :)
Nice tutorial–very easy to follow, and gives a nice effect.
You only missed one thing–a well-worn blueprint is sure to have one or more coffee-mug rings!
Thanks!
Ha! You can add more coffee mug rings when you re-create it :)
THANK U! This is great:=)
Thanks mare13*
Really love it! Great work. Every project work needs such pre-approach blue print for design and develop.
Glad you loved it Mark!
i like this. thanks for sharing
Thanks Myaktion
Great work. The tutorial is really easy to follow – perfect for creating graphics on an architects website! Thank you!
It’s good to hear the tutorial was easy to follow. Thanks Coderra!
That’s amazing and beautiful work, loving it! Your adobe photo shop blueprint is easy to understanding. I am a graphics designer, I am optimistic that I’ll create this type of effect with adobe photo shop ingredients. Thanks you for this naturalistic tutorial.
Thanks Akhi, let me know how your version turns out :)
This is an awesome technique we do a fair bit of design for building companies. I am sure you will see this technique show up in our work.
Great to hear this Roger!
Great tutorial for creating blueprint effects! I like all the little details :)
Thank you John
Its awesome tutorial to create new effective designs. keep on.
Thanks
Thanks Chris, your tutorials are always great and thanks for this awesome tutorial :-)
Next time I have an architecture client, definitely playing with this. Thanks! ;)
:)
I love this Chris, You really made my day.
Thanks Kate, good to hear!
Amazing, as always.
Thank you, Chris!
Thank you Jeni!
im having problems in making the grids. i have copied every settings and steps so far but when i add the pattern in the blue picture, only white borders in left and top side will show. not the grids
I’m going to pass on this article to a builder friend – this would work perfect for his site – thanks for taking the time to share this Chris :-)
Andy :-)