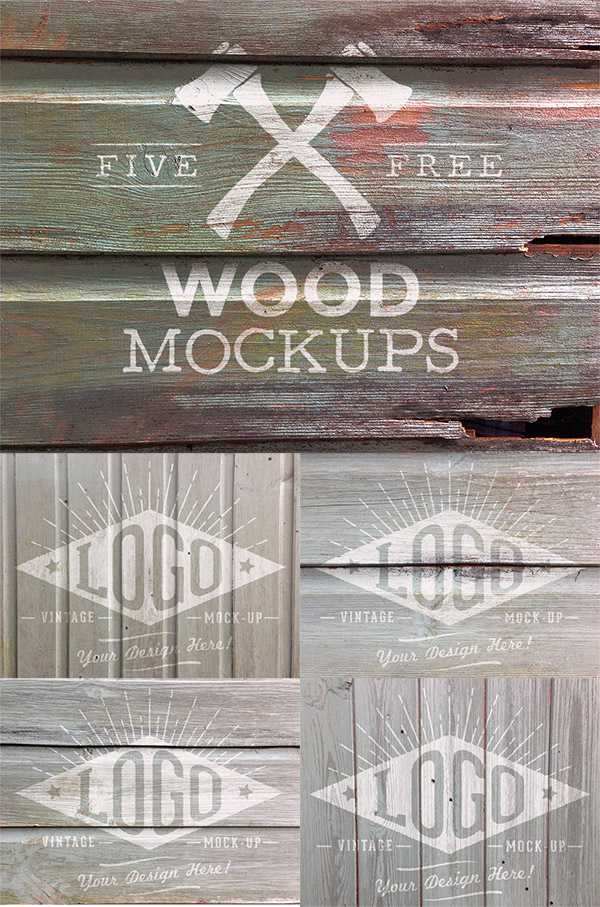
A couple of months ago I shared some rusty metal logo mockups which allowed you to place your logo designs onto distressed textures to create simulations of your artwork being painted onto real surfaces. I’ve been hunting for more cool textures to create another set of free resources, so today’s giveaway is a collection of 5 weathered wood logo mockups. Use them to realistically apply your logo onto an old, aged wooden background. They’re the perfect setting for outdoors or rustic themed designs.
This set of wood mockups includes five weathered textures straight from my garden shed. The files have been processed with Photoshop Smart Objects so you can edit the placeholder logo to have your own design pasted straight onto the texture, with all the grain and grime automatically applied to create a realistic effect.
How to edit the mockup file

Open up your chosen mockup file in Adobe Photoshop. You’ll notice a layer named “Double click to edit”. Double click the thumbnail of this layer to open up the Smart Object.

Delete the placeholder logo and paste in your own design. Scale it up to fill the document. Save and close the file to return back to the mockup template.

Your logo will be applied to the wood texture with the grain automatically erased from the artwork. You can make adjustments to the logo colour by altering the adjustment layers in the file.

Likewise, you can also alter the colour of the wood background by changing the colour of the “Wood Colour” layer.

Your logo can be adjusted by opening up the Smart Object layer. Change the size or alter its position then save the file and return back to the mockup to find the changes automatically applied.


thank you!
No problem Hutch.
Thank you so much Chris! Great resource!
Thanks, really glad you liked it!
Thank you!
Noo, thank YOU! :)
I really appreciate your efforts. Thank you!
Thank you so much Cassandra, It means a lot.
So darn sweet, thanks!
Thanks Tony!
Thanks Chris for useful resource. I’m actually in learning phase and am damn sure this will come in great use.
Happy to know It’ll help. :D
Thank you Chris for the textures.
Anytime!
Thanks so much. Can’t wait to use these textures in a presentation.
Good luck on your presentation, hope it goes well.
Awesome work again my friend!
Cheers Scott. :)
Thank you so much! I am thinking of how I am going to use these!
Su
I’m sure whatever you do will look great. :D
All the posts and tips you’ve posted is very useful for me Sir Chris and you have explained to your article very clearly and can understand easily. Thank you! I’ll visit this blog always so I can learn a lot more.
I’m thrilled that you will come back Gerald, so happy I can be helpful.
Hey! Thank you so much, they are lovely. I’ll definitely use them and send you the results :) Thanks
I look forward to it. :)
thanks for sharing I find quite useful
Great! thanks Mario.
Chris – Being an old guy and n truth not the best student I’ve struggled with online tutorials for years – generally because the tutorial authors seem to assume a level of experience I may not have. That said, I find your instructions both thorough and easy to follow. I appreciate that doing these must take a fair amount of your time. Thank you for that investment in educating all of us. You have a gift for teaching. Steve
That means so much Steve! I’m so happy to help people with all levels of experience. Really appreciate the comment. :)
Awesome work thanks Chris!
Thank you!
I can truly say I have never come across a blog that gave such great detailed step by step instructions. Thanx! I’ll be frequenting your blog often:).
I’m glad you’ll be back Andrea!
Great resources Chris, thank you. I use the GIMP instead of PhotoShop. Things work somewhat differently there but I’ve achieved the same results. If anyone reading this article wants to achieve the same effect, simply select the logo layer then select the logo’s alpha (Layer->Alpha to Selection), after that go to the logo colour layer and add a layer mask. Hey presto – one logo in the colour of your choice. I found the method works best with lighter colours. Reduce the opacity of the coloured logo layer to get the wood effect coming through.
The wood textures are great :-)
Thanks for the tip Lesley! I’m sure that will help people who use the same programme as you and I’m happy this has still helped as a guideline. :)
Thanks Chris for the freebies! I was going to comment on the post of free logo templates because they are AMAZEBALLS! Seriously – thank you for creating and sharing. I run a small business and am always looking for free or affordable element to incorporate into marketing materials or our videos.
Thanks for sharing!
Really glad to know I can help you along the way! Thanks for the comment.
Thanks
absolutely great wood logo mocup. awesome design.
i love this !
Thank you for sharing this information. The information was very helpful and saved a lot of my time.
Sorry if I missed the explanation, but why does it keep asking me for a displacement file before saving my logo in the smart object layer?
Very very useful for me thanks