Tutorials
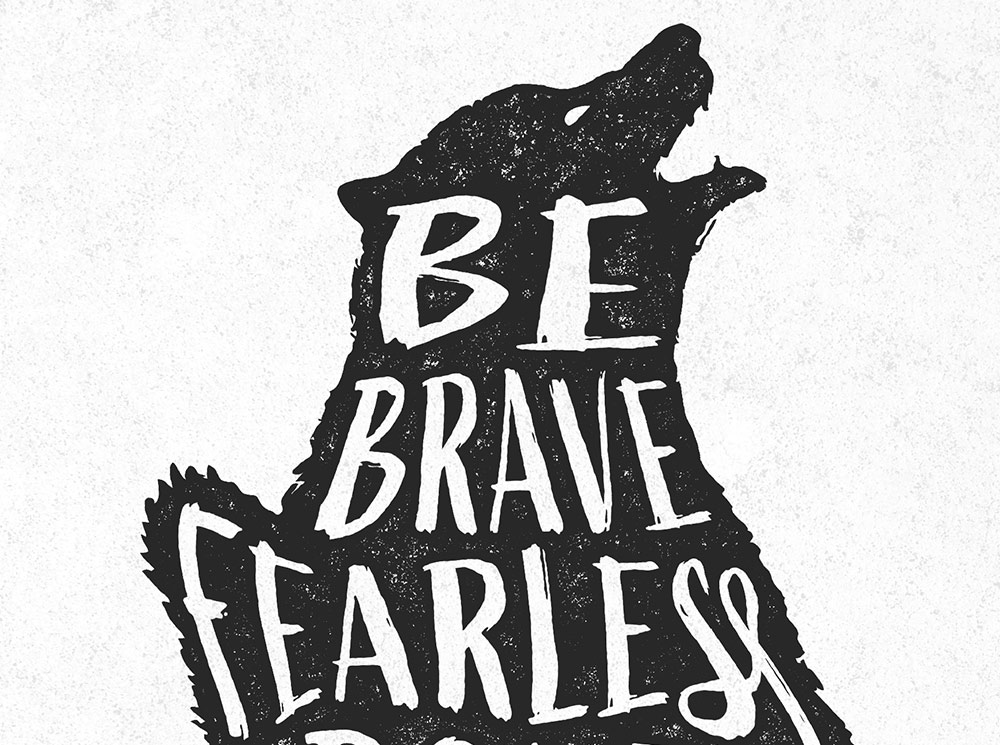
In today’s Adobe Photoshop tutorial I’m going to show you how to create hand lettering illustrations the easy way! This popular art style combines a silhouette graphic and a quote that is distorted and manipulated to fit within the outline of the surrounding shape. Usually, illustrations like this would be created by hand with pen and paper, but it takes some artistic skills to be able to plan and craft the image with no ‘undo’ button! This digital technique makes use of ready-made graphics, fonts, and textures to achieve the hand-made look, but with the added benefit of being able to tweak and adjust the layout until it looks just right.
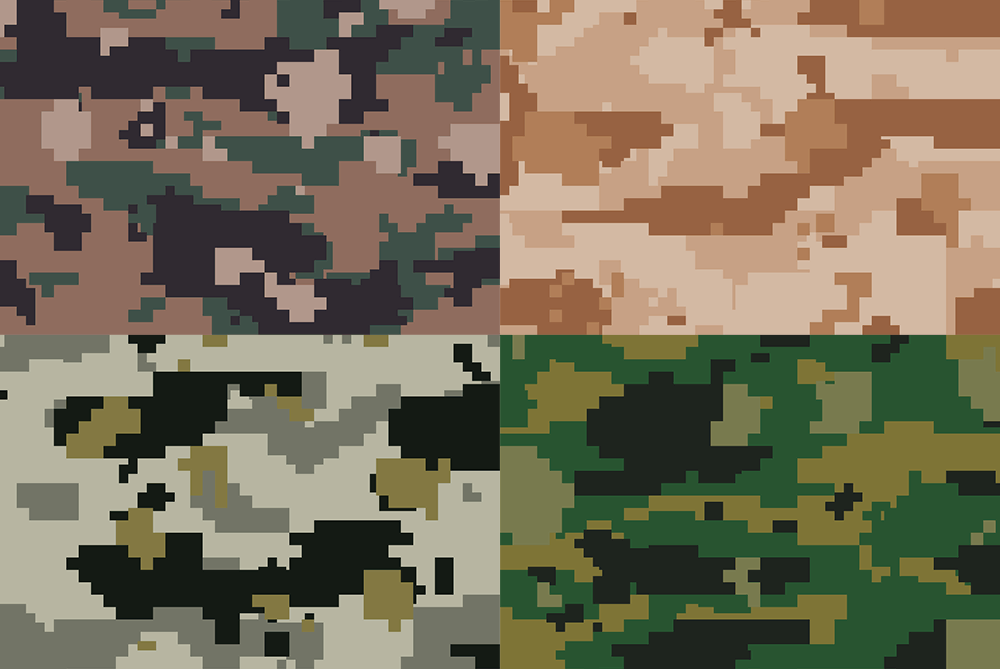
Today’s tutorial is kind of a follow-on from my guide to creating custom camouflage patterns in Adobe Photoshop from back in 2019. In that previous tutorial I shared some useful techniques for creating a variety of camo pattern styles using nothing but Photoshop filters. All those camo patterns are comprised of random blobs and shapes, so this tutorial will focus on creating the more modern digital pattern styles that are made up of tiny pixel-like squares. Using a similar process, we can create disruptive digital camo patterns that can be regenerated with a random result every time. By modifying the colour scheme, we can even replicate modern-day military camouflage patterns such as the US Marines MARPAT camo, or the Canadian CADPAT.
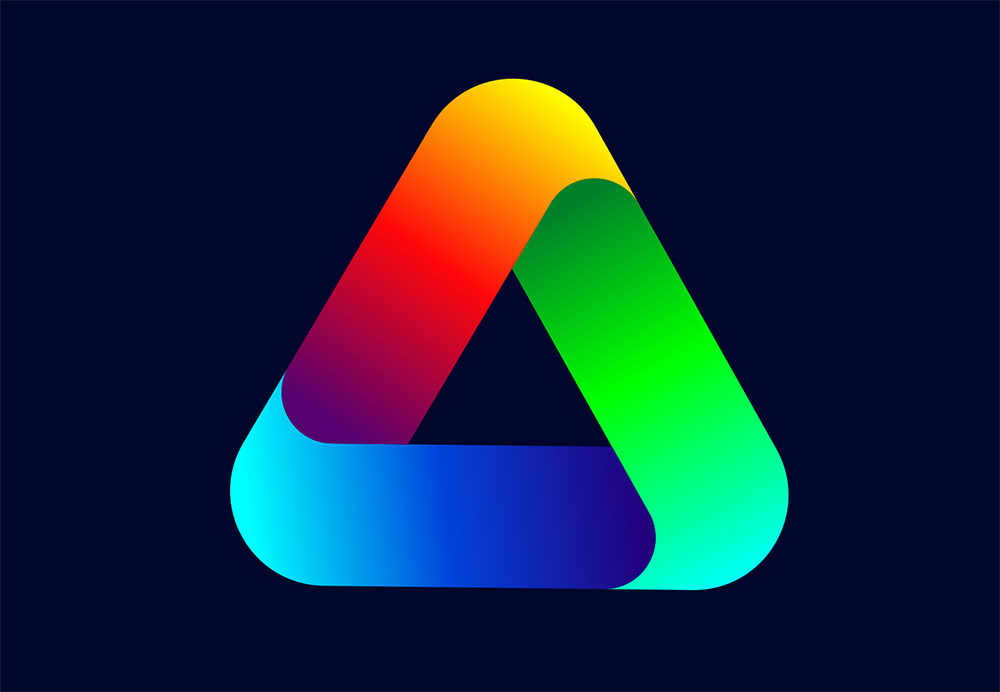
In today’s Adobe Illustrator tutorial I’m going to take you through the process of creating a colourful gradient logo icon. I’ll show you how Illustrator’s shape tools make it easy to construct the basic vector design, then we’ll apply a vibrant colour scheme using gradients. The final result is a trendy vector logo icon with interlinking shapes and bright colour spectrums. Using these same techniques, you can create modern logo designs with all kinds of shapes and layouts.
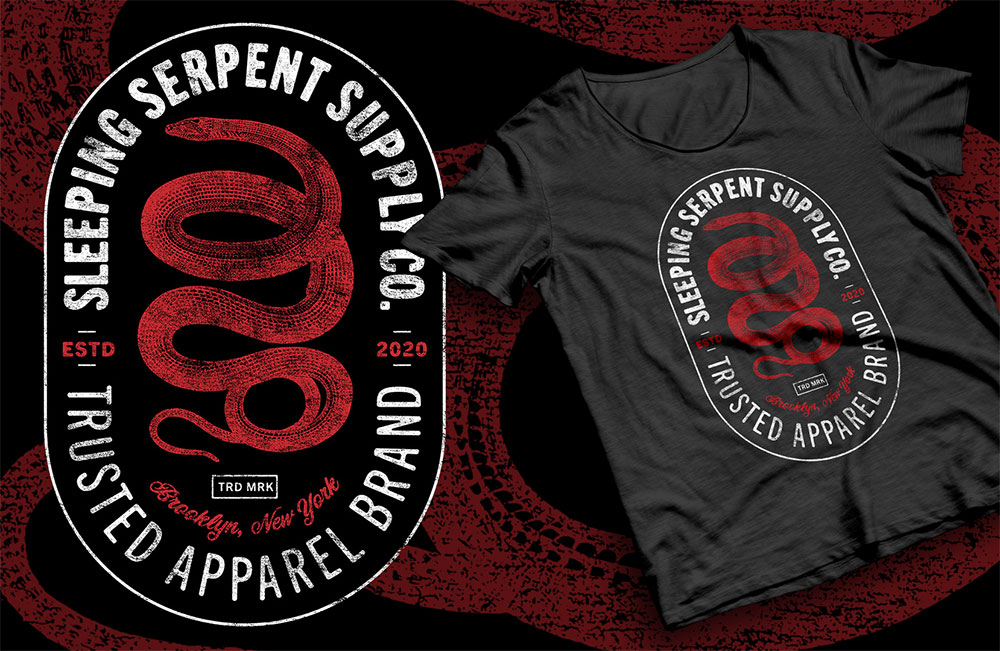
In today’s Photoshop tutorial I’ll show you how to easily create cool looking vintage logo designs by combining antique illustrations with some visually interesting text styles and layouts. This kind of artwork is really popular as T-shirt graphics, so I’ll show you how to set up your document at the appropriate size for a T-shirt design. To finish off the artwork, we’ll apply some vintage print effects and make use of my Washed and Worn textures to make the digital design look like a real old T-shirt print.
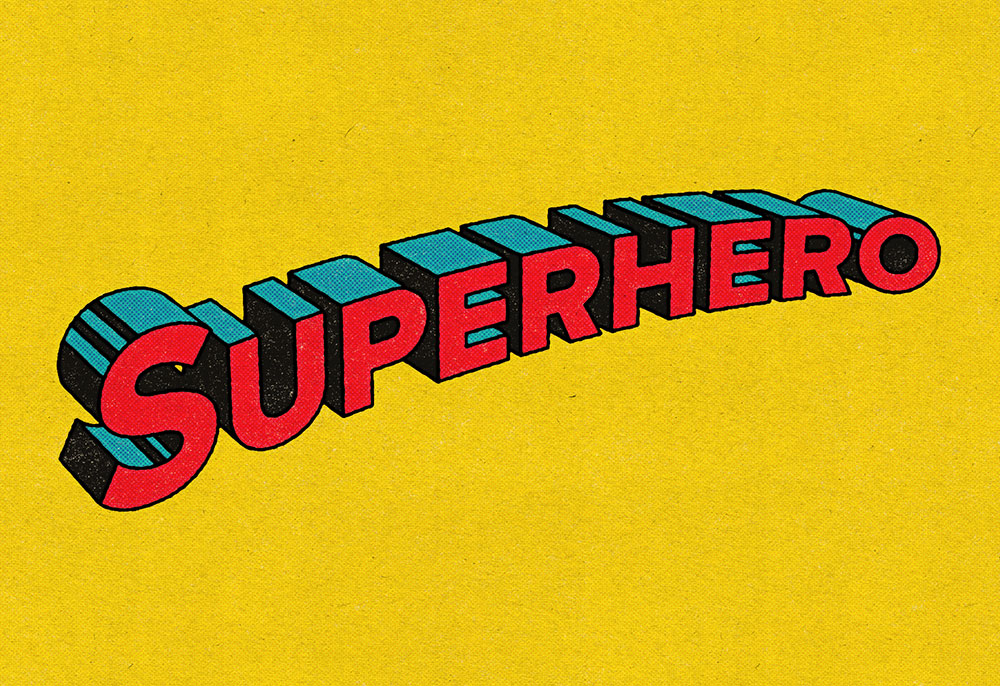
In today’s Adobe Illustrator tutorial I’m going to take you through the process of creating a retro text effect, inspired by the title art for the Superman comic books. Old comic book titles feature some really simple but effective text styles, often incorporating faux-3D effects, bright colours, and thick black outlines. It’s a graphic style that is immediately recognisable thanks to these common visual features that appear in different variations across all the superhero stories. The original comic book covers were drawn by hand, but I’ll show you how to apply some adjustments to your text in Illustrator to transform it into a bold comic book title effect, then stick around to the end to see how the comic book theme is enhanced with the help of my Bad Print Effects Photoshop Action.
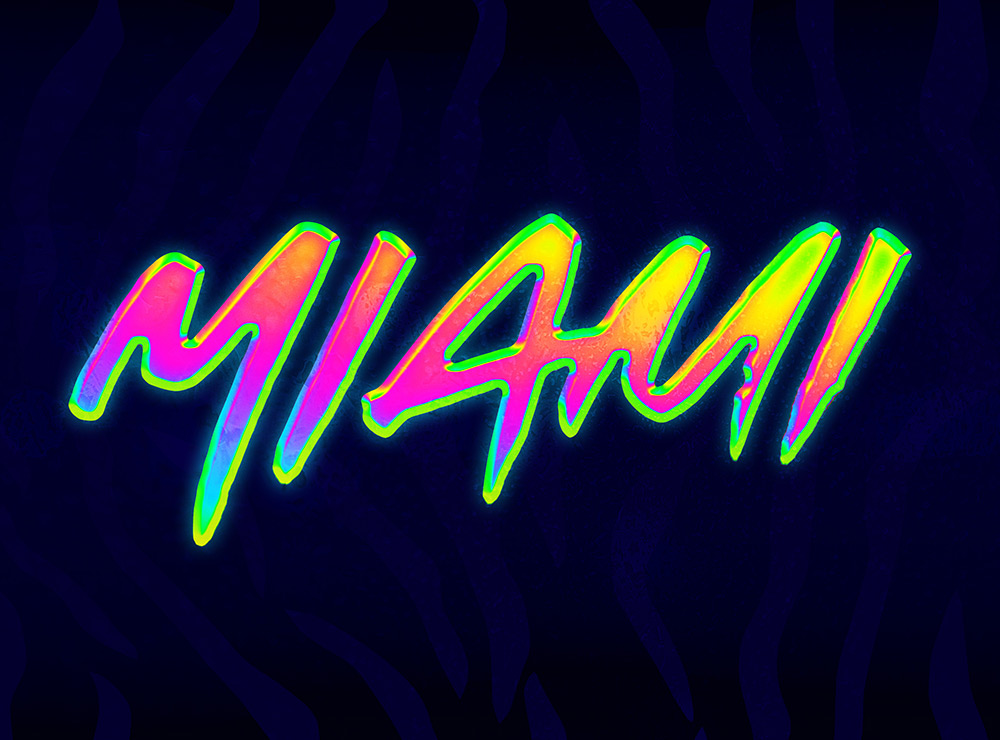
In today’s Photoshop tutorial I’m going to take you through the process of creating a vivid 80s style neon chrome text effect. This ultra rad style uses the most intense RGB colours available to create the brightest, most fluorescent effect possible that smoothly transitions through a variety of hues. We’ll use Photoshop layer styles to create the foundation of the effect, then add the vibrant colours with a combination of gradient tools. Some subtle texturing helps to add some intricate details to the chrome text surface, then the artwork is finished off with a complementary 80s inspired tiger stripe background.