This post was originally published in 2013
The tips and techniques explained may be outdated.
Often when post-processing a photograph the aim is to carefully fine tune the levels and colour balance to capture the real life scene, but sometimes it’s worth taking the edits a little further to enhance an image with hyper realistic effects. Applying colour casts, increasing the contrast and adding lighting effects can give an image an intense mood just like we see in magazines or on billboards.
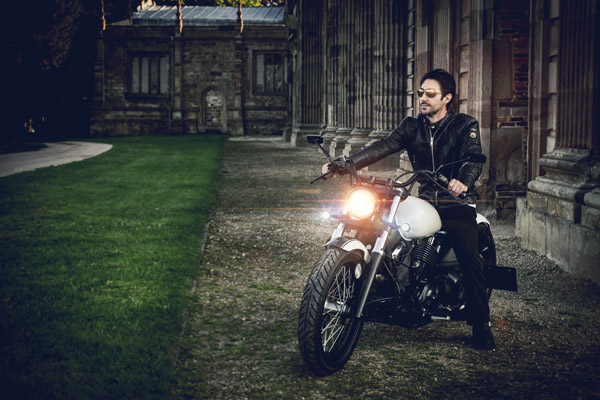
After recently finishing my custom motorcycle project my buddy Ric (Urbanpixels) kindly used his photography skills to take some amazing pics of me and the bike at an old ruined Georgian mansion (see the full collection of shots). Ric did a great job of processing the images from the camera to fine tune the brightness, contrast and color balance, but I fancied playing around to inject a little hyperreality with some moody color casts and epic lens flares to subtly enhance the photo.
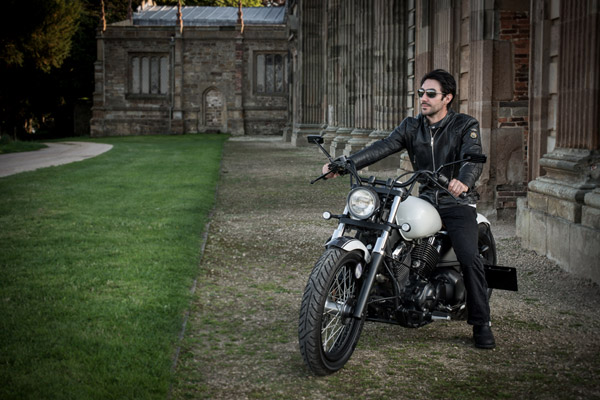
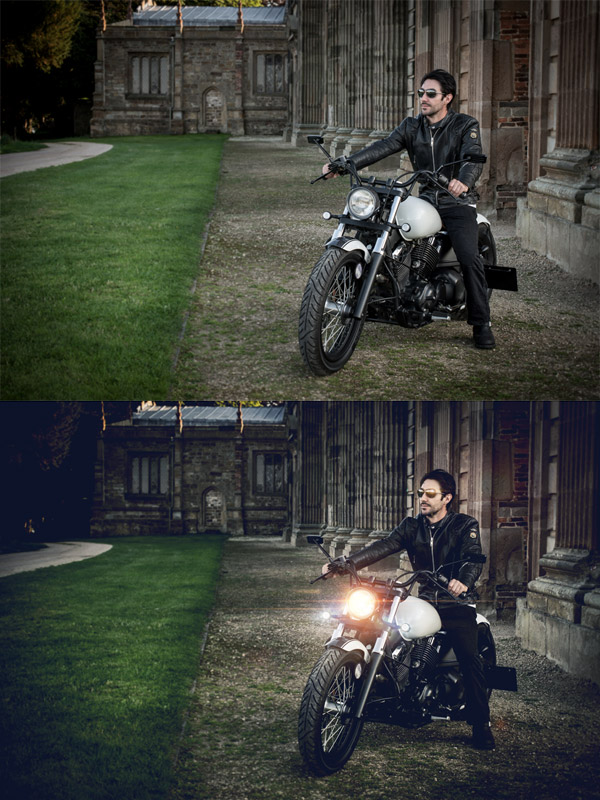
Here’s the photo I’ll be working with in this tutorial. It’s a perfect reproduction of the real life scene, but some additional lighting effects would really help bring the bike to life and intensify the mood. Open up your image in Photoshop to follow the step by step process.
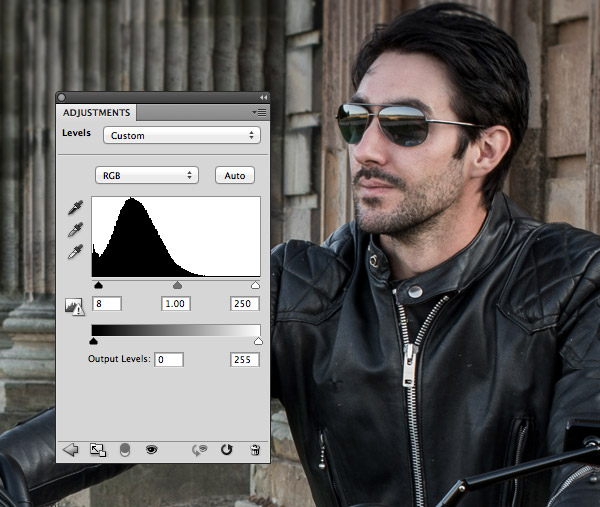
First add a simple Levels Adjustment Layer in Photoshop. Crop off some of the shadows to subtly darken the image. You could also drag the highlights inwards to further increase the contrast, but be careful not to blow out the highlights too much.
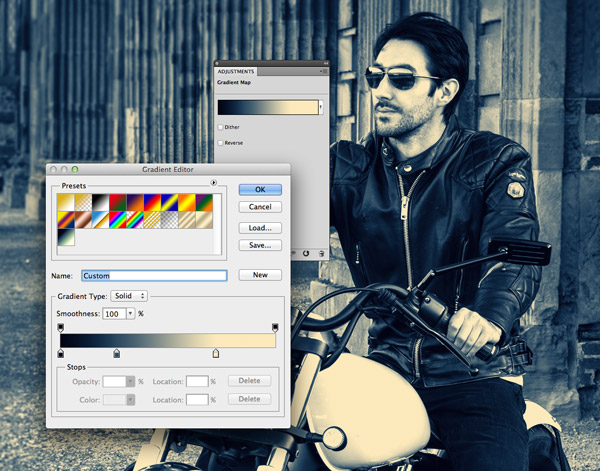
Next add a Gradient Map adjustment layer. Set up the gradient to flow from a dark blue (#020413) to a grey-blue (#2b4a61) to a pale yellow (#fce9bb). All the colours of the image will be swapped for a value between these selections.
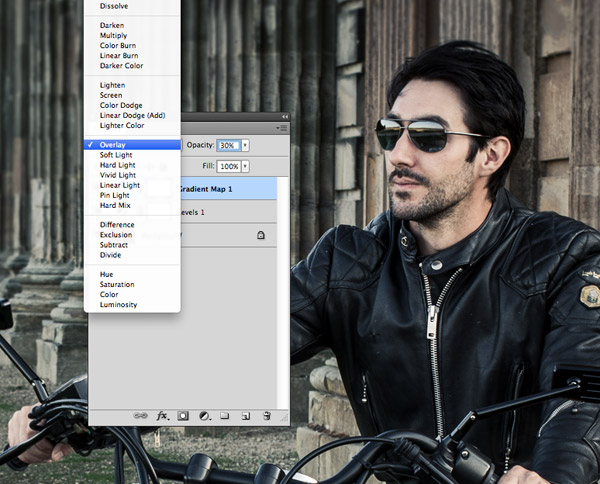
Change the blending mode of the Gradient Map to Overlay to allow the new colours to interact and alter the tones of the original image, generating a subtle colour cast. Drop the opacity to lower the contrast and the impact of the effect.
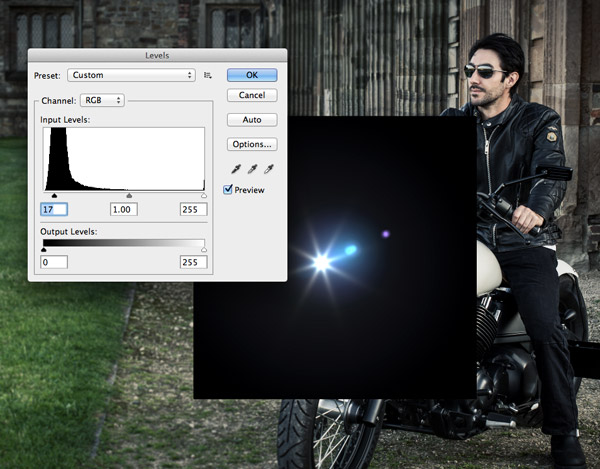
The motorcycle is the main subject of the image, so illuminating the headlights will really bring it to life. Open up a suitable lens flare resource and paste it into the document. Adjust the Levels of the image to make sure the background is completely black, otherwise it will still be visible after the next step.
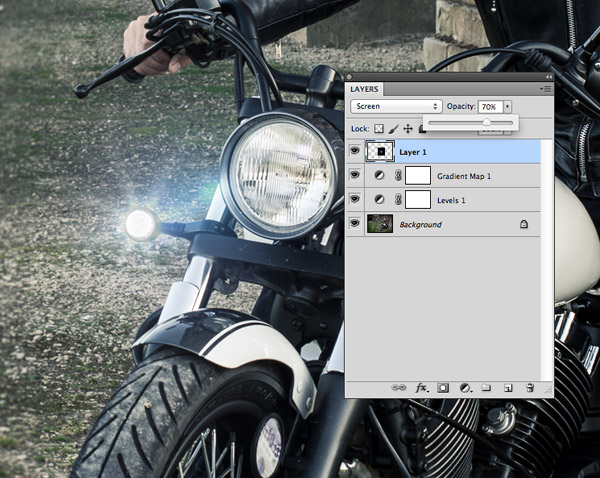
Change the blending mode of the flare to Screen to render the black background area transparent, then scale and position the flare over the running lights to fake their illumination. Alter the opacity to adjust the brightness of the flare and bring back some of the detail of the lamp unit.
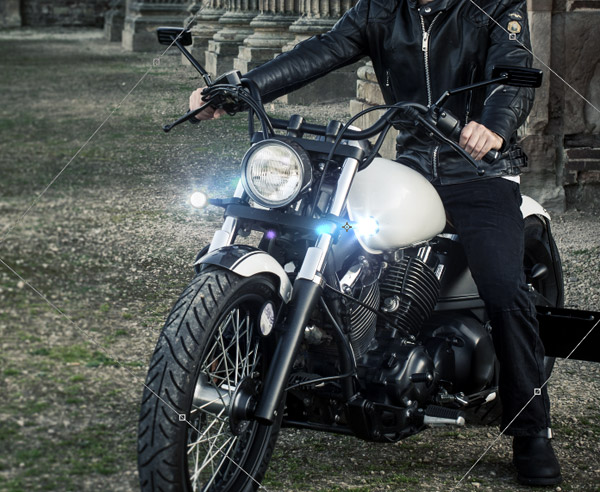
Duplicate the layer and position the copy over the other running light. Press CMD+T and rotate the image so it doesn’t look like a direct copy/paste.
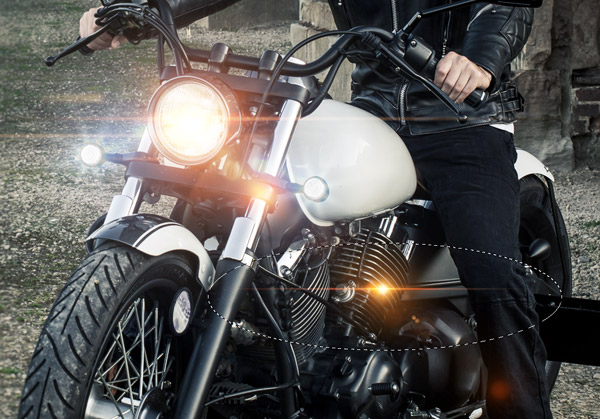
Open up a yellow flare from this optical flares pack and paste it over the main headlamp in the document. This particular image has an additional flare that needs removing. Draw a selection around it and hit delete.
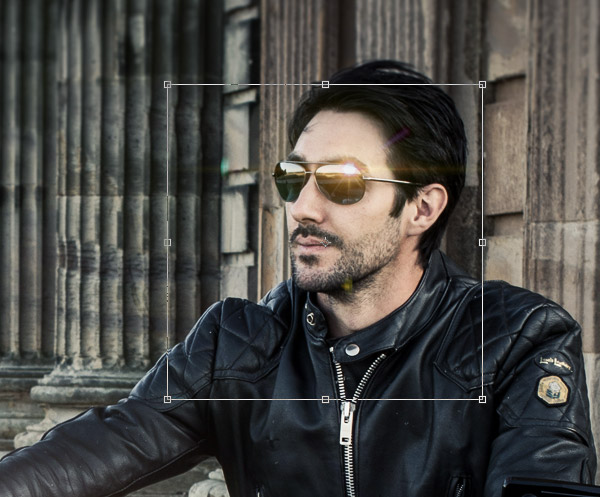
Add one extra flare to represent a reflection in the lens of the sunglasses.
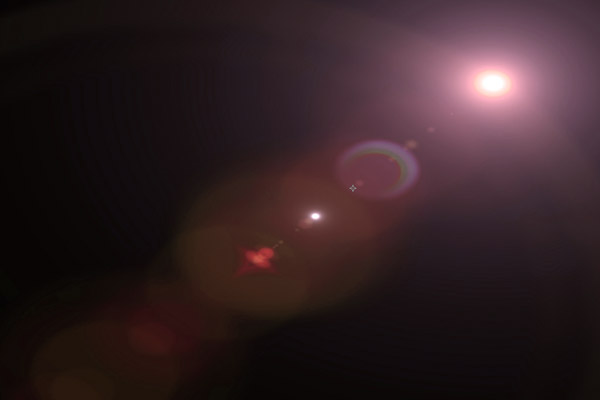
Open up a random flare image and scale it to fit over the entire canvas. Select a flare that roughly suits the composition of the image, as the bright areas will be used to draw focus to those areas of the photo.
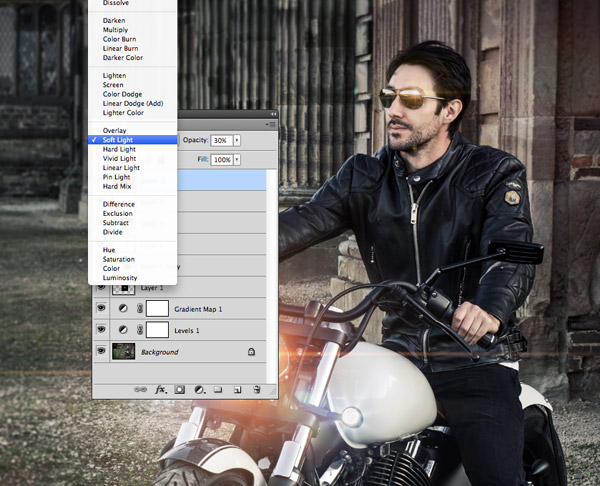
Change the large flare layer to Soft Light and reduce the opacity to fine tune the effect. This helps brighten the main subject of the image while also adding an extra subtle colour cast.
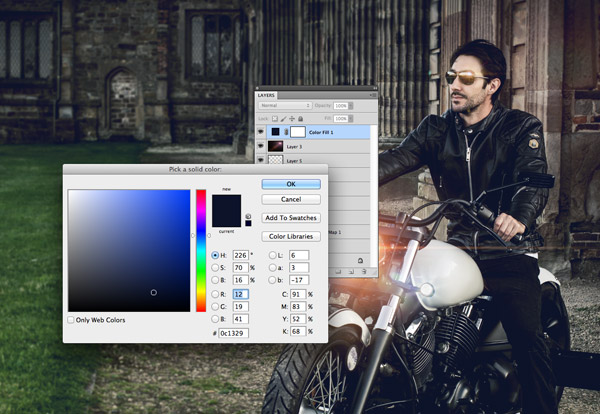
Add a Color Fill adjustment layer using a deep blue (#0c1329). Change this layer’s blending mode to Lighten to restrict this colour to the shadows, turning them from black to this deep blue colour.
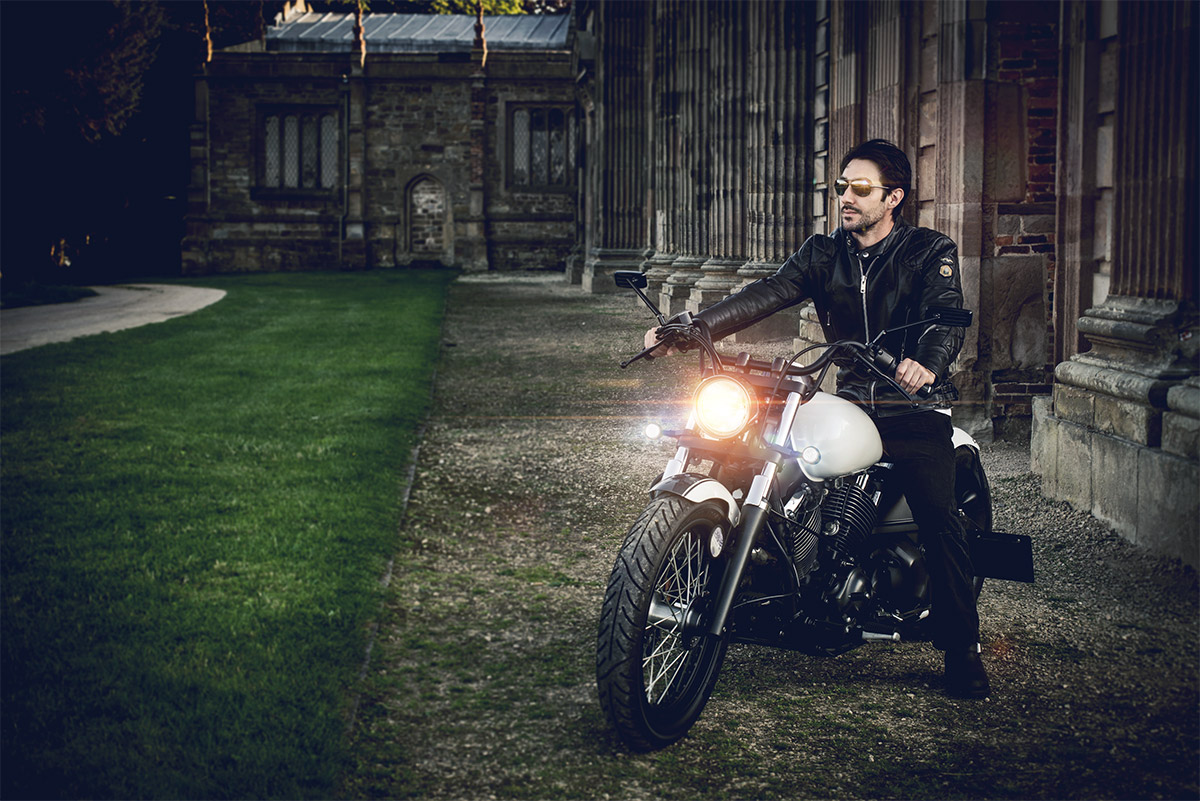
These subtle colour adjustments and faked lighting effects give the image much more of an intense magazine or rock n’ roll mood.


Simple and efficient ! Nice tutorial Chris, keep up the good work :)
Awesome! Love it!! Thanks for sharing ^^
Thanks for sharing eh, really learned alot!
Great ! Is that you in the picture !!!
Thanks so much. Your tutorials rock and NICE bike man! :-) You’re one of those amazing people who seem to be good at everything you do!
Great! Thanks so much for this and all your other tutorials.
Awesome, I love the bike and the dramatic effect of the tutorial
Looking Great! And amazing tutorial. Thanks for sharing.
Brilliant retouch!
And I must say you look pretty cool on the bike!
How vain! Look at me on my bike.
Color correction is very important for any photography. sometime we take photo but not perfect according to its background or environment so its really important for do some photoshop work like your given tips to make it more attractive.
Thanks for sharing. Amazing tutorial. Again thank you very much
awesome spooner
Wow! Your attention to details and adding the reflexion in sunglasses is just amazing! It makes Photoshoped photo look so natural and awesome!
wonderful! thanks for informative share! I do like this tutorial.
Haha you look so badass Chris!
our Chris looks action hero and this is stunning lightening effects. Great Work
Great explanation, Thanks for sharing!
Nice skill you have Chris,
Its look like naturally captured photo.
I like the sunglasses flare :)
wonderful! Photo editing work !
Thanks for sharing!
Thanks for sharing Chris. Many of these tasks have been stumbling blocks for me.
Awesome! Great job..Really i like this very much…Thanks for sharing this great information.
Cool effect, thanks for sharing.
Great post. Very helpful. Thanks.
Nice Tutorial..just for the final image.. Can you remove/hide the light that appears on the roof of back building… :)
btw, great post Chris..
Great post and cool effects. Thanks!
Thank you for this great read!!
So amazing! I will try to use this effect for my photo.
Colour balance and light effects editing in Photoshop can make a lot of difference to the picture. Magazines often use these techniques to enhance the overall appeal of the pictures featured in their editions. The effects used in this image are easy and great.
Great tute, thank you!
Just fab Chris
Thanks :)