This post was originally published in 2013
The tips and techniques explained may be outdated.
While I’m no pro videographer I do enjoy creating videos of my adventures on an amateur level. Recently I’ve been editing loads of footage from our road trip honeymoon in the USA, so I thought I’d share some of the techniques I’ve developed in Adobe Premiere to create cool vintage or retro style video effects. In this tutorial I’ll show you how I created an old style discoloured effect with film burns.
Adobe Premiere vs Final Cut Pro
When I first got started editing video on my Mac I used Final Cut Express, but I found the application pretty difficult to learn (plus it never seemed to support my footage!). I soon migrated over to Adobe Premiere and found it much easier to use, with many of the effects and tools having similar menu locations and names to those we’re all familiar with in Photoshop. While this tutorial is based on Adobe Premiere the same effects can be created in Final Cut Pro (or even Express), you’ll just need to dig through the menus to find the correct settings. For instance, Photoshop style blending modes appear under the Opacity menu in Premiere, but they’re known as Composite Modes in Final Cut.
How to Create Vintage Video Effects
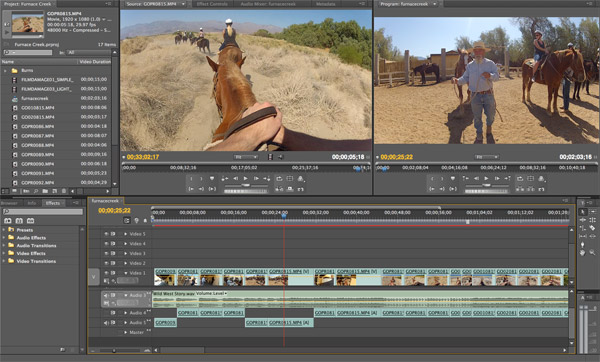
So let’s get started with some vintage effects. To begin you’ll need to compose your clips to create your basic video sequence. In today’s example I’m using my GoPro footage from a horse riding session across the desert at Furnace Creek Ranch in Death Valley. My video takes on a Western theme so old vintage effects will set the scene and give it more authenticity.
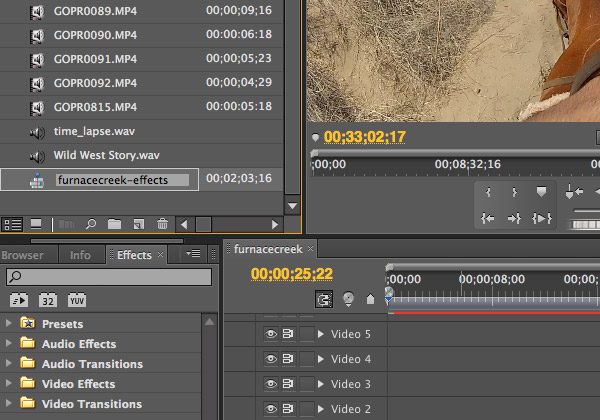
Video effects can be added to each clip individually, but it then becomes a painstaking task to make minor adjustments when each tweak has to be made numerous times. Create a duplicate of your sequence by dragging it over the “New Sequence” icon then add the word effects to its name. We can add the various adjustments to this single block of footage while still allowing for edits to the original composition.
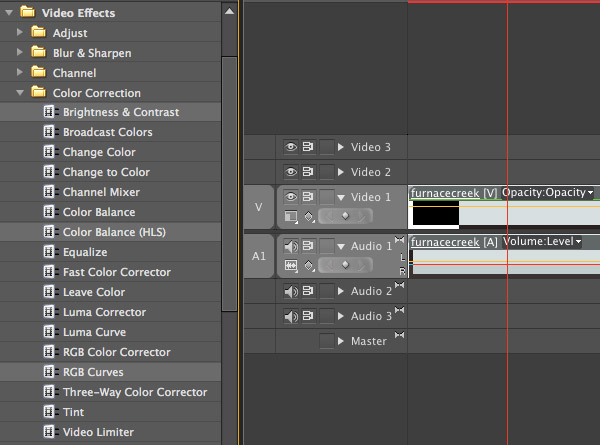
Open the Color Correction folder under Video Effects and drag RGB Curves, Color Balance (HLS) and Brightness & Contrast effects onto the new sequence.
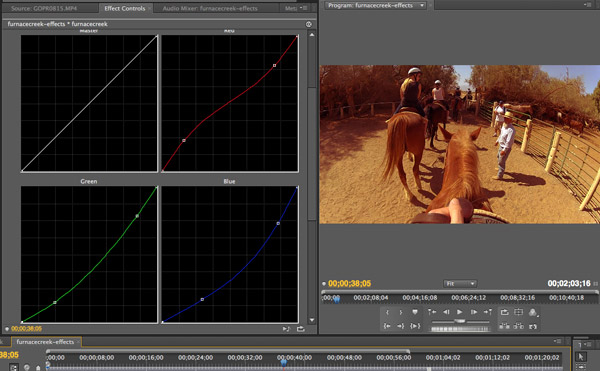
Under the Effects Controls open out the RGB Curves options and begin editing the curves profiles. These particular adjustments will increase the reds in the shadows and give the whole footage a warm orange tone.
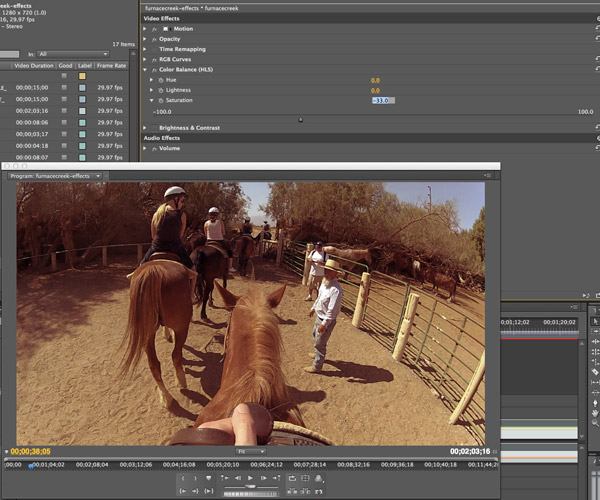
Next, tone down the vibrancy of the colour adjustments with the Saturation option of the Color Balance (HLS) effect. -30% takes away the orange tones to create more of a vintage sepia appearance.
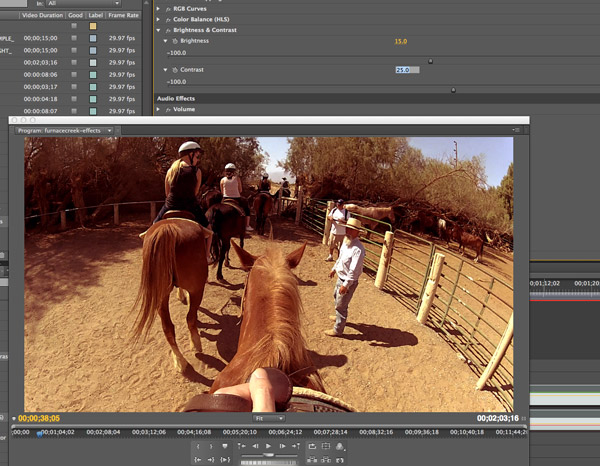
Footage can begin to look a little muted with saturation adjustments, so bump up the brightness and contrast to around +15% and +25%.
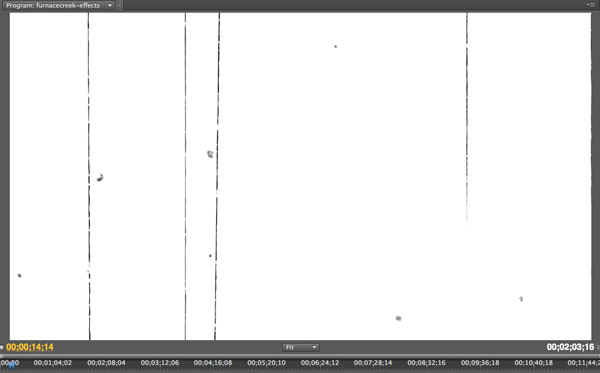
Just like textures really help create authentic effects in Photoshop, video resources can be placed over your composition to distress and age your footage. This simple grunge loop is part of a cool Film Damage pack.
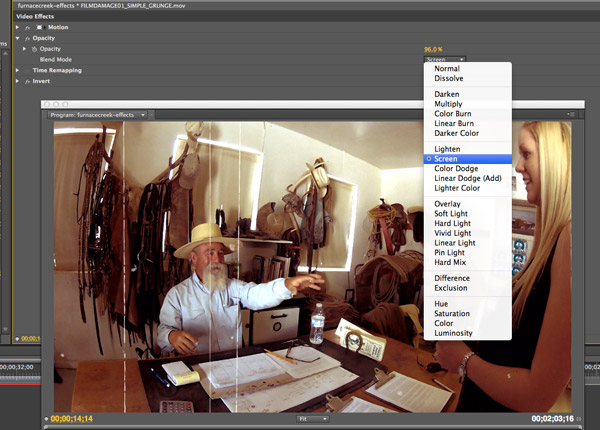
By default the footage features black distortions against white, so add an Invert effect from under the Channel Video Effects, then change the Blend Mode to Screen under the Opacity settings to render the black background transparent. Don’t forget to click the little timer icon next to the word “Opacity” to disable keyframes.
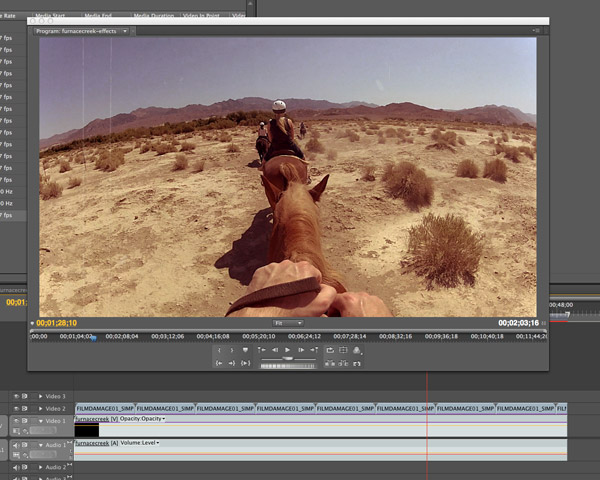
Reduce the opacity of the clip to around 20%, then copy/paste a series of film damage clips across the whole composition.
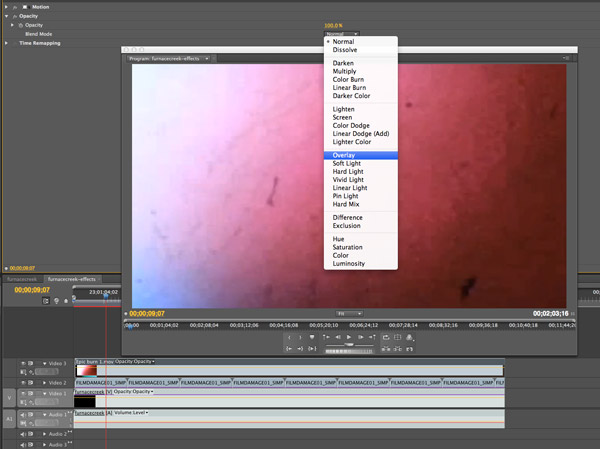
Another video resource I always rely on is this pack of 50 Epic Film Burns. These are really useful for either creating additional textures and colour distortions or to create trendy light leaks and mimic the old film mishaps of analog cinema.
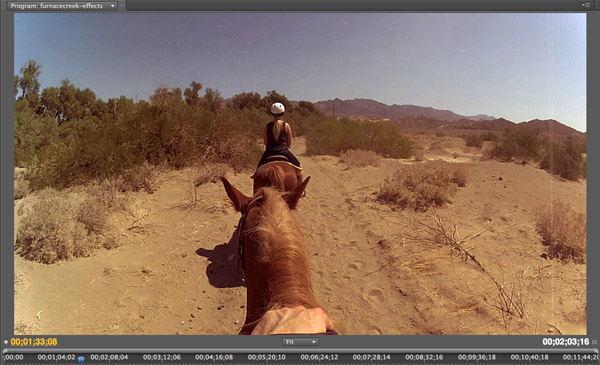
The first film burn in the pack is a mix of red and blue colours with dirty textures. Setting this file to Overlay and reducing the opacity to 20% adds some cool discolouration to the original footage, which is animated as the video plays.
The final vintage video effect
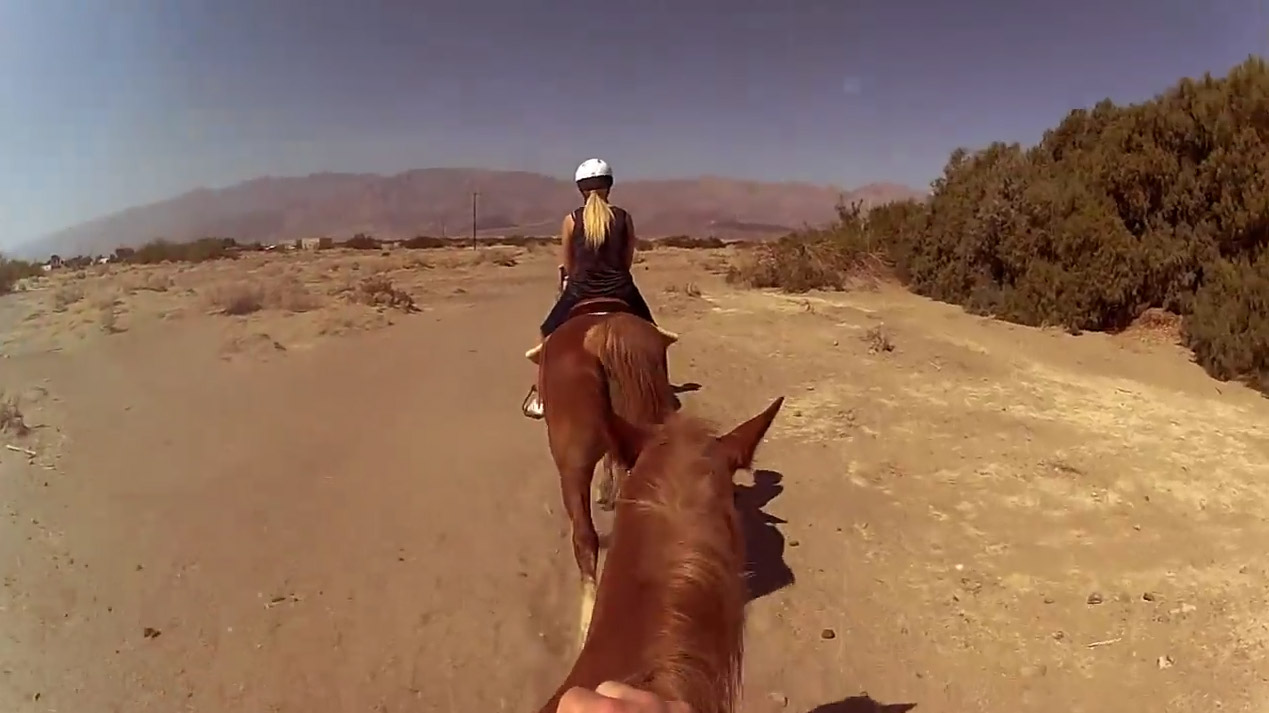
The combination of the sepia style colour correction and the various film damage resources really captures the low fidelity of analog footage. Here’s an example of these effects at work on my own video sharing our horse riding experiences at Furnace Creek Ranch.

Fantastic! The result is beautiful and I hope to read more Premiere tutorial!
Very nice tips. As a side note, Chris: we yanks are taught from a young age that the saddle horn is not a hand hold. But you can be forgiven the cultural faux pas since you are so generous with your digital advice :-)
These tips are really helpful for any Starter designer who uses adobe Premiere , but he needs to focus on it work not on other task, anyways i am also a starter and honestly it really helps me a lot….good one mate
Thank you for posting the great content. I was looking for something like this. I found it quiet interesting, hopefully you will keep posting such blogs. Keep sharing
Appreciate the well made tutorial and I wish to proceed by using this in my daily life. Again thank you very much for helping me understand this complex content!
Great tips, might come in handy since I’m experementing with video editing tools. I am concidering buying Premiere since I just an amateur too. Overall; a well made tutorial.
Congratulations on the video. Very well done.
The clarity to your publish is just cool. Using Adobe Premiere as an editing software has a lot of advantages, one of which is the number of effects and tools that are available to you. Vintage effect gives a premier look to our videos.
Great work and keep it up !!!