It can be difficult to get your head around how seamlessly repeating patterns work. Any objects that ‘fall off’ one side must reappear on the opposite side of the pattern tile, much like the retro arcade game Asteroids. This allows the pattern to continue over an infinite area, by enlarging the pattern area as the tile graphic is duplicated. Thankfully there’s a clever technique that can be used within Photoshop that makes the process of creating custom patterns easy. In this tutorial I’ll show you how to create a repeating rustic themed pattern with the help of Photoshop’s Offset filter.
The pattern I’ll be creating in this tutorial makes use of some beautiful paintings from The Watercolor Bundle, which is just one of hundreds of premium design resources that are available to Access All Areas members. A selection of illustrations are randomly composed into a pattern tile that seamlessly repeats without any gaps.
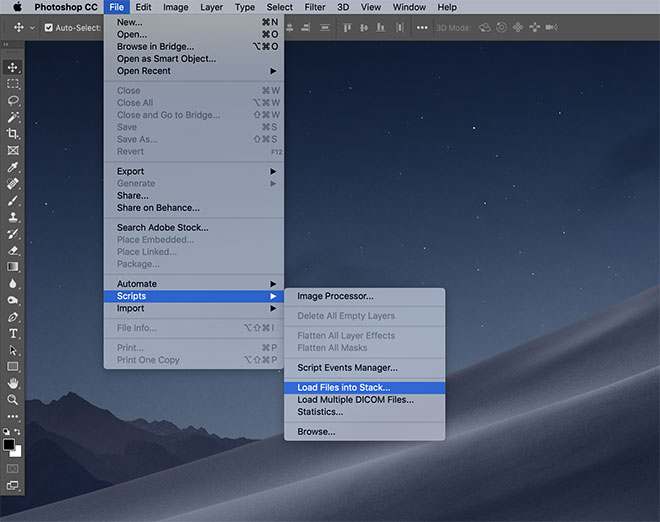
Since this pattern will be created from several individual illustrations, an easy way to open them into Photoshop is to use the Load Files Into Stack script, which will automatically place each graphic onto a separate layer within one document.
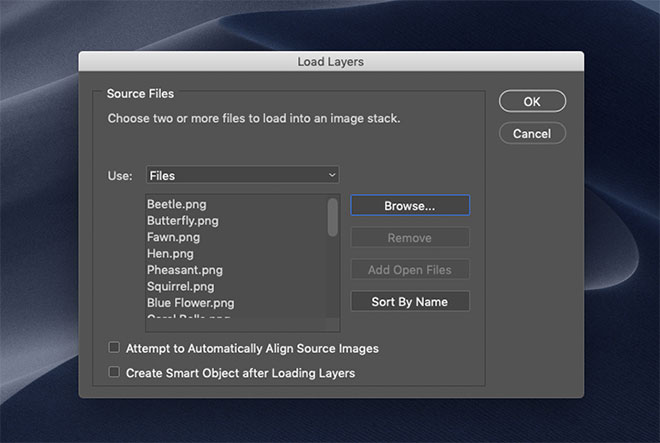
Choose a range of images to use within the pattern tile via the Browse menu. Make sure the Auto Align option is not checked.
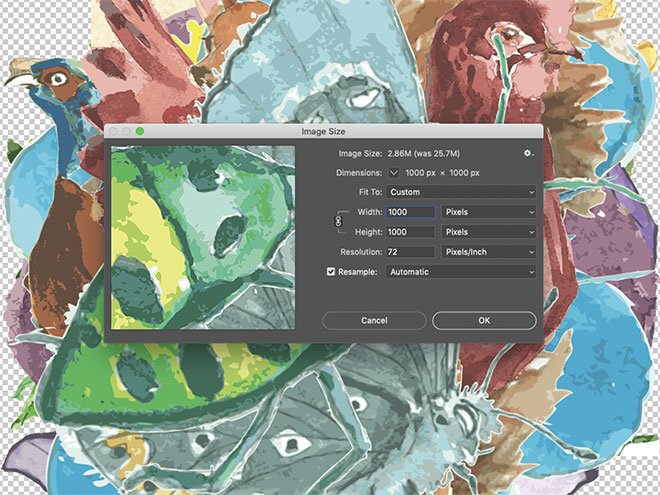
The original illustration images are pretty large. Scale then down by reducing the dimensions under the Image > Image Size menu.
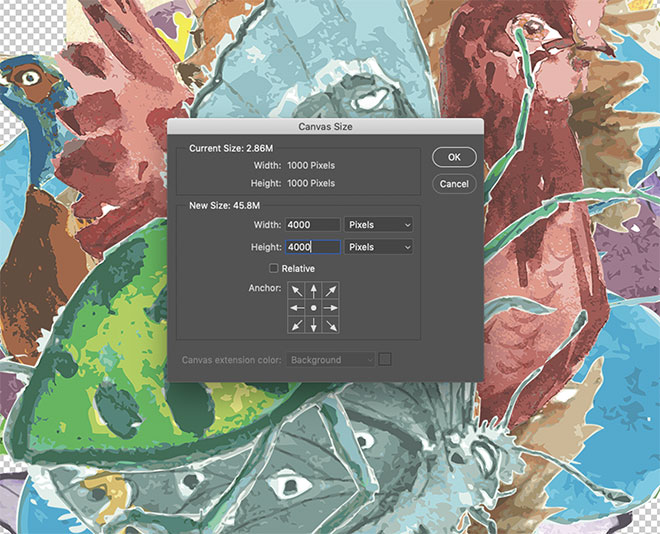
Go to Image > Canvas Size and create a much larger work area to compose all the illustration graphics. The exact figure depends on your final use and how large your pattern needs to be, but remember, you can always scale down with no loss of quality, but you can’t scale raster graphics up.
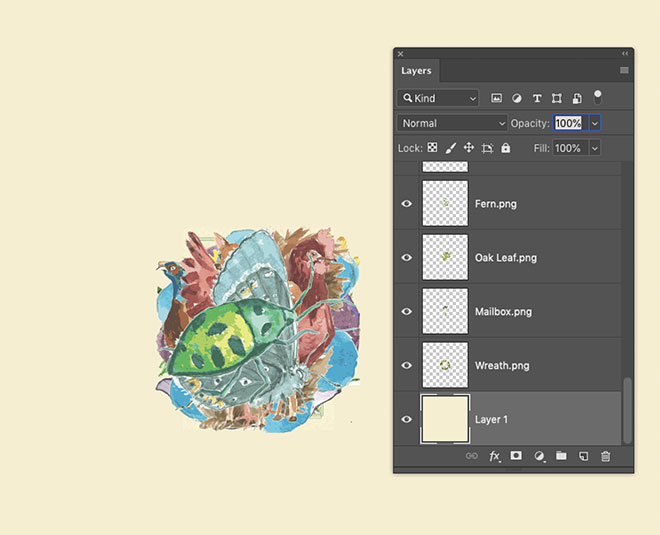
Choose a background colour for your pattern, then add a new layer and fill using the ALT+Backspace shortcut. Click and drag to move this layer to the bottom of the layer stack.
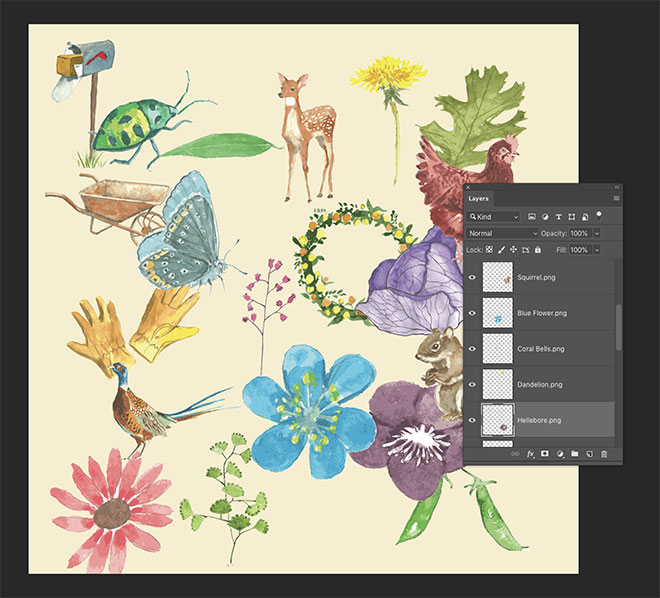
Move each element into its own space within the canvas, but make sure they don’t extend beyond the edge of the document. Activating the Move tool’s Auto-Select option in the top toolbar makes it easy to select each layer.

Use the CMD+T (CTRL+T for Windows) for Transform to alter the sizing of any illustrations. Arrange the items to form the basis of your pattern.
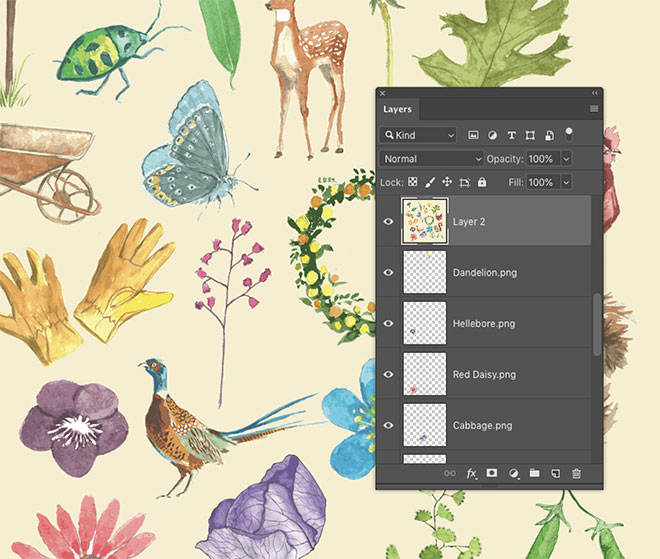
Create a snapshot of the document on a new layer using the CMD+ALT+Shift+E shortcut, or hold the ALT key while clicking the Layer > Merge Visible menu.
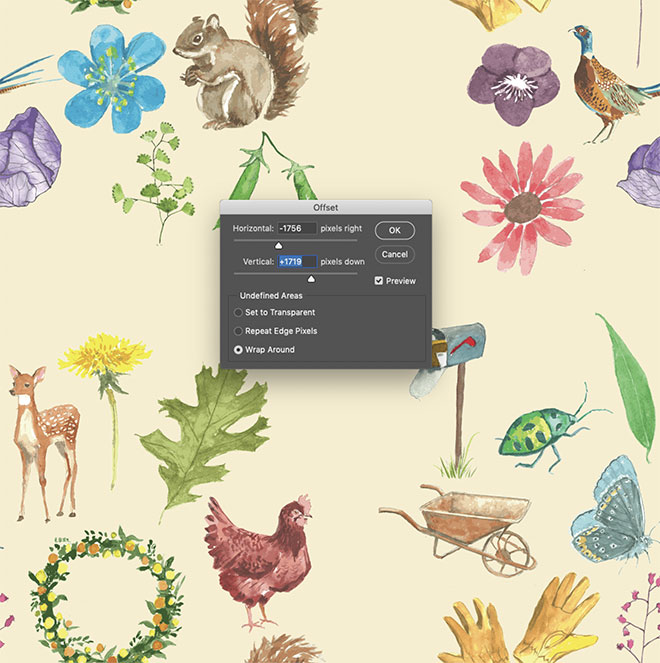
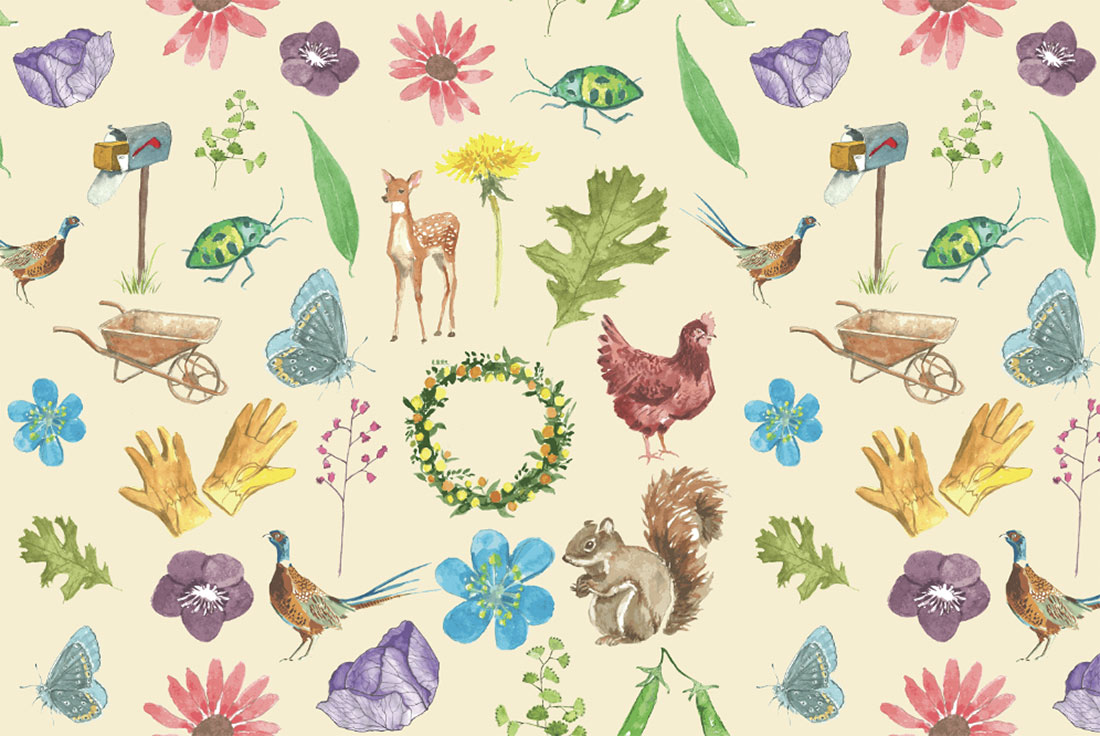
Currently all the items are contained within the centre of the canvas. Go to Filter > Other > Offset, then alter the Horizontal and Vertical values to shift the items. Any illustrations that extend beyond the edge of the canvas will reappear on the opposite side, which forms the functionality of a repeating pattern tile.
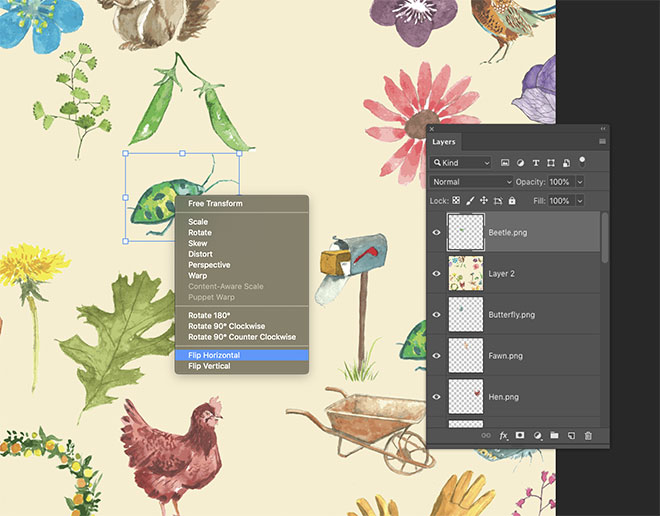
The gaps that were originally around the edge of the document are now easily visible as they cross through the centre. Choose an illustration layer below the snapshot and drag it to the top of the layer stack. Reposition this illustration to begin to fill the empty space. Use CMD+T to alter the size, then right click and choose Flip Horizontal so it looks different to where it is used elsewhere in the pattern.
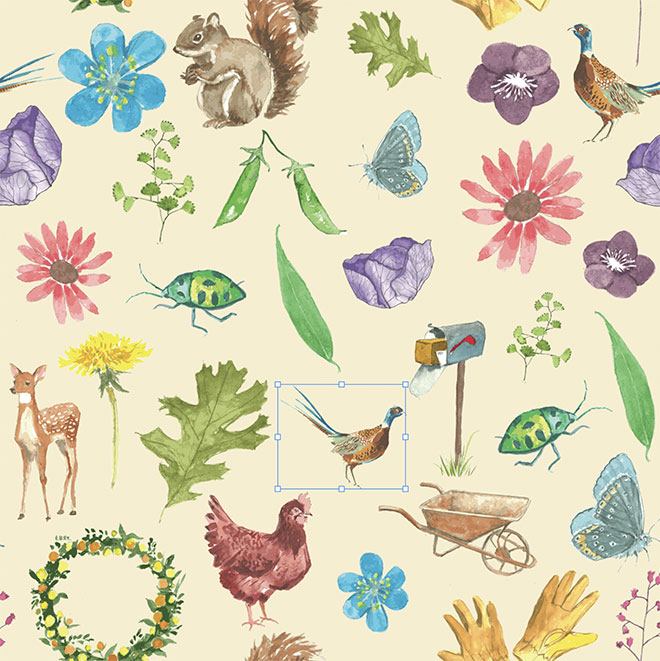
Continue adding duplicate elements to fill in the gaps within the pattern tile, until the whole document is filled with evenly spaced elements.
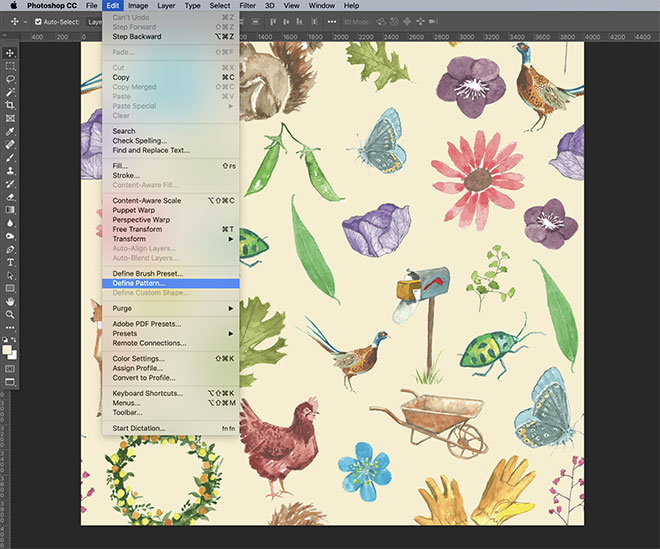
Go to Edit > Define Pattern to create a Photoshop Pattern file, which will be saved within the Pattern Library.
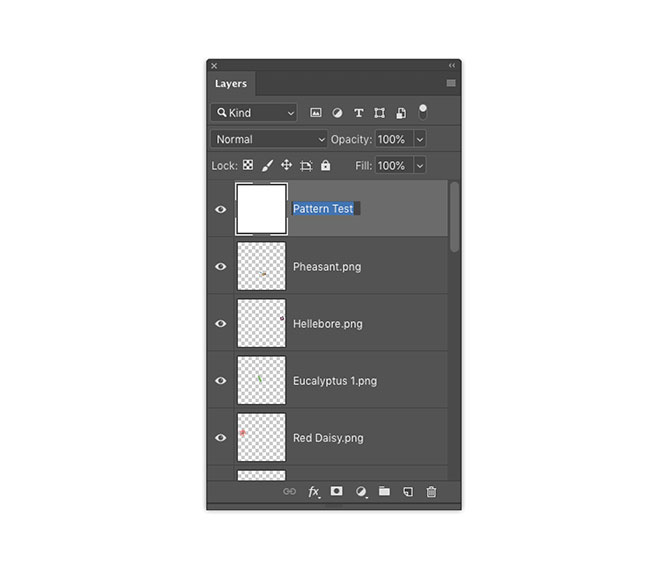
Add a new layer to the top of the layer stack and fill it with white. We can test out our newly created pattern using a Layer Style.
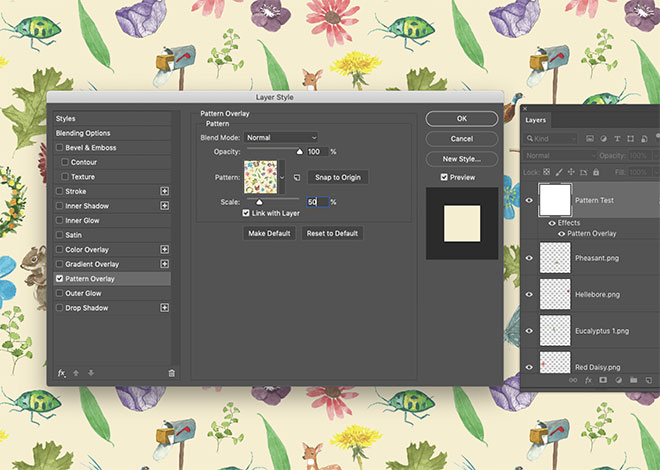
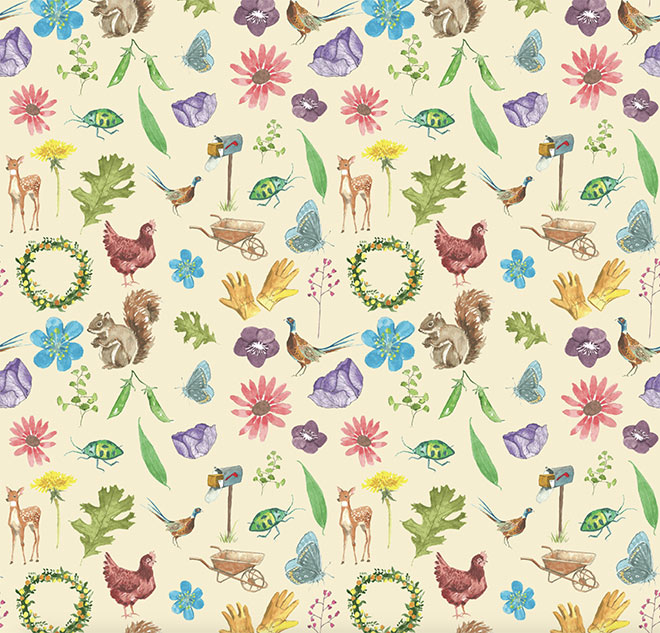
Double click the test layer and apply a Pattern Overlay. Choose your newly created pattern from the library. At 100% the pattern will be the same size as the document, so reduce the Scale to see how the pattern seamlessly repeats.
The final result is an infinitely repeating pattern tile that is now saved within Photoshop’s Pattern Library for use with the Fill tool or as a Pattern Overlay. Photoshop’s Offset filter makes it easy to create a seamless tile by automatically duplicating the illustrations as they extend beyond the edge of the canvas. By simply filling in any leftover the gaps in the layout, the pattern repeats without any visible lines between each tile.


Great tutorial! I just wanted to add something from my own experience as a textile designer. The offset values are easier to manipulate for textile design if the document DPI becomes 254dpi. Textile repeats are usually even divisions of 64cm width. If you use 254dpi, then moving art around means just typing in “6400” for 64cm, “3200” for 32cm, etc.. And another textile repeat go to is doing a “half-drop” repeat which allows you to vary the pattern more with less elements. In a half-drop repeat, the entire repeat section is moved over and then down by half the length. So using the easier to plug-in numbers you get when you use 254dpi and get simpler number values makes it so much easier. Go metric!!
Wow! That was awesome! I’m still learning a ton about Photoshop (aren’t we all?), and this was so fun and useful! Thanks, Chris!
I can’t thank you enough for this tutorial. I will use this often. Bravo!!!
Wow, love the tutorial. I will give it a try! Thanks :)
OMG, I’ve been looking for a tutorial on creating seamless patterns in Photoshop that I could UNDERSTAND and follow for ages! This was so easy – thank you SO MUCH!
Thanks ! Please do more on textile applications – like color separations etc . Your tuts are very simple and effective , thanks again!
This is very cool! I think repeatable patterns were one of the first things I tried to learn in PS! LOL Thank you!
This is really cool ! i think this kinds of repeatable patterns are great !! Thank you !
Great post !! looking forward to get more like this…