This post was originally published in 2012
The tips and techniques explained may be outdated.
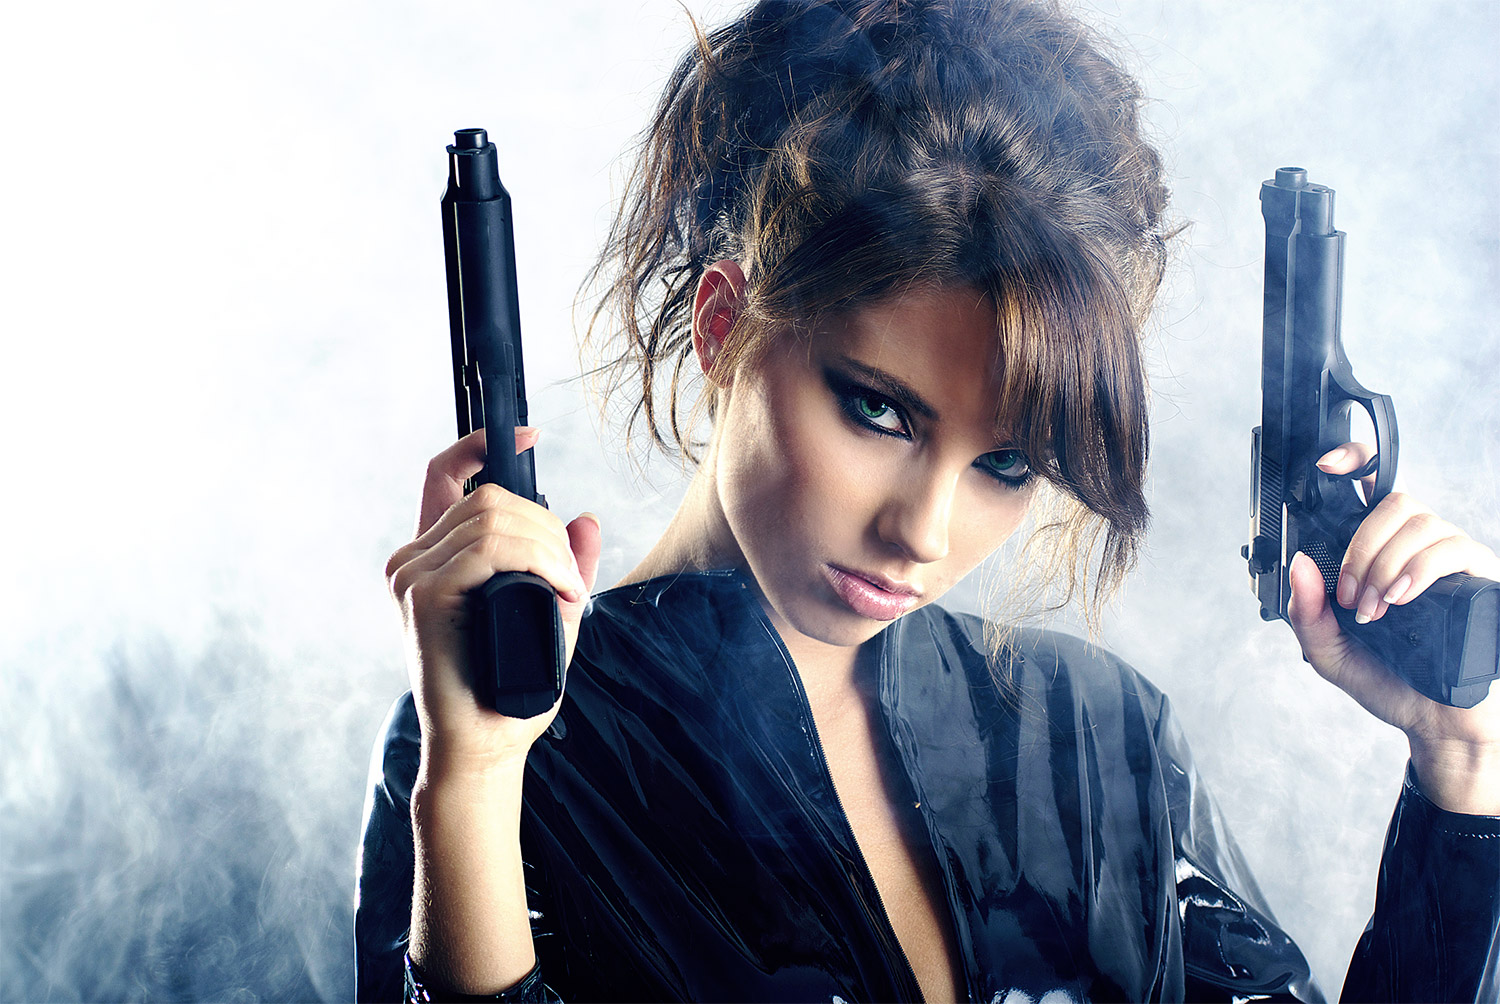
Everyone loves photo effects, especially those that are super easy to create and really transform your photos. Today we’re going to take a look at retouching a photo to create a cool cinematic movie effect with high contrast and blueish tones.

The original photo
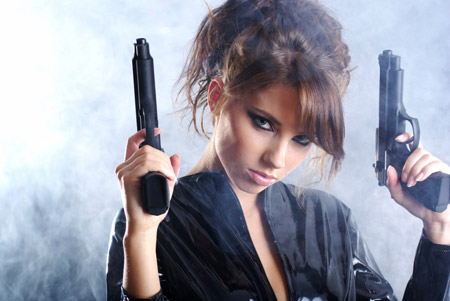
Seeing as we’re going for a cinematic movie effect, a typical action movie style stock photo makes a great base for this tutorial, but the steps can be applied to any image.
Initial photo retouching
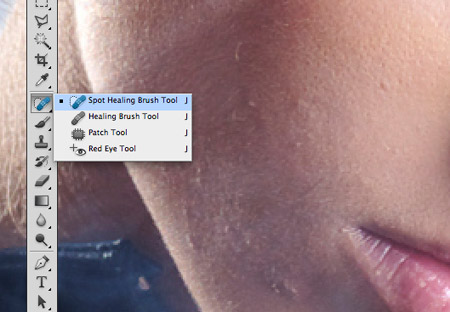
We all have imperfections in our skin, but one of the wonders of Photoshop is these blemishes can be zapped away in seconds. Use the Spot Healing Brush tool to zap any tiny pimples on the skin. Selecting the Sample All Layers option in the header and working on a new layer maintains a non-destructive workspace.
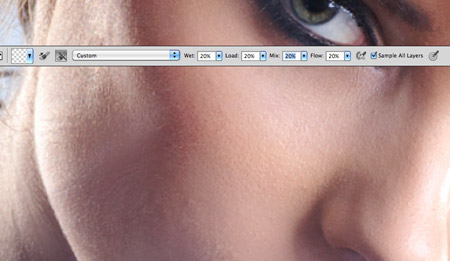
A common step in photo retouching is to smooth out the skin to further remove blemishes. Magazines often go too far and make the subject look somewhat creepy, but a light smoothing can really help out. Use the Mixer Brush Tool with the “Clean brush after each stroke” icon checked and the settings reduced to 20%. Lightly paint over the cheeks, neck, nose and forehead to iron out the skin tones, but stop before the pores disappear in order to maintain a natural look.
This young lady looks lovely enough in the before image, but those simple retouching steps really helps give the photo that movie poster quality.
Movie style color correction
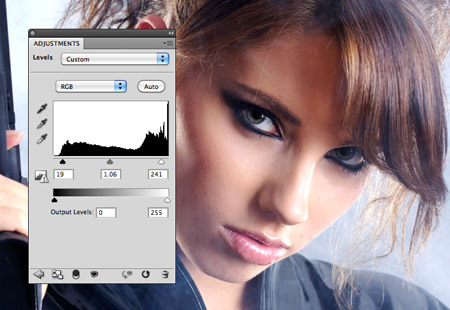
Now the basic prep work is out of the way we can begin adjusting the tones and colours of the image. Begin by adding a Levels adjustment layer and moving the black and white handles inwards slightly to clip the shadows and highlights to increase the contrast of the image.

Next, add a Color Balance adjustment layer. Change the Tone to Shadows and adjust the sliders to Cyan and Blue. Adding cool tones to the shadows gives a dramatic or intense atmosphere, whereas using reds and yellows creates more of a vintage, summer feel.
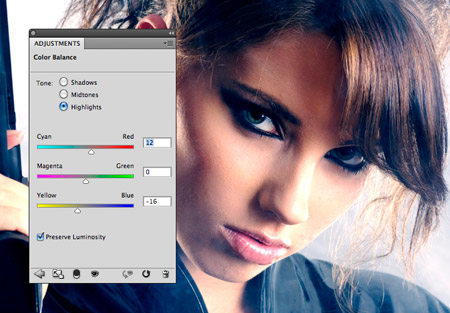
Change the tone selector to Highlights and this time move the sliders to Red and Yellow. This contrast between warm and cool tones in the shadows and highlights creates a cool cross-processing style effect and really enhances the image.
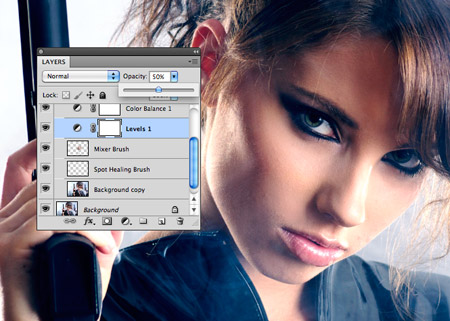
The Levels and Color Balance adjustment layers can then be tweaked by altering each layer’s opacity. I adjusted the Levels to 50% and Color Balance to 70% to tone down the contrast and impact of the colour correction.
Finishing touches
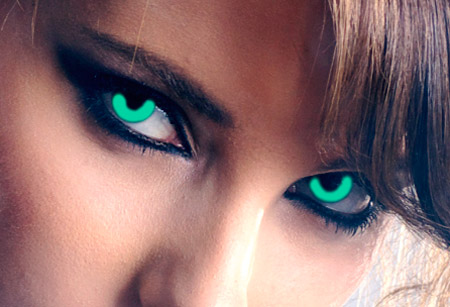
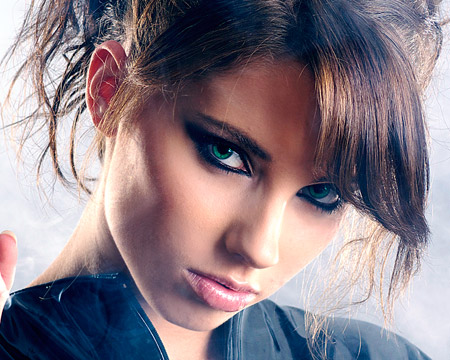
Our image now has a cool cinematic effect, but there’s a couple more tweaks we can add to really make the image pop. Paint over the iris of the eyes with a bright green or blue.
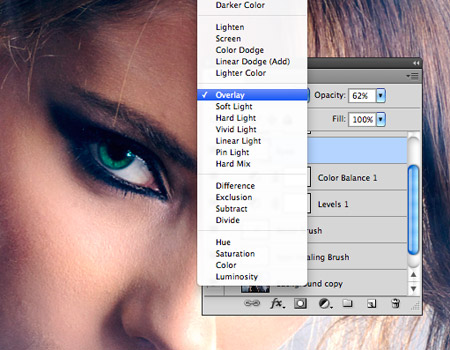
Change the blending mode of the iris colour to Overlay and reduce the opacity until the eyes appear natural.
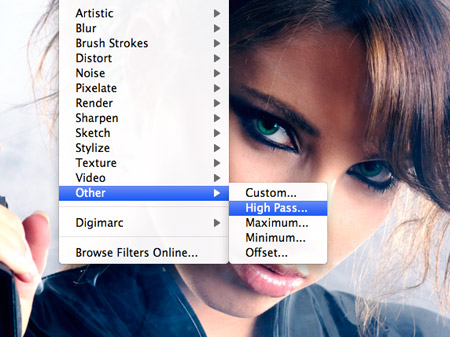
Go Edit > Copy Merged and paste this duplicate of the image on a new layer, then add a High Pass filter. Enter the setting of just 1px so the fine details are barely visible through the grey background.
Change the High Pass layer to Linear Light to sharpen the image. This sharpening effect looks great on the hair and eyes but it is bringing out too much detail in the skin’s pores.
Add a Layer Mask to the High Pass layer and paint over the facial areas with a soft brush to erase the sharpening effect, leaving it in place over the hair, eyes and lips.
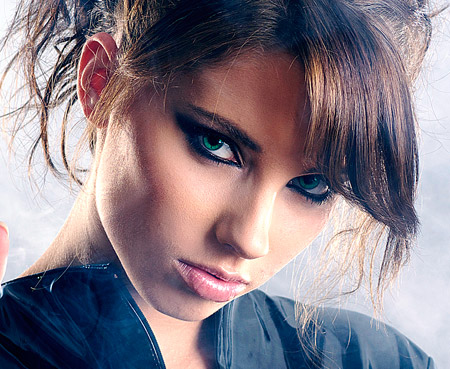
Compared to the original photograph the colour corrected version looks great. The increased contrast and cross processing effects really help create an intense and cinematic style image.

wow great tutorial, thanks for share
wow! well done!
Very interesting. Thanks for sharing your work!!
Chris, you can make lot of money with womans who whant a “retouche” for Facebook photos!
Wow
Really cool
Awesome! thanks for sharing.
I might of gone wrong slightly but it won’t let me copy merged for some reason. Help?
Awesome!
I love the blur tool :) Great post. Thanks.
Thanks for sharing all your experiences and for the valuable replies from the author.
Thanks for the tutorial. Comes in handy when you want to enhance a photo.