
This post was originally published in 2015
The tips and techniques explained may be outdated.
The flat style has been immensely popular in the web design scene, but it’s also a fun illustration style that results in cool abstract artwork which is perfect for infographics, icons or even branding. In today’s tutorial I’ll show you how to create a vector space scene and planet in Adobe Illustrator, using its powerful shape building tools to easily create the trendy effects used by Illustrators.

The artwork we’ll be creating in this tutorial features a simple space scene with planets, stars and a moon all illustrated in a flat style with bright colours. The rounded lines that produce the basic shading on the planets is a really popular effect used by Illustrators who have adopted this stylised flat vector look.

Begin by creating a new document in Adobe Illustrator. Draw a rectangle to cover the entire artboard to produce a background for the design. Give this rectangle a dark blue fill (#1e1e3a) by double clicking the fill box at the bottom of the toolbar.
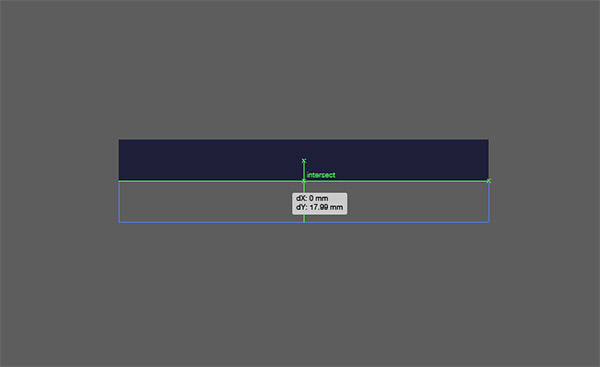
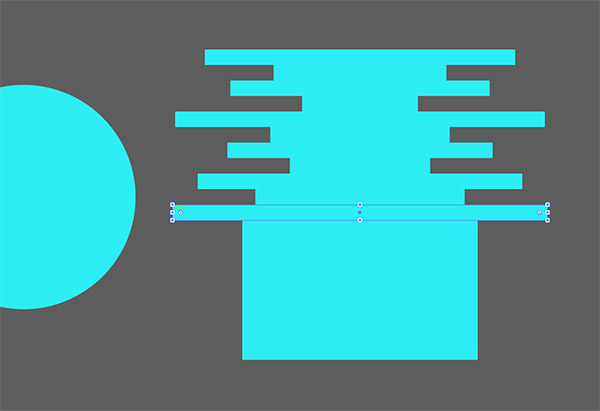
Draw a long thin rectangle elsewhere on the artboard. Turn on Smart Guides (View > Smart Guides), then hold ALT and Shift while dragging a duplicate of the rectangle until it butts up next to the original. The Smart Guides make it easy to snap the shape exactly into place.
Press and hold CMD+T (shortcut for Object > Transform > Transform Again) to create a series of perfectly aligned rectangle shapes.
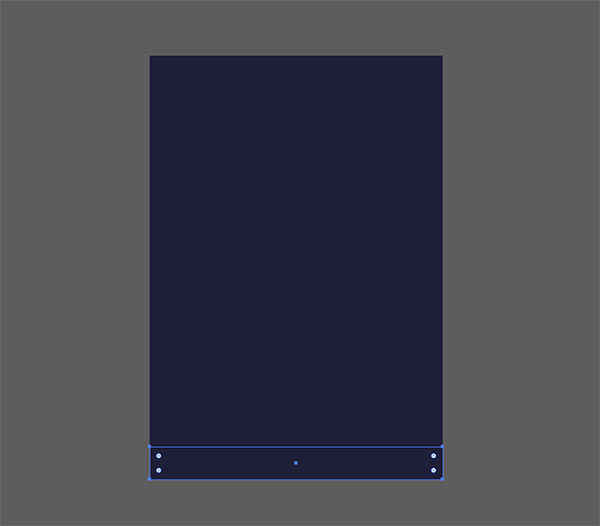
Grab the Selection tool, then adjust the width of each rectangle while holding the ALT key. Alternate between a wide and narrow shape as you go, scaling each one to a random size.
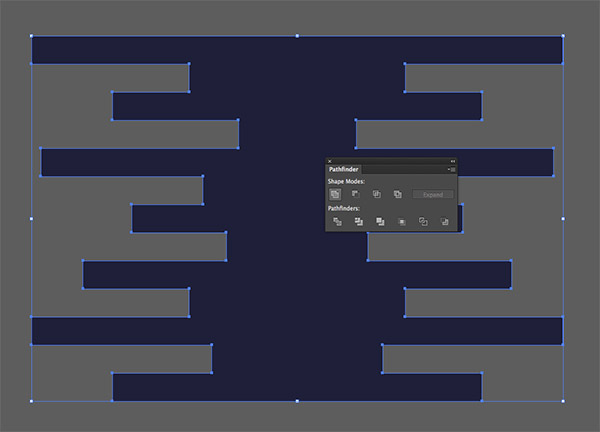
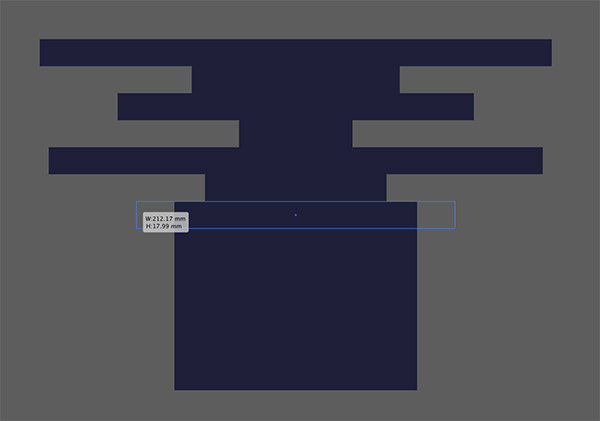
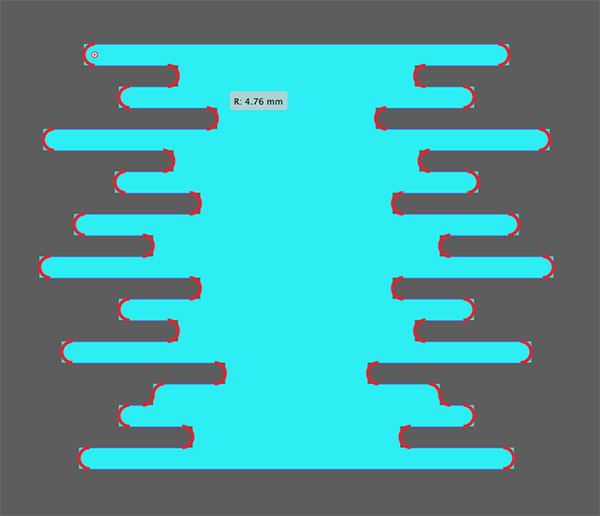
When all the shapes are different lengths, select them all and click the Unite option from the Pathfinder panel to merge them into one object.
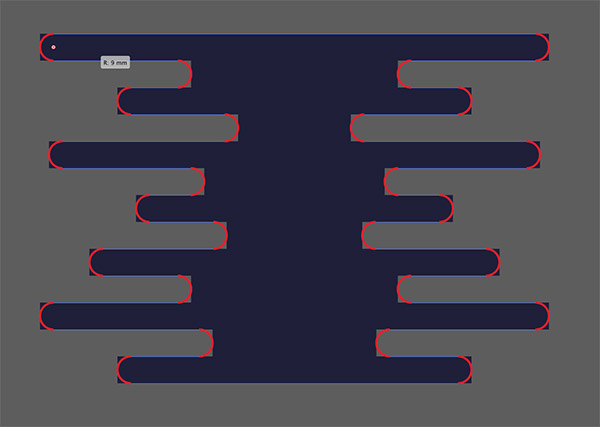
Switch to the Direct Selection tool, which will bring up the Corner Widgets in version CS6+, click and drag the widget to round off the corners. Users with an older version of Illustrator can use the Effect > Stylize > Round Corners menu to find a suitable value to replicate this effect.

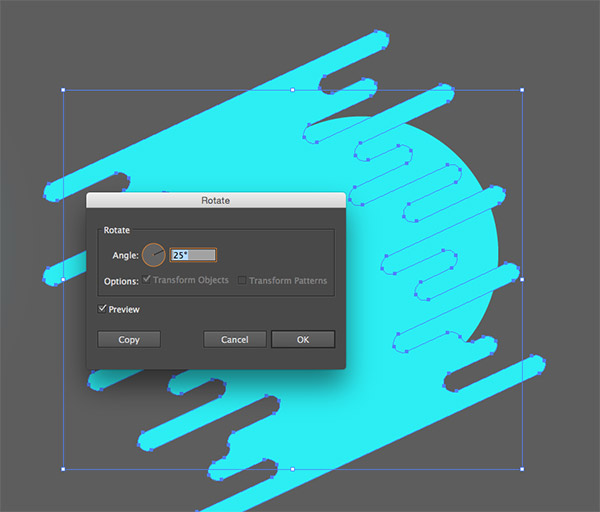
Go to Object > Transform > Rotate and enter a value such as 25°, then change the colour of the object to a mid blue (#313166) and scale the shape over the main artboard to creep in from the upper right area of the documemt.
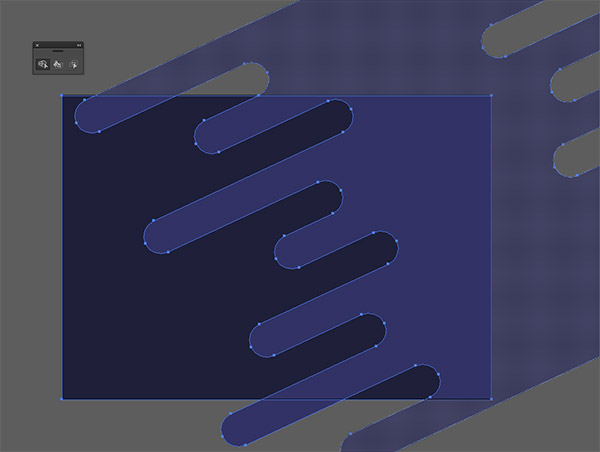
Shift and click the background rectangle to add it to the selection, then activate the Shape Builder tool from the toolbar. Hold the ALT key and click the areas outside of the rectangle to clip the shape to the size of the artboard.
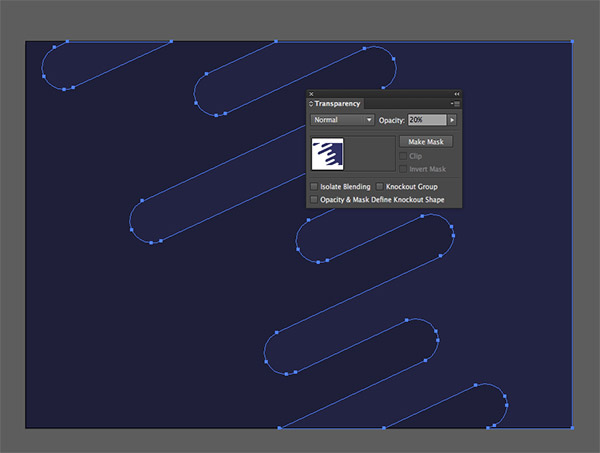
Reduce the opacity of this object to around 20% to create a subtle change of colour in the background.
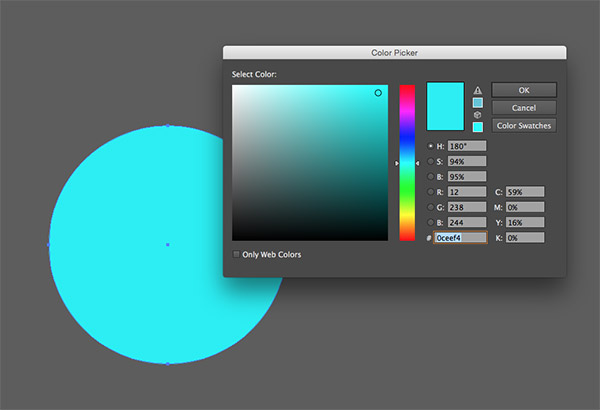
Hold Shift while dragging with the Ellipse tool to create a perfect circle somewhere on the artboard. Give it a bright cyan fill such as #0ceef4.
Select the rectangle tool and use the same process as before to create a series of perfectly aligned shapes, then adjust the size of each one.
Unite the shapes with the Pathfinder tool, then round off the corners by dragging the corner widget handles (or the Round Corners effect).
Go to Object > Transform > Rotate and enter the same 25° value, then scale and position the shape over the circle, allowing the lines to creep in from the bottom left.
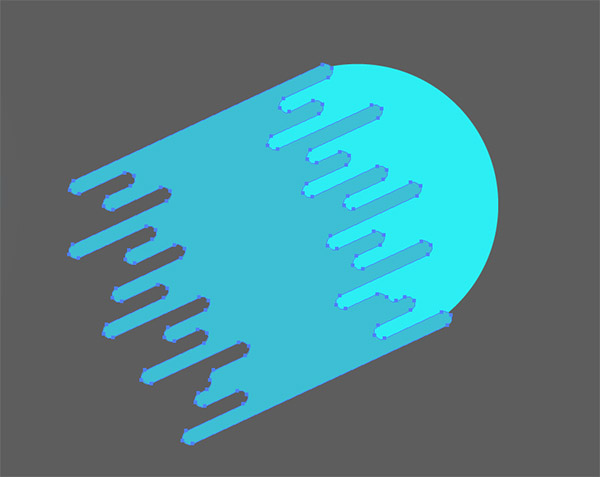
Change the fill colour of the lines object to a darker shade of blue (#34bfd6) so it produces a simple flat style shading effect.
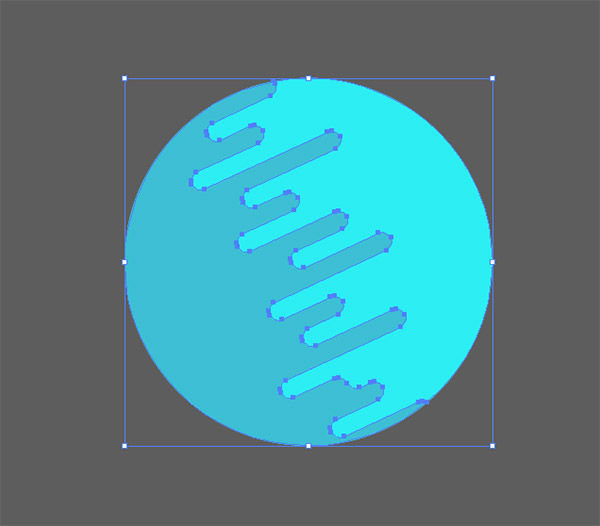
Select both shapes, then use the Shape Builder tool to clip away the lines object where it extends beyond the outline of the circle.
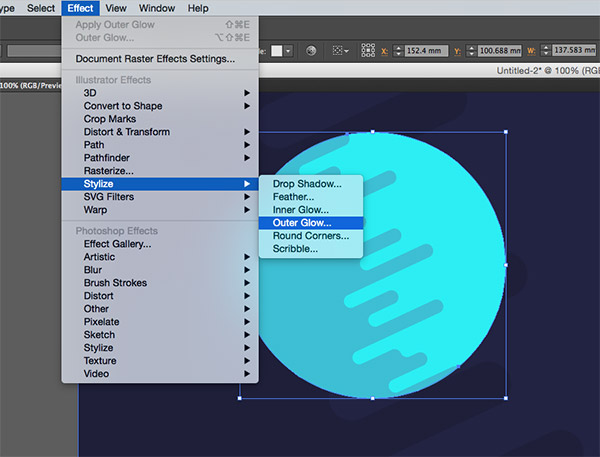
Deselect the shapes, then select just the main planet circle. Go to Effect > Stylize > Outer Glow.
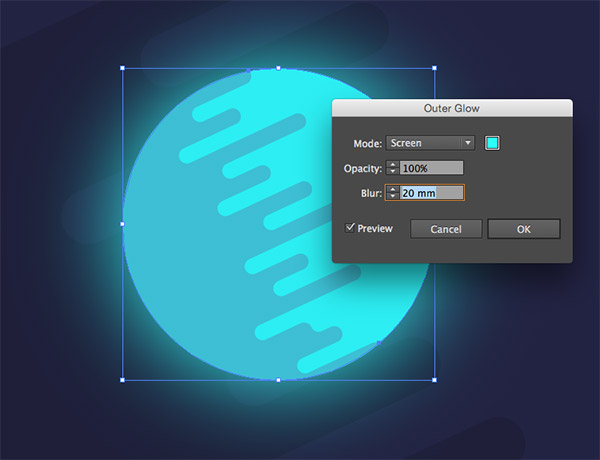
Change the colour to a bright cyan (#0ceef4), the Opacity to 100% and a size of around 20mm to form a soft glow.

Repeat the entire process to create a second planet or a moon. This time use a different colour such as magenta or yellow. I’m using #e517be and the darker shade of #af2b83. Remember to add an Outer Glow effect, but with a smaller size to match the scale of the moon/planet.
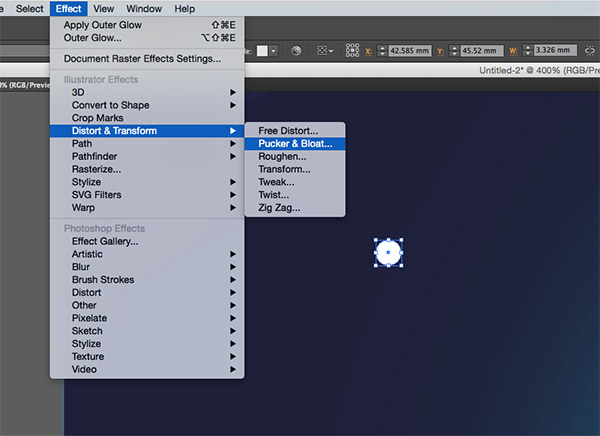
Draw a small white circle somewhere on the artboard, then go to Effect > Distort & Transform > Pucker & Bloat.
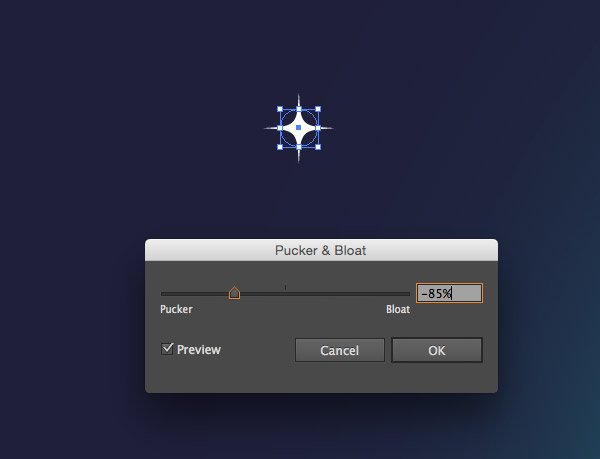
Drag the effect slider towards the Pucker end of the scale by around -85% to form a star shape.
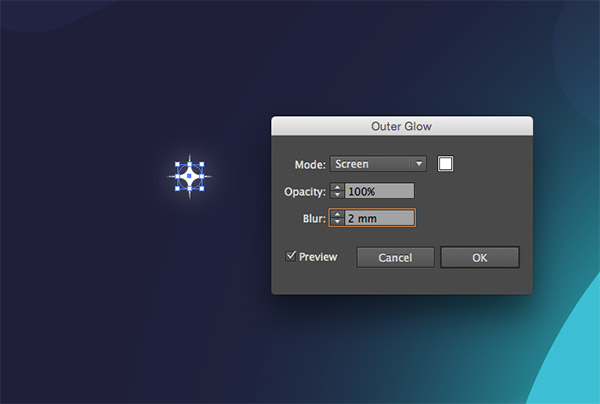
Add an Outer Glow effect, but with white as the colour and a much smaller blur size of around 2mm.
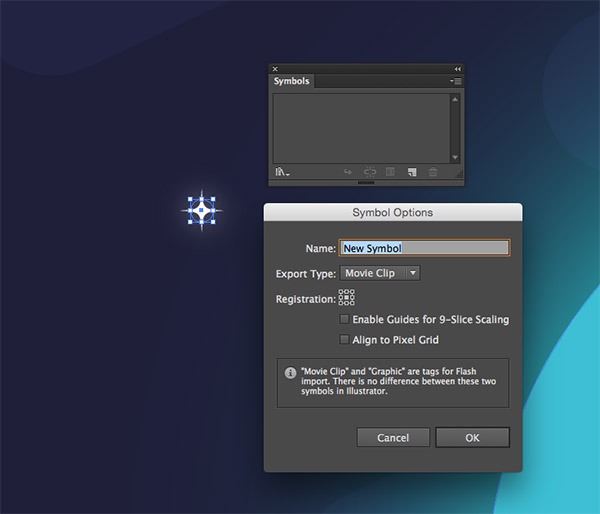
Click the New icon at the bottom of the Symbols panel to create a new Symbol. There’s no need to alter the Movie Clip or Graphic setting.
Select the Symbol Sprayer tool from the toolbar, then click and drag to add multiple stars across the entire artboard.
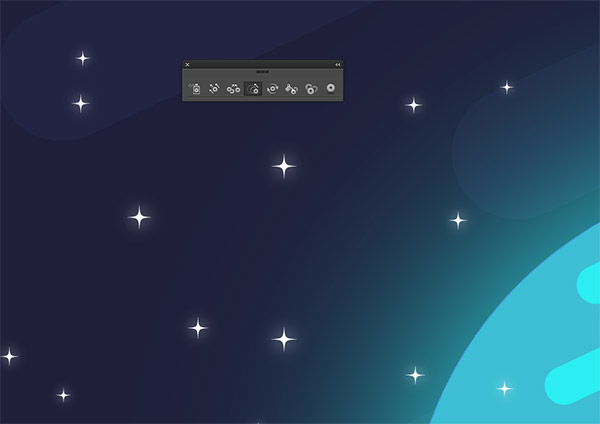
Switch over to the Symbol Sizer tool from the Symbol Sprayer’s sub-menu, then hold the ALT key while dragging the tool over the shapes to shrink them in size. Quickly ‘scribbling’ over the artwork with the tool will allow the shapes to randomly change size as some are affected more than others.
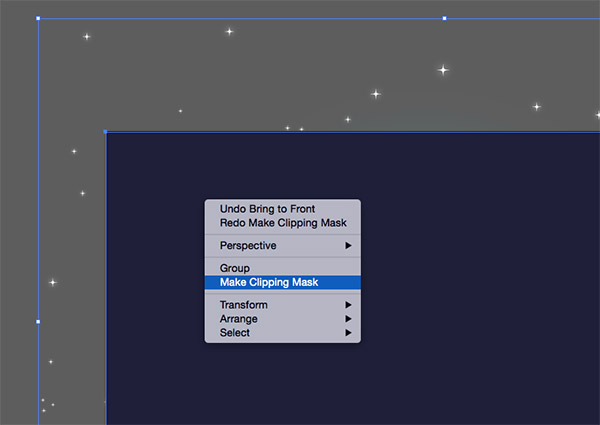
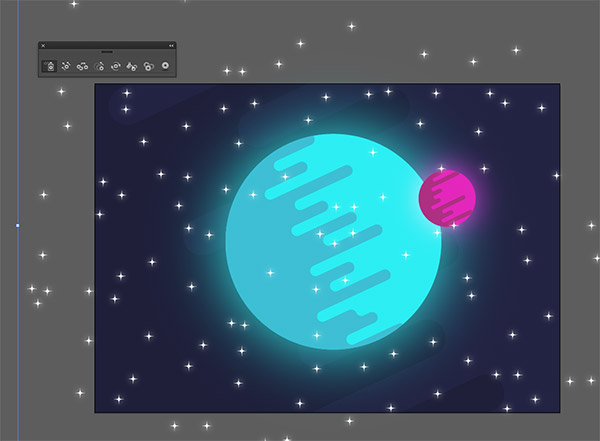
Select the main background rectangle and press CMD+C to Copy, then CMD+F to Paste in Front. Select this shape along with the symbols element and click Make Clipping Mask from the right click menu.
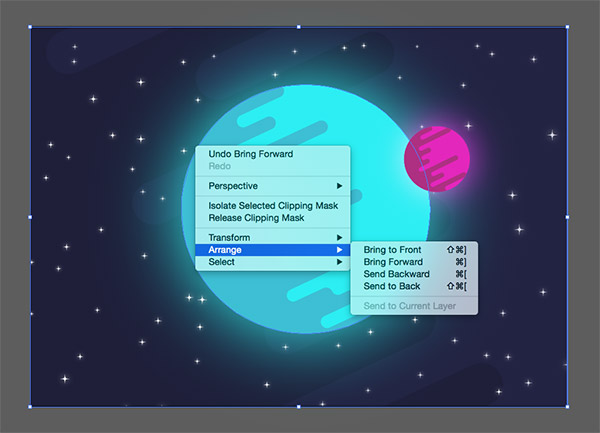
The stars will currently appear over the top of the planet and moon, so alter the stacking order by selecting Arrange > Send to Back, followed by Bring Forward so they sit above the background rectangle.
The final result is a cool flat style vector illustration of a simple space scene. The basic shapes do a great job of producing that trendy stylized look, while the vibrant colours give the design a bright, almost illuminated appearance.
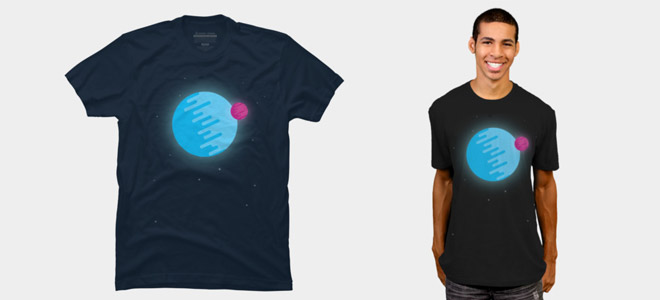
Love this design? Get the t-shirt!
Very nice information provided in this blog. It gives information about PSD web templates which is useful for PSD designer.
Don’t forget to give credit to the artist that inspired you!
There’s loads of people who create illustrations this style so it’s impossible to find out who was the very first
I like how you use the Shape Builder tool, as well as the techniques to create the stars and make them vary in size. I really love reading and watching tutorials about flat design and illustrations!
There’s so many ways to do things in Illustrator! That’s one of the reasons I love it so much
Love learning new tricks. Shape builder is incredible and works so fast. Would have always used pathfinder for cropping shapes. Nice stuff Chris.
The Shape Builder has totally changed how I create stuff in Illustrator. I don’t actually know how long it’s been in the program but I always just used the Pathfinder too
Nice tutorial, Finally i’m able to create flat style vector planet in illustrator…
Hi Chris,
love your blog. I was trying to get through this excellent tutorial but I have two problems with the round corner effect (CS6).
1. Instead of producing a rounded path I get a nicely rounded area but within the rectangular path. Thus it produces little white corners when I try the Shape builder tool with the circle below.
2. When I clip the extending lines of the overlay away it does not give me a nicely round and globe-shaped left half of the “planet”. Instead, the Round Corner effect tries to also round the corners between the new anker points making the shape rather elliptic than perfectly round.
Any ideas?!
I like to read this article as I learn something from it.
thanks for the info.
Ceramic Duniya
I just need a good idea and I got something by your posts. I think it is one of them…Thanks so much..
The flat design looks clean and neat. Your illustrations are great and easy to learn. Thanks for sharing.
great tips..
nice and lovely vector planet using issustrator.. is it possible using photoshop ?
Thanks – I’d been looking to do something similar for a while, much appreciated.
Shape builder is my favourite. Thank you so much!
Always great tutorial, Chris I want to never miss your post, I’m appreciated on this Illustrator tutorial.
Awesome guideline for mid-level designer. I think that the tutorial is very informative and it help me professional work. Thanks for sharing………