
A couple of weeks ago I created a showcase post of breathtaking infrared photography with surreal colours. Those featured examples were authentic infrared photos that were shot on infrared film, or digitally with an infrared lens, but I’ve been playing around in Adobe Photoshop to find a way to replicate the effect with a standard image. In today’s tutorial I’ll show you how to reverse the colours of a landscape scene to switch the greens to vibrant pinks to mimic the popular false-color infrared style.
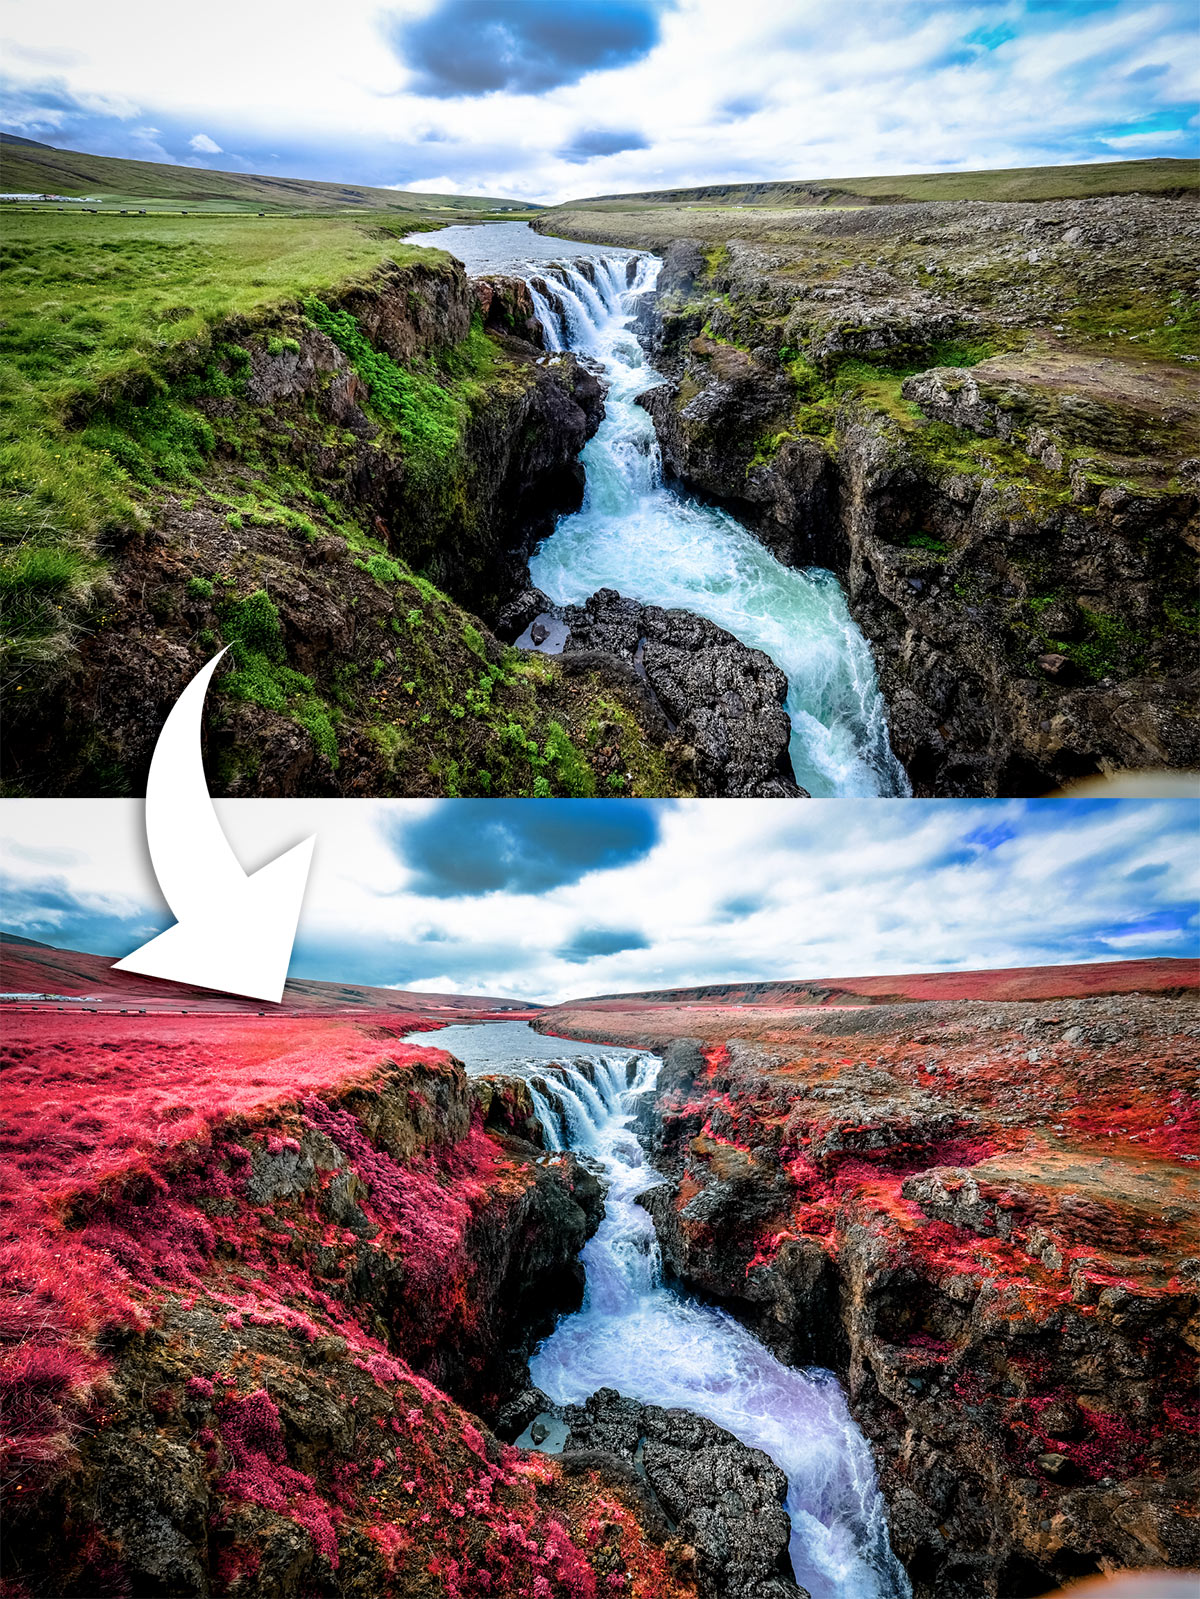
As we saw in my showcase of infrared photography, images look pretty surreal when the colour are mixed up, especially in pictures with lots of trees and foliage. In this tutorial we’re going to replicate the effect using a standard photograph, but with some Photoshop adjustments to reverse the channels.
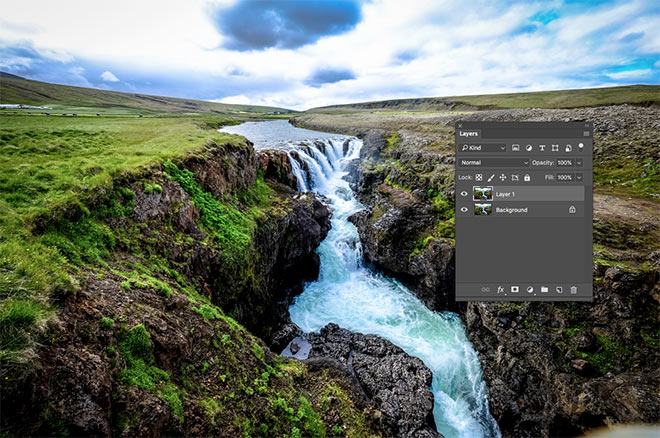
Open up your standard photograph in Adobe Photoshop. I’m using this landscape image, which has a nice mix of greens, but also contrasting hues in the sky, river and rocks. Begin by duplicating the layer with the CMD+J shortcut.
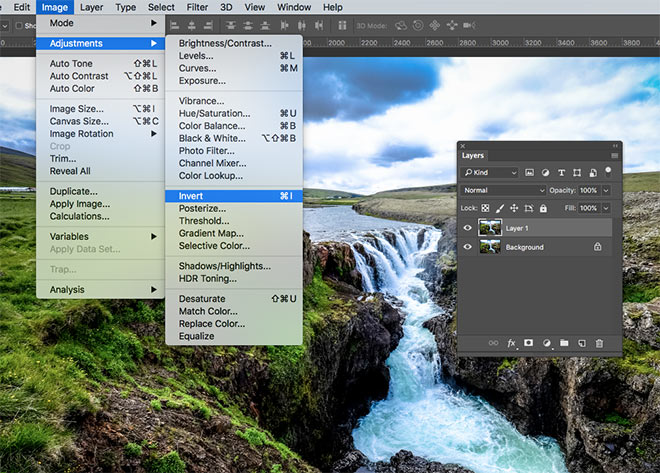
Invert the duplicate layer by going to Image > Adjustments > Invert, or using the CMD+I keyboard shortcut.
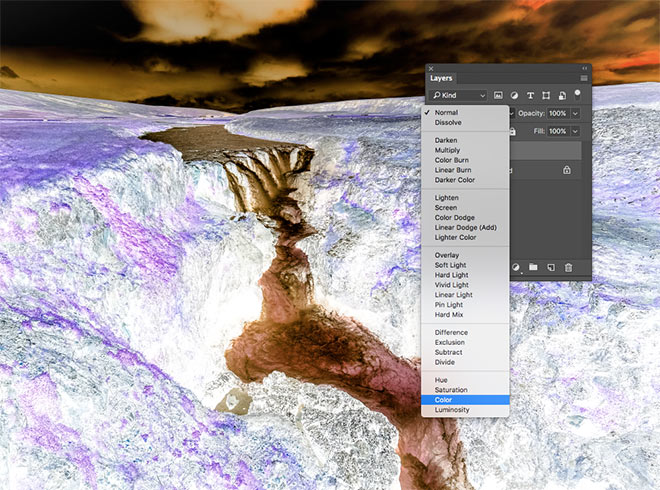
Change the blending mode of this inverted layer to Color. This step inverses the colours of the image whilst removing the negative effect.
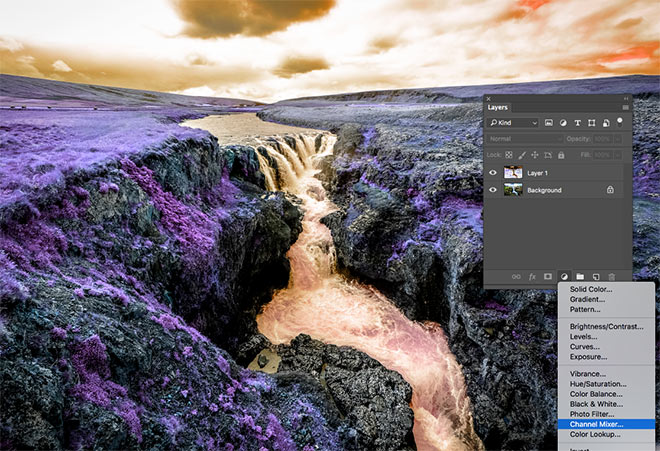
The hues don’t quite reflect how they appear in authentic infrared images. To fix this, add a Channel Mixer adjustment layer.
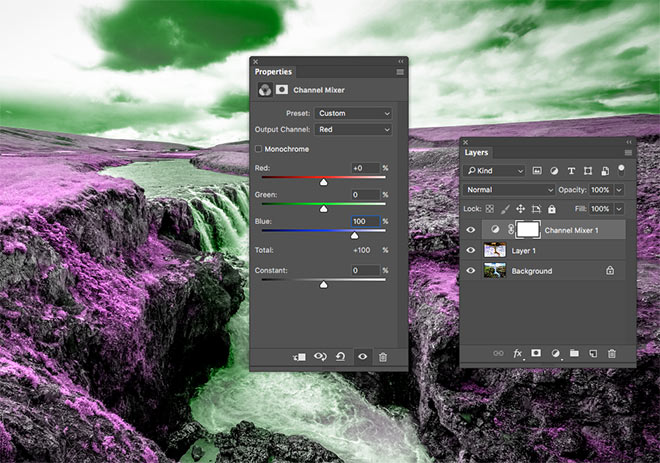
Under the default Red Output Channel, reduce the Red value slider to 0 and increase the Blue slider to 100%.
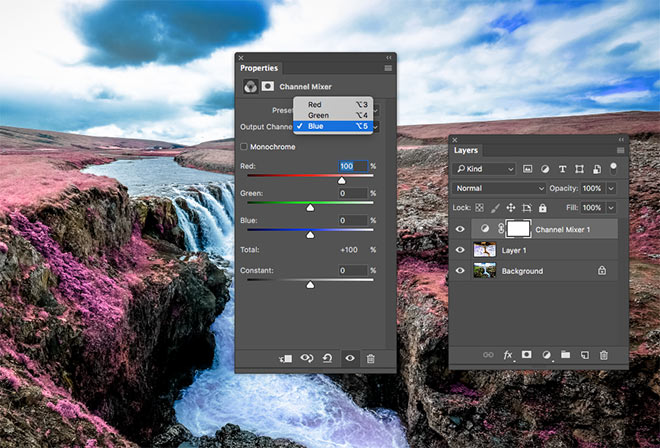
Change the Output Channel menu to Blue, then increase the Red slider to 100% and reduce the Blue slider to 0. This will swap the Red and Blue channels around, which brings back the correct colour for the sky and water, but gives the green foliage that cool infrared style pink appearance.

We now have the correct colours to represent the infrared style, but they’re quite dull. Add a Hue/Saturation adjustment layer.
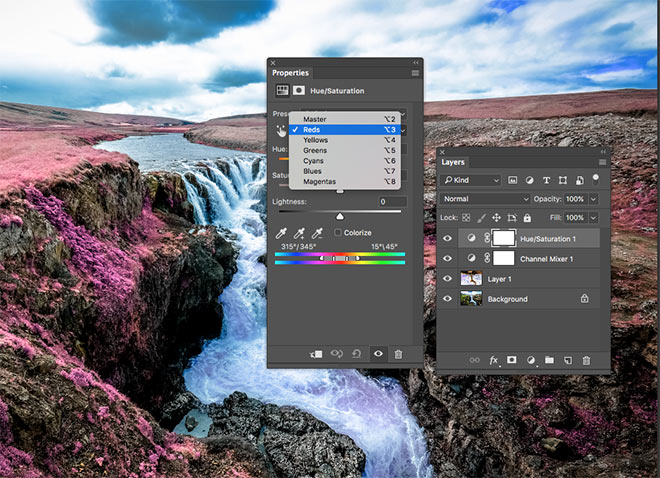
Change the drop down menu to affect just the Reds, which will allow us to boost the vibrancy of those pink areas without blowing out the saturation of the entire image.
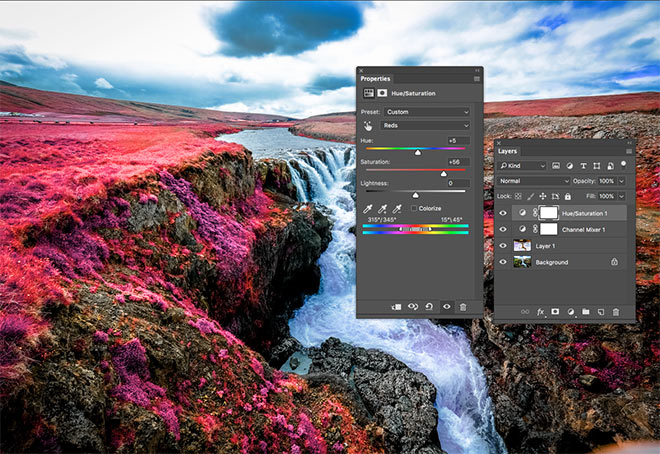
Increase the saturation slider to make the pink areas much more vivid, then carefully tweak the Hue to find the best balance between red and pink.
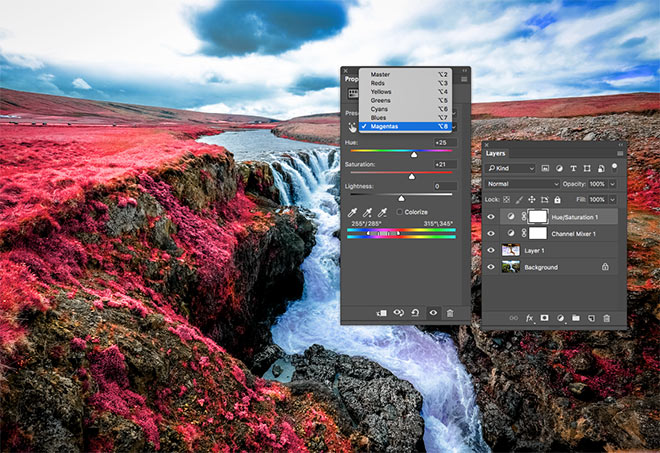
Change the drop down menu to Magenta and alter the sliders to edit the slightly more purple hues. Increase the saturation and edit the hue to give them more of a red/pink or blue appearance.
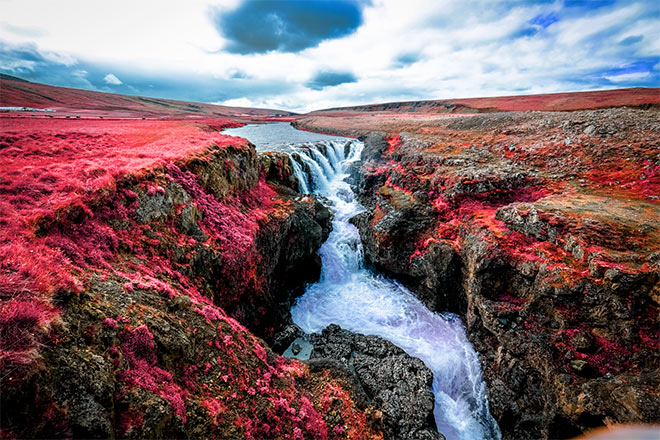
The final result is a realistic false-color infrared photo effect with vibrant pink foliage, which gives the landscape image a surreal appearance, almost like an alien planet! By simply inverting the colours and switching the red and blue channels around, we can replicate the aesthetics of authentic infrared photos directly in Photoshop.

I was actually looking for something like that few days ago, thanks!
Great timing :)
Hi there! thanks for making this tutorial . I had been looking for advice on how to create this effect. Some of my favorite musicians in the 60s such as Donovan and Jimi Hendrix did photoshoots with this kind of effect.
Thanks for your comment Will, I’m glad i could help!
Very useful tutorial! Thanks!
Thank you Andrea
I love this! The timing couldn’t be more perfect. I have been trying to come up with a photo effect for a special project…yahoo! Thanks.
:) great timing, glad you love the tutorial!
I loved this trick and make sure I will try for my pictures too. I learned new thing and it will help me in future.
That’s great to hear John!
Great trick..
I think i should immediately try it.
Thanks Chris for the post..
Thank you! I’m glad I could help!
I love your tutorials!! Thx you really help me a lot!
Thanks for the tutorial!!! lots of fun and had a blast putting it to use.
Great tutorial, thank you very much for this :)
It’s very helpful. I like it.
I noticed that on some of the infrared photos, what would be green also could be white or yellow besides pinkish colors. What caused the variation of colors? Also to make the mock effect in these other colors, what channels would you need to adjust? Also, how are the blues intact, but the other colors change in the actual infrared? Thank you! You do a great job in providing us with various tutorials!
This is really cool! I was wondering how it could be done.
Thank you!
Been without internet since Monday due to Irma! LOL
Su
Awesome. This makes a boring picture very interesting and filmy. I am new to photoshop but I will definitely try this.
You know I’ve been looking for tutorials like this for a while, just so I can finally understand how to edit the photos I take of all the spoons I steal from my elementary school cafeteria. They usually last about 1 good “pudding time”. Thanks for the tut and I will upload pics of this special time later.
Thanks for sharing Chris, I’ve seen this effect before but never knew how it was done.
Thank you for sharing.
Brilliant!
thank you so much for this tutorial! it really helped a lot! keep going!
It’s Great tutorial, thank you very much for this guide:)