There’s some fantastic examples of flat style map designs out there on the web that depict a city or country with ultra simplified illustrations with basic shapes and flat colours. I really fancied giving the style a try myself, so I thought ‘why not make a tutorial to share my process with others?!’. Follow along with today’s guide to learn how to build a creative vector illustration of a landscape with trees, roads, mountains and towns using a range of tools in Adobe Illustrator. Working in the flat design style involves simplifying an object to its most basic form, so Illustrator’s various vector shape building tools are ideal for crafting your illustrations.
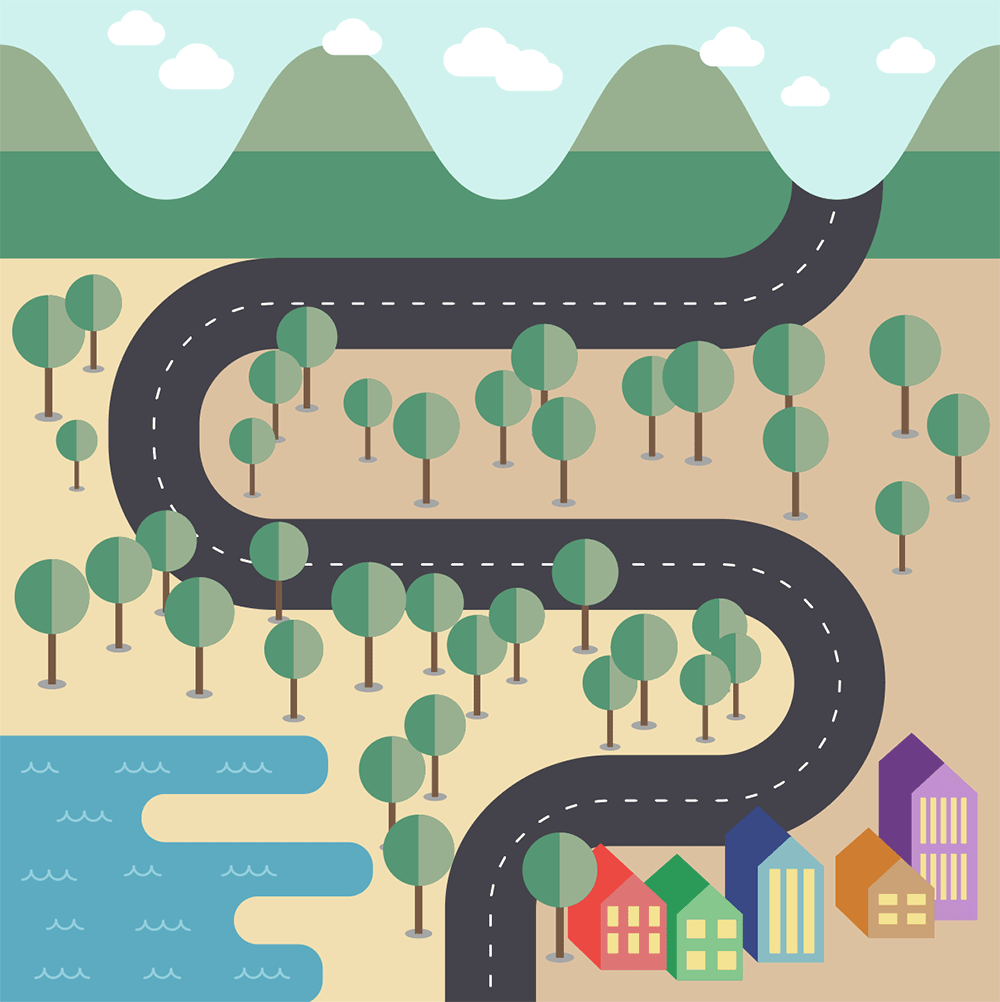
The artwork I’ll be producing in this tutorial includes a range of objects and landmarks that are all depicted by basic shapes while still being recognisable. The key to creating designs in the flat style is figuring out how you can illustrate something using just circles, rectangles and smooth lines. Choose just one or two colours for each object’s fill, without any shading or gradients to achieve the cartoon-like appearance.
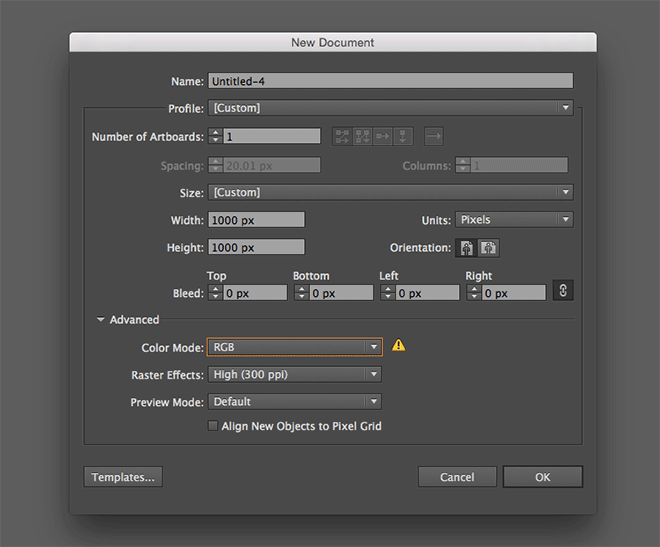
Open Adobe Illustrator and create a new document. I’m using dimensions of 1000x1000px with the RGB colour mode.
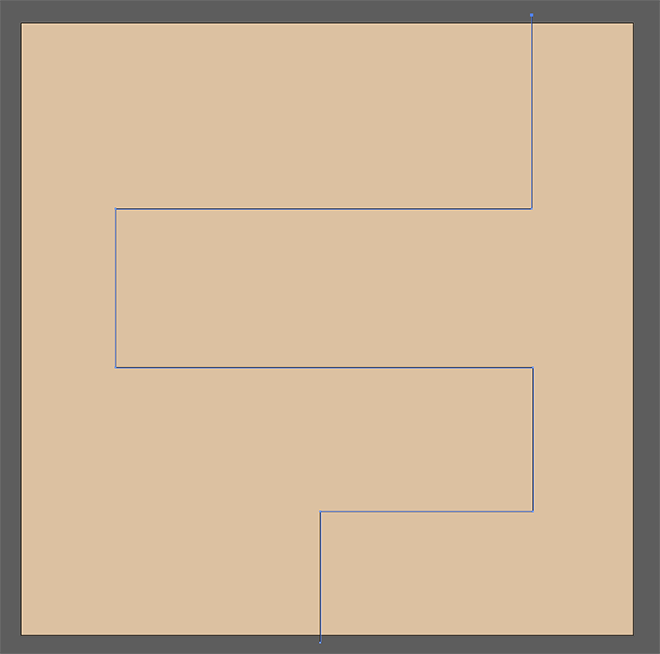
Draw a rectangle to cover the artboard. Clear out its default stroke styling and switch the white fill for a sandy-brown colour (#ddc19f). Grab the Pen tool and set it up with just a black stroke. Hold Shift while clicking points to form a path that alternates from left to right.
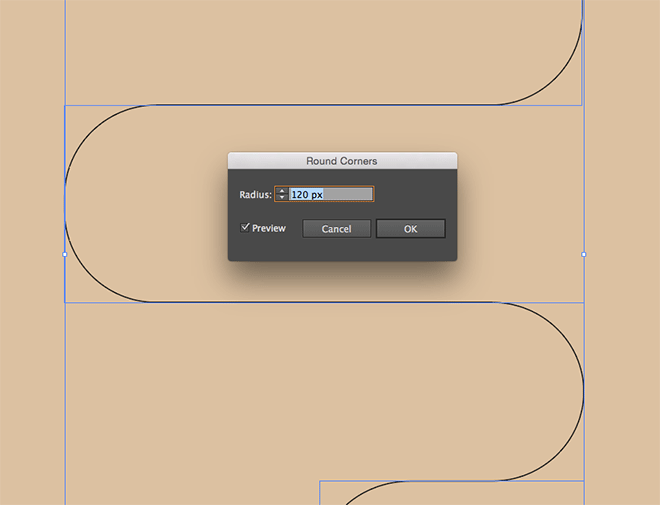
Head to Effect > Stylize > Round Corners and check the Preview option. Increase the Radius setting to turn all the corners into a smooth path.
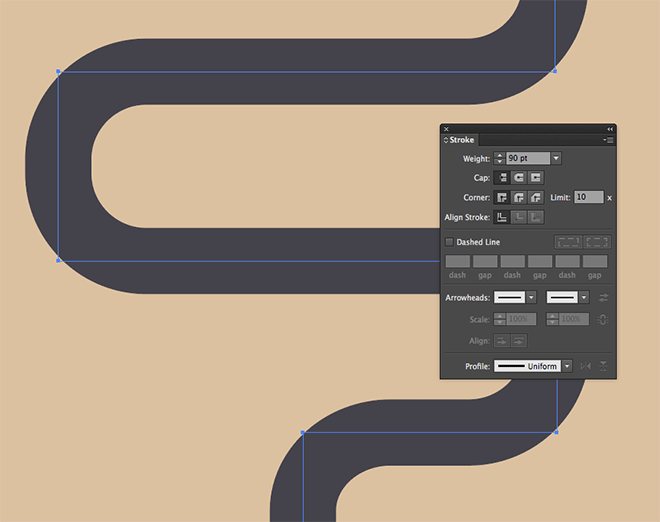
Increase the stroke weight to around 90pt and swap the default black fill for a grey (#44434b) to form the basis of a road.
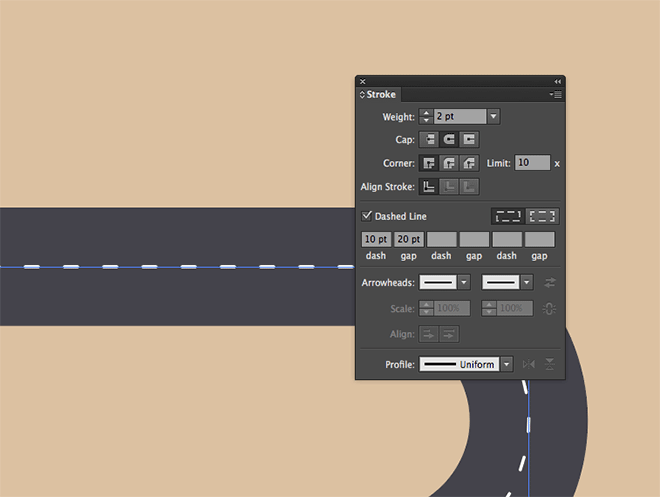
Copy (Edit > Copy) and Paste In Front (CMD+F) a duplicate of the road path. Swap the stroke colour from grey to white, then change the stroke settings to 2pt with a round cap. Check the Dashed Line option and add a 10pt dash with a 20pt gap to form the central road markings.
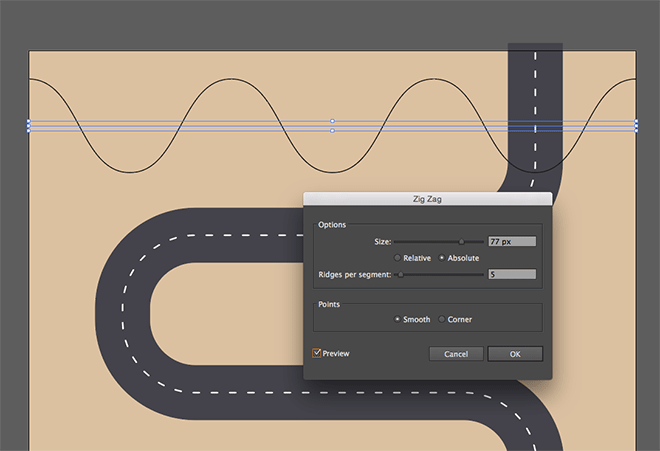
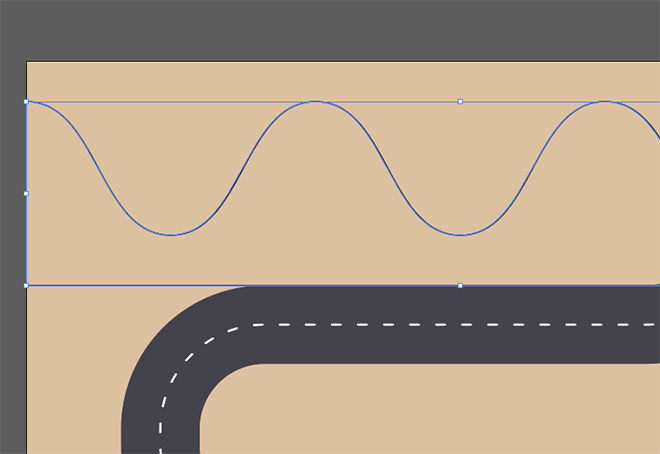
Deselect the road paths and reset the stroke colour to black. Hold the Shift key to draw a straight line with the Pen tool that spans the artboard. Go to Effect > Distort & Transform > Zig Zag and change the settings to Smooth and 5 Ridges Per Segment. Alter the Size to form a series of mountains.
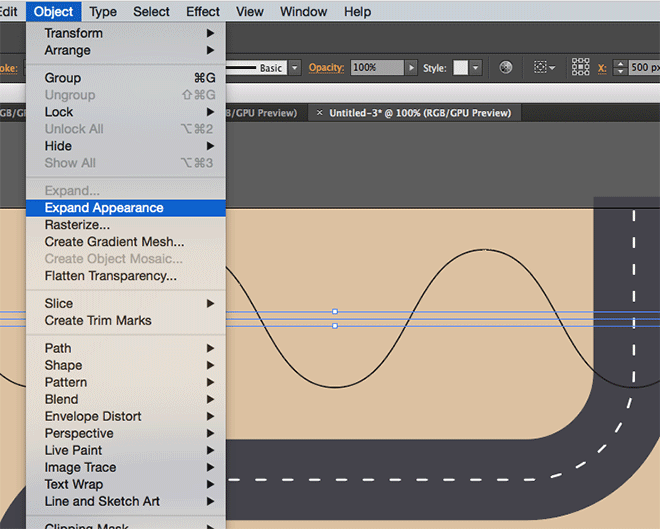
Go to Object > Expand Appearance to permanently apply the Zig Zag effect and to make the path editable.
Select the Pen tool and click the open point at one end of the zig zag line to continue its path. Hold Shift while extending it downwards, then across the artboard and up to join the path at the point on the opposite side.

Clear the stroke from this mountains shape and add a light green fill colour (#97b18f). Draw a rectangle that covers the lower half of the mountains and give it a slightly darker green fill (#539773).
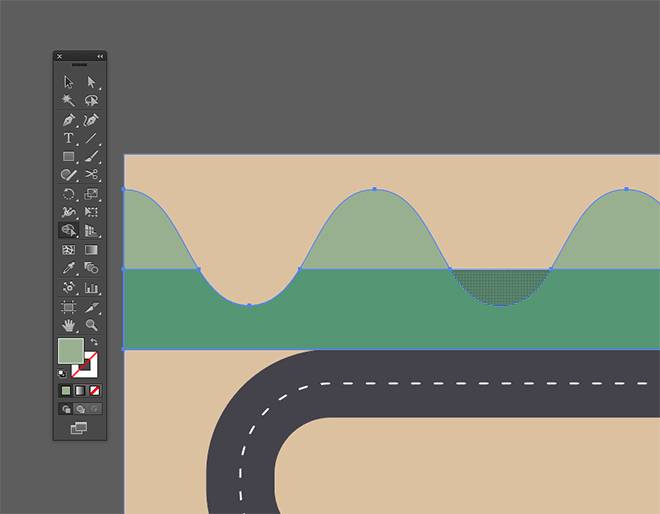
Hold the Shift key in order to select both the mountains and the rectangle, then use the Shape Builder tool to punch out the unwanted portions. Hold the Alt key while clicking these areas to remove them.
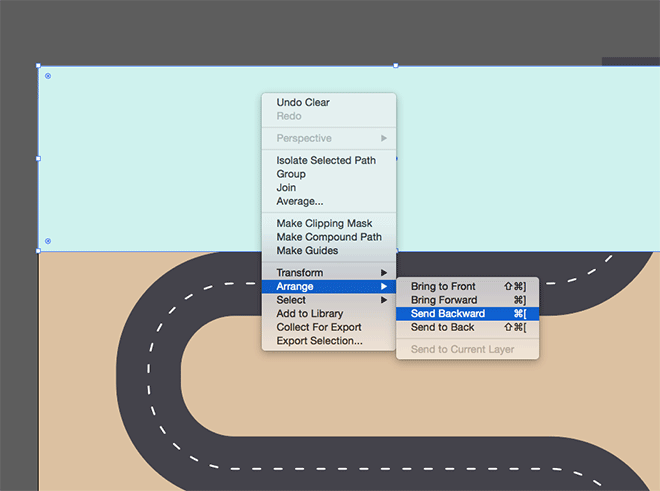
Draw another rectangle that covers the entire mountains area, extending to the top and sides of the artboard. Give it a light blue fill (#cef2ee), then repeatedly press the CMD+[ Send Backward shortcut until it sits underneath the mountains to represent a sky.
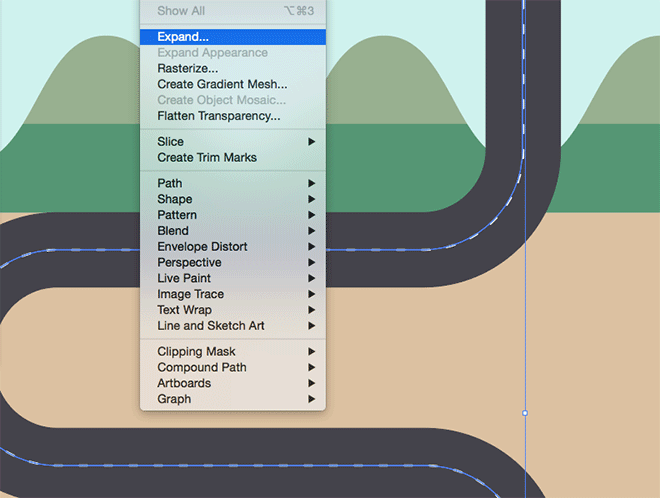
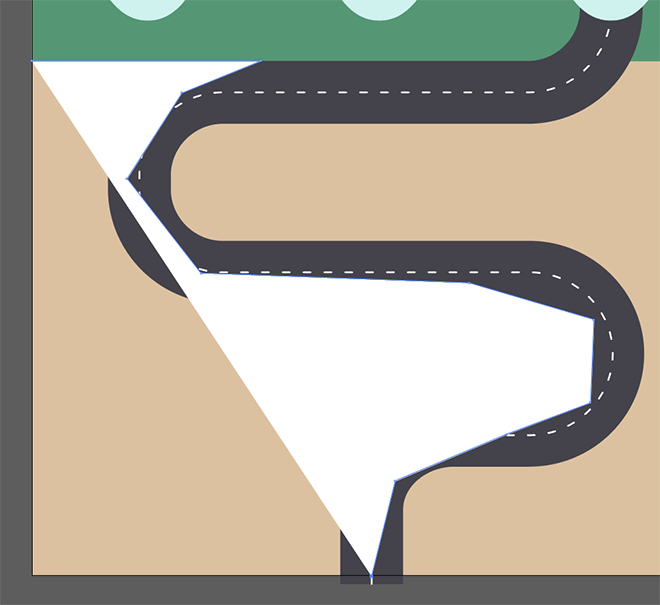
Select the two paths that form the road. The easiest way to do so is to drag a selection that also captures the sky and background rectangles, then hold Shift and drag a new selection to deselect these shapes, leaving the just the two paths. Go to Object > Expand Appearance, followed by Object > Expand to convert them into outlined shapes.
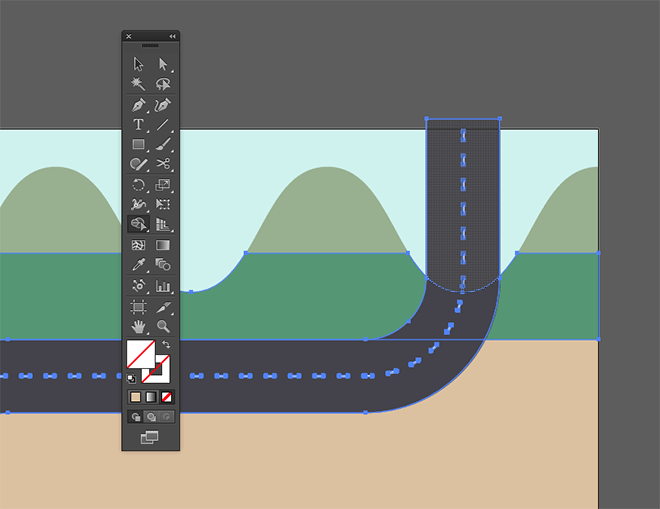
Add the darker green mountains shape to the selection, then use the Shape Builder to delete the shapes that form the section of the road that extends over the sky.
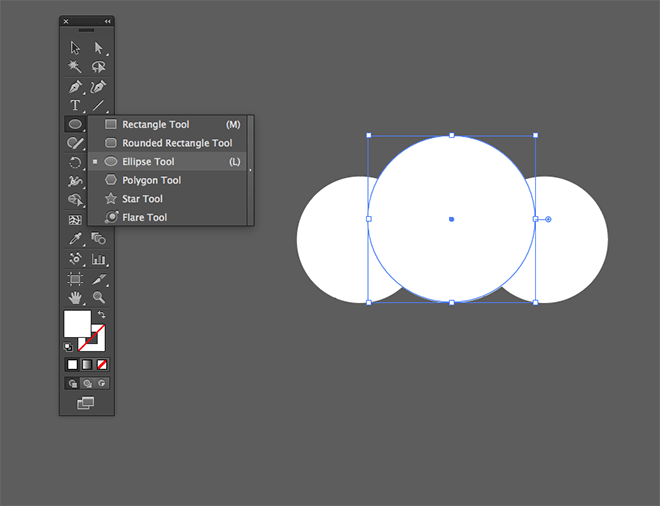
Elsewhere on the artboard, draw a series of small circles with the Ellipse tool to represent a cloud.
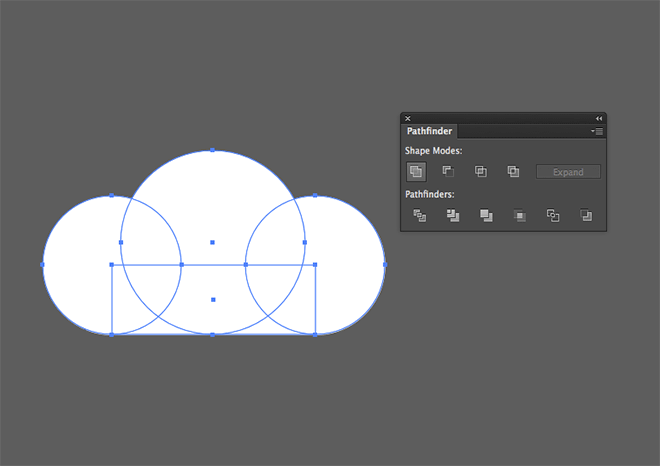
Fill in the bottom area with a rectangle to give it a straight edge, then select all the shapes and click the Unite button from the Pathfinder panel to merge them all together.
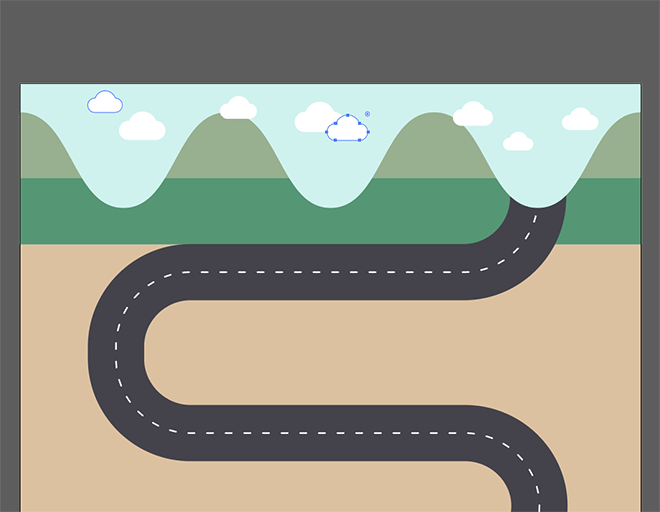
Copy and paste a series of clouds, then resize and position them across the sky.
Select the Pen tool and roughly draw a path that follows the road and continues back to its starting point via the artboard edges.

Replace the fill colour for a slightly lighter sandy-brown colour (#f2e0af). The flat design style doesn’t use gradients, but mixing two shades of the same colour can help add more visual interest to your illustrations.

Use the Pen tool to draw a series of straight edges with a blue fill (#59abc1). This will represent a lake, but to conform to the flat style it has been simplified to the max!

Another technique to round the corners of a shape is to grab the Direct Selection tool and drag the Live Corners widgets that appear on shapes in the CC version of Adobe Illustrator.
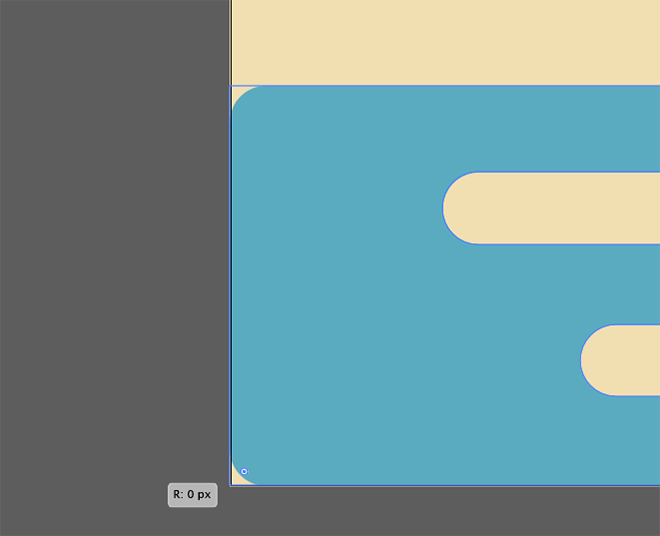
We don’t want the two corners next to the artboard edges to be rounded, so click just these individual points with the Direct Selection tool and drag the live corner widgets back to straighten them again.
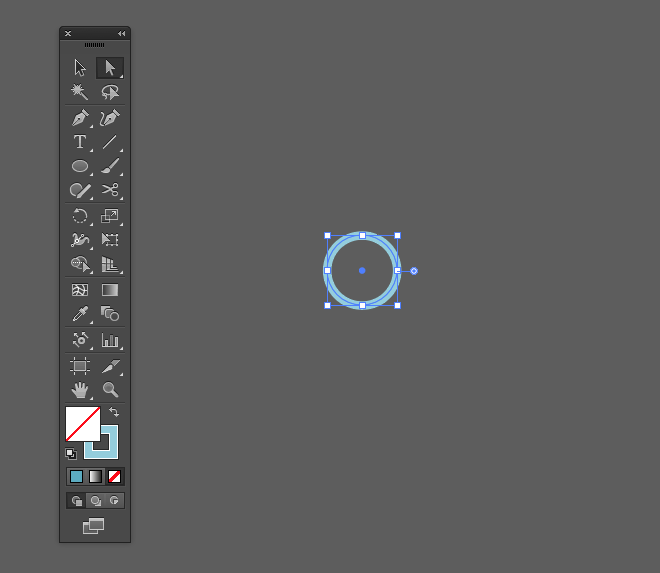
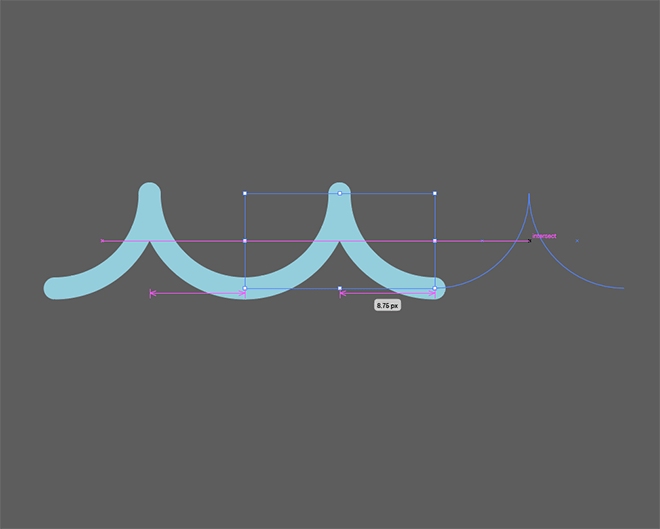
Elsewhere on the artboard, draw a small circle with the ellipse tool and give it a light blue stroke (#92cddd). Change the stroke settings to 2pt with round cap ends.
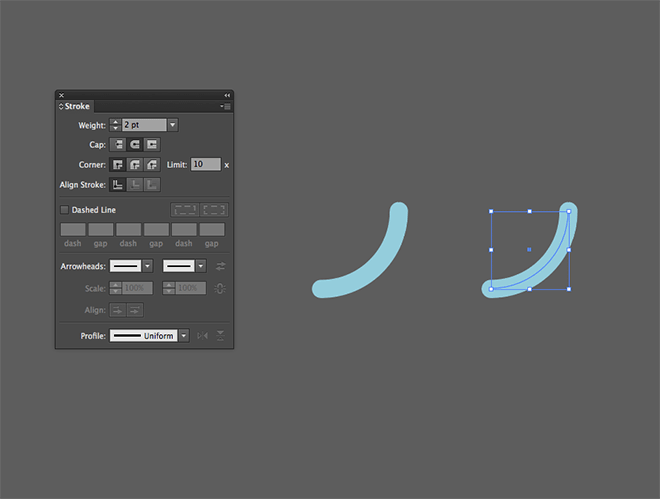
Select and delete the top and left points of the circle path with the Direct Selection tool to form a quarter circle, then hold the Alt key while dragging it to the side to make a duplicate.

Go to Object > Transform > Reflect and select the Vertical axis to flip the shape, then snap its position next to the original.
Select both shapes and drag duplicates to form a series of two and three shapes. The Smart Guides under the View menu make it easy to perfectly position these shapes side by side.

Make separate groups of these shapes in sets of two and three, then make copies and position them across the blue lake to depict a series of stylised waves.
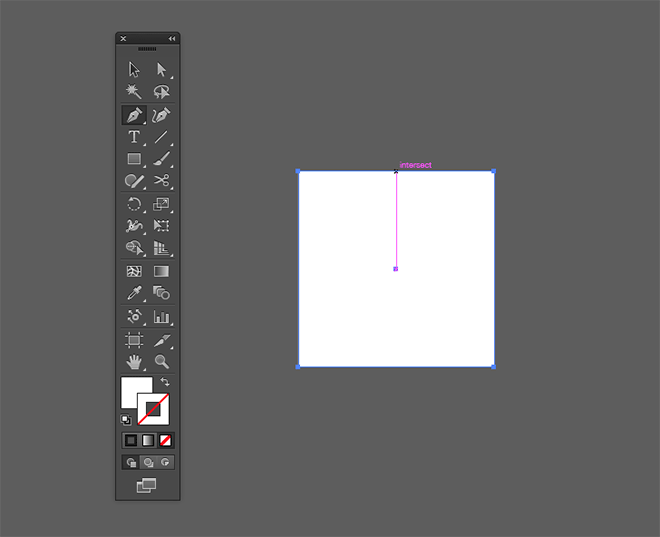
Draw a square somewhere on the artboard, then use the Smart Guides tooltip to find the center of the top edge and add a point with the Pen tool. Drag this point upwards with the Direct Selection tool to create a house shape.
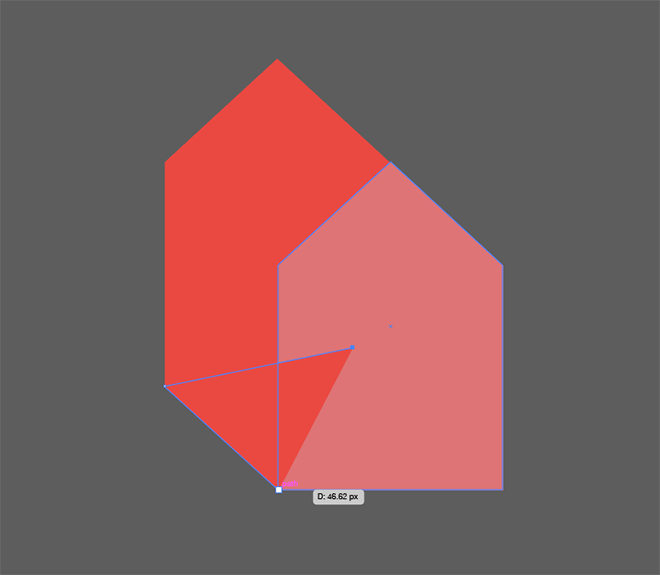
Give the shape a light red fill (#e07373), then Copy (CMD+C) and Paste In Back (CMD+B) a duplicate. Fill this new shape with a darker red (#ee483c), then move it upwards and to the left. Use the Pen tool to fill in the gap between the points on the lower edge.
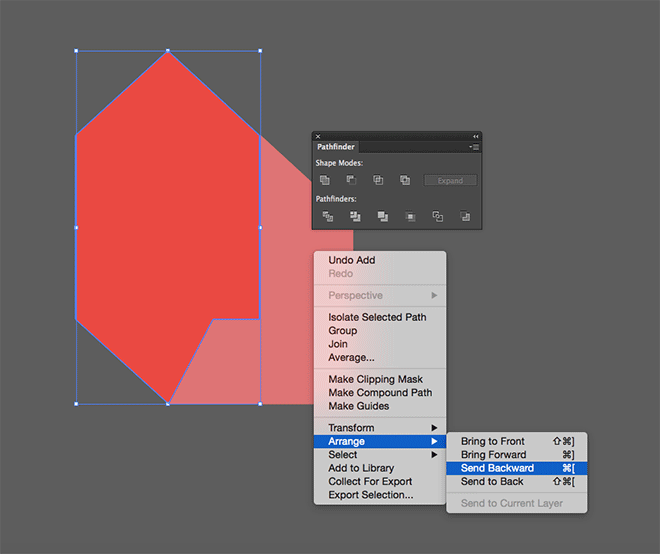
Select this temporary shape along with the darker red shape and unite them with the Pathfinder, then use the CMD+[ shortcut to alter the stacking order so the lighter pink house shape sits on top again.
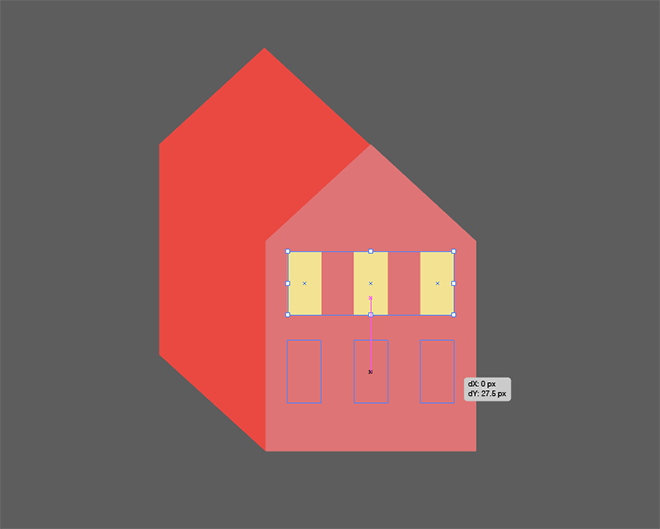
Draw a small rectangle to represent a window, then drag a duplicate while holding the Alt and Shift keys. Use the shortcut CMD+D to Transform Again to add a third shape, then select them all and drag a copy to add another row.
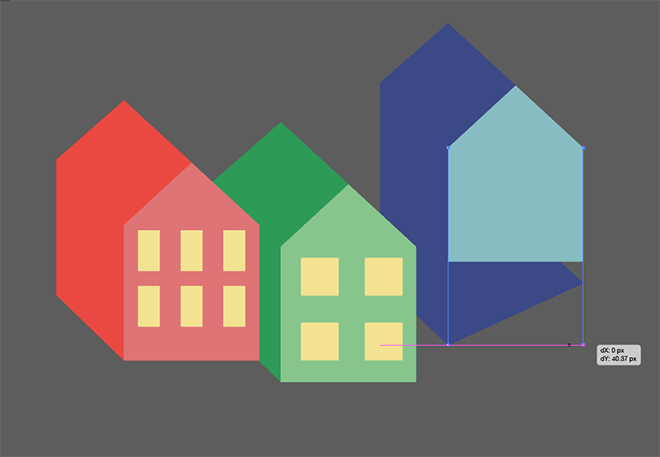
Duplicate the entire house graphic then change the fill colours and recreate a new window layout. To add more variety, drag the bottom edges of the shapes with the Direct Selection tool to extend the houses.
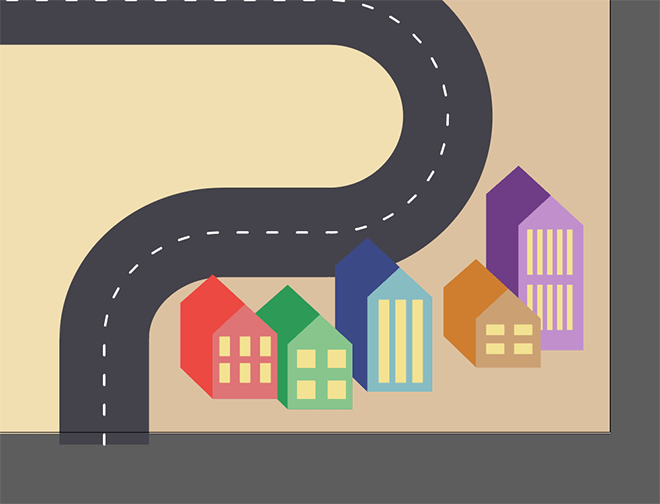
Position your houses within the artboard to form a mini town in your map design.
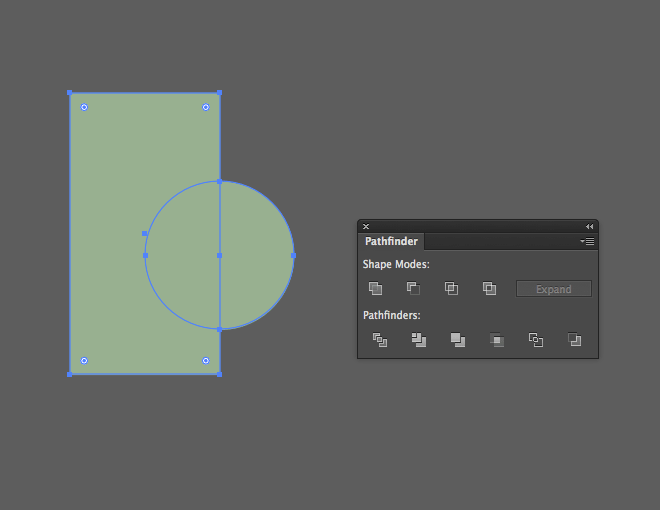
Draw a simplified tree by drawing a circle, sample the darker green fill from the mountains, then copy and paste in front (CMD+F) a duplicate and give it the lighter green colour. Draw a temporary rectangle that covers half of the circle, then with the top circle and the rectangle selected, click the Minus Front button from the Pathfinder panel to trim it into a semi-circle.
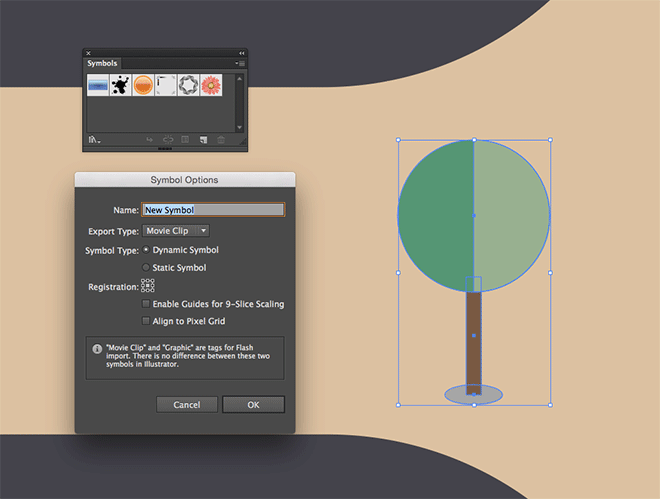
Add a brown tree trunk by drawing a long, thin rectangle, then a small grey shadow with the ellipse tool to finish off the tree graphic. With all the shapes selected, click the New icon in the Symbols panel.

Select the Symbol Sprayer tool from the toolbar, then click and drag across the artboard to quickly draw a series of tree graphics.
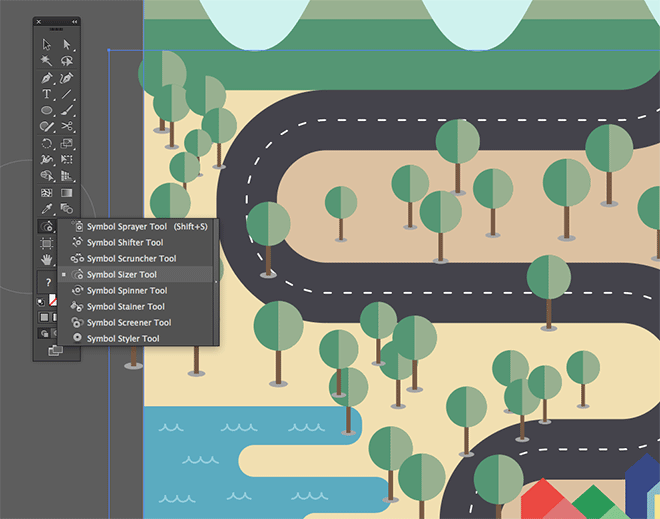
Switch the tool selection to the Symbol Sizer tool, then click and drag over the trees to alter their sizes. Hold the Alt key while clicking to make them smaller.
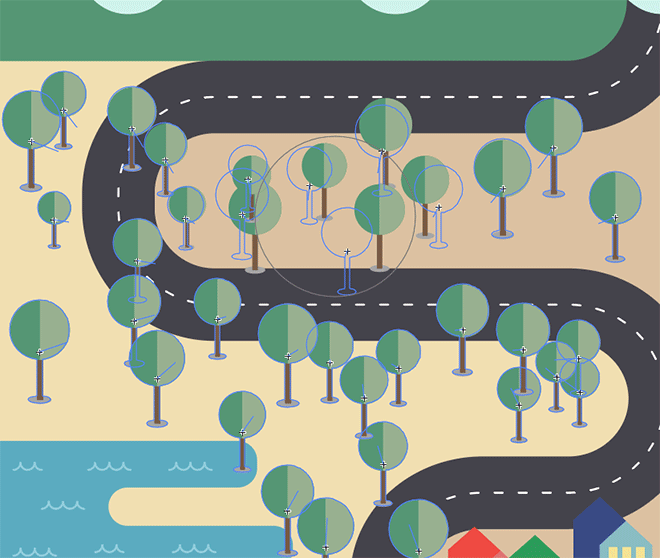
Use the Symbol Shifter tool to move the trees around to ensure they’re all positioned within the artboard and no trees are growing out of the lake, houses or road.
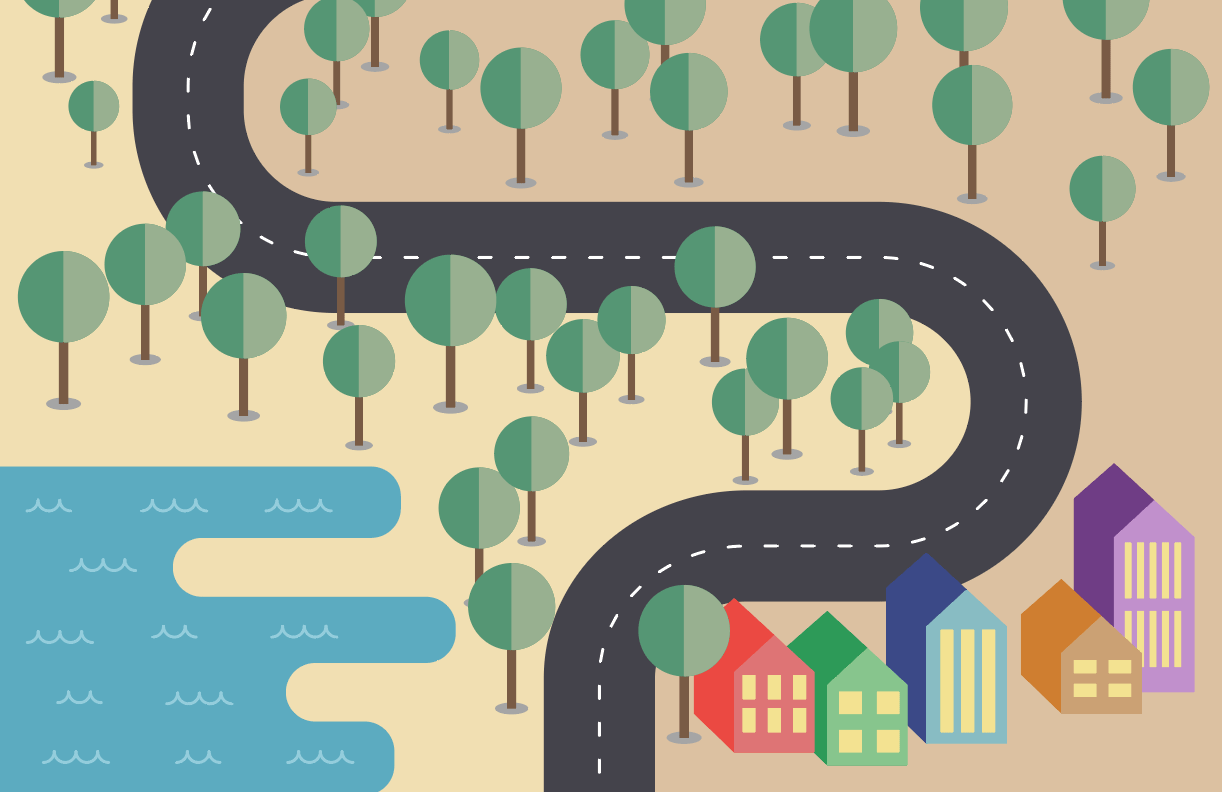
The final result is a cute map design that depicts a range of landmarks in a flat illustrative style. My aim in this tutorial was to cover a range of techniques that you can use to construct illustrations of anything you might need to include in your own landscape designs. By simplifying the objects down to basic shapes, you can illustrate anything with just a few circles, rectangles and vector paths!


Great tutorial Chris, ridiculously timely. On the white dotted line part though, it should be paste in front, not back. Might confuse some people trying it out. Cheers!
Well spotted! Just edited the post to Paste in Front for that step
This is a very good step-by-step tutorial, Chris! I’m a designer too, don’t consider myself a pro yet so I use these vector maps (https://vectormap.info/free-maps-for-all-designers-and-mappers/). What other tools or apps are good to custom build maps? Pls send me your reply too via my email add. Thanks!
Nice tutorial. One note: there is no need for duplicating the grey road for making the white center line. After making the first grey stroke of 90pt wide, you can add the white center line to the same stoke using the Appearance panel: just ADD a new line to the existing line and make it white dashed and 2 pt wide. You could add yet a third line if you wanted to. Of course this is no longer possible after you expand the lines to objects.
Enjoying your tutorials, keep up the good work!
Great tip! I always forget about using the Appearance panel for adding multiple strokes and end up doing it the long way with offset path or duplicate shapes.
Another great tutorial! Thank you so much! I’m learning so much from you.
Brilliant! Exactly the kind of tutorial I was looking for. I’m following it step by step and the results are looking promising!! cheers.
Loved this tutorial! I was wondering why you didn’t use 3D effects for the houses in the mini-town. I followed your instructions, and I couldn’t get the perspective to look just “right.” It didn’t look correct in your picture either, but I was able to find how to create 3D objects online. Do you think you’ll be producing a tutorial on those effects anytime?
Awesome post!
This is certainly cool! I am going to have to give Illustrator a go! Maybe this tut will get me off to a good start!
thanks for sharing
I followed your full instructions and I got perfect results with the new idea . This tutorial Helped me a lot . Thanks .
That’s great to hear! :)
This is very advance technique, but you have described it very softly, now anyone can easily understand. Many thanks for your effort.
Thank you, I’m glad you found it easy to understand and follow!
Thanks much for a great tutorial. Some of us have an easier time learning step by step. Videos are often too fast and really not clear enough and it gets cumbersome having to backtrack so much.
Hi Karin, thanks for your feedback, I’m glad you liked this tutorial!
Got some points.. such as Effect > Stylize > Round Corners Effect > Distort & Transform > Zig Zag , Shape Builder tool . Amazing use of them! Thanks Chris!
Thank you Kate, glad you found it useful!
This is certainly cool! I am going to have to give Illustrator a go! Maybe this tut will get me off to a good start!
Thank you!
Su
Thanks Su, give it go! :)
yo criss y u only ofer 7 fnts wit yo pakage?
let me just say you’re amazing for making this look so easy. Thanks for this tutorial. I think I just found my new project.