Color splash is a classic photo effect that goes by many names; selective colour, spot colour, colour isolation, partial colour, colour accent and many more! It’s made by converting a photograph to black and white, but leaving a specific colour intact, which produces a striking effect that highlights specific areas of the image. Typically the effect focuses on bright reds, yellows or blues, which is the colour of the main subject within the photo. In today’s tutorial I show you how to create the effect in Photoshop by picking out the hue using the Color Range selection method, then we’ll complement it with a couple of additional enhancements.
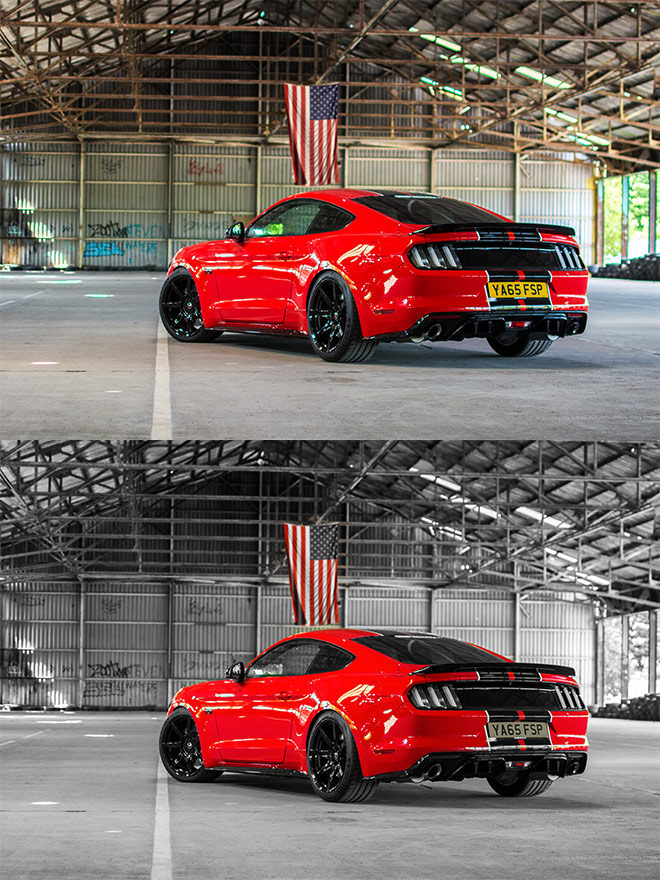
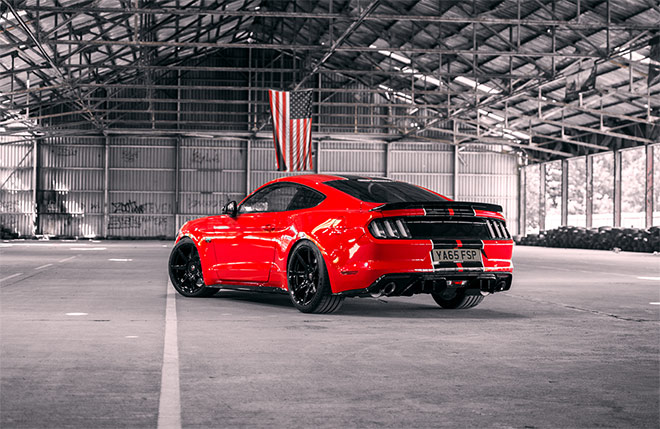
In my personal life I enjoy driving, tinkering and showing off my Ford Mustang. I recently did a great photoshoot with my friend at S.W Photography in an old aircraft hangar. The bright Race Red colour really stands out against the derelict backdrop, making it an ideal candidate for the colour splash effect. All the other hues and tones are subdued, which enhances the reds even further.
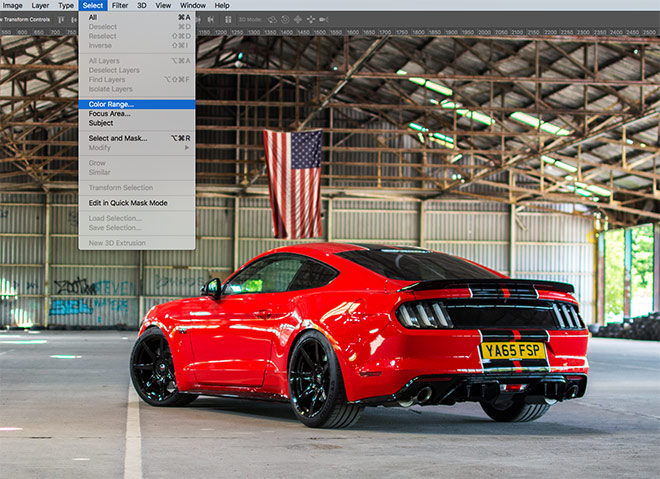
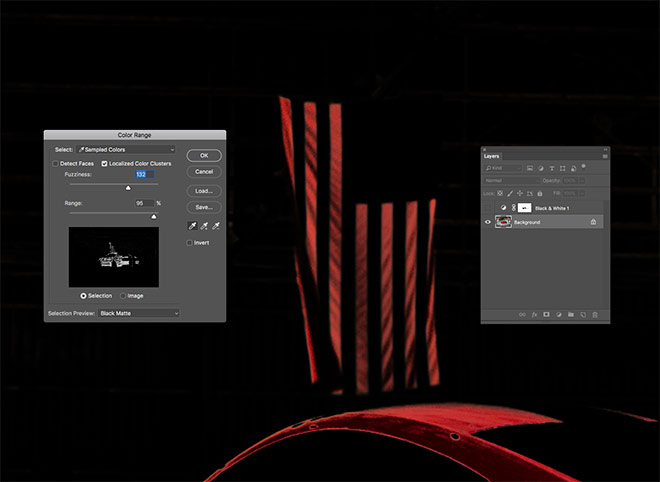
The main Photoshop tool that is used to achieve the color splash effect is the Select > Color Range selection method.
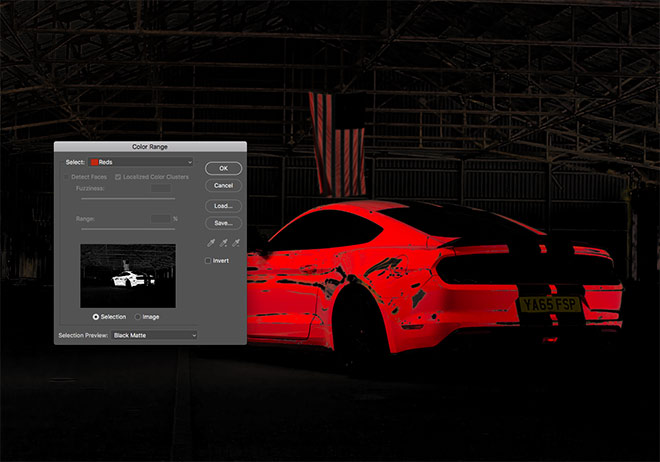
The Color Range tool has a series of preset selections, such as Reds, Yellows, Greens and Cyans, but these options are often too broad and capture unwanted areas of the image. In my example Red naturally includes the car body, but it also incorporates some of the unwanted red hues that appear in the background.
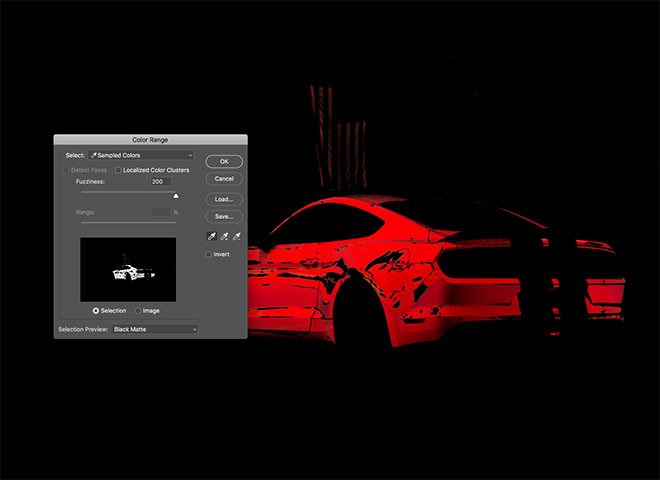
Alternatively, choose Sampled Colors, then click around on the image to choose the specific hue of your subject. Max out the Fuzziness slider to capture as much of this colour selection as possible, except if any unwanted hues begin to creep in.
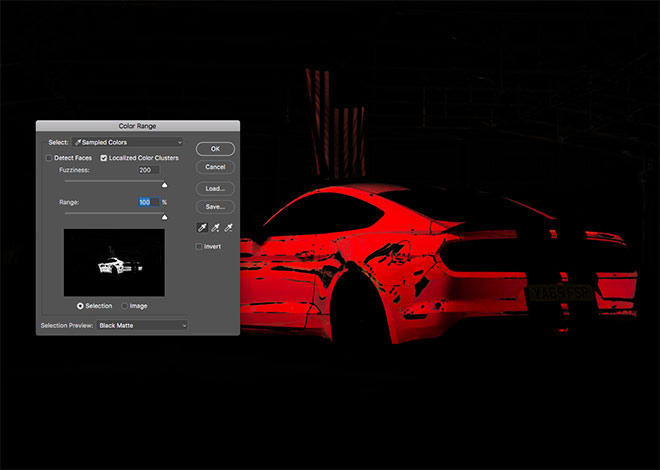
More refined results can be achieved by activating the Localized Color Clusters setting and max out the Range slider. This option helps to capture close variations of the hue that has been sampled.
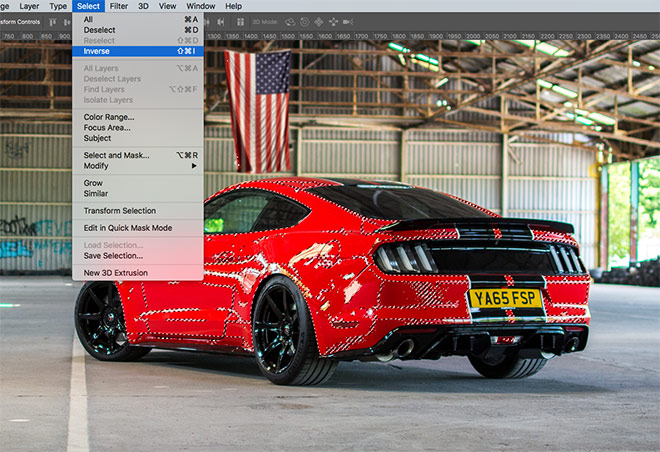
Click OK to turn the Color Range settings into a selection. In order to apply this as a mask, go to Select > Inverse, otherwise it will applied the wrong way round!
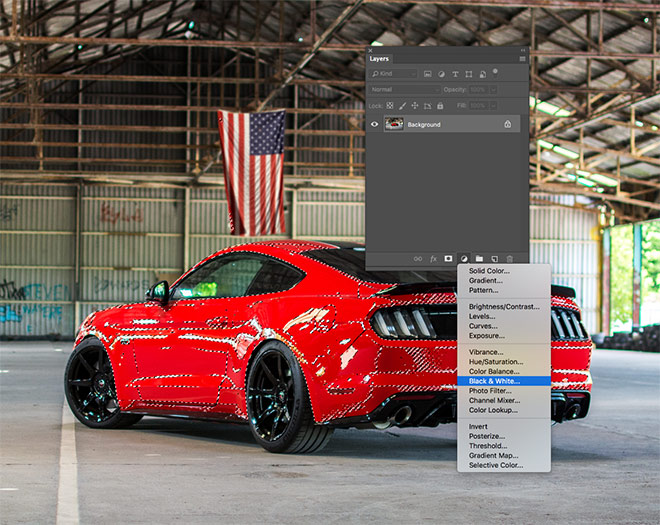
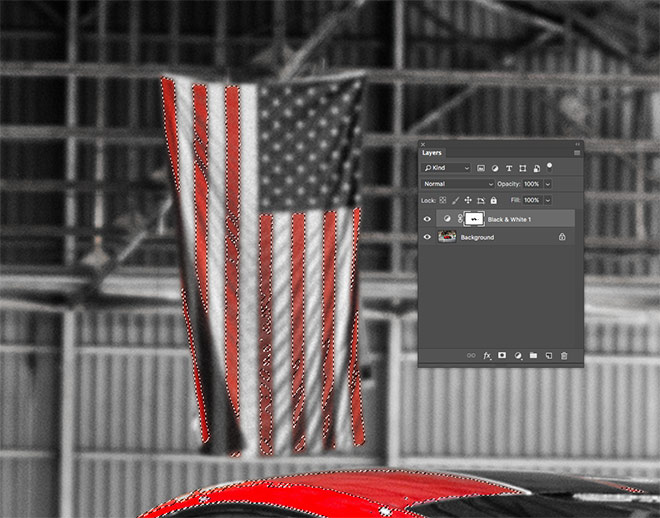
Add a Black and White adjustment layer. The selection will be automatically used within the layer mask, which prevents the black and white effect being applied to the red portion determined by the Color Range tool.
The effect works in principle, but if you look closely, you’ll see there are some darker red tones that are being hidden in grey by the black and white adjustment layer. The stripes on the American flag are also quite pale, because these reds are a slightly different hue to the sampled colour from the main car body.
Select the Background layer again and turn off the visibility of the adjustment layer, then go to Select > Color Range again. This time sample a red hue from the flag stripes. In my example image, this particular hue also brings in elements from the background, so careful tuning of the Fuzziness and Range sliders is necessary to adjust the result.
The sampled colour from the flag also incorporates some additional hues in the car body. Since this area is being highlighted anyway, it helpfully enhances the mask by restoring some of those hidden hues. Turn back on the visibility of the adjustment layer and select the mask, use the CMD+Backspace shortcut to fill this selection with black to add these portions to the mask.
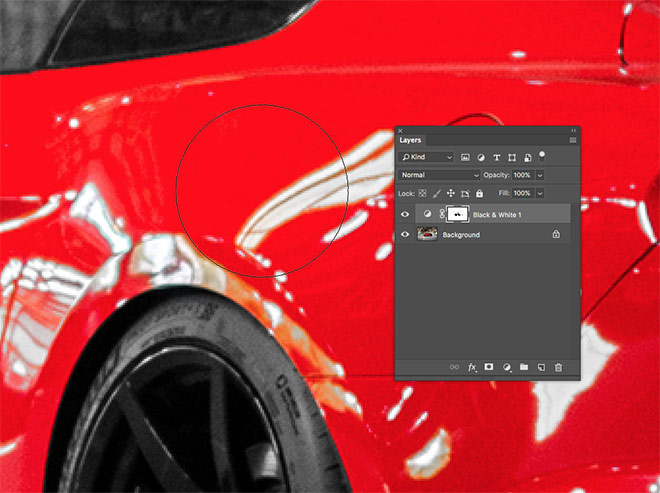
If there are any areas of the image that are still a little muddy, they can be added to the mask by producing another Color Range selection. Alternatively, they can be manually painted in using the Brush tool with a black tip. Conversely, any unwanted areas that are being highlighted can be muted again by painted them over with white within the layer mask.
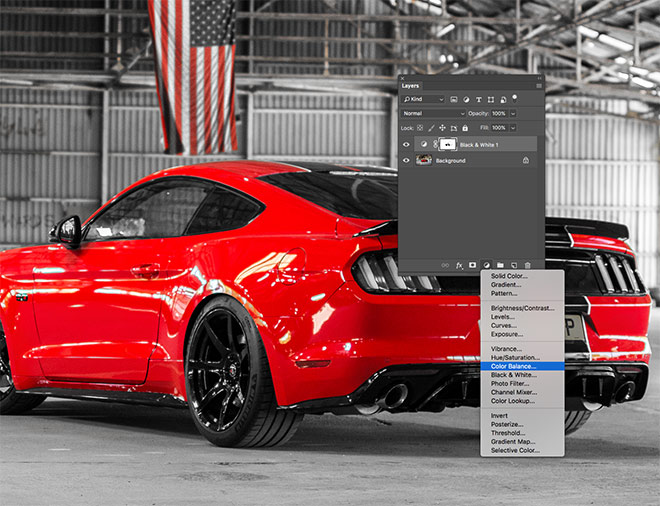
As a finishing touch, a Color Balance adjustment layer can be used to apply some interesting toning to the black and white filter to enhance the overall effect.

In the Color Balance properties, change the Tones menu to Shadows. Tweak the sliders towards Cyan and Blue to add a selenium style colour cast to the surrounding image.
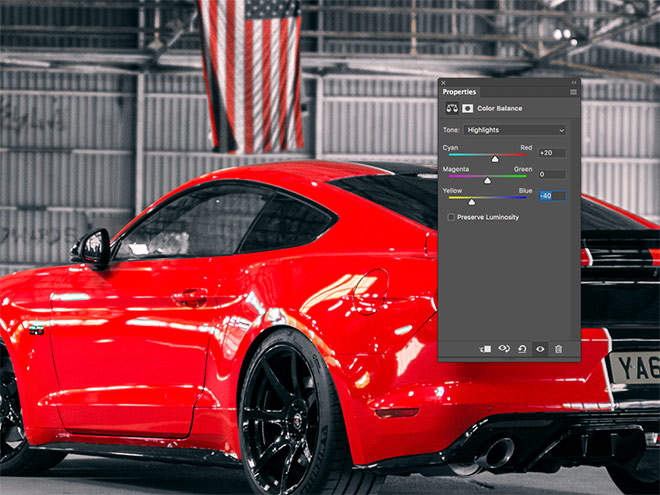
Change the Tones slider to Highlights and move these sliders towards Red and Yellow to produce a split toned effect.
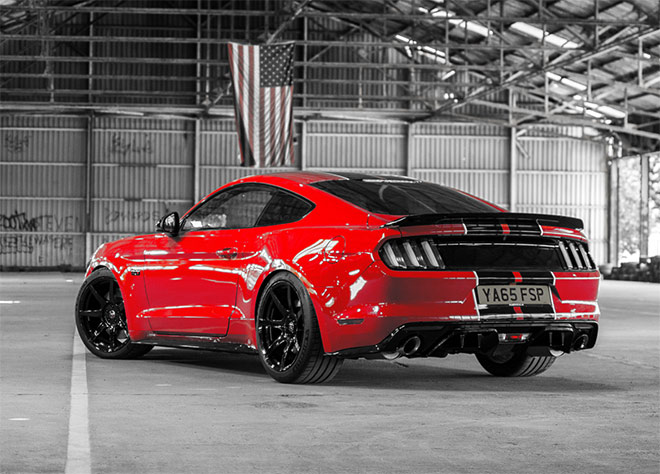
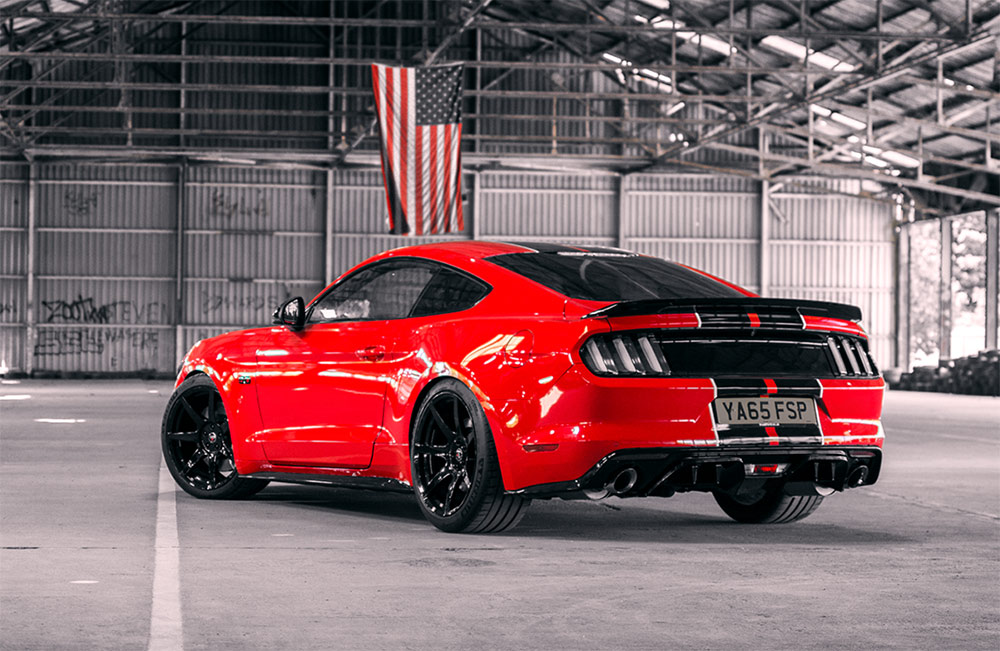
The final result is a cool colour splash photo effect that highlights a specific hue within an image. In my example it brings out the sporty red paint of my Mustang and the red stripes of the flag to enhance the American Muscle theme of the shot. Try out this effect in your own photographs whenever you have a vibrant subject you want to draw focus to!


Nice car and beautiful tutorials as always, wishing you more success
Chris a great tutorial spoiled only by the incorrect hanging of the flag. Might be a good time to word up your photographer buddy about flag etiquette. Maybe this can lead to a tutorial on how to flip the photo but not flip the licence plate.
Everyday is about learning something new.