This post was originally published in 2012
The tips and techniques explained may be outdated.
Follow this step by step Illustrator tutorial to create the popular retro style pattern design made up of lots of colourful squares and triangles. The process is pretty simple, making this a good tutorial for newcomers to Adobe Illustrator. We’ll be using tools to accurately align our elements, then see how the Pathfinder can easily create custom shapes.
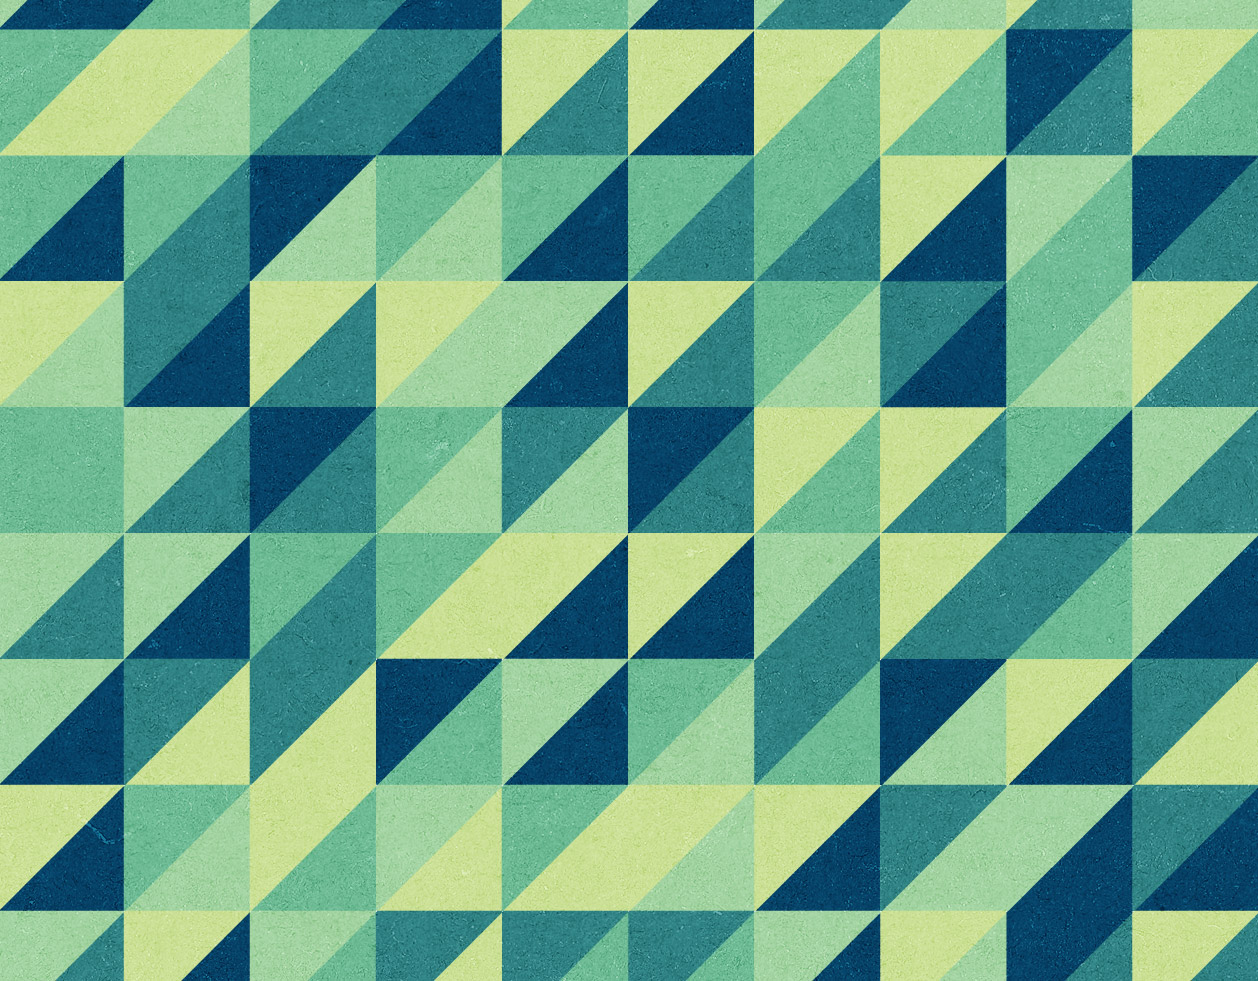
The pattern we’ll be creating is this cool retro inspired somewhat mosaic like design. The mix of squares and triangles along with the limited colour palette attracts the eye with cool illusions.
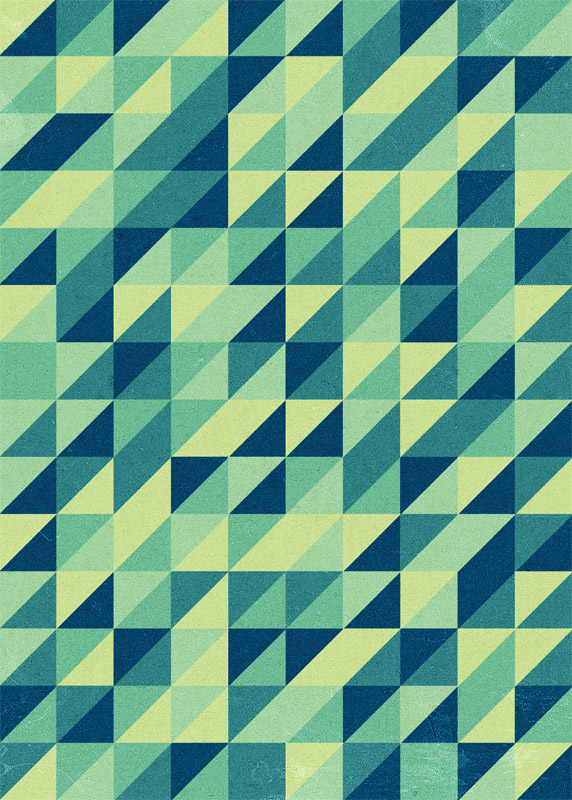
View the final retro pattern design
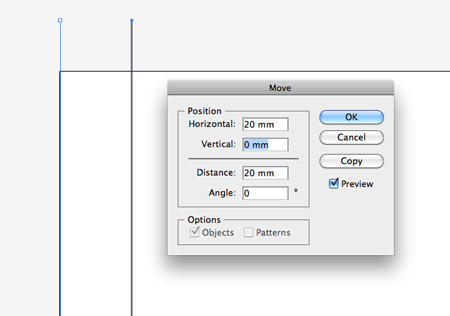
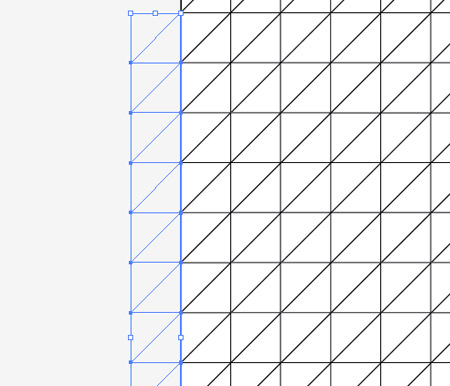
Open up Adobe Illustrator and create a new document. Select the Line tool and draw a vertical line down the left border of the artboard, then hit the Enter key to bring up the Move options. Enter 20mm in the Horizontal field then click the Copy button.
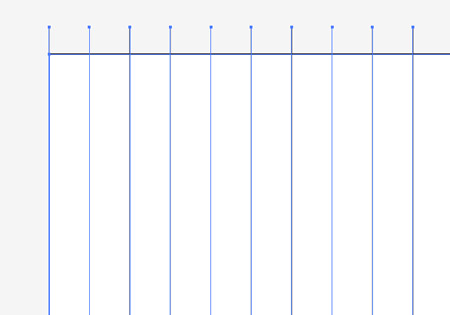
Repeatedly press CMD+D to repeat the last transformation until the width of the artboard is filled with evenly spaced lines.
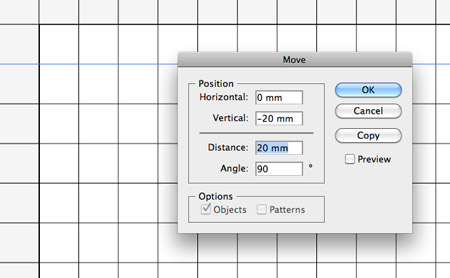
Repeat the process, but this time with a horizontal line. In the Move options window enter 20mm in the Vertical field then repeat the transformation to fill with the artboard with a grid pattern.
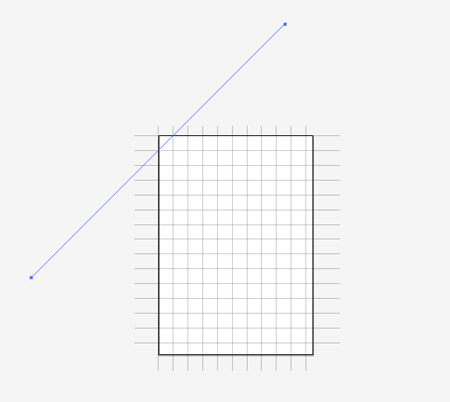
Next, draw a diagonal line at 45 degrees across the artboard. Be sure to make this line long enough to cross the whole artboard, even at its widest point.
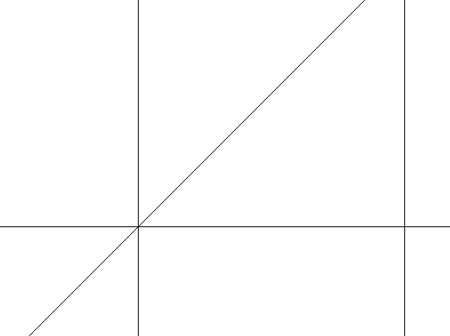
Zoom right in and toggle outline mode (CMD+Y) and carefully align the diagonal line so it accurately intersects each grid point.
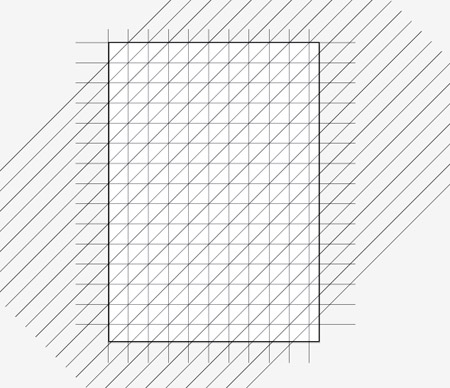
Hit Enter to bring up the Move options and enter 20mm in both the Horizontal and Vertical fields. Repeat the transformation to make duplicates to cover the artboard.
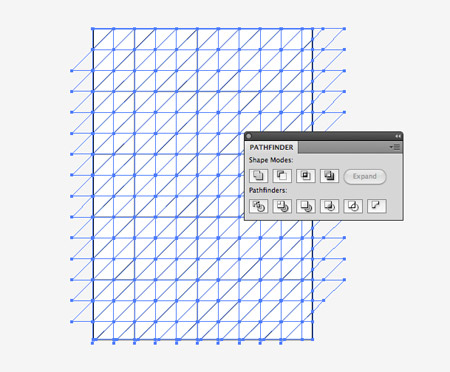
Draw a selection around all objects then hit the Divide option from the Pathfinder tool palette. This will split all the lines into individual shapes.
Right click and select Ungroup to split up the objects then draw a selection and delete any shapes beyond the edge of the artboard.
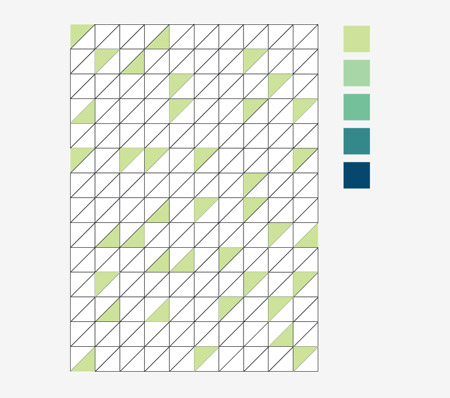
Now let’s add some colour! First we’ll need a basic palette to work from, here I’ve picked out a mix of greens/blues from ColourLovers.com. Begin by randomly selecting a bunch of shapes while holding the Shift key, then add the colour fill using the Eyedropper tool on your temporary swatch.
Continue selecting empty shapes then give them a colour fill using the next swatch in the palette.
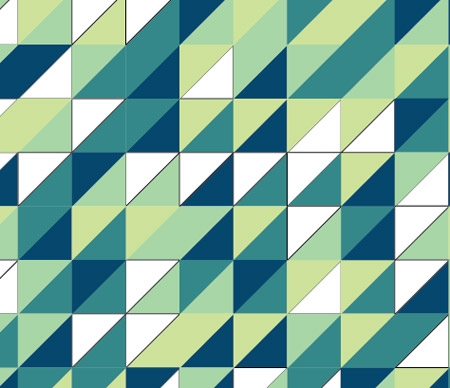
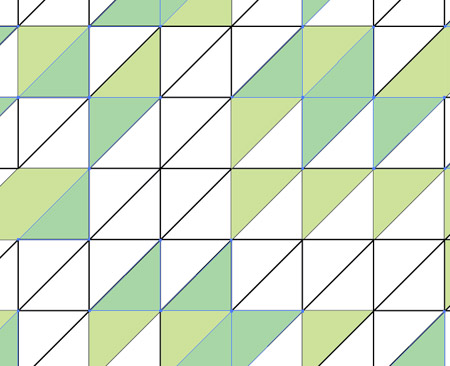
As more colours are added the design really starts to take shape…

…until eventually the whole design is filled with colour. Make any adjustments if there’s any dense areas of a single colour, or sparse areas that lack one of the other swatches.
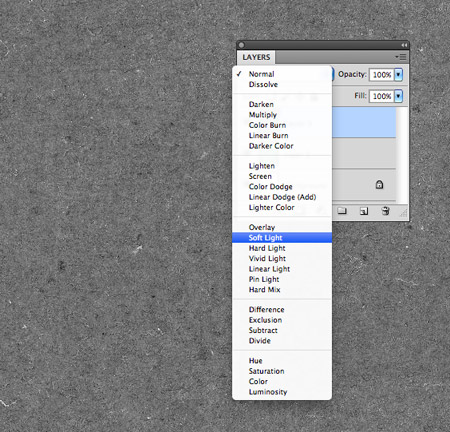
The pattern itself is complete, but it wouldn’t be a Chris Spooner design tutorial without a texture overlay! Copy and paste the design into Photoshop and open up a texture file. Desaturate the image and set the blending mode to Soft Light, then adjust the opacity to tone down the effect of the texturing.
The texture overlay just helps add that tactile feel to the design to help remove the flat appearance of digital graphics. The uses for this kind of pattern are endless, it could be the base of a business card design, a skateboard deck design or even just as a printed poster.

Awesome, thanks for the share!
Wow, same shit, different day…
Dont be a dick Daniel. What are you contributing to society?
Really nice Chris ! Simple and stunning !
I need to work more with illustrator, really…
I love this style of yours! This one I’m gonna do, print and hang on the wall in my bedroom :)
Thank you ;)
That’s a really clever way to achieve this effect. I would have drawn a single square and then repeated it which woul take much longer!
http://www.paperacrobat.blogspot.co.uk/2012/03/posh-dosh.html?m=1
Did something cool with your tutorial, which was quick, easy and awesome. Is there somewhere I can attach it?
I laughed-out-loud when I read this: “…but it wouldn’t be a Chris Spooner design tutorial without a texture overlay!”
Keep up the awesome work, Chris! I really enjoy it :)
I love this. You are a master my friend.
Sweet pattern, Chris!
Excellent tuorial! This looks amazing and is really inspiring.
Thanks a lot (again)…
Looks like a diamond quilt. You should see my mother create the same thing with a needle and thread. Now that’s retro! It’s a great color palate.
<3 the combination of colors and of course nice tuto :)
nice tips n tricks,i have made same pattern design
Simple and very effective, lovely outcome. Learning lots from you and your blog, thank you for sharing :-)
Thanks for the tutorial! Clear and awesome, as always!
When playing around with my little triangles, a friend started talking about Zelda… Triangles… Zelda… TRIFORCE! Here is the result : http://img3.imageshack.us/img3/3884/postertriforcertro.jpg
Buy from – AliExpress . com — DhGate . com
I think this is really a very nice post. Thanks for the great content!
Nice technique, Thanks for sharing :-)
Hello Everyone!
Thanks for this tutorial it’s inspire me to create tool for automatically creation pattern like this. You can check it at my blog there (link to download at the bottom of the post):
http://arsvqd.blogspot.com/2012/03/trianglefill.html
Excellent tutorial, one can make now patterns very easily after reading it.thanks
Awesome! Thanks:-)
nice! for some reason I thought that it would be a lot harder to make a old school background, It will probably take me longer than you to make this cause I’m just learning how to use this program. Thanks so much for the awesome easy to follow tutorial!!
Very nice. Just got myself a new facebook cover. Thanks alot!
The textures part was inspiring :)
Great work. A very informative and detailed tutorial as well.
The texture isn’t working for download : (
Very nice Chris! Thanks for sharing!
I love Illustrator, and this was a great trick that I never knew. Thanks for sharing!
thanks for sharing awesome & helpful tutorial =)
Love it!!!