In today’s Photoshop tutorial we’re going to have some fun changing the weather in a photograph by adding a heavy rain shower. The effect works best on night shots of dark streets to give the image a dramatic mood. We’ll amplify the subtle light reflections on the pavement to simulate the appearance of a wet surface, then add three layers of rain drops, each at different sizes to achieve the illusion of depth.
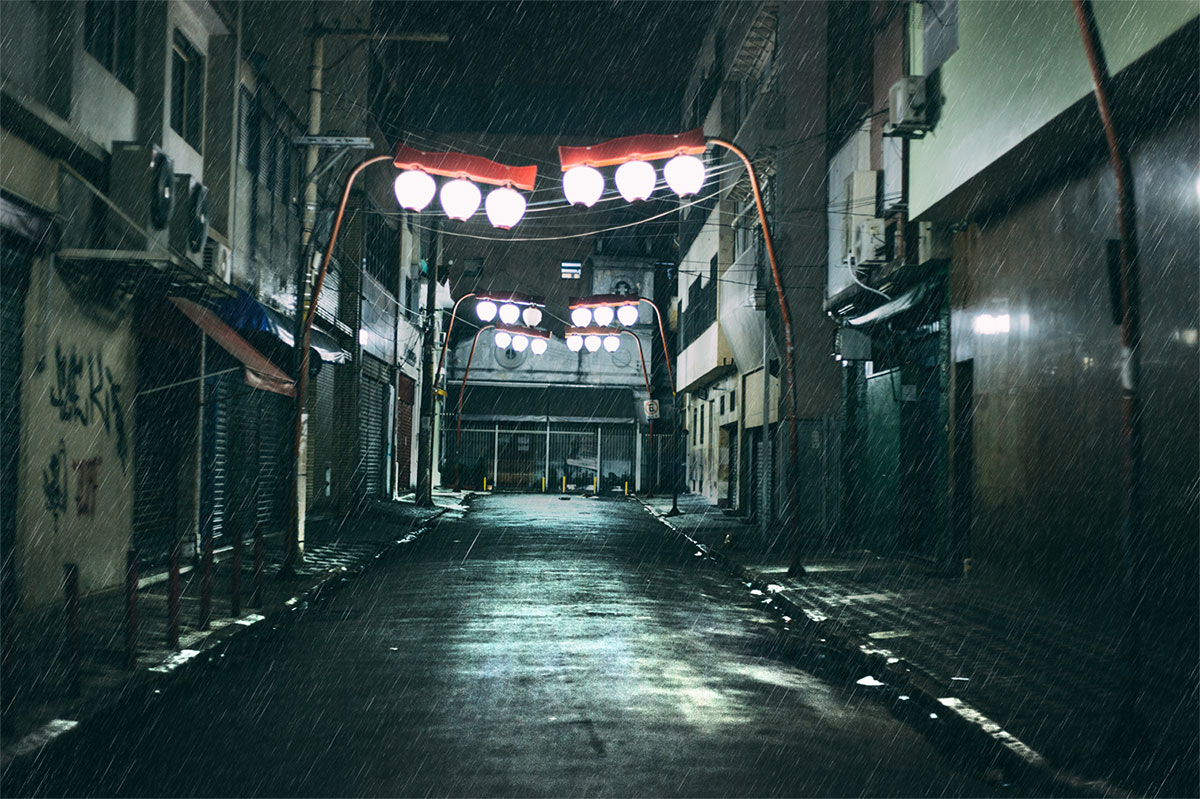
The photo I’ll be working with is a shot of an dark urban street. The effect works the best with nighttime photos because the darker background helps makes the raindrops visible. Dark street images also produce great results by turning the photograph into a scene from a dramatic thriller!
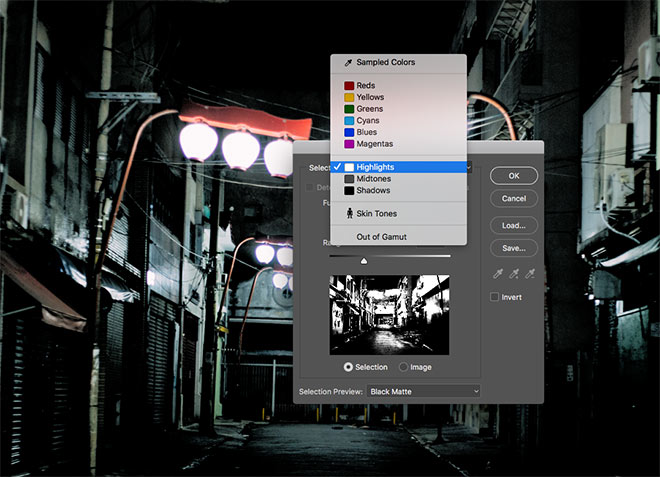
Open your chosen image in Adobe Photoshop. We’ll first work on making the surface appear wet, which will complement the raindrops to achieve a more realistic effect. Go to Select > Color Range and choose the Highlights selection method.
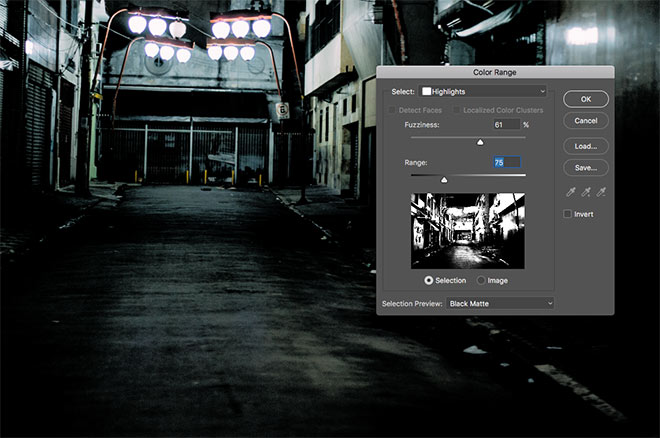
Move the Fuzziness and Range sliders while observing the preview thumbnail to find subtle selection of the floor highlights. The brightness of these areas will determine how wet the street will appear!
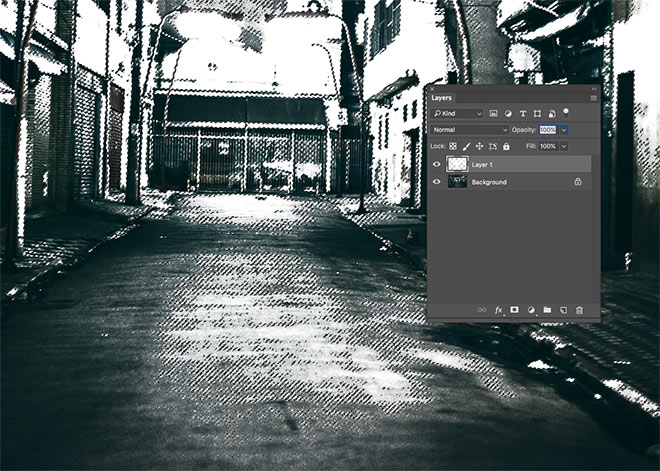
Create a new layer, then fill the highlights selection with white using the CMD+Backspace shortcut. Press CMD+D to Deselect.
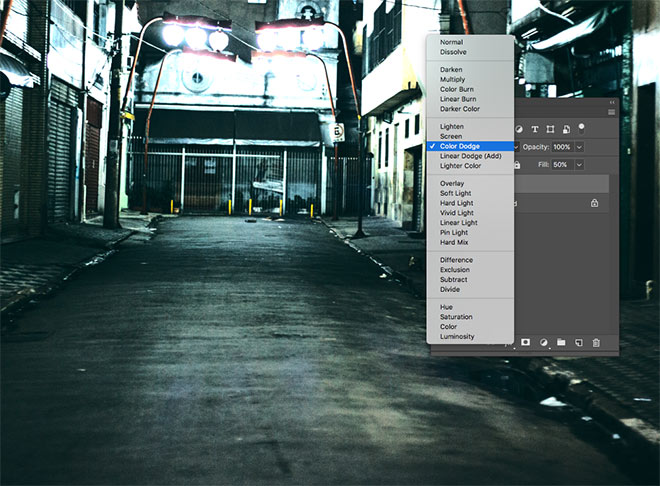
Change the blending mode of the white layer to Color Dodge, then reduce the layer’s Fill to around 50%. You can play with the Fill and Opacity settings to find just the right amount of surface shine for that wet tarmac look.
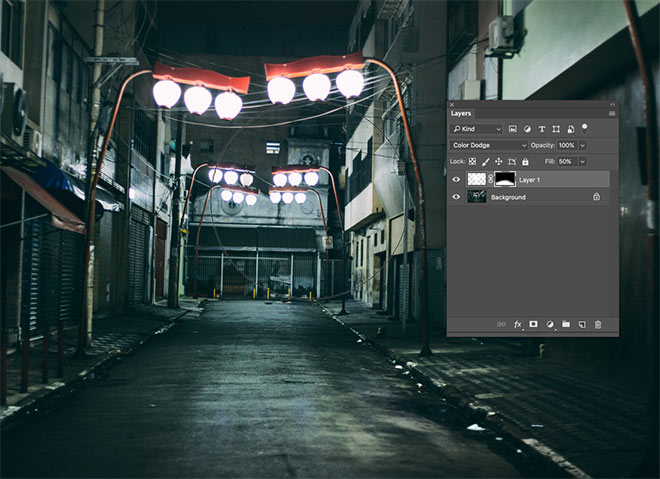
The bright surface areas help give the road a shiny wet appearance, but we don’t want all the other highlights being blown out. Add a Layer Mask to the layer, then use a soft brush to erase the unnecessary areas.
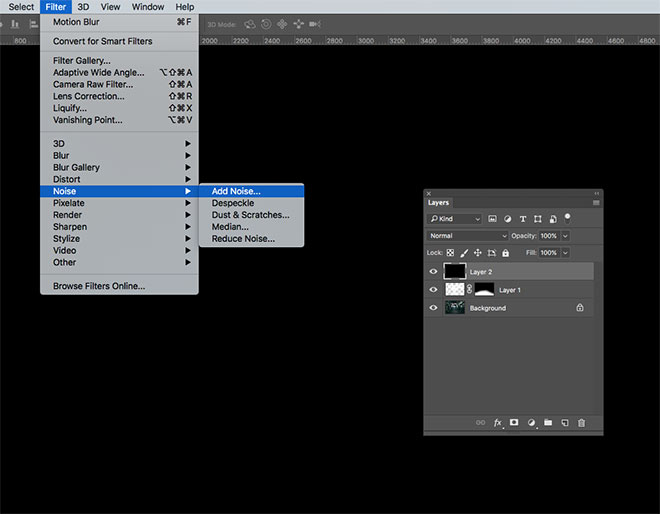
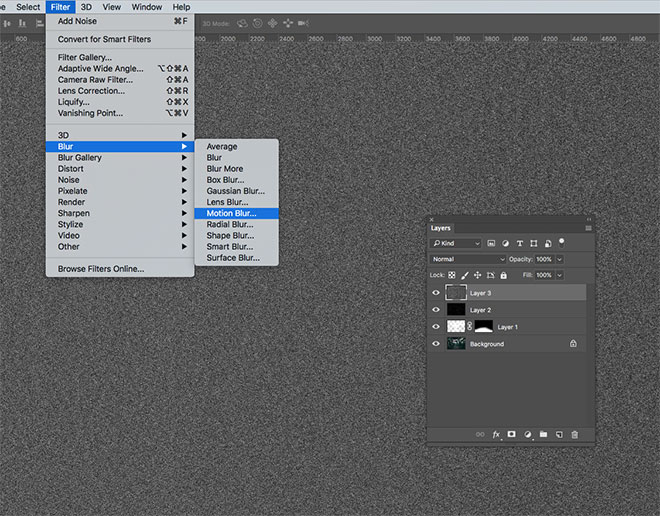
Add a new layer and fill it with black using the ALT+Backspace shortcut. Go to Filter > Noise > Add Noise.
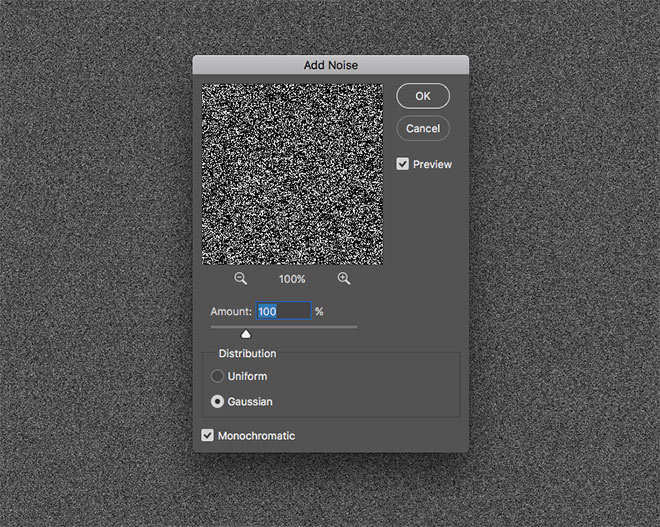
Add 100% in the Amount setting, then set the Distribution to Gaussian and check the Monochromatic option.
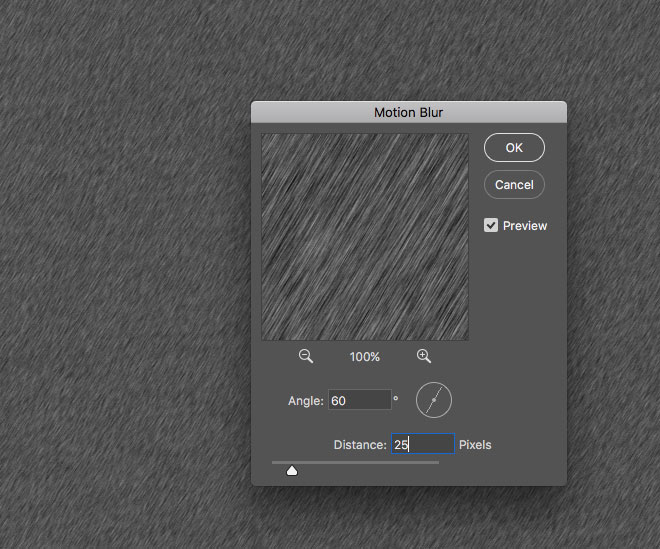
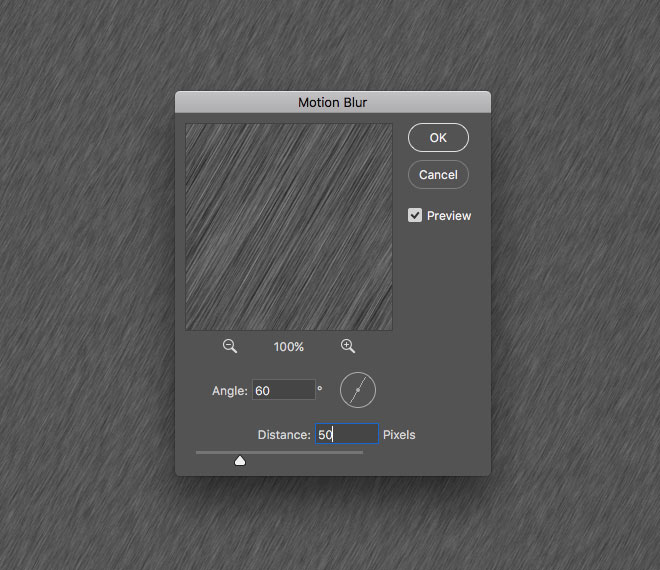
Next, go to Filter > Blur > Motion Blur. Set the angle to around 60 degrees, with a Distance of 25px.
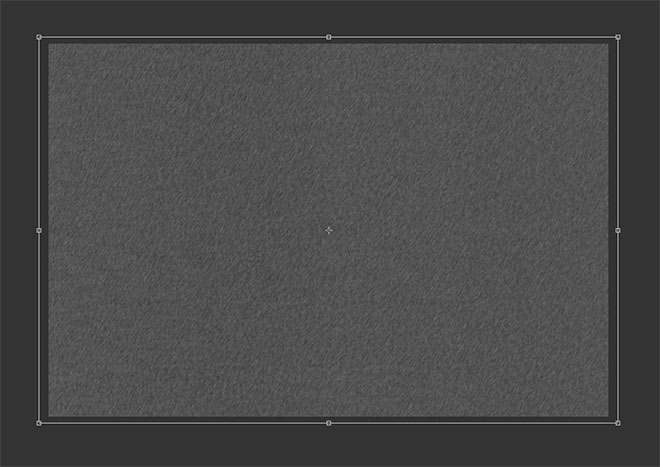
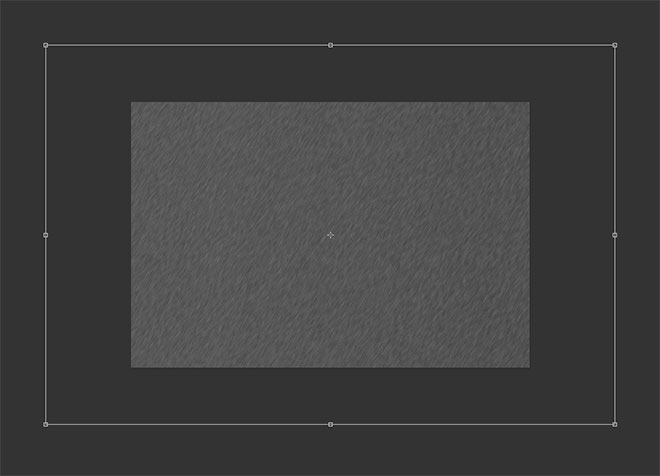
There’s a thin strip around the edge of the layer where the motion blur isn’t applied. Press CMD+T and scale up the layer slightly to hide it.
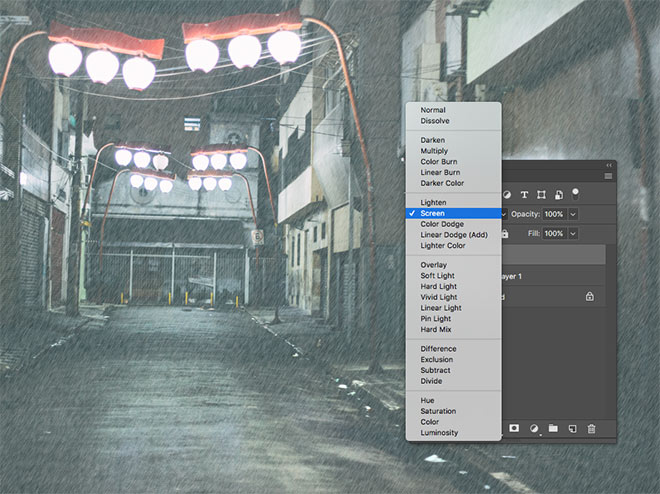
Change the blending mode to Screen so only the white portions of the noise is visible, which allows the original photo to show through.
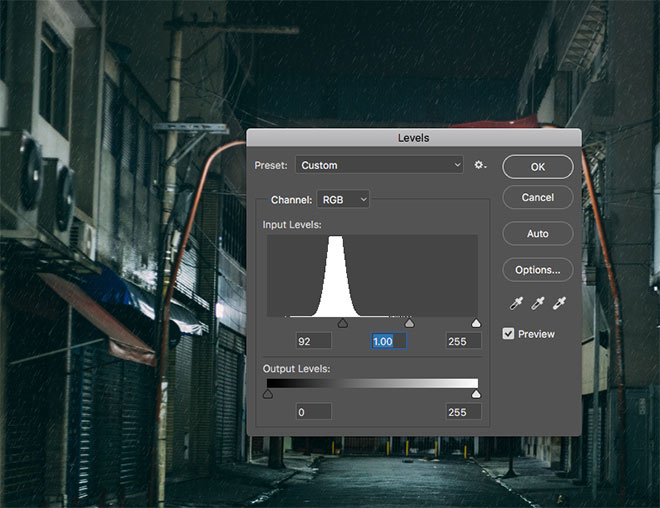
Go to Image > Adjustments > Levels (or use the CMD+L shortcut), then drag the shadows slider handle to the right to reduce the number of rain drops.
Add another new layer and fill it with black. Add the Noise filter with the same 100%, Gaussian & Monochromatic options, then add a Motion Blur filter.
For the settings of this second noise layer, increase the Distance to 50px, but keep the Angle set at 60 degrees.
Press CMD+T to Transform this layer and scale it up a little further than the first noise layer to enlarge the noise particles. Set the blending mode to Screen.
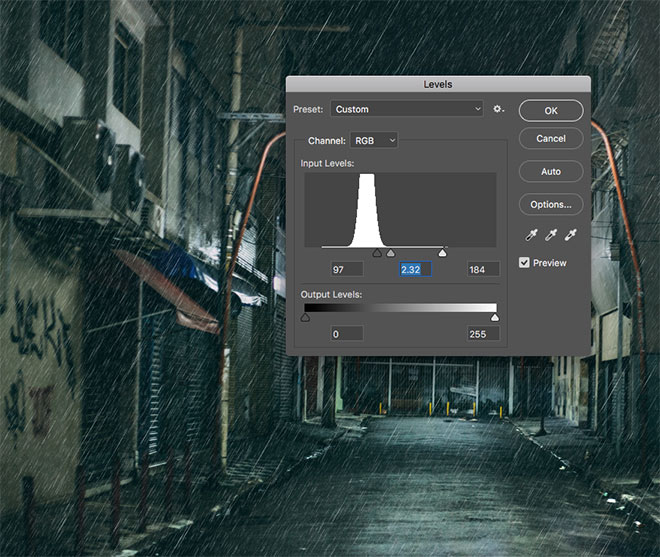
Use the CMD+L shortcut again to open the Levels. Drag the shadows slider a little further to the right and bring the midtones towards the left. Keep an eye on the live preview to find the right balance where the raindrops aren’t too sparse, or too dense.
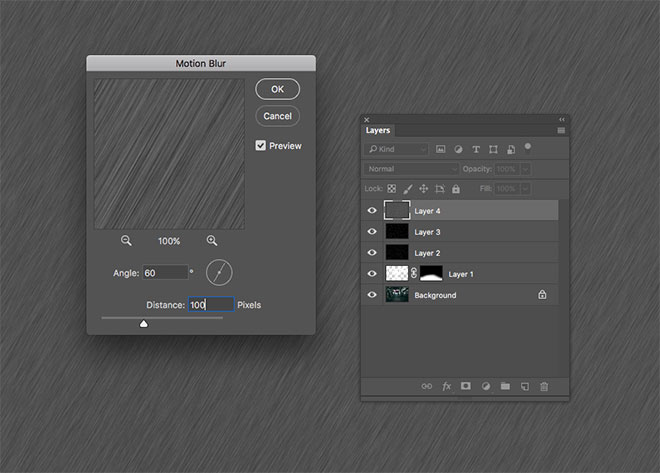
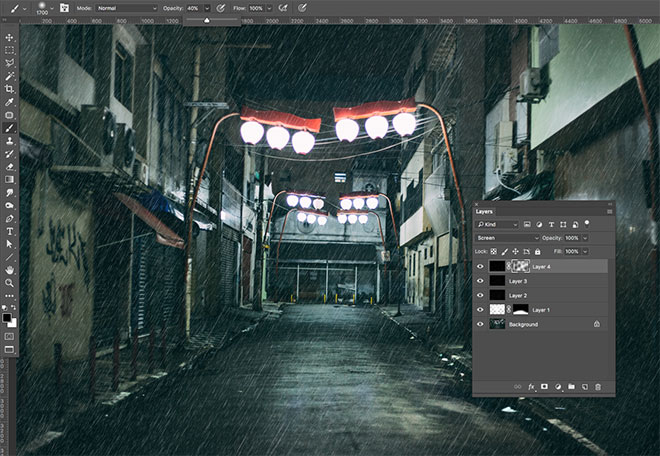
Add a third noise layer and add a motion blur filter. This time increase the Distance to 100px. This will form the close up raindrops which would appear to be moving faster.
Dramatically scale up the layer with the CMD+T shortcut to create a series of large raindrops. Set the blending mode to Screen to see the layering of raindrops adds depth to the effect.
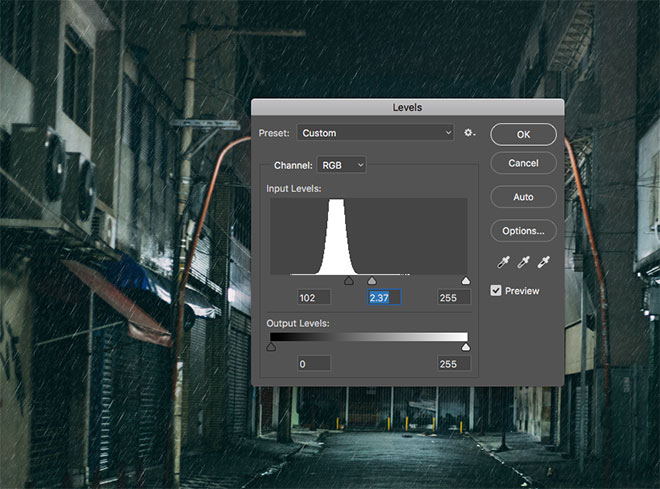
Reduce the amount of rain visible in this foreground layer by adjusting the Levels. Move the shadows slider towards the right, then increase the contrast by dragging the midtones and highlights leftwards.
To eliminate the uniform appearance of the rain layers, add a layer mask to each one in turn. Use a soft brush set at 50% opacity and randomly dab around the canvas.
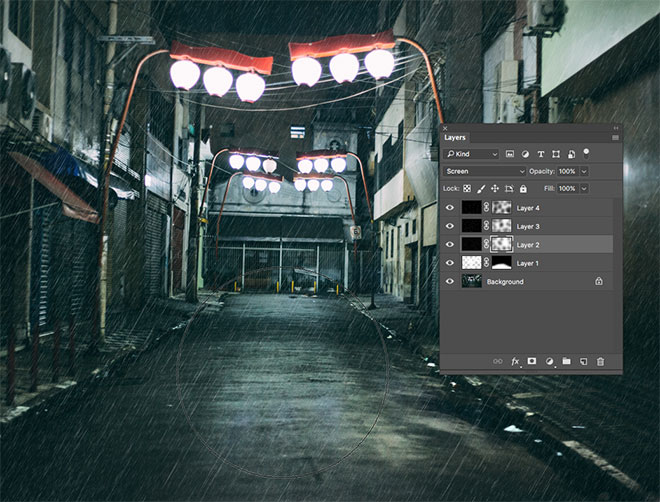
Paint within the other layer masks to erase random portions of the rain layers to finish off the effect. If necessary, switch the brush colour to white to restore the mask to bring back raindrops in specific areas.

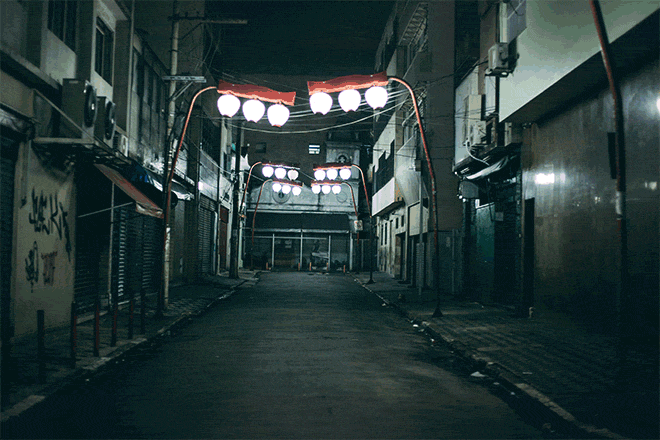
The final image now has a much more dramatic mood. The stacking of the rain layers helps add depth to the effect to help it blend into the environment, while the steps to add highlights to the surface nicely complement the rain effect by making the ground appear wet.

I’m intrigued by the ‘highlight’ selection at the start. I can’t believe how much it adds to the ‘wet’ look!
Awesome tutorial, Chris!
Thank you!
I really like how the light effects do wonders for the wet street so thanks for that. I do however, have a couple notes. The rain above the lights wouldn’t be lit the same amount as below the light and the rain to the right of the lamps wouldn’t be falling at the same angle as the center and left of the image because the buildings being in the way. Those two things just stood out right away that it was doctored. I think with those changes and maybe adding some vertical drops from the buildings and light it would be much more believable. Cheers and thanks again.
Many thanks to you Chris for yet another great tutorial.
Your incredibly detailed and informative tutorials have, from the beginning, been the mainstay of my Ps and Ai resources — guess one could say you’re the best “go-to for how-to!”
Cheers!
Miss Diana
ps. While I heartily agree with Jake regarding light sources, etc., the sheer endless creative possibilities one conjures up from the simple, yet fundamental design principles illustrated here is what makes these tutorials such a boon! However, I would be amiss if I didn’t thank Jake for his beautiful comment — comments, like Jake’s just add that much more to the whole rich creative juices going one here :)
Miss D.
Chris:
when I select HIGHLIGHTS, I can’t access fuzziness slider./
PS CS6
Any joy?
Very informational blog, You inform very deeply about Photo-shop tool to change Image design. I am a designer and after read all steps I know how i can make my image attractive. Thanks
Thanks so much..
One question can i use both png and jpeg image, If answer is yes then which you prefer. otherwise no any other single problem to made like your image.thanks for great sharing.
Nelly, png is lossless so the better choise of the two if you want to reopen the files. And png saves layers and can be made transparant. Jpeg can’t.
Thanks for this awesome article. I have been one of those that always think about how to start using Adobe Photoshop.
Till now, I was using Canva and other online tools to create a feature for my blog post. Just Start Learning Adobe Photoshop, and trying to learn new thing in photoshop everyday.
And it is very useful for me and other Newbie, who is learning photoshop. Thanks for sharing it with us!
Great and detailed tut Chris, thanks. The only things what I would add in this image are some bigger fuzzy rain drops in the foreground and some haze in the background. Image is now still clear from front to end, but with heavy rain it should be slightly hazy in the end of the street.
My 2 cts.
Very beautiful and realistic result. Thanks for the tutorial!
Wonderful tutorial, thank u!