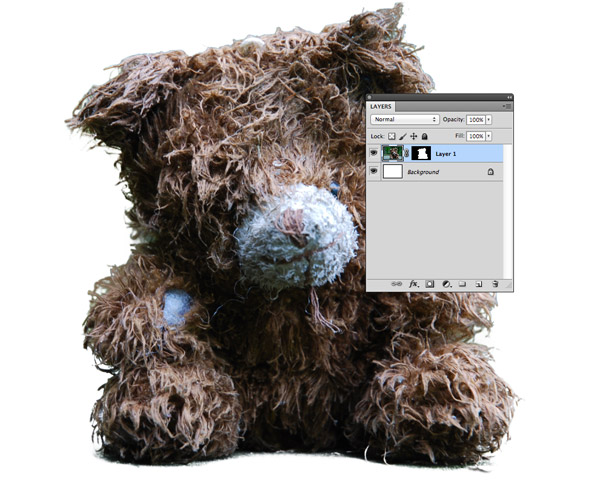
No matter what you’re working on, you can be sure that almost every project will require an image to be removed from its background! Sometimes it’s a breeze when professionally lit studio shots are provided, but it can get a little tricky when detailed backgrounds come into play. In today’s post I give an overview of a range of cutting out techniques that I’ve learned over the years and offer advice on when each method is best used.
Quick & Dirty Selections
Sometimes you just need to quickly remove something from its background with no questions asked. If the final result doesn’t have to be pixel perfect there’s a range of Photoshop tools that offer you quick and easy clipping solutions.
Eraser tool
So, you want to remove the background from an image. Just rub it out with the Eraser tool, right? The basic idea isn’t bad, but there are much better techniques that don’t ruin your document with destructive editing, as we’ll see later with Layer Masks .
How to use the Eraser tool
Select your Eraser brush and fine tune the softness and edge settings. You can then paint away the background, being particularly careful around the edge of your subject.
When to use the Eraser tool
The softness of the brush can really help create smooth results, especially with the use of a Wacom tablet to speed up the process and provide greater control. However, the destructive nature of the Eraser means you’re screwed if you make a mistake, so use a Layer Mask instead.
Magic Wand tool
The Magic Wand was probably the first tool we all discovered as Photoshop newbies, but as you level up in experience you soon realise its capabilities don’t stretch very far. However, the Magic Wand is a great little tool for cutting out simple images where there’s clear definition between edges.
How to use the Magic Wand tool
Click the portion of the picture you want to select and Photoshop does all the work for you. You can even play with the Tolerance setting to fine tune the selection, but the default value will probably be just fine.
When to use the Magic Wand tool
The Magic Wand is great for selecting areas of an image with hard edges, solid colours and high contrast.
Quick Selection tool
The Quick Selection tool is a step up from the Magic Wand. Rather than let Photoshop make all the decisions, with this tool you paint over the exact area you want masking and Photoshop will apply a mask based on your instructions. It’s much easier than the trial & error of the Magic Wand Tool’s tolerance setting.
How to use the Quick Selection tool
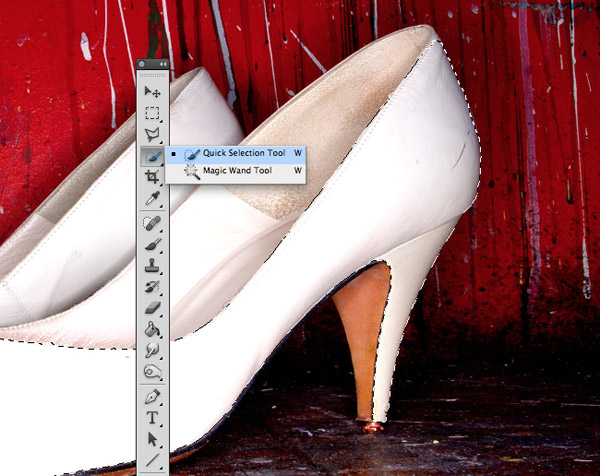
Found in the same tool category as the Magic Wand, the Quick Selection tool uses a brushing method to draw a selection. Photoshop will calculate the area of this selection based on edges it finds nearby. Adjust the brush size with the [ & ] bracket keys for finer control. You can also remove areas from the selection by painting while holding the ALT key.
When to use the Quick Selection tool
When you need more control than the Magic Wand, but you’re still not worried about a high quality final result, the Quick Selection brush is the tool for the job!
Manual Selections
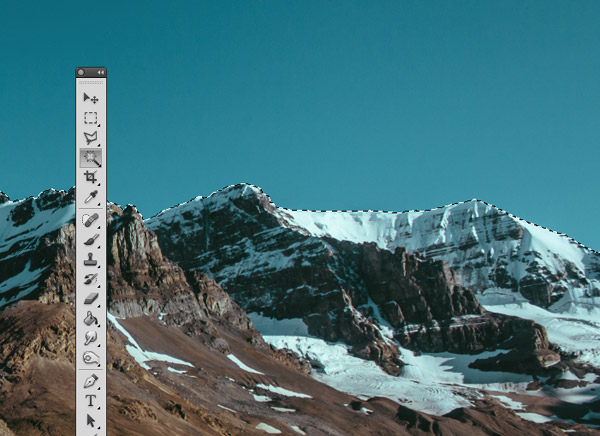
It might be tedious, but the best clipping results often come from manually drawing a selection around your subject. Graphic Designers soon become masters of the Pen tool with the daily use this tool sees.
Polygonal Lasso tool
The Lasso tool is another somewhat newbie tool that beginners rely on, until they graduate to the Pen tool. The Lasso tool is great for quick selections, but its series of straight edges and the frustration of accidentally double-clicking and closing the selection too soon can make this tool a nightmare when used for more advanced selections.
How to use the Lasso tool
The Lasso tool comes in a range of variants, including Freehand, Polygonal and Magnetic options. The Polygonal Lasso is the most commonly used. Just trace your image with a series of clicks, then either close the selection back at the starting point or double click to instantly close the selection with a straight edge. Hold the Shift key to constrain the angles to 45° and 90° for perfectly square selections.
When to use the Lasso tool
The Lasso tool, particularly its Polygonal variant is an effective ‘cut & paste’ tool where you just want to snip out a rough outline around a subject. For anything more detailed, you’re really missing out if you don’t use the Pen tool.
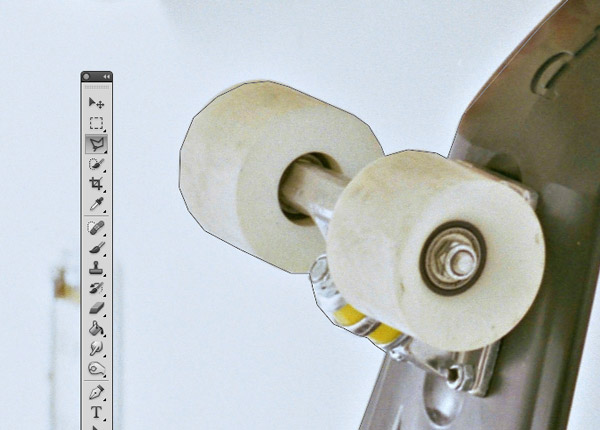
Pen tool
The Pen tool has so many more benefits over the Lasso tool. For starters you can create curved outlines, which is useful for those of us who live outside the Minecraft world. The Pen tool also creates paths that can be edited and saved for future use, which are valuable features when working on real-world projects.
How to use the Pen tool

The basic mechanics of the Pen tool’s Bezier curves could take an entire post to explain, but once you’ve mastered this tool it becomes you new best friend. Trace your image, making an accurate path within a few pixels inside the edge of your subject to avoid capturing any slithers of background in your cut out, then close the path back at the starting point.
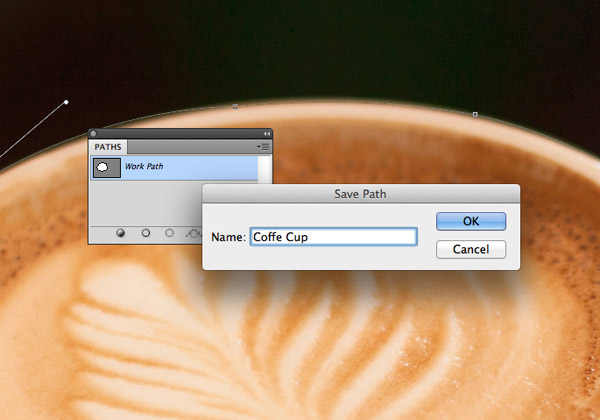
This path can be tweaked using the Direct Selection Tool, or you can save it by giving it a new name under the Paths panel.
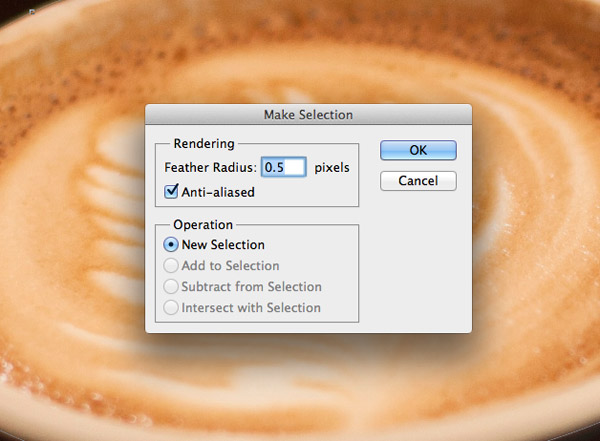
Your path can be converted into a selection at any time. You can even add feathering to eliminate any harsh edges.
When to use the Pen tool
The Pen tool is the Swiss Army Knife of Photoshop tools. There’s not many situations where this thing can’t be used, but there might be other techniques that are faster, especially when trying to tackle complex stuff like hair, fur or fine details.
Tonal Selections
Tonal selections is the name I’m using for techniques that use the overall contrast and colour of an image to make a selection. These methods are great for ultra detailed images where it’s just not feasible to draw a selection manually.
Channels
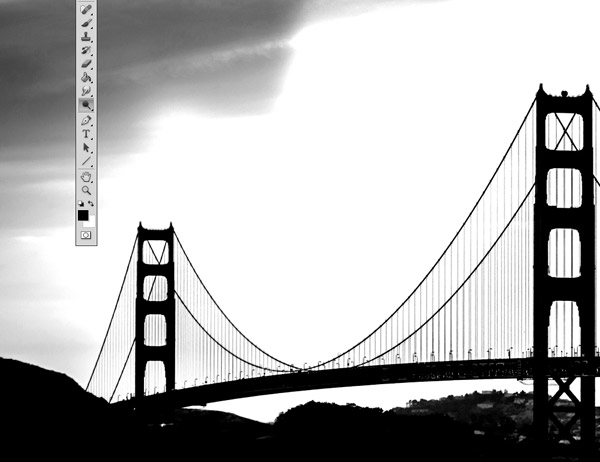
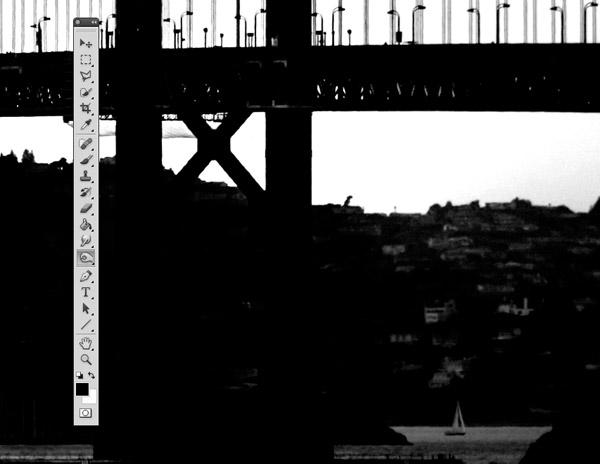
Every image is made up of a Red, Green & Blue channel that each contains a different tonal version of the picture. Channels have the ability to create the most perfect selections from ultra fine details such as hair or fur, but they don’t work well with detailed backgrounds or where there’s a lack of contrast.
How to use the Channels

View the Red, Green & Blue channels individually to find the one with the highest contrast between the areas you want, and the areas you don’t. Drag it over the ‘new icon’ to make a duplicate.
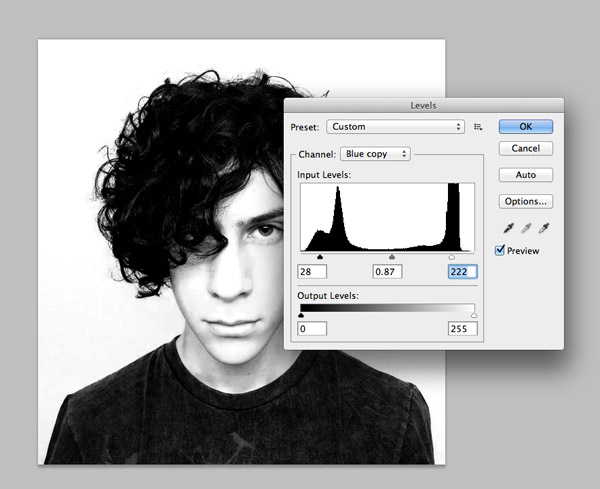
You can increase the contrast further by adjusting the Levels or Curves to darken the blacks and lighten the whites.
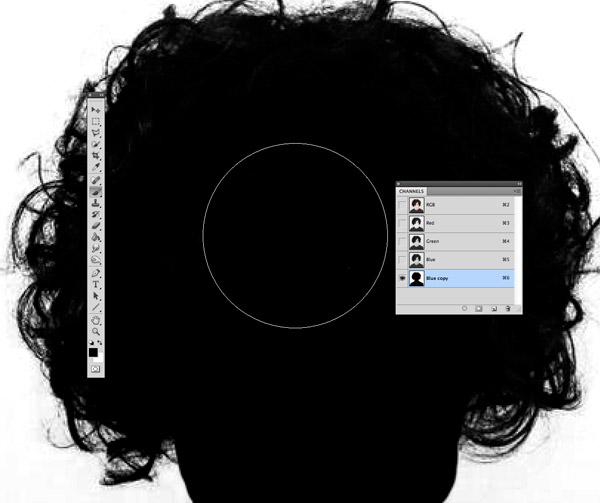
Once you have achieved good contrast between the fine details of your image, you’ll also need to fill in any remaining areas of your desired selection manually with a black brush.
Load the selection of your Channel by CMD/(CTRL)+Clicking on the thumbnail from the Channels panel.
When to use the Channels
Whenever you have an image with clear contrast between your subject and the background the Channels will provide the best and cleanest selection. They’re especially great when selecting hair or fur, but only if the background is clean.
Color Range
Color Range from the Select menu is a handy tool that can be used to make quick selections based on the tones of an image. It’s particularly useful to select highlights or shadows, or if you need to select areas of a specific colour from your image.
How to use Color Range
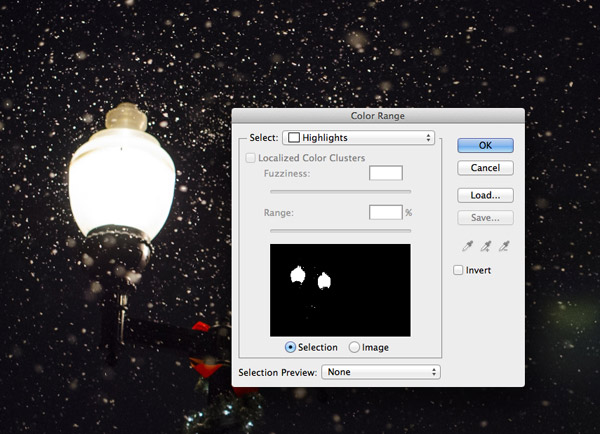
Go to Select > Color Range to open the Color Range options. You can now choose from Sampled Color (your current foreground colour selection), or pick from Highlights, Midtones or Shadows if you only need to select bright or dark areas of an image.
When to use Color Range
The Color Range selector is most effective at quickly selecting the white background from a staged shot, which can then be inverted to capture the outline of the product.
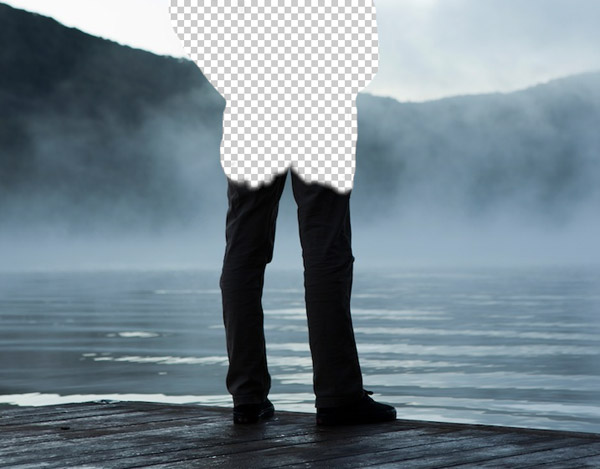
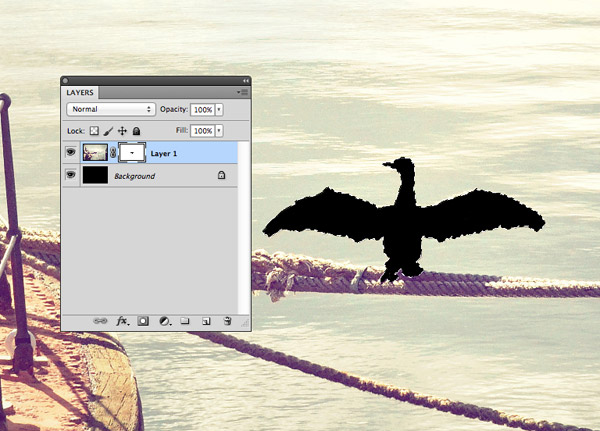
Mask Selections
Masks are the ultimate non-destructive editing tools. Rather than permanently erasing your image, they hide the unwanted portions just in case you want to edit the selection later. Draw your masks manually, or use them with any of the previously mentioned selection techniques to temporarily delete portions of your images.
Layer Masks
Layer Masks are applied to a single layer by selecting the Add Layer Mask icon at the bottom of the Layers panel. Whatever areas of the mask are black are the portions of that layer that are hidden.
How to use Layer Masks
We talked about Layer Masks being a better alternative to the Eraser tool earlier. To use this technique with a mask, you would use the brush tool in place of the Eraser and paint those unwanted areas away with a black brush. The key difference is if you make a mistake, you can rectify it by painting back over the area in white.
When to use Layer Masks
Layer Masks are best used when combined with another selection technique to ensure your edits are non-destructive.
Clipping Masks
Clipping Masks are similar to Layer Masks, except that can be applied to multiple layers. They still work on the same principle of black areas are hidden; white areas are visible.
How to use Clipping Masks
ALT+Click between two layers in the Layers panel, or right click on your chosen layer and select Make Clipping Mask from the menu. Remember to place the clipping mask under your main image in the layer stack.
When to use Clipping Masks
Clipping Masks are especially handy when used with tonal selections. Fill a monotone channel or color range selection with black on a new layer than apply this layer as a Clipping Mask.
Pro Tips!
Now you have a full arsenal of selection techniques you’re ready to tackle any kind of image your projects throw at you, but I have a few more selection tips that can really help achieve the perfect result.
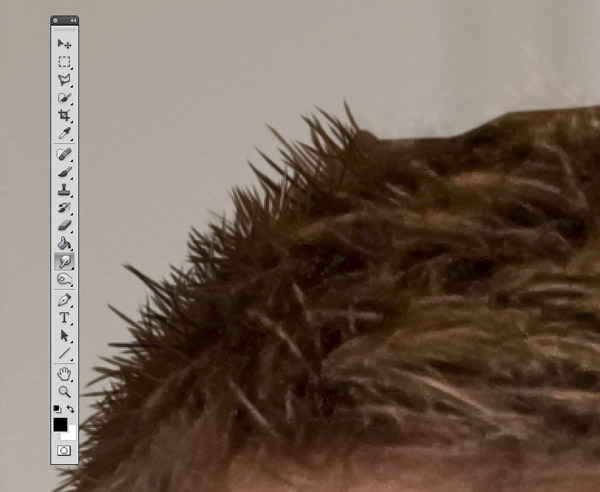
Use the Refine Edge tool to cut out hair & fur
The Channels technique is perfect for cutting out model shots against perfect studio backgrounds, but for every other scenario the Refine Edge tool is your best option. This tool should really be named “The Hair Tool” as that’s really all I’ve seen it used for. It takes your basic Magic Wand / Pen / Lasso selection and expands it to intelligently capture those fine details.
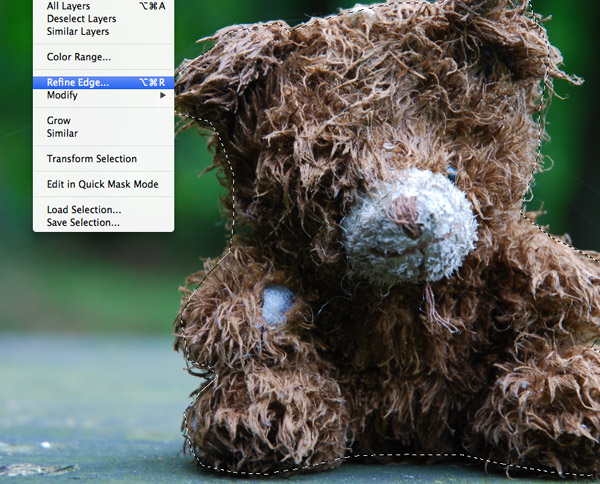
Trace a path around the subject, but just roughly outline any areas of hair or fur, not worrying about fine strands.
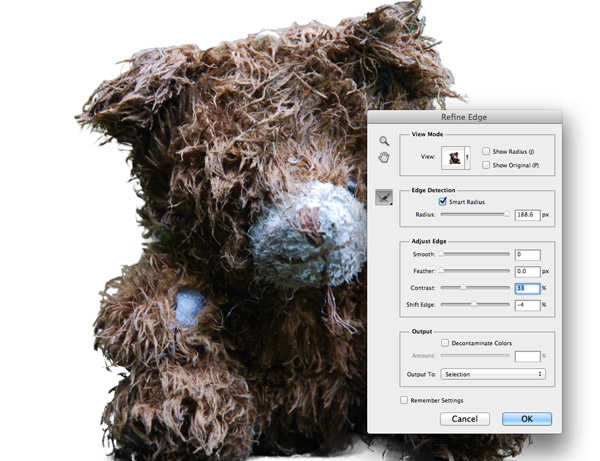
Go to Select > Refine Edge and increase the Radius value to see the hair magically appear in the selection.
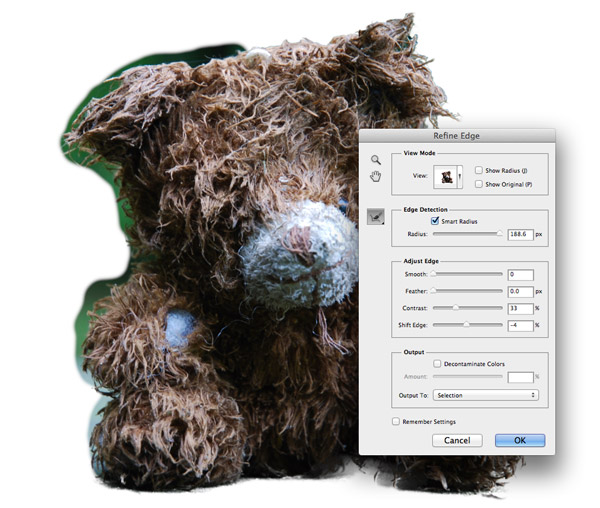
Expand the brush options and paint over the areas of hair you want to keep with the Refine Radius tool. Switch over to the Erase Refinements tool and paint around any areas where this refine edge adjustment isn’t required.
The final selection will hopefully make a good hair selection even against the most detailed of backgrounds, as long as there’s enough contrast.
Defringe to eliminate outlines and halos
Sometimes when you paste your cut out onto a darker background, you’ll notice it has a very fine light outline or halo. There’s a super easy way to eliminate this using the Defringe option.
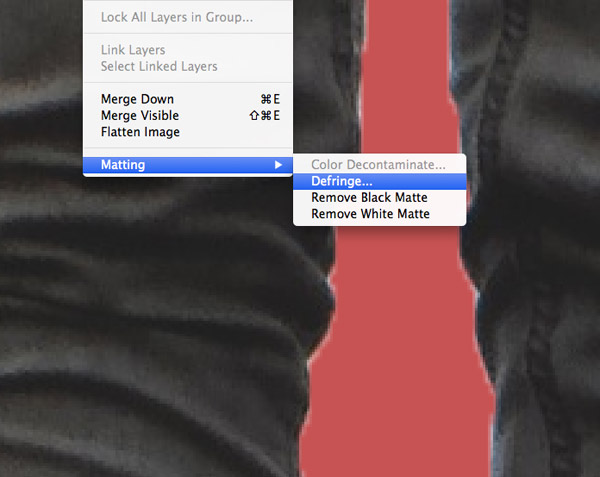
Go to Layer > Matting > Defringe and enter 1px in the options. With just one click of a button that ugly outline will be gone. Be careful through, this can ruin your cutouts with extremely fine details.
Dodge & Burn the image to adjust the contrast
The tonal selection method that uses the Channels can generate perfect selections if the contrast and tone of the image is right. Levels and Curves adjust the whole image, but you can fine tune specific areas with the Dodge & Burn tools.
Use the Dodge tool to brighten areas of the background such as the sky. A blue sky will appear mid-grey in a channels selection, but you can brighten it up to add more contrast between it and your main subject.
The Burn tool can help darken areas within a selection that might be too delicate to paint with a pure black brush. Change the mode to Shadows, Midtones or Highlights to safely target the right area.
Paint the hair back in!
Sometimes it’s just impossible to make a clean selection of a person’s hair from an extremely busy background. In those situations there’s one final tip that can save the day – Paint them some new hair!

Make a rough selection around the subject’s hair line and paste the cut out on a new layer. Reduce the opacity of the original image below it in the Layers panel.
Use the Smudge tool with a fine brush to paint back in the individual hairs. Begin with a 3-4px soft brush to flesh out the thick base, then incrementally reduce the brush to paint in finer stray hairs. This sounds like an extremely tedious process, but it doesn’t take too long, especially if you have a Wacom Graphics tablet.
Buy a Photoshop plugin
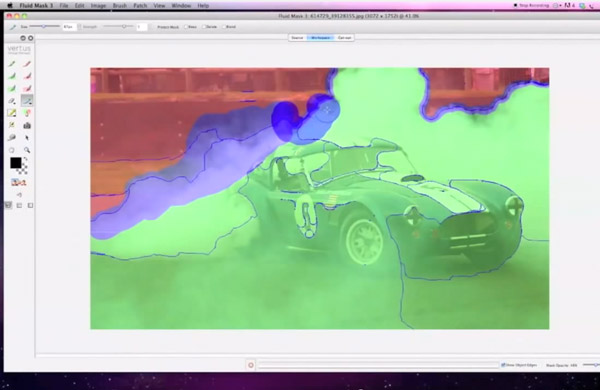
I don’t have much experience with Photoshop plugins so I can’t make any personal recommendations, but I know there’s a range of selection based plugins out there for Photoshop. Fluid Mask is a popular choice that has features designed specifically for selecting complex hair, trees, glass and translucent fabrics. If you find yourself spending countless hours cutting out images, you might find a little extra help from a plugin can speed up your workflow and improve your results.

Very nice and complete article, thanks !! Didn’t know the last tip with the Smudge tool :)
Ah! “defringe”! I never knew about this, I always ended up making a ctrl selection on the cutout layer, then used the offset>contract, then inverse, then delete, but this always made the selection look very stark. Brilliant time-saver, thank you :)
What a great roundup of all the tools.
I also use the refine edge command with the magic wand when I have an original image which is rough/jagged and I want to smooth it out somewhat. This works best – as stated here – when the image has a high contrast.
Another great well written informative article :)
An addition to the “dodge & burn” concept to create enough contrast for the more automated selection tools to work:
When doing a job like this, for starters I create two layer copies. This totals three layers of the subject. Now I change the top most layer’s blending mode to “multiply”. If this brings out the needed edges — perfect. If not, I use “screen”. However, one way or the other I just duplicate (Cmd+J) the topmost layer until the edges look good enough for the job at hand. Once I’m there, creating a composite (Alt-Shift-Cmd + E) and using the Magic Wand tool, then going to the original (with the ants still traveling) and creating a layer mask. Voilá.
If it’s a tough subject (like bottles) you may try this technique twice, “multiply” first, creating the layer mask, then deleting all the layers above #3 and using “screen” as the blend mode. This way you’ll get a selection of the bright areas and it’s up to you how you merge that with the existing layer mask on layer #1.
In any case I found the “black and white” filter especially helpful – you can get very well defined edges by getting rid of the colors using the color slider this filter provides.
I invented this techniques a while ago when I had some 80 wine bottles which needed to be put on white. Using the stacking of filtered layers properly, I could even get a usable edge between the reflections on the bottle and the slightly gray background.
Oh, and for those who can’t figure this out themselves: once you’ve created a nice layer mask, you should delete all the “working layers” above the original layer. Fine tuning the layer mask with any tool you think fits is a piece of pie — I find myself using the brush with appropriate hardness on the layer mask gives me the fastest results.
Heck, in the time it took to write this I could have cleaned up a bunch of images — it’s way faster to use than to read (let alone write :)
Hope this helps.
thanks for that, its really helpful. Anymore magic tips for enhancing pictures. I know the usual but there must be a fabulous one out there somewhere.
Thanks for the tip Norbert! I have to admit it puzzled me a little just reading your comment, but it worked pretty well when I followed your steps in PS, especially for items like the wine bottles you mentioned.
I do this! I figured it out about the same way you did. I had to extract some really light images. I darkened them with multiple layers and multiply until I got a good contrast and made a composite and added a mask, but, then I move the mask to my original. I like this technique! Thank you for posting it!
Su
How can I achieve the same result as the “matting” option with CS3?
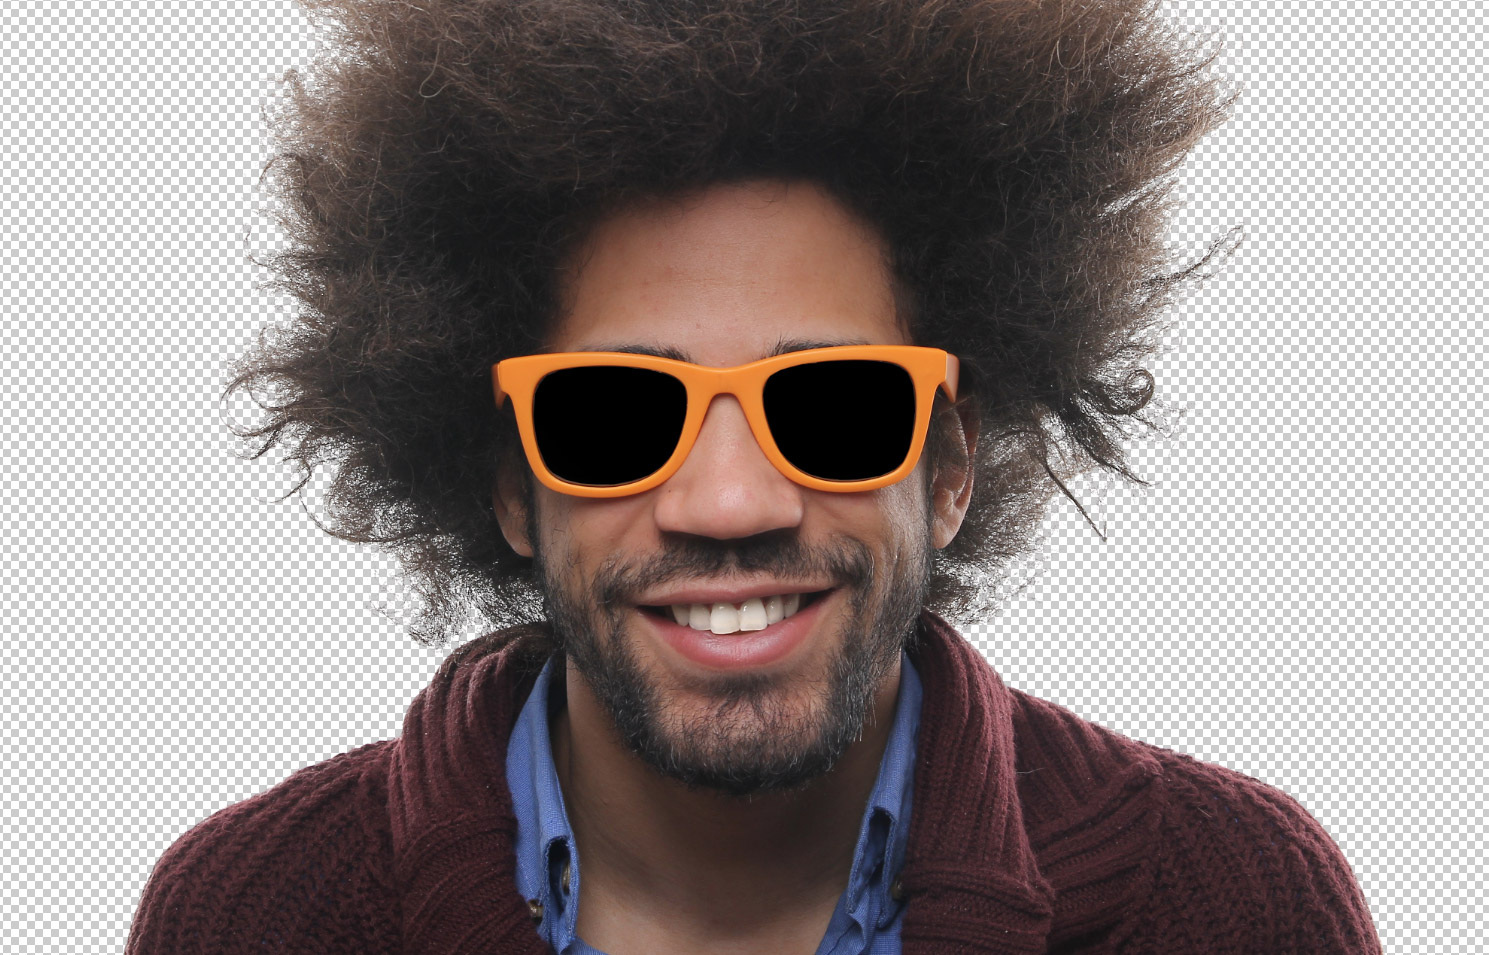
I really appreciate you sharing your knowledge to me in layman’s terms. But I saw at the top how you erased the font, can you tell me how you did that?
That effect was pretty simple, just CMD+Click the layer thumbnail of the text and fill that selection on a layer mask on the image layer.
Remember to then turn off the visibility of the original text and background layers.
This was a greate idea spread
I really enjoyed learning this
As a self taught- slow learning noob I really appreciate the tips and tricks. I have literally spent hours at the pixel level with the eraser removing things. I have learned some better ways since then, but this post has opened up new doors for me. Thanks
“Use the Smudge tool with a fine brush to paint back in the individual hairs.”
You nailed this one, Chris.
This, and Channel, or ‘Tonal’ selections, have been my method of choice for rendering fly-away and individual hairs (the smudge tool works especially well for super-realistic animal hair and fur).
My last resort for hair is to actually “draw” it back in with a one or two pixel brush with various Flow and Opacity settings.
I’ll start by drawing single hairs on their own layer. Once I get a couple of dozen good ones, I’ll combine them to a single layer and apply Transparency and Layer Effects to help bring out subtle differences against the real hair in these newly drawn “clumps” of hair.
Sounds a bit tedious, but once you get going, it moves surprisingly fast. This is really where the Wacom earns its keep. I cannot imagine using this technique without it.
It’s also a great opportunity to give them a hair cut while you’re at it :-)
As a former haircutter, that has often crossed my mind!
Amazing round up of tips and tricks for background removal Chris! These aren’t the first time they’ve graced your site in one form or another but always SO helpful for a refresher and update when you pull them together into one article! Awesome!
Nice trick for background removal.
Great list!
WOWW!!!!! SUPERB SIR.. REALLYY LIKE IT.. ALL BLOG ARE USEFULL…. REALLY LIKE IT…. ND I SHARE ALL BLOGPOST IN MY WORDPRESSBLOG…..
The tonal selection didn’t make sense to me :/ it was hard to follow, all the others were great though!! thanks
Doh! When using the Refine Edge tool, I didn’t know I was supposed to click on the image! I have been clicking ‘around’ what I want to keep. Doesn’t work! LOL Thanks for all of these, but, mostly for clarifying that!
Su
Wow! Thank you for such a detailed guide! I often had problems with cutting something from photos and pics, and if I easy can get rid of the background, the more tricky methods are totally new. Am now looking forward to try them all
Excellent round-up, thanks !
Great guide Chris. Thank you
I never knew about the defringe feature. It definitely would have come in handy in my past projects.
Wow! That’s pretty much 90% of Ps in a single post, nicely done Chris!
Hey, very nice. Thank you
Fantastic tutorial with brief description.
Cool….. thanks for the tips
I never knew about the defringe option.
This guide go directly in my bookmaks! Thank you!
Great blog, really needed a refresher on all that, thank you
Nice illustration with real time experience. Will be handy for the users.
Professional services like image masking are available in online . Thanks for the post.
image masking
I will be sharing this now when some asks me how to cut in Photoshop.