This post was originally published in 2007
The tips and techniques explained may be outdated.
Part one of the mini-series covered the creation of the Flying Bat Ghost, now we'll take a look at the Dumb Blue Sucker Monster! Again, using mostly the basic tools and shapes making the tutorial suitable for beginners to Illustrator.


Launch up Adobe Illustrator, select the Rounded Rectangle Tool and draw a shape as shown. Use the cursor keys to adjust the roundness of the corners to give almost circular ends.
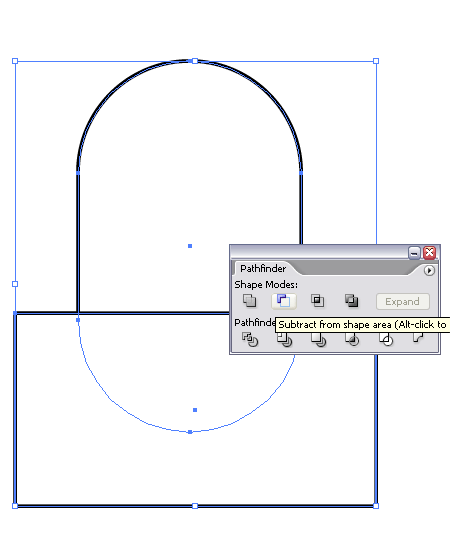
We don't need the bottom half, so create a rectangle to cover the area to chop off. Select both the shapes and use the Substract From Shape Area option from the Pathfinder Window and click Expand.
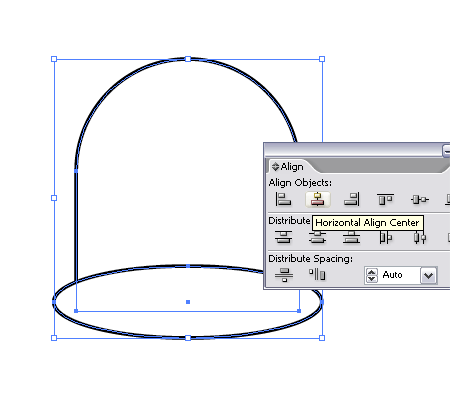
Use the Circle Tool to create an ellipse for use as the sucker part of the monster. Align these two shapes centrally.
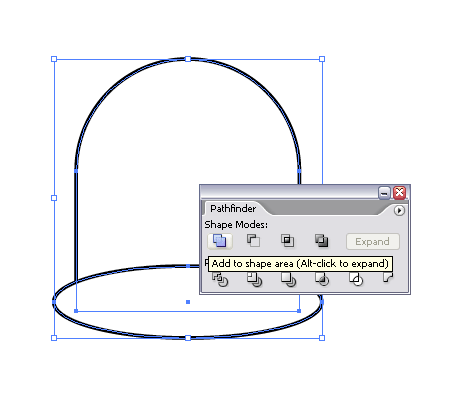
Use the Pathfinder Tool to Add To Shape Area, and Expand. This merges the objects together into a complete shape.
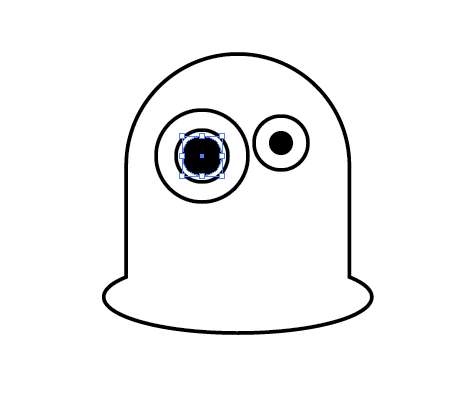
Continuing with the Circle Tool draw a large circle as an eye, copy and paste in front (CTRL + F) then scale down whilst holding shift and alt. Repeat this again and fill the final circle with black. Use the same process to create the second eye.
Remember this character is quite dumb so creating different sized eyes both wide open will express a brainless, vacant stare.
To further enhance his characteristics create a curved line for use as the mouth using either the Pen or Pencil tool; a wobbly shaped mouth expresses confusion which is perfect for this character. Add a thick red stroke to this line to simulate the lips, and add rounded edges by checking the Round Cap icon.
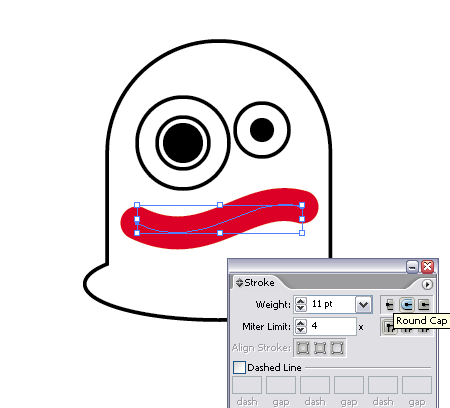
Copy and Paste this line but give a much thinner, black stroke to make the mouth opening.
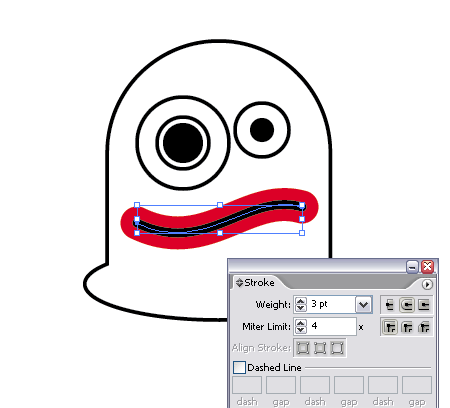
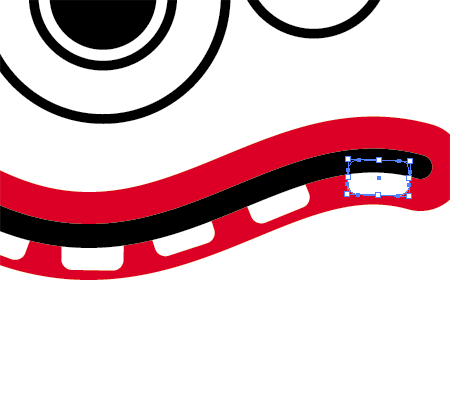
Create small tabs with the rounded rectangle for use as the teeth. Make duplicates of these and position them equally across the mouth, rotating each one slightly to follow the curvature of the line.� Use CTRL/CMD + [ and CTRL/CMD + ] to alter the order of the objects to make the black stroke the front most object, hiding the top half of the teeth underneath it.
Bring in some colour by adding a blue fill to the body shape. Copy and Paste this shape, but exchange the fill and stroke to a dark blue stroke aligned to the inside of the object.
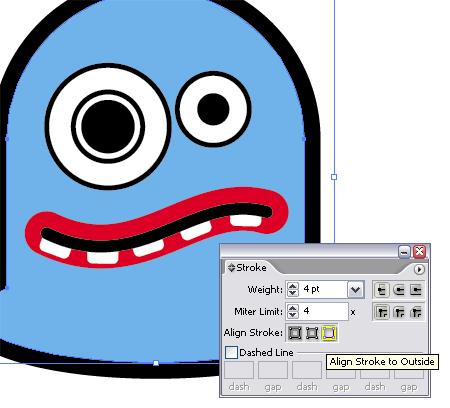
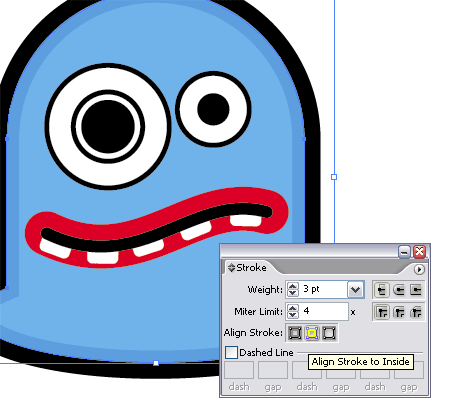
Thickening the strokes on the eyes gives more definition, enabling them to stand out.
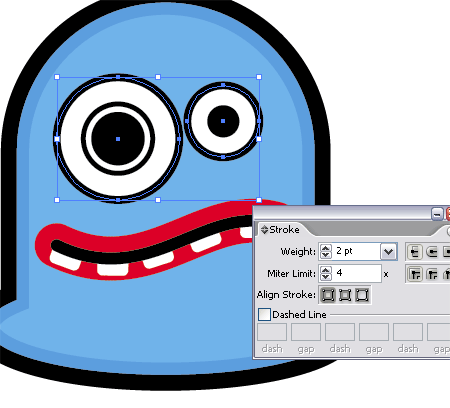
Copy and Paste Behind (CTRL + B) the eyes and add a dark blue stroke to the outside of the circles.
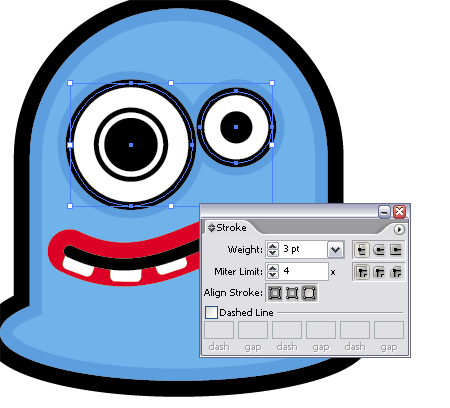
Repeat this process with the red mouth line, paste behind and change the stroke to a thick blue outline.
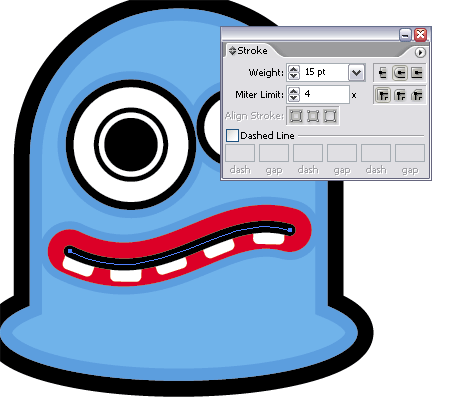
Give more definition to the sucker part of the monster by adding a subtle shadow. Draw a blue ellipse with the Circle Tool.

Create a slightly larger ellipse as a tool to remove an area of the underlying circle. Use the Substract From Shape Area tool and Expand to leave a thin crescent shape.
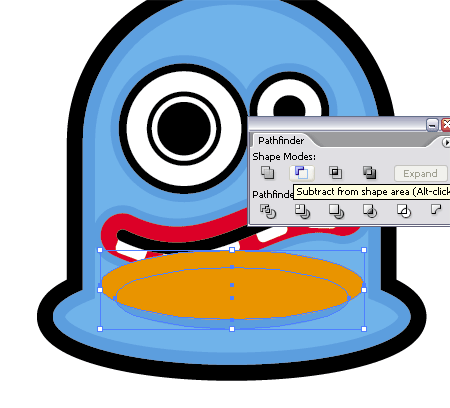
Finally add some small circular highlights in the monsters eyes to give a glazed appearance.


Subscribe or check back soon to put some of these techniques into practice, and learn a couple of new tricks on the next monster character!


Your site is really beautiful. My favorite design on the whole web!
Another great character! I love the ‘inner stroke’ on this and the bat, I think it really adds to it!
Just loving the simplicity of these characters. Fan-freaking-tastic.
I’m opting for Gastly Green Goo Goblin & Terrible Trumpet Troglodyte up next :)
Many thanks for the comments,
Nielsen, I have to say your names are much more creative than mine! I might have to re-think the names of the next two characters haha
I am loving this series of tutorials. This is my first step into using Illustrator and you make it so easy. Can’t wait for more in this series.
Does anyone know how I can turn this character into my account picture on a mac? I have saved and exported my creation in many formats / sizes but it always seems to look slightly rough and pixelated.
great keep em coming , really like everything you do, im learning a lot
Really cool tutorials!
Can’t wait for the next monster!
Great Monster Character series tutorials! You gotta love those teeth on the Dumb Blue Sucker Monster!
Thanks for the great tutorials! Great site, by the way.
Next one is coming soon, had to hold off a while this month with the bandwidth limit filling right up to the brim!
i really like it. perhaps it reflects badly on me that i find it resembles a condom…(?)
Great way to get started in Illustrator. Funny result and easy to follow. Thanks!
it is great!
this cartoon are nice, look like condom. kekekek :P
thanks! first time using illustrator – really clear, and fun! my monster looks happy, and so it should be. it looks good.
Oh I love this another perfect tutorial. I am so going to have a go at all these characters tonight. Have you been published in any magazines? I could see computer arts taking this tutorial up!
Was loving it til I realised it wasn’t compatable with Ai 10. There’s no align outside button so couldn’t do those steps. Ah well. Thanks! :)
i love these tutorials!
and how do you adjust the edges on the rounded rectangle tool? you said use the cursor arrows but they just move the whole thing….
How come I cannot find the pathfinder window? I found it in the Effect pull down menu, but it didn’t do anything for me… I want to do this tuts but I cant get passed that one stage! thank you
Hey i am having some trouble i can not do the part where you put the darker shade of blue behind the lighter blue or as i like to call it step #9. Please HELP!!!
If using CS2, change stroke color to darker blue, then copy and paste in back, double stroke width and make black.
i love these tutorials