This post was originally published in 2014
The tips and techniques explained may be outdated.
One of the most satisfying uses of Adobe Illustrator is to transform your rough pencil sketches into colourful illustrations. It’s great to see your concepts come to life with crisp linework and bold colours, but sometimes the result can be a little disappointing when the vector art just doesn’t have the punch you had hoped for. Follow this step by step process to discover some of the simple techniques I’ve learnt that really help give your illustrations that pro look.
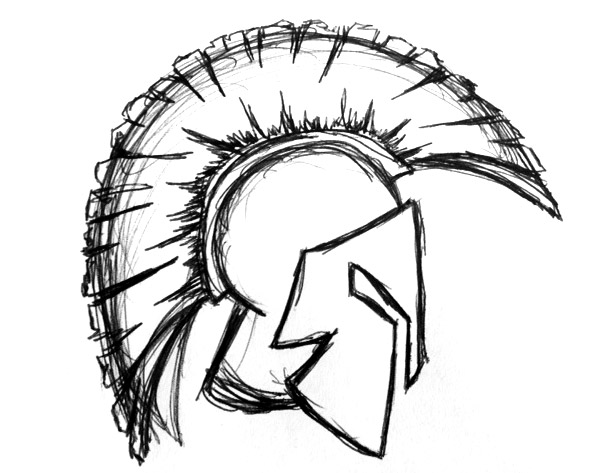
The artwork we’ll be using for this guide is a drawing of a Spartan helmet that I randomly decided to put on paper this morning. Starting with traditional mediums of pen and paper is really the best way to get an illustration started, it’s so much easier to flesh out your concepts with a free-flowing pencil than it is with a mouse controlled digital tool. Where Illustrator really takes over though is when we “ink” the sketch with crisp linework then bring it to life with colour and shading.
Tracing your sketch
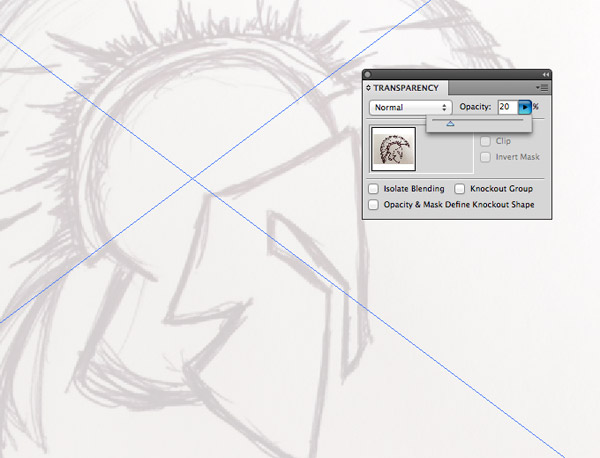
Open up Adobe Illustrator and go to File > Place to select your scanned sketch file. Reduce the Opacity of the sketch to around 20% then use the shortcut CMD+2 to lock it into place on the artboard so it can’t be accidentally selected.
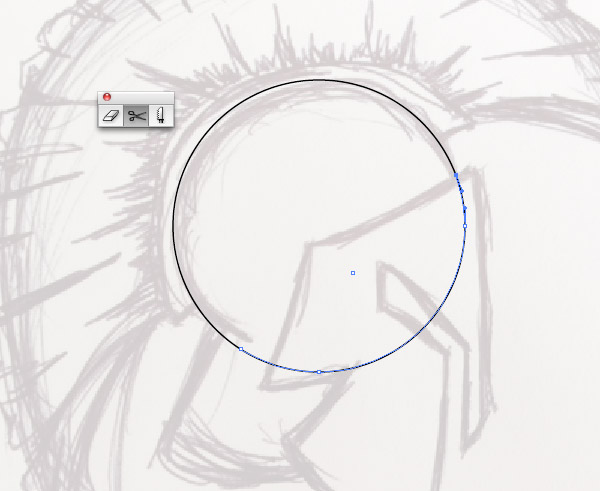
We’ll start the tracing process by making use of geometric shapes wherever we can. In the case of this Spartan sketch a circle will neaten up the outline of the helmet, but we don’t need the whole shape. Use the Scissors tool to clip and shape at the relevant points and delete the excess.
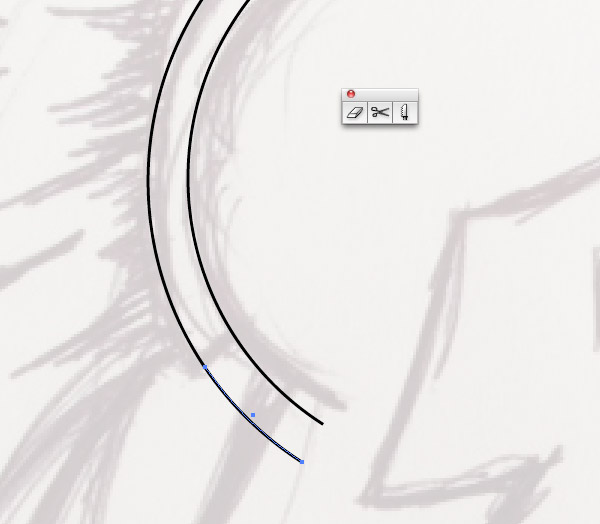
Copy (CMD+C) and Paste in Front (CMD+F) a duplicate of the circle then hold ALT and Shift while enlarging the shape slightly. Trim the edges where appropriate with the Scissors tool to roughly match the sketch.
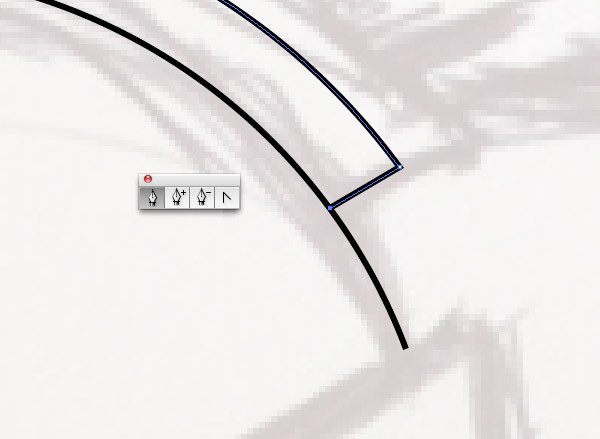
The Pen tool can then be used to continue the path. Click the open end point where you see the small line icon to identify that the path will be continued, then add an extra point to overlap the path with the other linework.
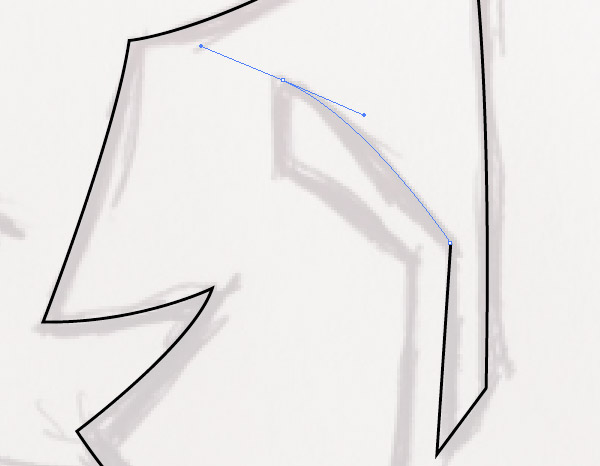
The Pen tool alone can be used to trace the other elements of the sketch. My preferred technique is to click and drag a curved path, then click the end point to Convert the anchor and remove the bezier handle before continuing the path. This allows you to add straight or curved lines without those pesky bezier handles sending your path wild!
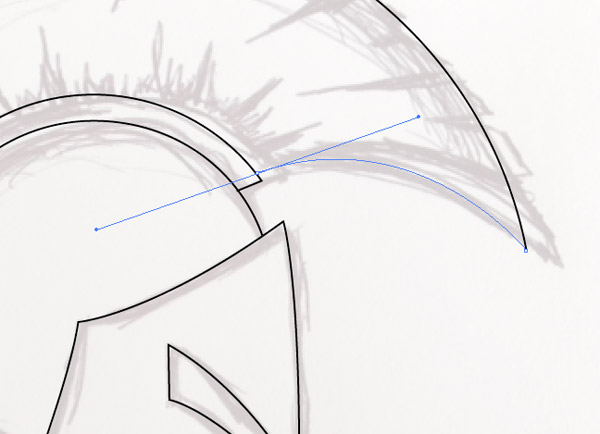
Continue tracing your rough sketch with lots of digital paths. Some paths will produce complete shapes, whereas some end points will simply need overlapping with existing lines.
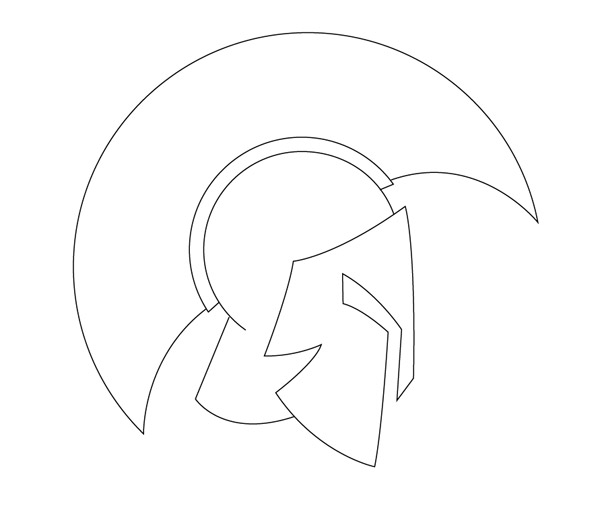
Press CMD+Alt+2 to Unlock the sketch images then move it to one side to see the isolated linework. It looks nice and clean compared to the rough sketch, but it’s a little boring!
Creating natural linework
The key to making digital illustrations look natural is to mimic the tiny variances in line weights as if the illustration had been inked with a traditional brush. There’s multiple ways of doing this, such as using vector brushes or manually drawing the areas of negative space, but the following techniques is my favourite.
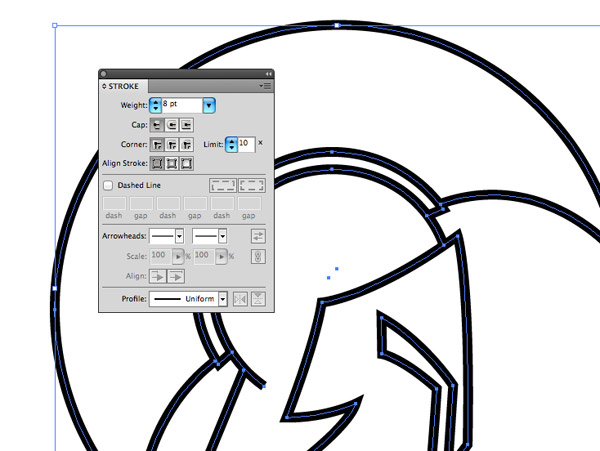
Select all the paths that make up the linework of your illustration and increase the stroke weight to beef up the size of the lines.
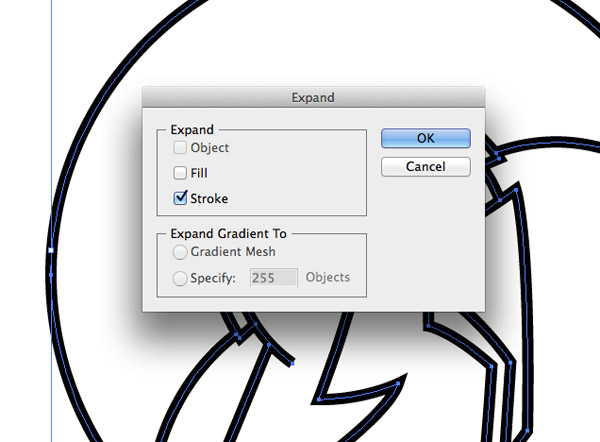
Next, go to Object > Expand and select just the Stroke option. Hit OK to convert all the strokes into solid shapes.
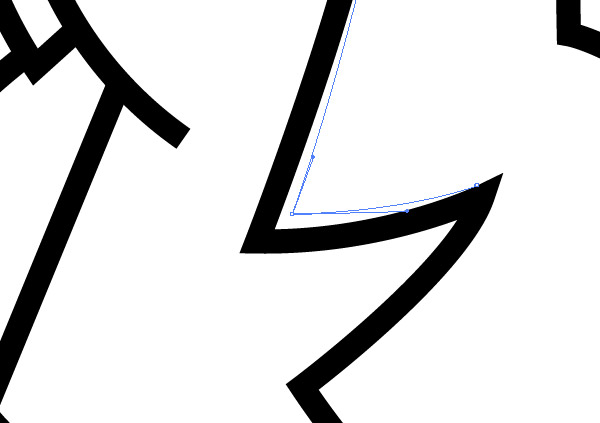
Grab the Direct Selection tool and begin subtly adjusting the points to alter the thickness of the lines in key places around the design to mimic the ‘thick-to-thin’ characteristic of a brush stroke.
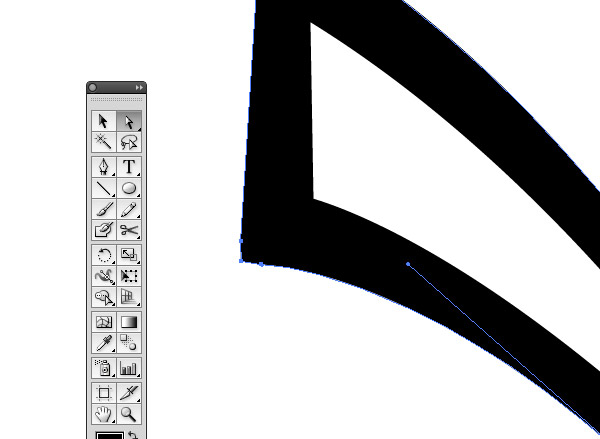
Sometimes the Expanding process will create areas of multiple points. Make sure you select all the points of a corner to make sure the path continues to flow smoothly.

Just this simple technique alone can really transform a vector illustration. It gives the linework much more dynamism compared to the uniform line width.
Colouring your illustration
There’s also multiple ways to colour in your artwork. The Live Paint tool is a good option, but this following technique gives you a little more flexibility and keeps your linework separate from your colouring.
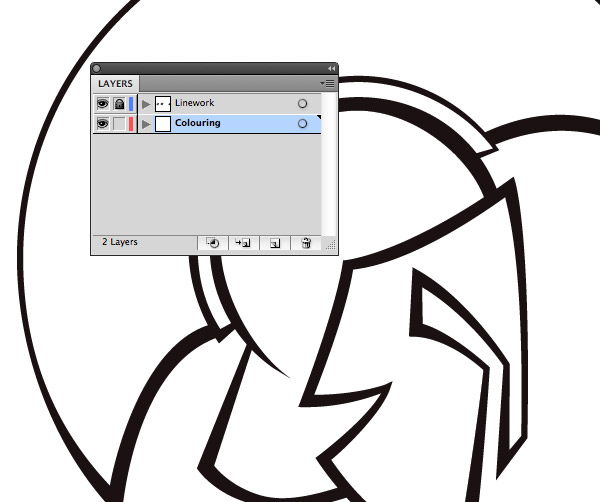
Create a new layer underneath your original Linework layer then click the little Lock icon to avoid selecting linework elements.
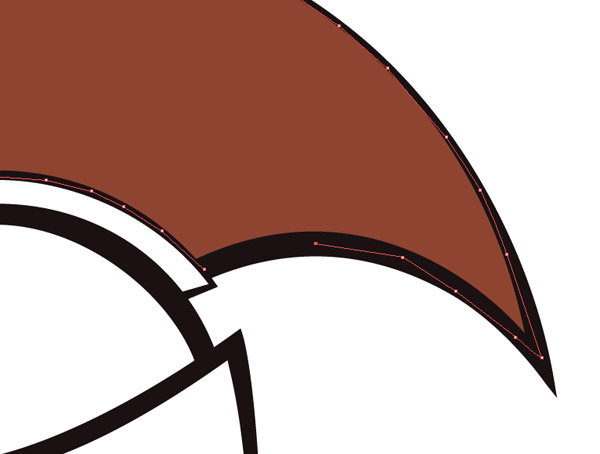
Grab a colour of your choice from the swatches palette and begin tracing the area it needs applying to using the Pen tool. These lines can be really rough as they are hidden by the black outlines on the layer above, just make sure you stay within the black area.
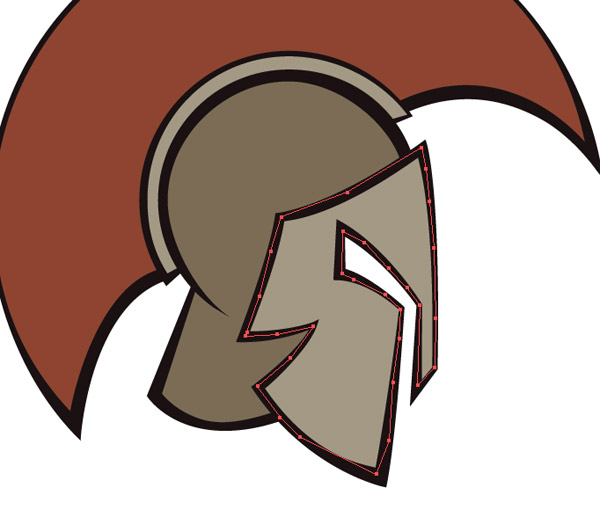
Trace all the individual segments of the illustration and apply a relevant colour fill. It’s sometimes easier switch the fill and stroke while tracing so you can see where you’re going. The illustration is now in colour but it still looks a bit flat and boring…
Shading your illustration
Simple shading is what really brings a vector illustration to life. Even if you’ve forgotten those important rules from art class, just adding a few random highlights and shadows can transform your artwork.
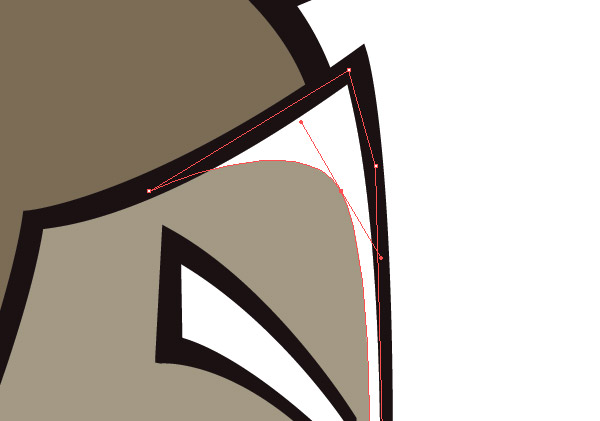
Let’s begin with some highlights. Grab the Pen tool and select a white fill colour. Begin roughly tracing an area of the illustration where a highlight will be applied, but cross over the artwork with a nice smooth line to complete the highlight shape.
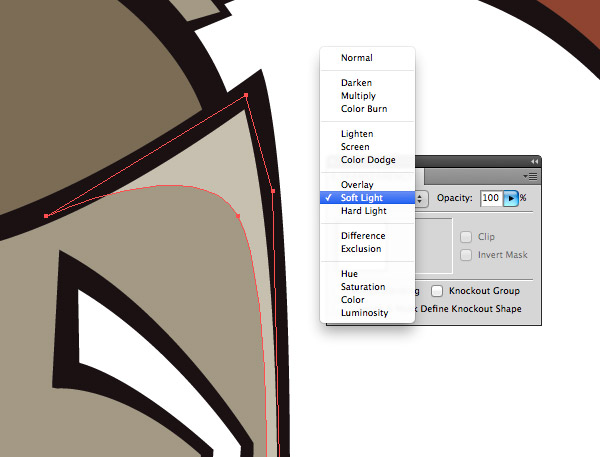
Change the blending mode of this highlight shape to Soft Light to allow the white fill to subtly brighten the underlying colour.
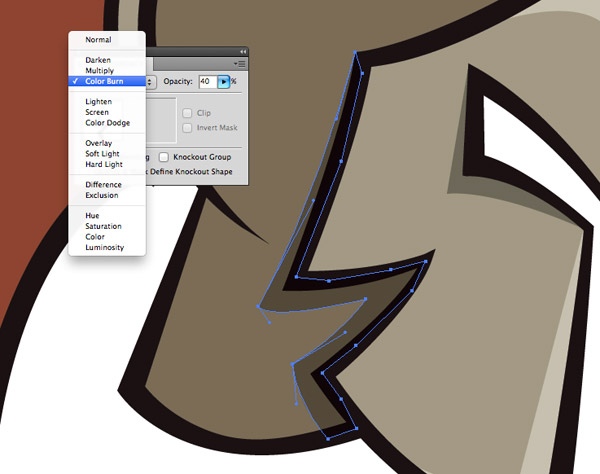
Begin drawing some shadows in opposite areas to the highlights, but this time use a black fill colour and change the Transparency settings to Color Burn at 40%.
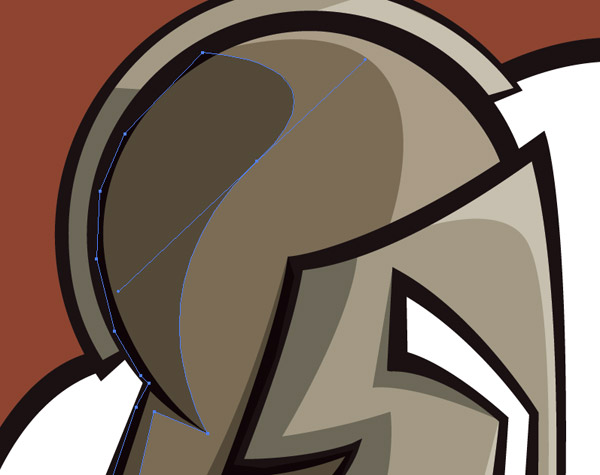
The great thing about this Screen/Color Burn technique is those same white and black shapes will automatically create darker and lighter tones of the underlying colour no matter where they’re applied on the illustration.
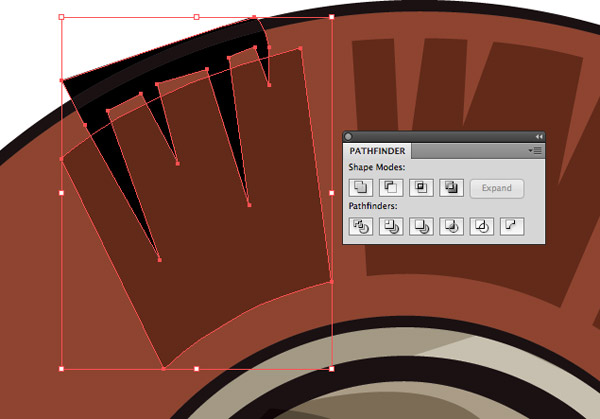
This Spartan helmet illustration was then finished off with some simple shapes to add some basic detail to the plume. In this case the Pathfinder tool was used to punch out some shapes from rough blocks of colour.
The finished illustration
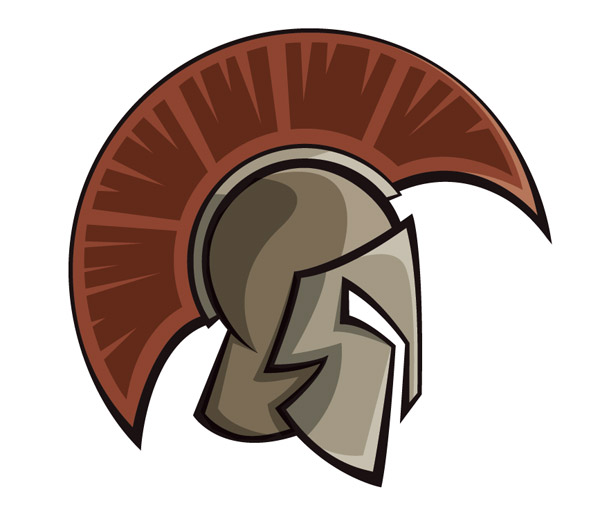
All these techniques combined really bring the initial pencil sketch to life. The key features to remember are the variations in line weight and the simple shading. Without these additions the illustration looks flat and lifeless.

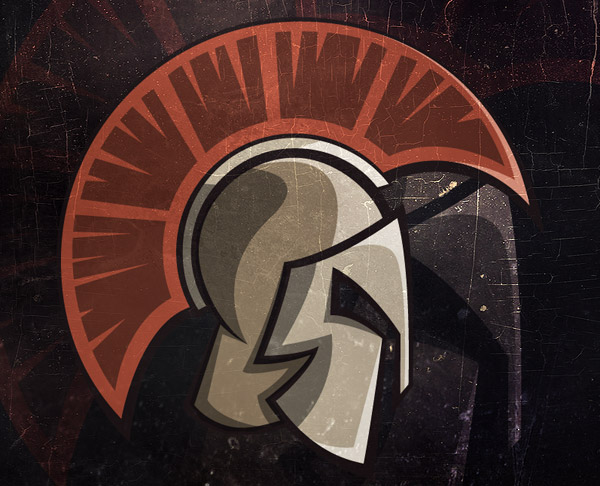
Switch over to Photoshop and throw in a texture overlay to really spice things up!


Great article, i miss doing these types of illustrations but i’m inspired to do some more, they give a great ‘cartoony’ feel. Thanks Chris!
Excellent, you really made my day, I’m teaching Illustrator techniques to young comics students and your whole lesson can be used as a complete approach of drawing in this software…
Your tutorials are always so clear Chris. Bite sized and superb, thank you.
Genny
Thank you! That’s all.
I’ve always been afraid of adding shadow and highlight to my vector illustrations and yes I’ve forgotten everything from art class, but this gives me the impetus to revisit these important techniques. Thanks for sharing; this is sure to improve my work!!!
This is really useful for adding hightlights and shadows to any illustration without picking colors. Thank you!
THANK YOU! I am trying to teach myself Illustrator and your tutorials are wonderful. Thank you so much!
Awesome! I am supposed to do sumn like dis. Thanks for adding to my resources Chris. Keep up the good work
Awesome tut Chris, can I ask what you use to draw your initial sketches?
Merci beaucoup.
Wow, I was over for a while, and then today find this wonderful tutorial. Thank you, I’ll try it with some sketches of my boyfriend. This will be fun!!!
Thanks for doing a tutorial. I don’t have illustrator, but gives me ideas for other ways to use my Photoshop. Very generous on your sharing. Have a great Tuesday. :)
Great tutorial/artwork, thanks for putting it together and sharing! I’m really trying to find a good analog-to-digital workflow and found this tutorial so clutch.
For users with drawing tablets, I find that the Pencil tool can also be useful during the “thick-to-thin” portion of the tutorial. Of course, you might want to adjust the sensitivity to avoid getting overly curvy results.
Awesome tutorial, thanks for sharing it with us
wow i love the images with the advice, thank you for sharing this with us
Great tutorial once again. Thank you for sharing.
nice one, post and very eye catching and attractively designed
Obrigado Chris seus tutoriais são realmente muito bons e inspiradores!
Vlw…
Awesome Man !!! You are really creative !!!
Awesome Artwork Dude !!
Great master class of illustration. I was delighted to see the process. Thank you.
Nice tut, I always found it difficult to add shadows to my illustration, but some time i will have to add shadows so, your tut is nice but please could you explain how did you draw the initial sketch?
Very nice tutorial! Thanks for helping us
Very detailed, thank you!!!
This Tutorial is a new inspiration for many people. Thank you for sharing with us.
i have some problems in tracing, like logos etc, but in this tutorial i learned too much about tracing. thanks dear for this kind of amazing tutorial.
I love the illustration techniques which you used in this tutorial. I will try to use this tut for making vector art. Thanks for sharing such a lovely artistic tutorial here.
Wow ! you created a nice tutorial and I will share it with my artist friends. You always create informative tutorial. Thanks for posting.
You shared a useful article about vector conversion. I have recently learnt designing and following your tutorials.
Keep rocking and thanks for sharing such a informative tips.
Awesome tutorial from you. You are creating very nice tutorials about designing techniques. Thanks for sharing useful articles.
Tnkss from Brasil!!
Wonderful….article.!!!
Man you are the master of designing. I learn a lot of things online here that is really very hard to find anywhere online. I really appreciate to teach us like this and to share your wonderful experience with us.
Really thank for these great tips. I start on this field two month ago, it will help me :)
How many time do you take to build this logo with photoshop?
I usue Adobe illustrator for my logo : http://insetup.com and I’m surprised with these advanced tips and tricks that we could made with this tool. Really thank for the tips.
Katty
Very Informational! Thank you very much!