
This post was originally published in 2011
The tips and techniques explained may be outdated.
Follow this step by step Illustrator tutorial to create a vibrant abstract design. We’ll put Illustrator’s Gradient Mesh tool to use to create a colourful shape, then build up layers of objects to create an abstract design with lots of vibrancy, bright colours and transparency effects.

The design we’ll be creating features a range of vibrant and colourful shapes which stack to produce an abstract array of bright and electrifying colours. The design is entirely made of vector elements so it can be scaled to any size you wish, whether it’s an iPhone wallpaper or super sized poster.
View the full size abstract vector design

Open up Adobe Illustrator and create a new document in RGB mode. Place a black rectangle across the artboard as a background then set up the Pencil tool with a moderate smoothness setting. Draw a random shape with your mouse or pen tablet with an aim to keep the outline nice and smooth. Correct any lines by re-drawing while the shape is still selected.
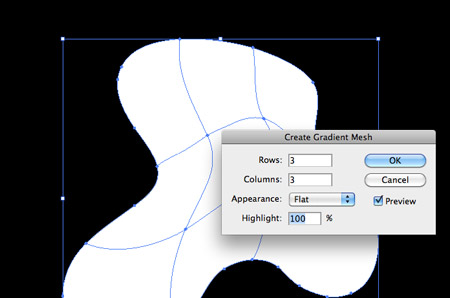
Go to Object > Create Gradient Mesh and give the shape 3 rows and columns. The gradient mesh adds extra points in the centre of the shape which we’ll use to give the shape the various colours.
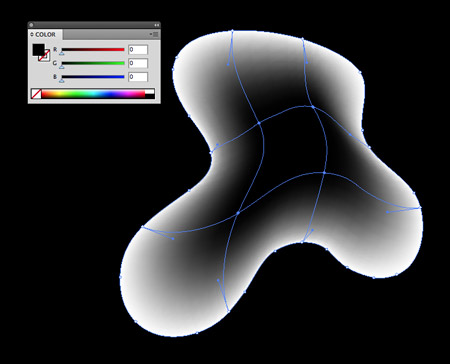
Use the Direct Selection tool to select the four inner points and give them all a black fill.
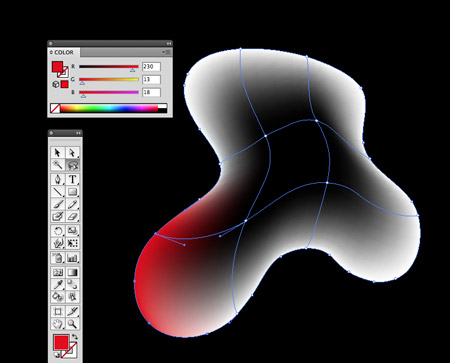
Use the Lasso tool to draw a looping selection around a collection of points in the lower left then give these points a bright red fill.
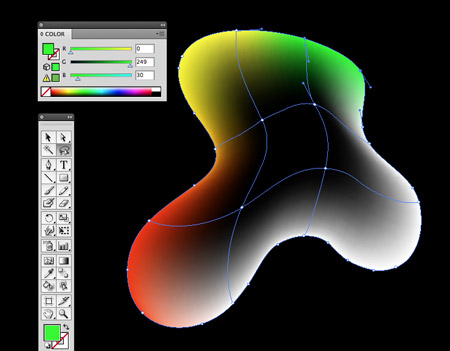
Continue around the shape selecting groups of points and giving each collection a fill according to the colour spectrum.
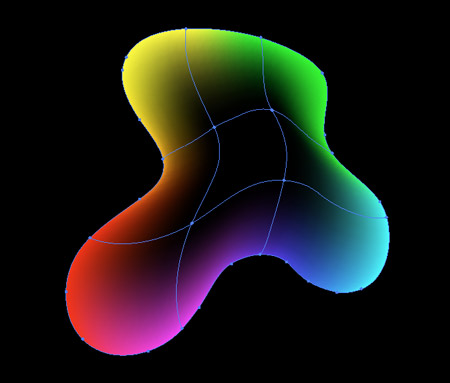
Once you’ve made your way around the shape it should be completely filled with red, orange, yellow, gree, blue and purple with each colour flowing smoothly into the next.
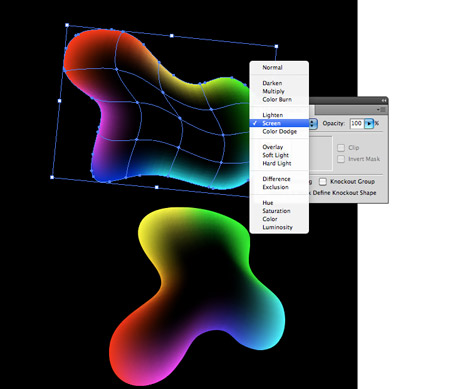
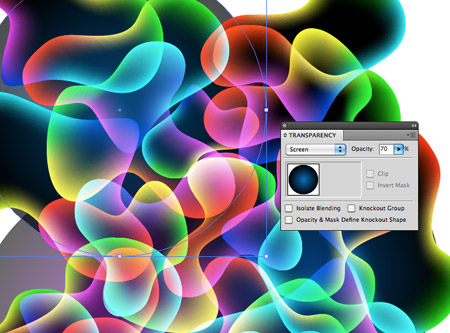
Repeat the process with another random shape, then change the blending mode of both objects to Screen. This will render the black centre transparent.
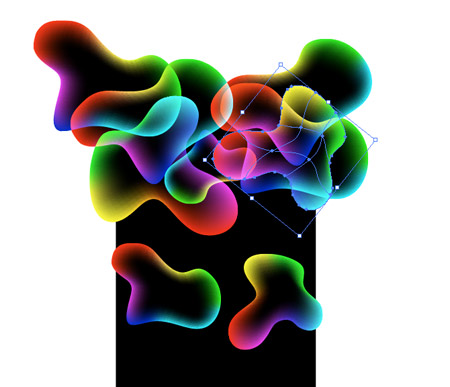
Hold ALT while dragging a shape to duplicate it, then scale and rotate various duplicates of each object to begin filling the document.
Add duplicates to the full width and height of the artboard and extend the shapes beyond the edges so the whole document is filled with abstract shapes.

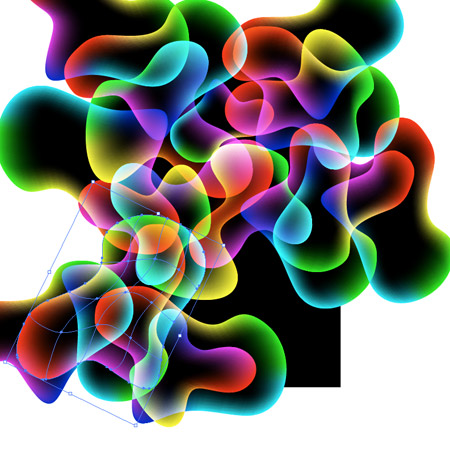
As the lines overlap each individual shape becomes disguised amongst the array of vibrant colours. The effect looks similar to groups of jellyfish when seen against UV light.
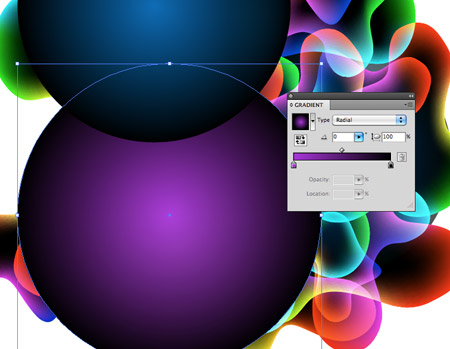
Draw a couple of large circles and give them a gradient fading to black. These will be used to spice up the design with colour casts.
Change the centre colour then change the blending mode to Screen. Adjust the transparency to tone down the impact of the colour casts.
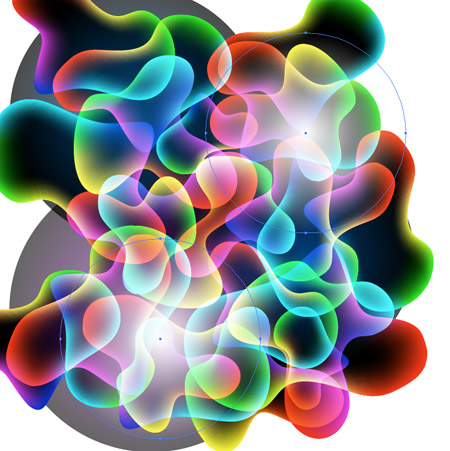
Add a couple more gradient circles, this time with a white fill. Change these shapes to Soft Light to add subtle highlights to the design.
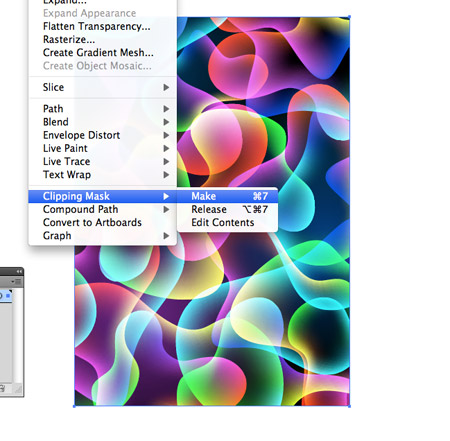
Select everything on your artboard and group them together. Draw a rectangle to match the outline of the artboard, then with both the group and rectangle selected go to Object > Clipping Mask > Make.
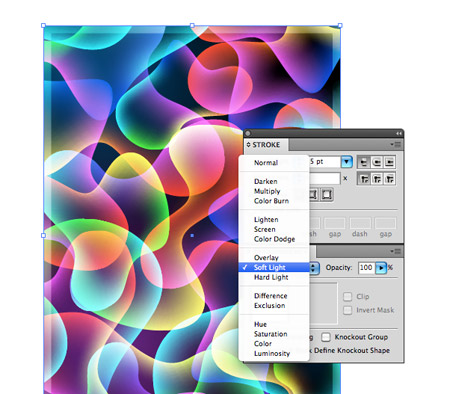
Draw another rectangle to match the size of the artboard, but give this one a white stroke. Align the stroke to the inside and increase its size. Change the blending mode to Soft Light to add a nice framing border to the design.
Export your electrifying vibrant design for use as a desktop wallpaper, poster or whatever takes your fancy. The simple steps of building up layers of colourful shapes soon brought this design to life.
This tutorial is so handy for so many different ways! Thanks!!!! Its Genius!
Awesome job Chris. Thanks for this tutorial!
Great tutorial, as usually. But, I don’t think that it will be handy. This kind of graphic isn’t popular anymore as it used to be.
Very cool – good tips for using the gradient mesh :)
cheers for sharing such a great tutorial :)
Nice 1
Nice designs..
Chris you are literally everywhere I look at the moment! Another great blog post and you were top hit when I searched for ‘web graphics’ on google today. You must be doing something right! Cheers fella x
Nice use of effect. The mesh tool can be so powerful. Would be nice to have different transparent faces all over the shapes as if in bubbles. SWEET CHRIS!!!!! Keep it up!!!
My first attempt to make this was nice, even as beginner :-) thanks for the nice tutorial!
VEry useful, i like colorful stuff !
Great job Chris! What would you say if i’ll tell you that i made this image in 10 minutes after i’ve read your article? Isn’t that great?
I too feel that……….
i just love your tutorials. You know how to show difficult stuff in a very clear and obvious way. Beautiful :)
nice tutorial, what could it be used for?
Thanks for all the great tutorials – I just shared this with my Illustrator class.
Thanks Chris
I loved this look. I added some extra circles with gradients and used the Overlay blend mode to boost the colour a bit as my design needed a bit more pizazz but the tutorial was easy to follow and the results totally rock.
I love the way you provide these tutorials and I don’t mean thanks that is free (well, yeah that too) but also that they are so easy to follow. Thanks Chris!
It looks amazing! Thank you very much for this wonderful so creative lesson! ))
This is a dope tutorial, good job. It’s weird seeing how people do things in photoshop. Like I would have achieved the same effect in a completely different way. Not to say one way is better then the next, it’s just weird how people think different.
Very useful for various tasks. thanks
Great tut and nice result,thanks!
I think this is a good tutorial for help, I will use this to help my knowlege grow for my future.
i like it
Fantastic tutorial. Beautiful colours as always. Had a go myself and as a complete novice found it great to follow. Thank you
Oaw..this is a masterpiece!!! very nice..i like it like it like it :D
Awesome!
tnx.
I love this! Super cool, Chris!
very cool.awesome design.