This post was originally published in 2012
The tips and techniques explained may be outdated.
Each year Halloween gives us a great excuse to hack at our designs with the most grungy brushes and textures in our collection to create the most raw and gory artwork we can. Follow this step by step tutorial to create an old school style horror movie poster. We’ll create a low-fi print effect with red on black and use a range of splatter brushes to rough up the design and capture the horror theme.
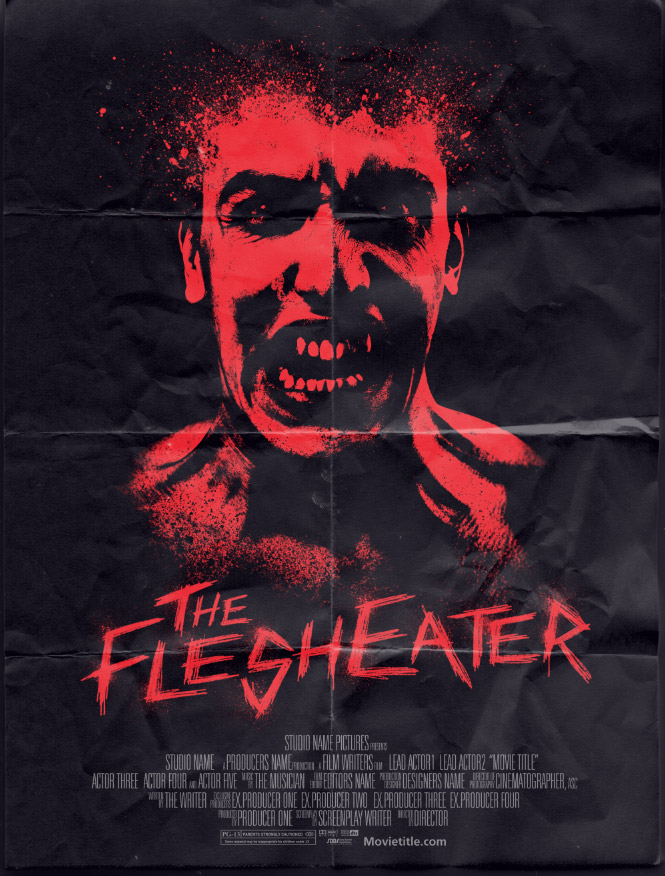
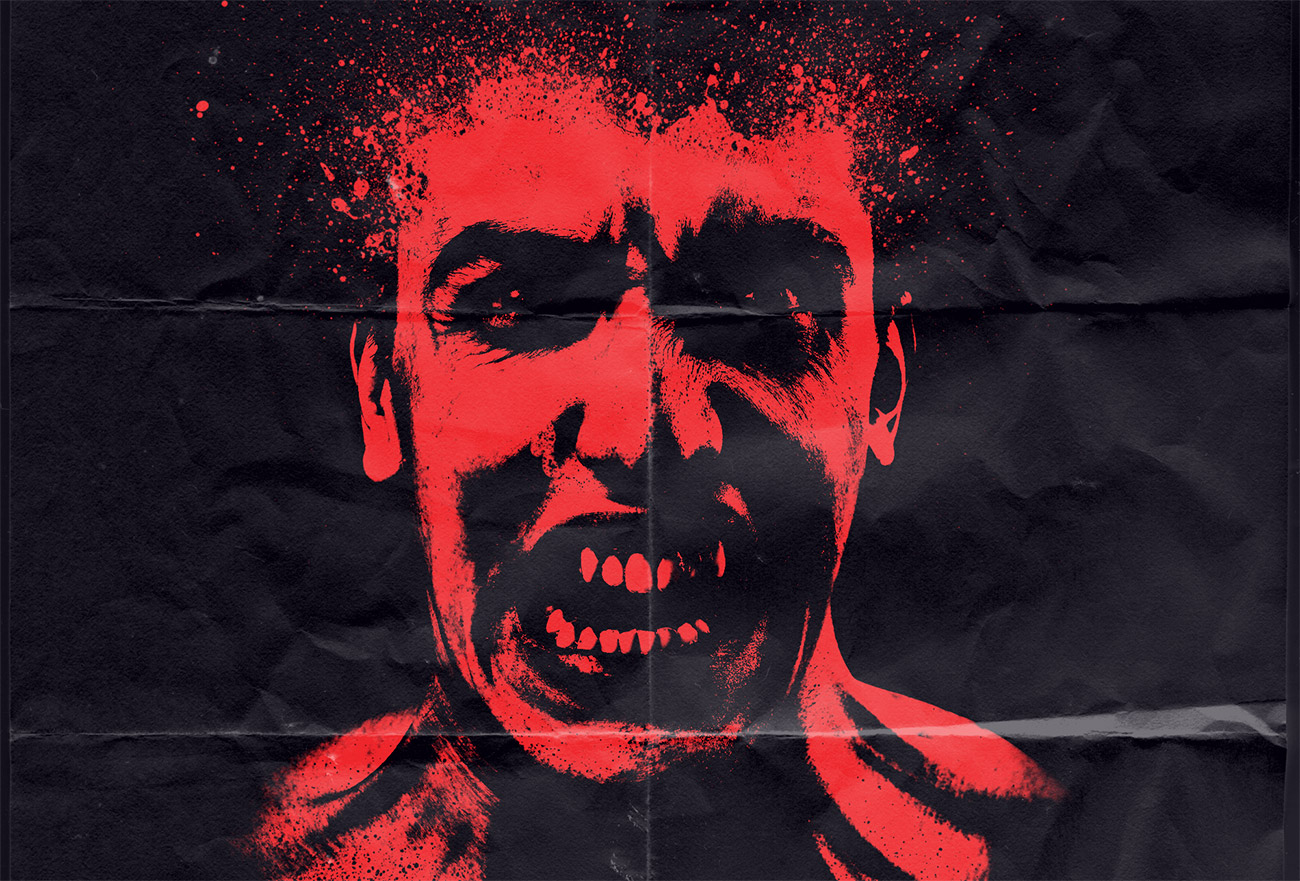
The horror movie poster design we’ll be creating as part of this tutorial features a scary looking infected zombie fellow. For maximum impact the design is created with red on black and has a grainy quality to relate to the low-fi printing techniques used on old school B movie posters.
View the final horror movie poster design
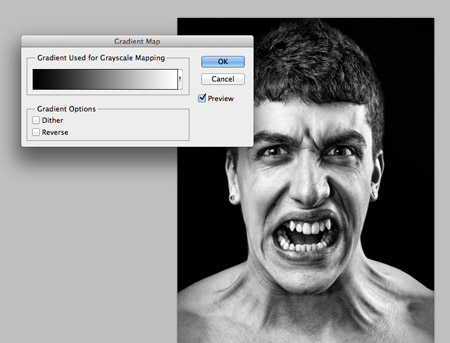
We’ll need a source photo to act as the main zombie character on our poster. Browse the stock photo websites for scary/angry faces. Here I’ve picked out a cool image from ThinkStock. Add a black to white Gradient Map to quickly convert the image to black and white.
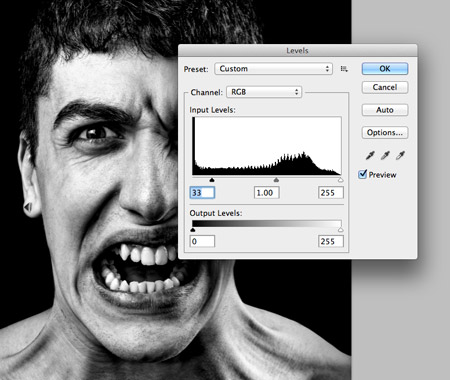
Go to Image > Adjustments > Levels and increase the contrast by dragging the shadows marker to darken the photo.
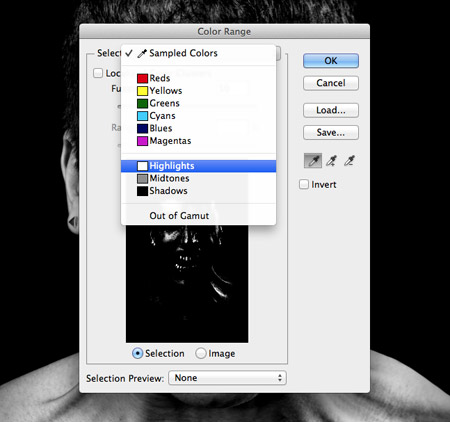
Go to Select > Color Range and change the Selection to Highlights in the drop down menu. Press CMD+C to copy the selection then paste the clipping into your main poster design document.
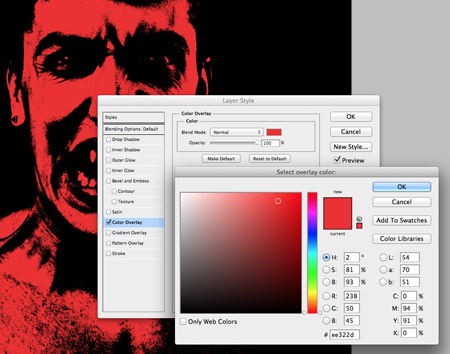
Fill the poster design document with a black fill then double click the zombie layer and add a red Color Overlay.
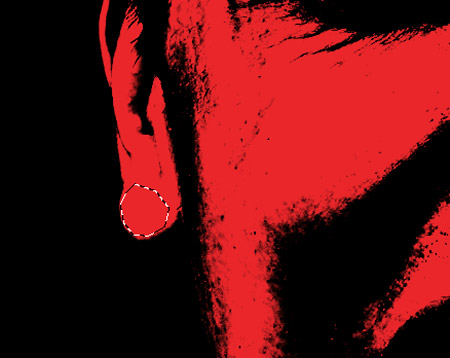
Our zombie character is currently wearing a pair of stud earrings, so roughly draw a mask around them and fill the selection in order to remove them.
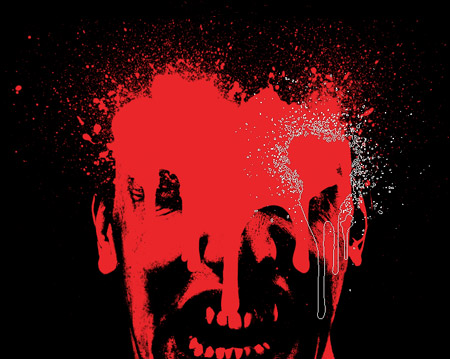
Instead of showing a neat hairline on top of the zombie’s head, we’ll add a few gory blood splatters. Use a range of spraypaint brushes to add various splatters on a new layer. Don’t worry too much about painting over the facial features, pay more attention to the pattern of drips and splatters.
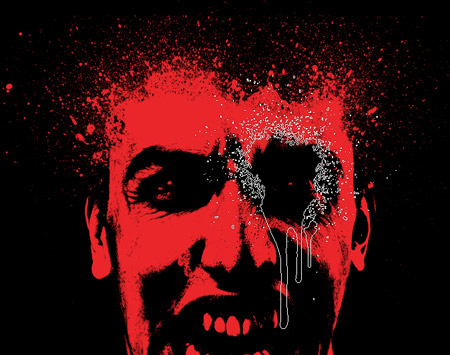
Add a Layer Mask to the blood splatters layer and use similar spraypaint brushes to paint away the excess that hides the facial areas.
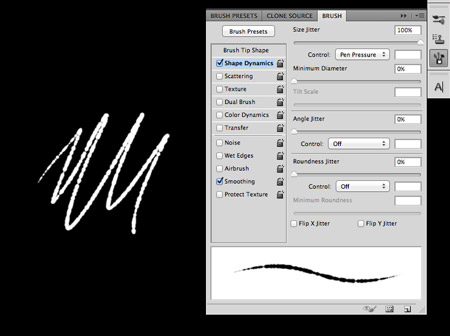
Create a new document and set up a new brush. Choose a small hard nib then alter the Size Jitter and Spacing in the Brush options to create a rough and irregular line.
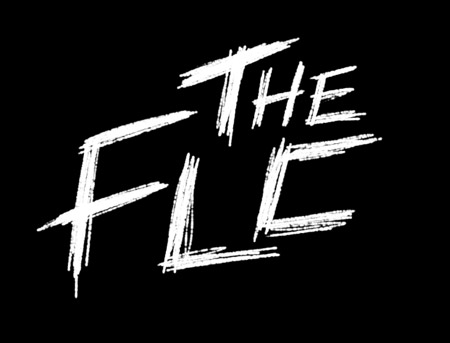
Use this new brush to roughly sketch out the title of the movie. I’m creating the words “The Flesheater” with very rough and thrashy lines.

Creating the text by hand helps avoid any duplicated letters that can result from using decorative fonts. Also, being a horror movie design the titles are often engraved, carved or created from blood splatters, so they’re easy to create manually.
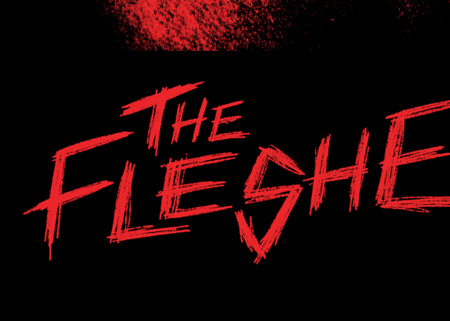
Paste the title into the main poster document and add a Color Overlay to match the red theme of the design.
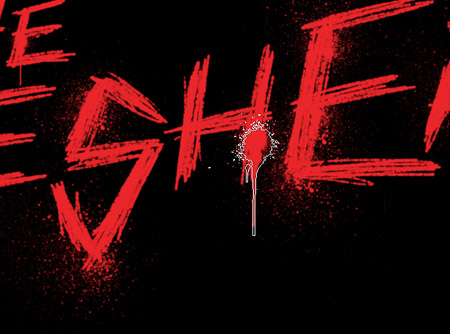
Use the spraypaint brushes, this time at a much smaller scale, to add a range of drips and splatters around the text to give it more of a gory horror style.
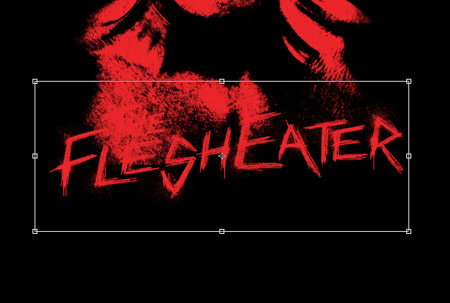
Move the title into a prominent position in the poster document. It might end up overlapping the character and being lost in the background.

Use the spraypaint brushes once again to paint away the lower portion of the character using black on a new layer. These spraypaint splatters do a great job of matching the rough texture of the zombie layer.
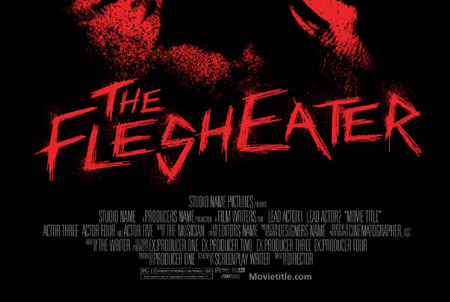
Add some generic movie credits to create a more realistic movie poster. I purchased and downloaded the Billing Block template from Graphic River and quickly pasted the default wording into my design, but the whole block can be customised with your own movie info.

To relate to the old school B movie theme we’re aiming for with this poster design, a folded paper texture is perfect for creating the appearance of an old poster that has been folded up in a back pocket for decades.

Paste the texture on the top of the layer stack, desaturate and invert it then change the blending mode to Screen. Adjust the opacity to fine tune the effect so it’s prominent enough to see the paper creases, but not too overpowering.
Finally, to give the design a slightly more retro and aged appearance, add a new layer filled with a very dark blue. Change this layer to Screen to give the black areas a subtle blue tint, which helps capture the faded ink effect seen on old prints.
This leaves our gory horror movie poster design complete. The grainy texture from the photo clipping and the spraypaint brushes do a great job of creating a raw and gritty horror movie theme, while the red on black scheme and creased paper texture helps give the design an old antique appearance.
I like it! Very “nice”! :D :)
Love this poster design and tutorial. The bitmap image is very effective and the hand drawn text gives it a real edgy feel. Great work!
Another great tutorial. Simple and effective techniques, spot on!
Wow! Man, I really love this tutorial Chris. I don’t own Illustrator, nor can I afford the whole adobe suite, so these Photoshop tutorials are killer. Two more days until Halloween, my man.
Cheers!
this is totally amazing..
good tutorial
Hi Chris!
I always enjoy your tutorials and stuff you upload for designers. This horror poster looks really cool!
Thanks,
Joe
это очень охеренно! и привет из Украины)
Love that tutorial, would love some for typography.
excellent Halloween themed design and i like always your work.
Great fun, Chris! Love the effect and the realism of the poster. :)
Nice effect with that papper! :D
Excellent Work Bro! very helpful for new designers, keep it up.
Hey in that colour range thing if I copy and paste the highlights it does nothing… And the red overlay just makes the whole image red and looks naff.
Just wanted to say a huuuge thanks, whilst i slightly drifted of track with my work, the theme is there, and it was awesome!
The faces in my work are all from a halloween party we had last week! i couldn’t get the blood splatters correct, but i feel it works well without! – thank you so much :)
https://dl.dropbox.com/u/77845919/h2012V1Poster.jpg (My picture link here)
Great tutorial, here’s the outcome.