This post was originally published in 2016
The tips and techniques explained may be outdated.
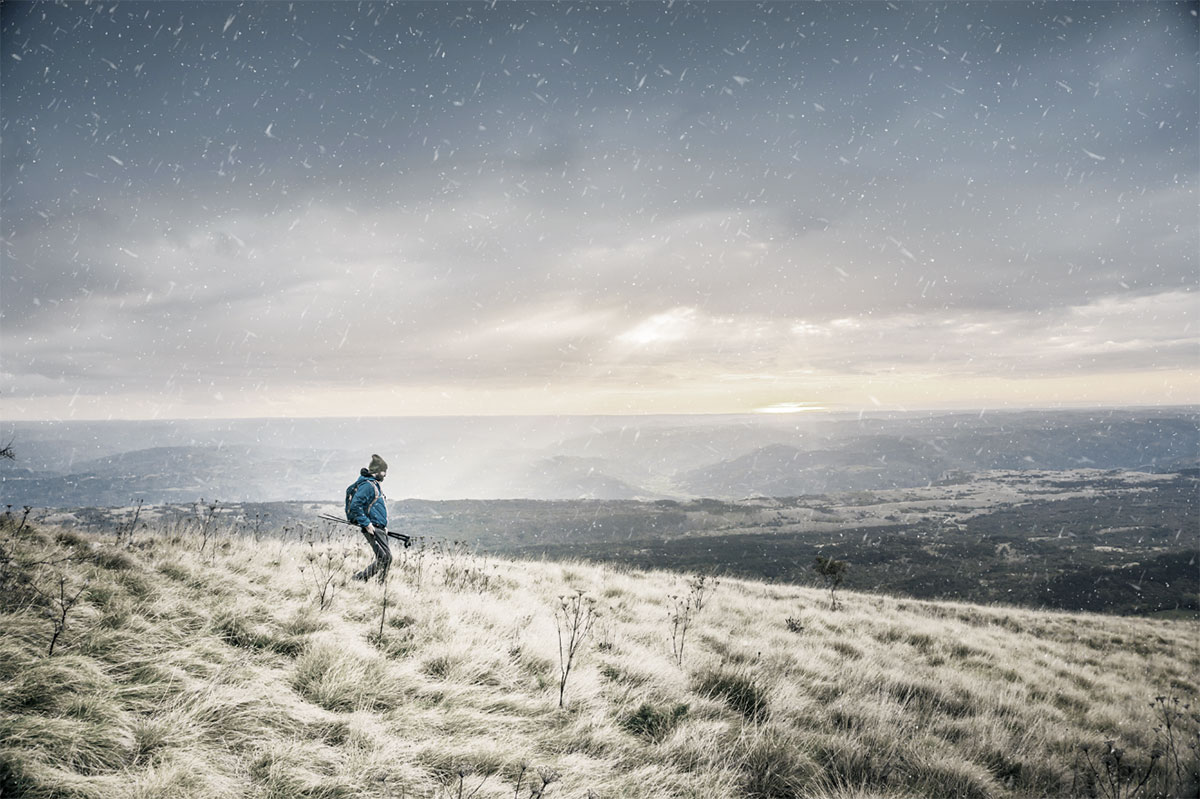
In today’s Adobe Photoshop tutorial we’re going to take control of the seasons with some Photoshop trickery by converting a bright and sunny summer photograph into a snowy wintry scene. We’ll make adjustments to wash out the colours and give the photo a cold atmosphere, then use a clever selection technique to add a covering of frost. We’ll even change the weather by adding a flurry of snow to completely transform the scene!
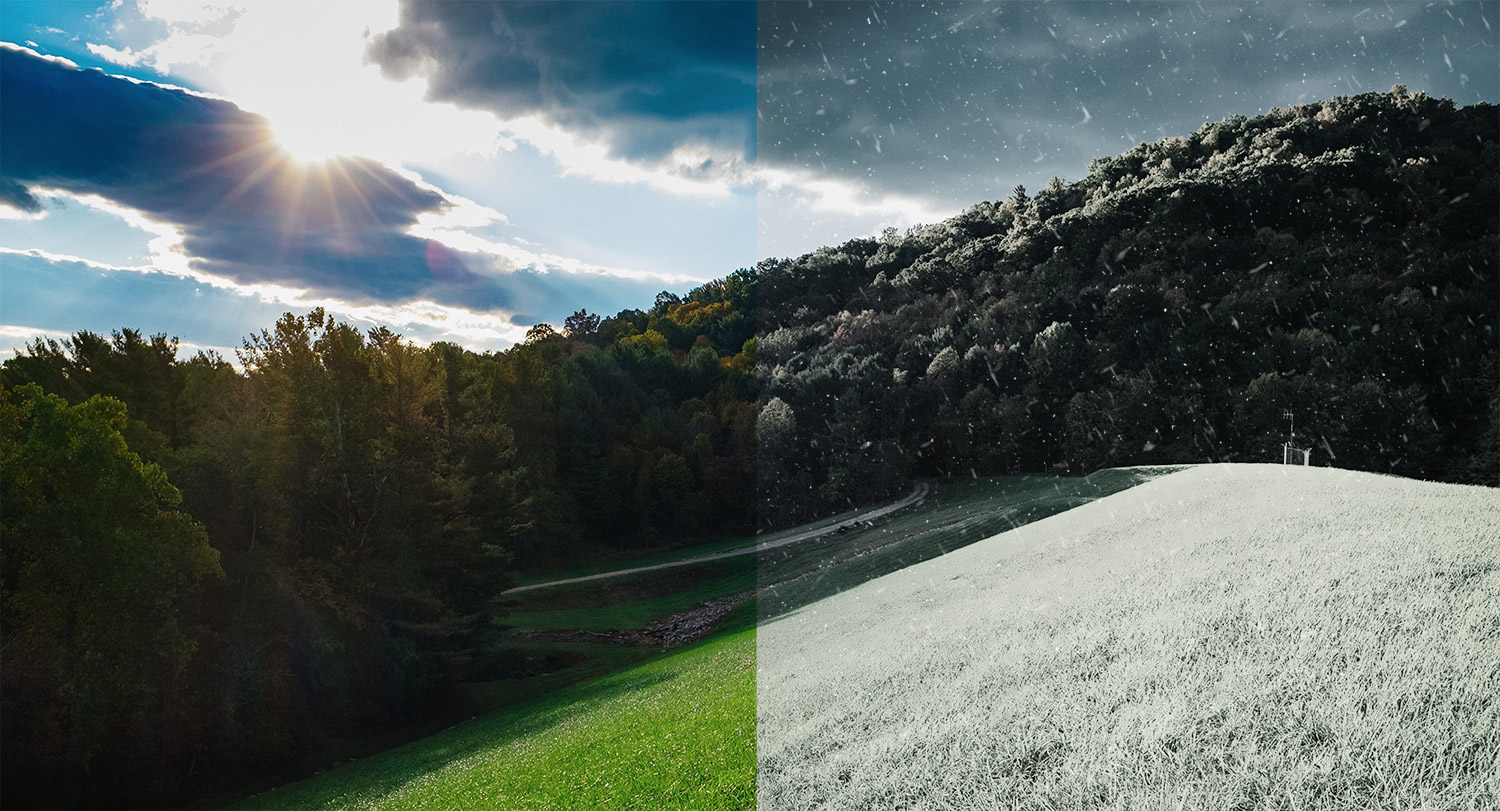
This Photoshop trick works best with landscape images that contains lots of detailed elements like grass and trees. There’s three main steps to the process; washing out the colours to remove the warm summery tones; applying a white overlay of snow/frost; then finishing it off with a realistic snow storm.
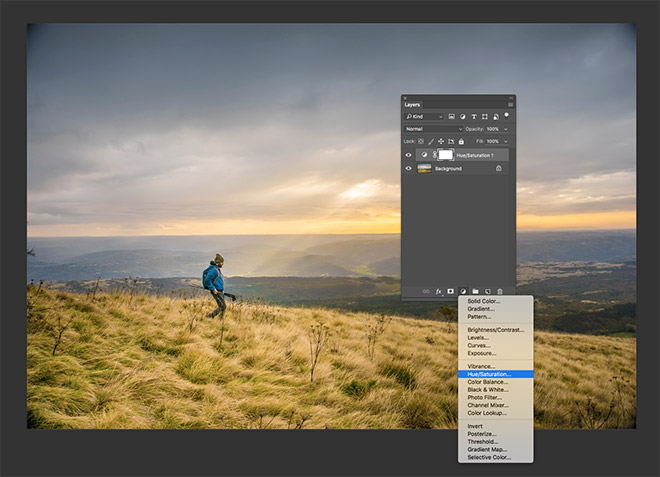
Open your chosen image in Adobe Photoshop. I’m using this photograph from Unsplash.com. Add a Hue/Saturation adjustment layer from the menu at the bottom of the Layers panel.
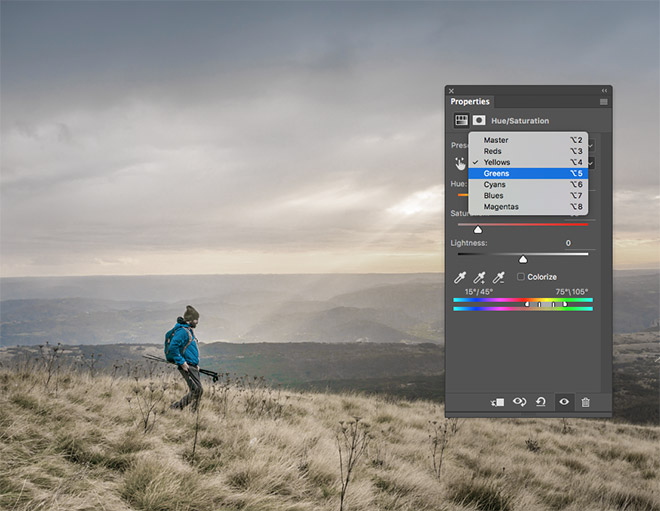
Change the drop down menu from Master to each individual colour channel and reduce the saturation slider while watching the live preview to find the best result. Aim to desaturate the warm tones in order to give the image a dull winter feeling. Reds don’t always need adjusting much, depending on the subject of the image; Yellows and Greens often need reducing a fair bit to remove the vibrancy from grass and foliage; then toning back the Cyans and Blues can help make clear skies cloudy and overcast.
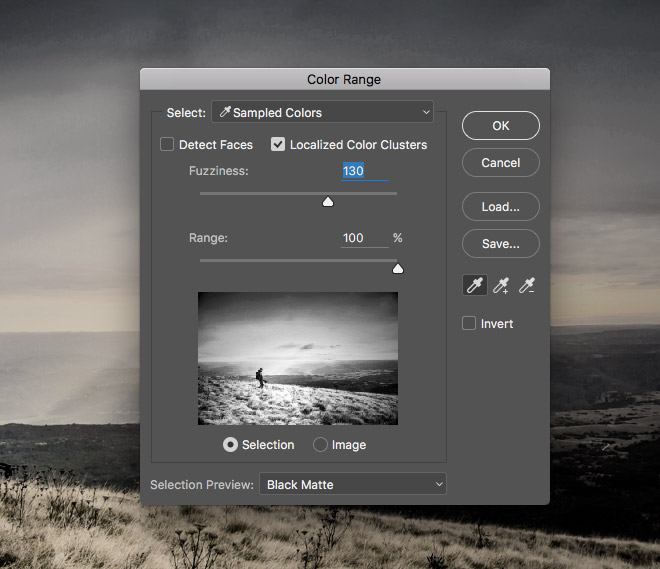
Select the Background layer, then go to Select > Color Range. Change the Select option to Sample Colors, then click around on the canvas to sample different tones. Try to find a selection that provides good contrast while keeping an eye on the small preview box to see the result. The Fuzziness slider can be adjusted to tune the brightness of the selection.
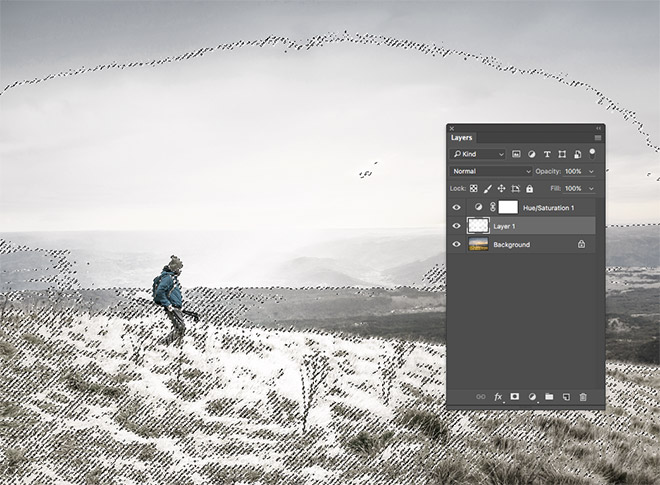
Add a new layer while the colour range selection is active, then fill this area with white using the CMD+Backspace shortcut. Reduce the opacity to around 70-80% to add some detail to this frosty overlay by allowing the original image to show through slightly.
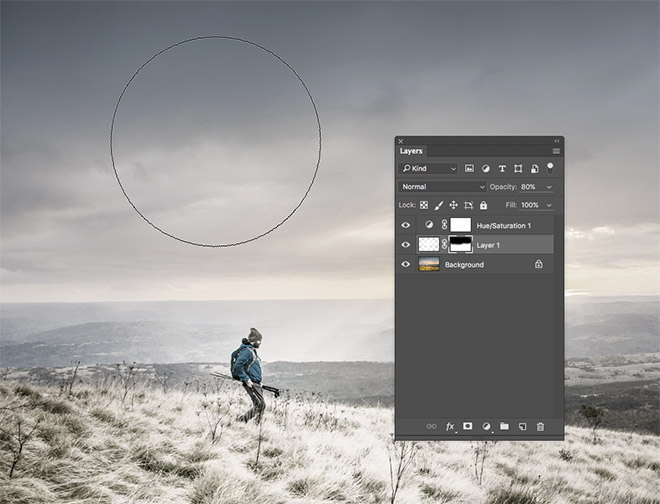
Sometimes this bright white overlay is applied to areas where it isn’t required. Add a layer mask and use a soft brush to erase it from areas where it might overexpose the image, like in the sky.
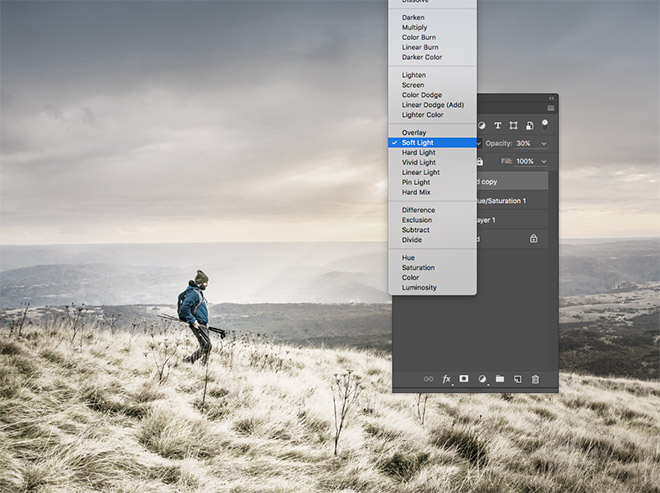
Drag the Background layer onto the new icon (or press CMD+J) to make a duplicate, then drag it to the top of the layer stack. Change the blending mode to Soft Light then reduce the opacity to around 20-30% to bring back some contrast to the image.
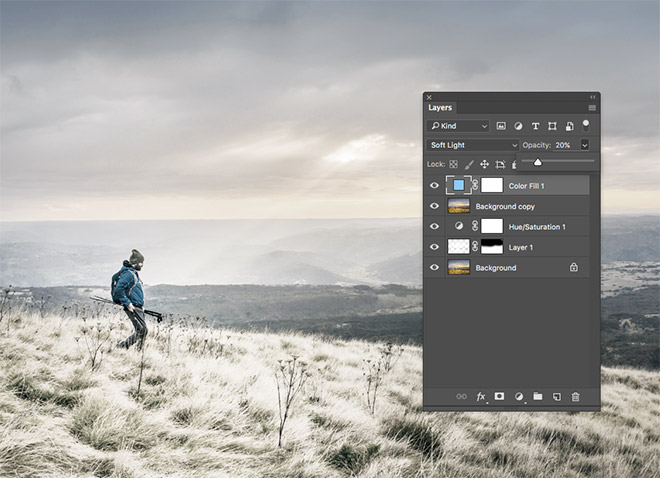
Add a Solid Color adjustment layer and select a bright cyan blue such as #7bbdf6. Change this layer’s blending mode to Soft Light and reduce the opacity to around 10-20% to apply a subtle cool blue colour cast.
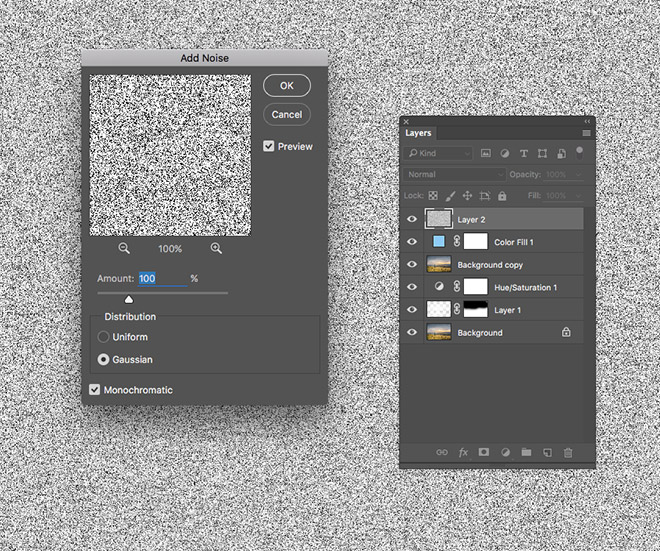
Create a new layer and fill it with white. Go to Filter > Noise > Add Noise and configure the settings to 100%, Gaussian and Monochromatic.
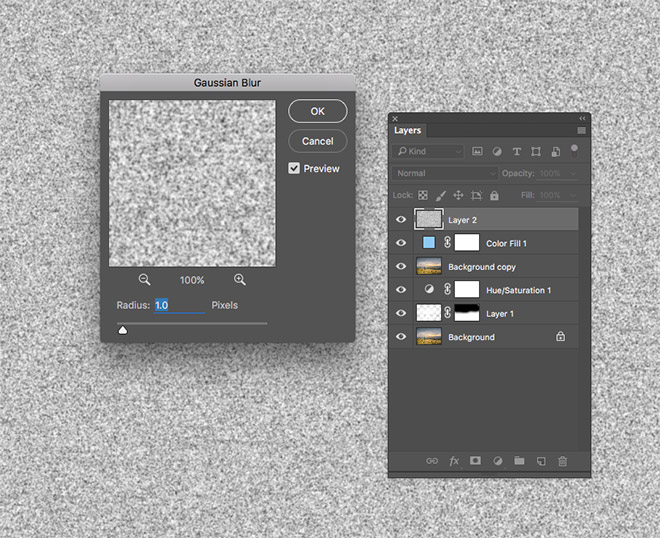
Head straight to Filter > Blur > Gaussian Blur and take the sharpness away from the noise by adding a 1px blur.
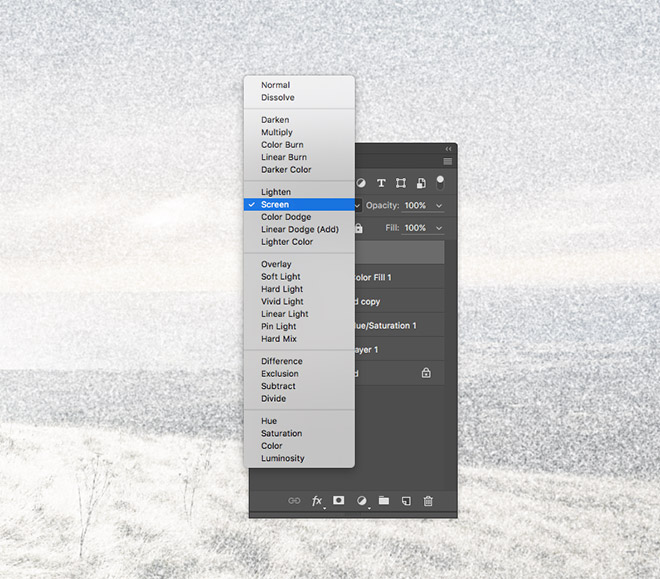
Change the blending mode of this layer to Screen to render the black background transparent, allowing just the white noise to be seen.
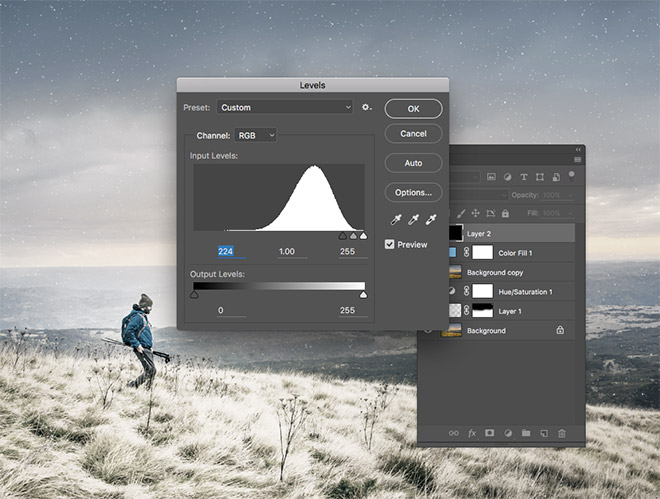
Go to Image > Adjustments > Levels (or CMD+L), then drag the shadows slider towards the right to reduce the density of the white noise until it looks like a light flurry of snow.
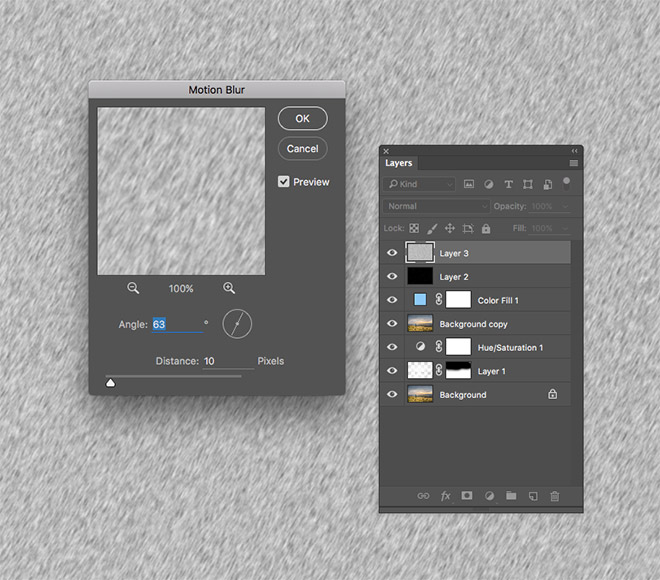
Add another new layer and follow the previous steps of filling it with white and adding the noise filter with a 1px blur, then also add a Motion Blur filter with the settings of 10px in a slight diagonal angle.
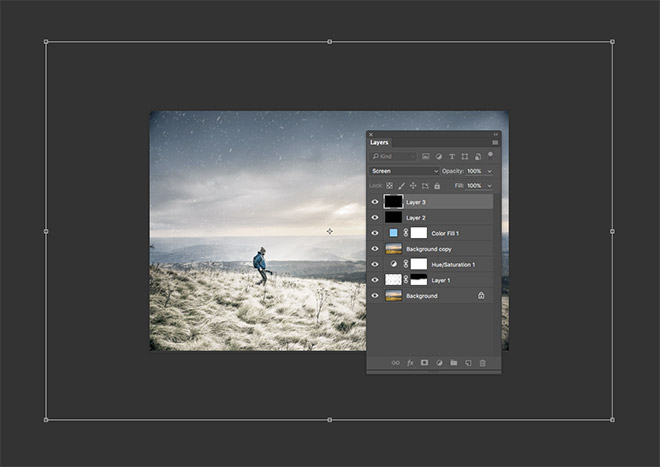
Use the Levels to reduce the density of the snow pattern, then press CMD+T to Transform this second snow layer. Hold ALT and Shift while scaling up the layer to enlarge it. Usually enlarging raster based artwork would result in a fuzzy appearance, but that’s actually the effect we’re aiming for with this snow effect.
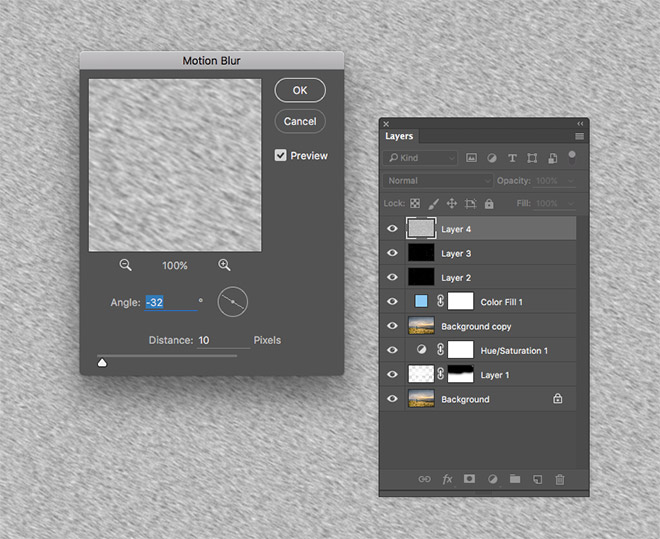
Add a third snow layer following the same steps, except this time alter the motion blur direction and scale up the layer even further. These three snow layers will add depth to the effect with large blurry snow flakes in the foreground, through to smaller snowflakes in the background.
The image has now been completely transformed from a vibrant summery scene to a cold and snowy wintry scene with the help of these Photoshop adjustments. The Hue/Saturation tweaks helped replace the warm colours with cooler tones while the colour range selection added a touch of frost to the grass and foliage. The effect was then reinforced with the addition of a realistic snow effect made entirely in Photoshop.

Hello Chris… How many times spend for prefer this tutorial ?
Over 9000!
Awesome tut Chris. You master!
Glad you like :)
My goodness! That DOES look awesome! I love Photoshop! I love seeing new ways to use the tools and adjustments! Thank you very much!
Su
I would dearly love to see your take on
…Frequency Separation. LOL Sorry about that!
I have seen it done once, on Plearn, but, I would like to see what you think and how you do it, if you do.
Thanks!
Su
Nice to hear Su!
Nice!
Thanks Julie
Creative calculation, nice techniques to discover a real winter from summer! Thanks !
Thank you Kate!
Awesome Chris. Definitely Try.
That’s great Amelia!
I can’t wait to start! perfect for the holidays.. Is this possible with photoshop express? I’m planning to purchase one.
This is a lovely transformation of seasons you taught in tutorial. I am a beginner in Photoshop and I am looking forward to learn the transformation of Day to Night in Photoshop. Will it follow more or less the same steps?
Amazing photos Chris, eminent tutorial. Thank you. Nice technique discovers to change the summer to winter photography. Really love your hard work. Thanks
Thanks, I really appreciate your comment!
Excellent tutorial, thank you very much for sharing your knowledge
Nice Post, thanks for sharing this informative article.
Nice, but now I need a tutorial to change a bikini to a parka!
Ha! Great comment pablo!
I can’t wait to start! perfect for the holidays.. Is this possible with photoshop express?
I am a beginner in Photoshop and I am looking forward to learn the transformation of Day to Night in Photoshop.
it’s a great technique. it’s very helpful for those people especially who cannot afford or avail these sort of facilities due to any reason. thank you for sharing your thoughts.
Excellent tutorial, valuable tips. Thank you!