Videos
2023 is coming to an end, so let’s take a look back at my tutorial videos from the past year and see which topics proved to be the most popular. My Neon effect Photoshop tutorial from a couple of years ago has continued to dominate as my top piece of content, gaining another 500,000 views to increase its total view count to 2.6 million views since it was published. Interestingly, my number one my popular upload this year saw an extremely negative reaction when it was first uploaded and was by far my most disliked video, but it has since gone on to become one of my best performing videos.
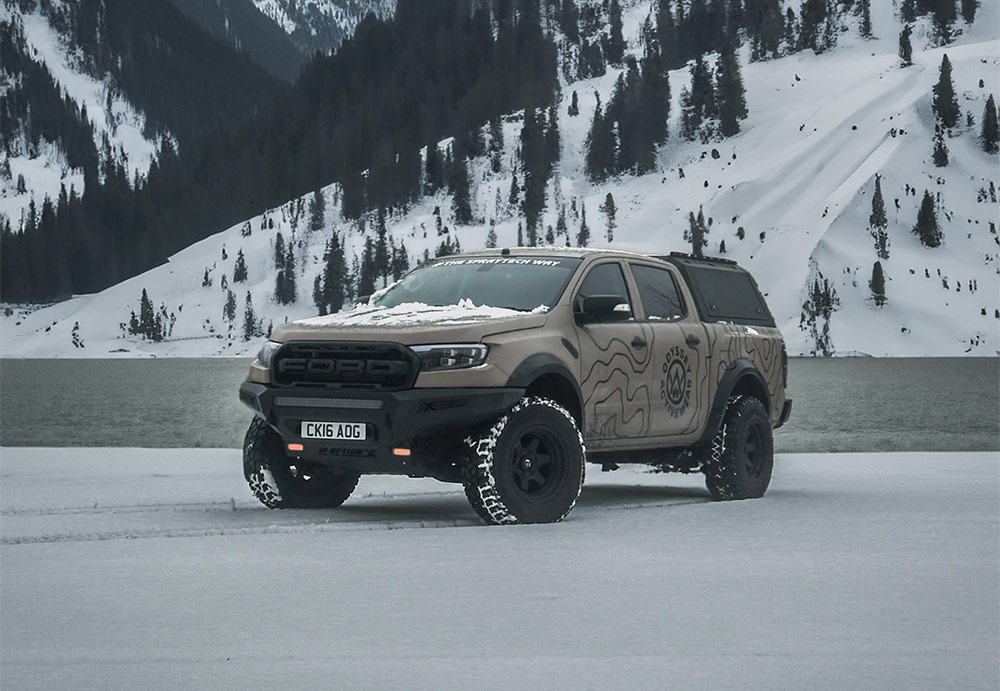
The new AI powered Generative Fill has quickly become my most used tool in Adobe Photoshop to quickly change the background of my photos. Take this one for example, it’s a boring iPhone photo of my truck after a recent flurry of snow, but with a quick AI background swap it’s suddenly teleported from an empty car park to a picturesque lake with snow capped mountains. So let me show you how it’s done…
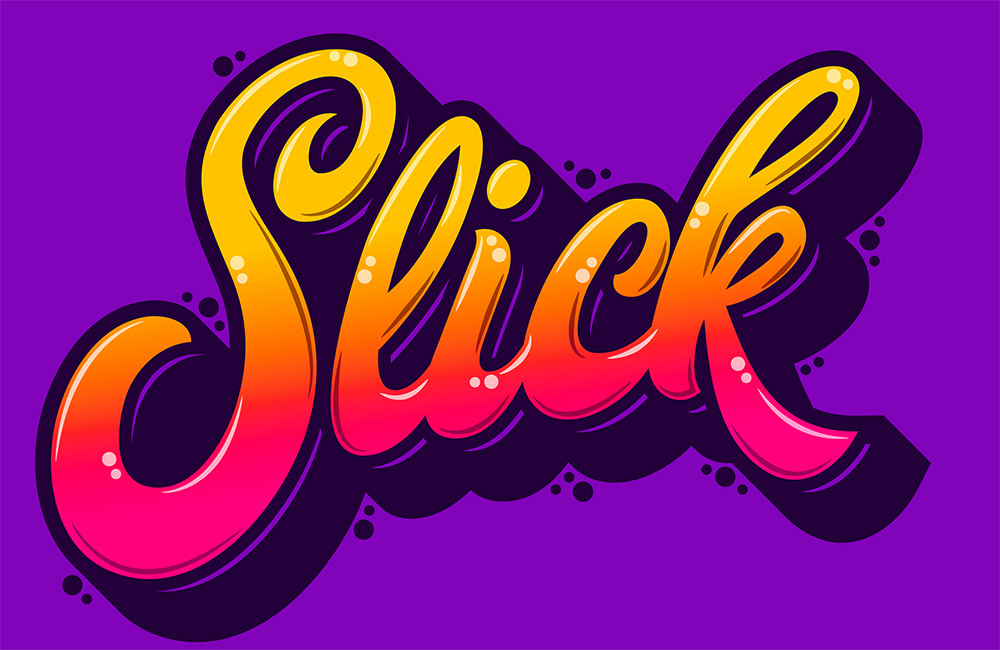
Usually custom typography pieces would be drawn by hand, but today I’ll share the secret of how you can still create trendy lettering by customising ready-made fonts in Adobe Illustrator. If you are a whizz at illustrating your own script text, the same vector shading techniques can be applied to your artwork once it has been traced to give it more impact with vibrant colours.
This Photoshop glow effect has a cool retro vibe with its colourful gradient halos and blurry outlines, especially when combined with grainy textures to enhance the low-fi look. In this tutorial, I’ll show you how to make it in Photoshop and provide links to the free assets you need from my Spoon Graphics website.
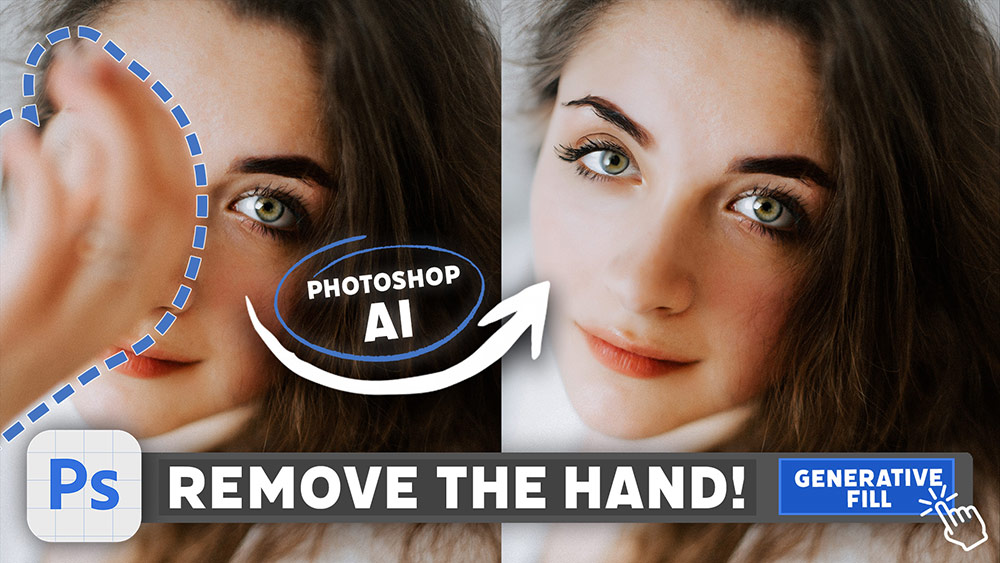
No doubt you’ve seen some mind-blowing examples of Photoshop’s new AI-powered Generative Fill feature! Today I’m going to show you how to access it yourself in Photoshop Beta and share some examples of ways you can make use of this magical new technology to enhance your images. Stick around until the end because I really put it to the test with some surprising results!
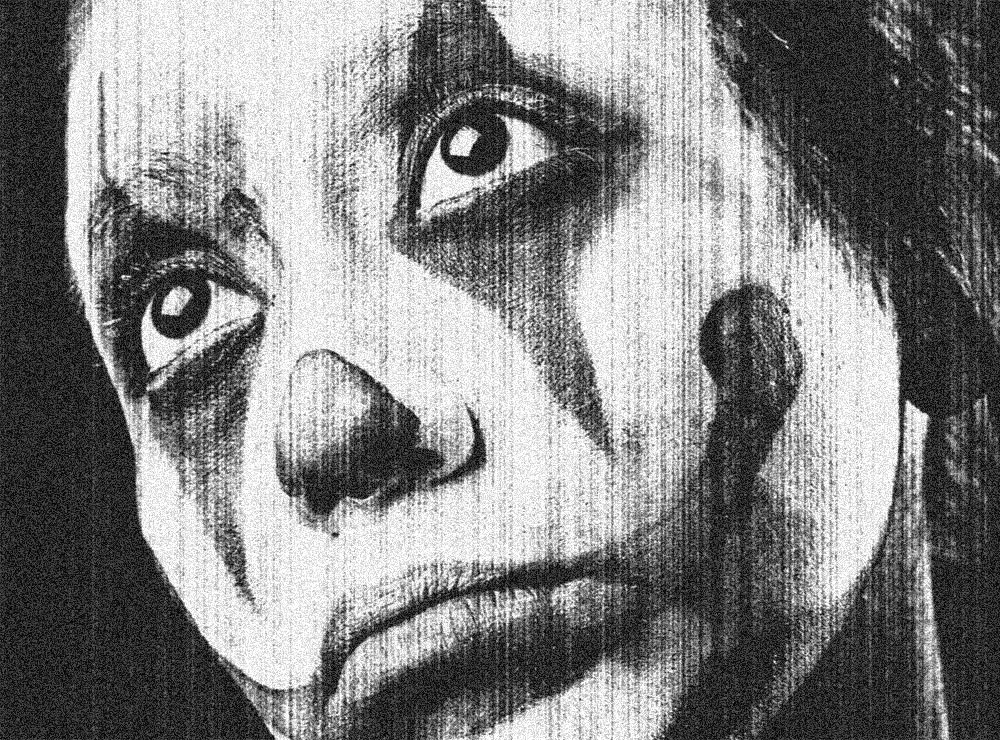
Today I’m going to share the secret behind my Photocopier Machine Actions and show you the combination of Photoshop filters that creates a grainy, high-contrast photocopied look with various dirty toner effect options.