Tutorials
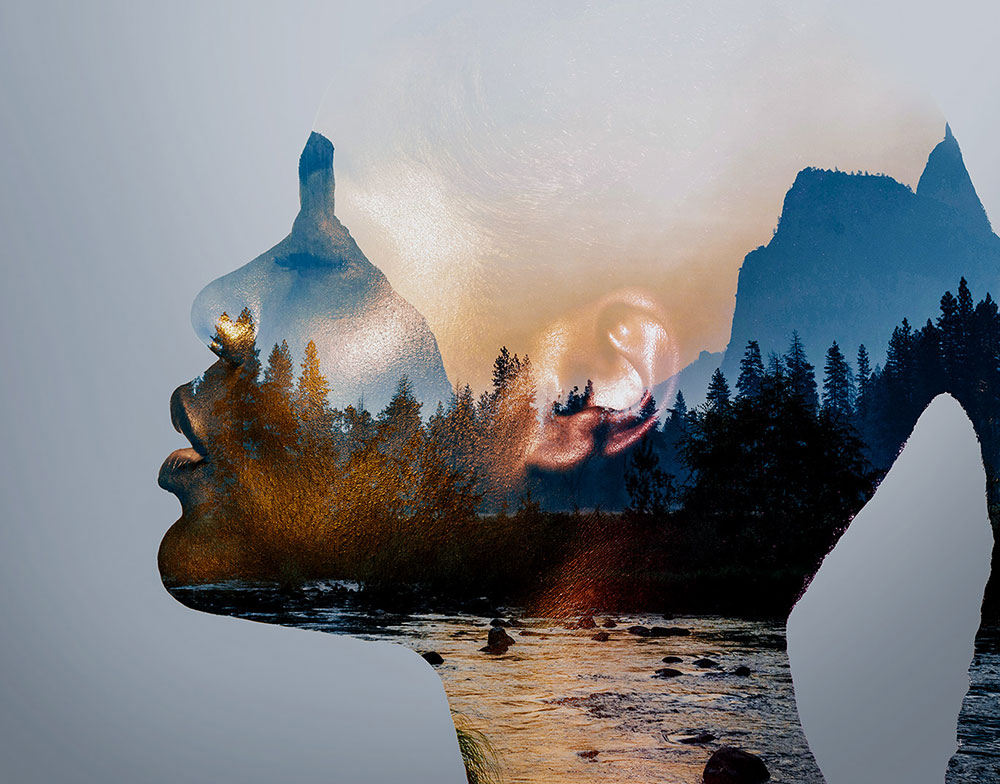
With the advent of AI, the process of creating the double exposure effect has become so much easier. Not only do we not need a camera. We don’t even need any source images because AI tools like Midjourney can conjure them itself! So let’s see how powerful Midjourney is at producing double exposure images and see whether it replaces Photoshop and even the original analogue film method.
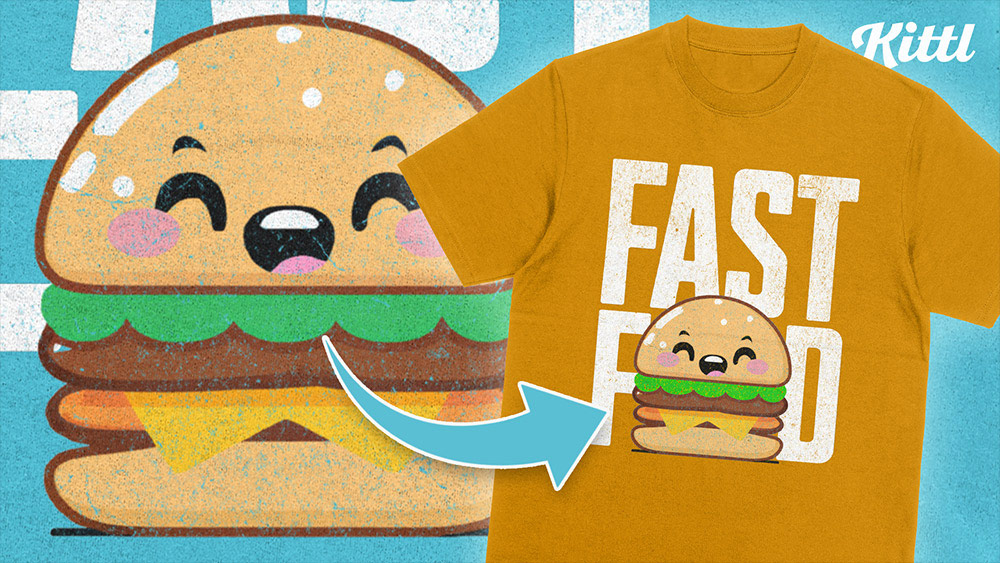
So far in my journey of exploring the capabilities of AI I’ve just used it to create fun images, but the new AI tool in Kittl gives an exciting insight into how AI can be incorporated into design software and used in real creative projects. See it in action as I easily create a cute T-shirt with an automatically generated character illustration and preview the design with Kittl’s built-in mockup library.
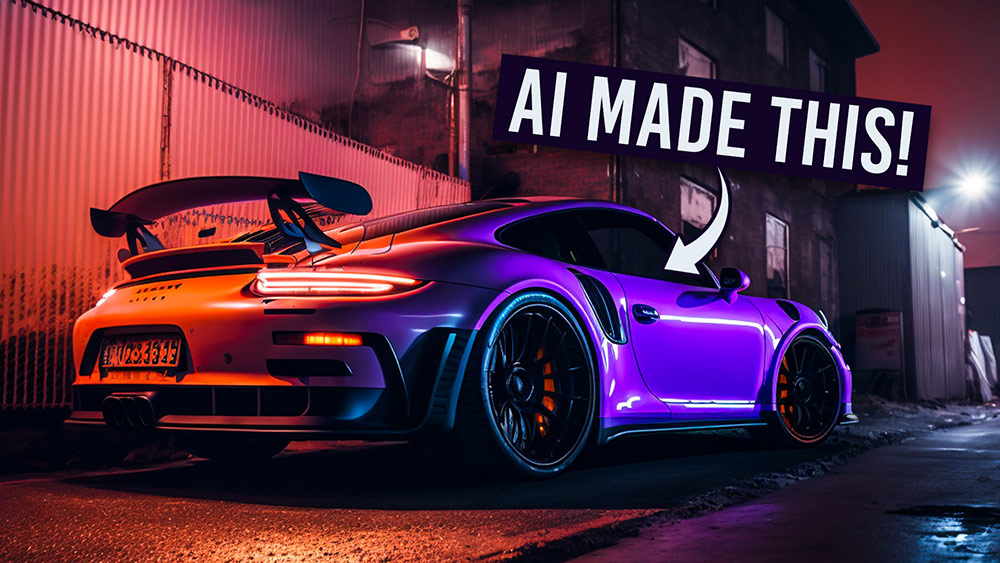
If like me, you’re a bit of a car enthusiast, you might enjoy making all kinds of cool AI-generated automotive imagery. In this video, I’ll show you some simple Midjourney prompt ideas to create stunning car photos, surreal concept cars, interesting car mashups, and reinterpretations of your favourite car in some crazy styles.
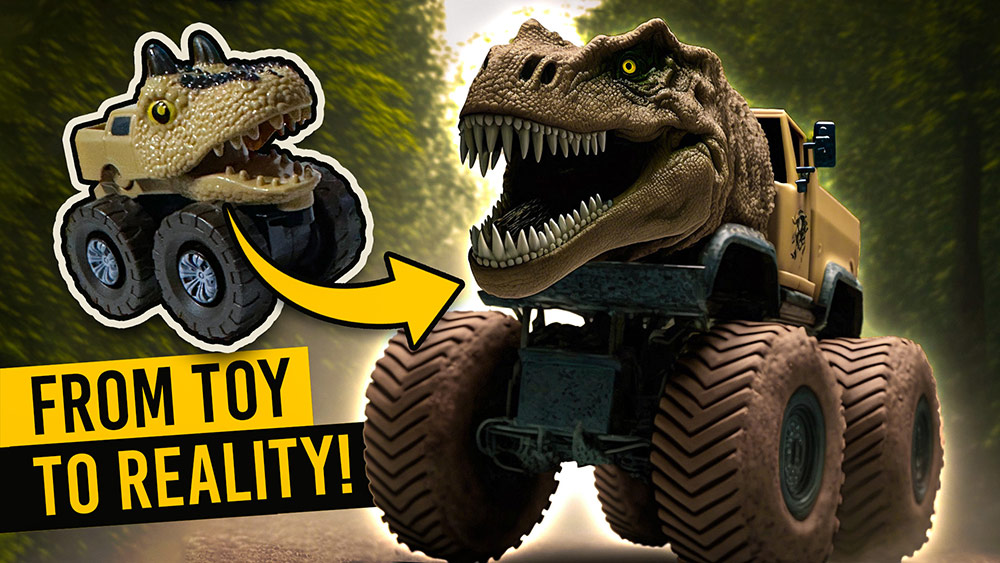
I recently began exploring the world of AI Art with Midjourney. It’s a tool that can bring anything from your imagination to life, no matter how surreal or abstract. Today I put it to the test by turning my son’s Dino-Truck toy into reality with just a few descriptive prompts, then I let AI do the rest… and the result is awesome!
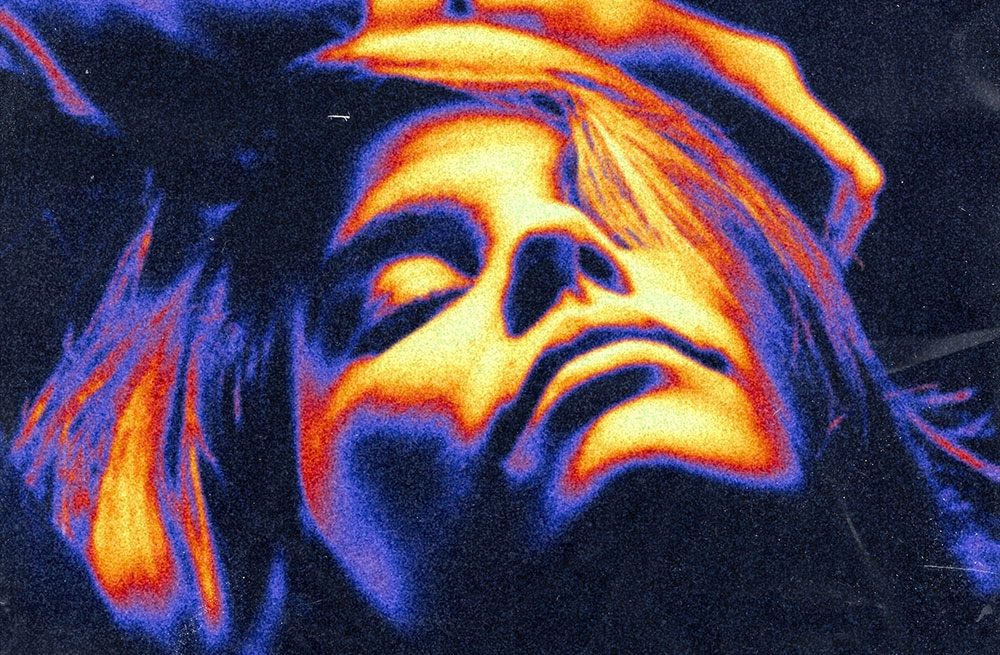
This grainy heatmap effect gives a photo an abstract, retro vibe with its ultra-bright colours that resemble thermal imaging. In this tutorial I’ll show you how to create it using three examples, each with a different colour scheme. First we’ll convert the photo with a gradient map to generate the surreal colours, then the addition of some blur and grainy filters really helps to enhance the effect. Then to finish off the piece we’ll add some of my free texture downloads from Spoon Graphics.
I recently began exploring the world of AI Art with Midjourney. It’s an online tool that can bring anything from your imagination to life, no matter how surreal or abstract. If you’re new to AI art, Midjourney is perhaps the best-rated for creating visual art. You enter a series of prompts and the AI will do its best to depict your written command. It can generate a wide range of art styles, from painterly effects to hyper-realistic renders. In this video I share some beginner tips to help you get started with Midjourney and create your first piece of AI art.