I’m sure we’re all familiar with Photoshop’s blending modes. Multiply, Screen, Soft Light and Overlay are among the most commonly used, but have you ever heard of Behind and Clear?! Despite decades of Photoshop experience, I only discovered these two elusive blend modes recently. I’ll be honest, they aren’t going to completely transform your Photoshop experience, but they’re useful options to know about for those rare occasions when you just might need them!
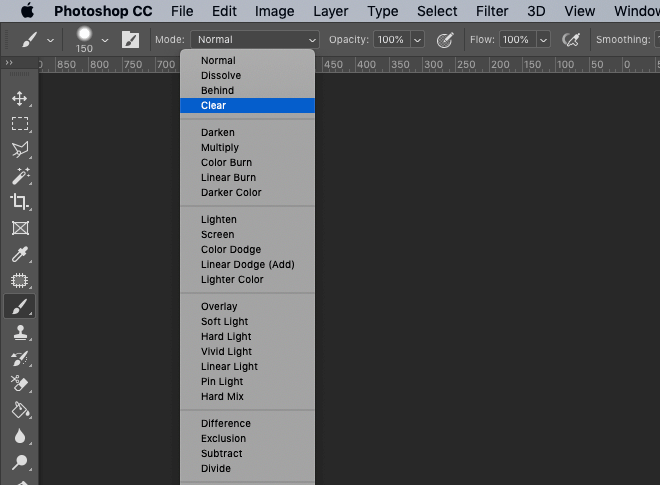
Blending modes in Photoshop are mostly used in combination with layers, but they are also incorporated into some tool-specific options. Behind and Clear are two additional blending modes that are exclusive to the Brush, Shape, Paint Bucket and Pencil tools. They can be found in the toolbar at the top of the screen whenever the relevant tools are active, within the Mode dropdown menu, or activated directly with the Shift+ALT+Q and Shift+ALT+R shortcuts respectively.
What does the Behind blending mode do?
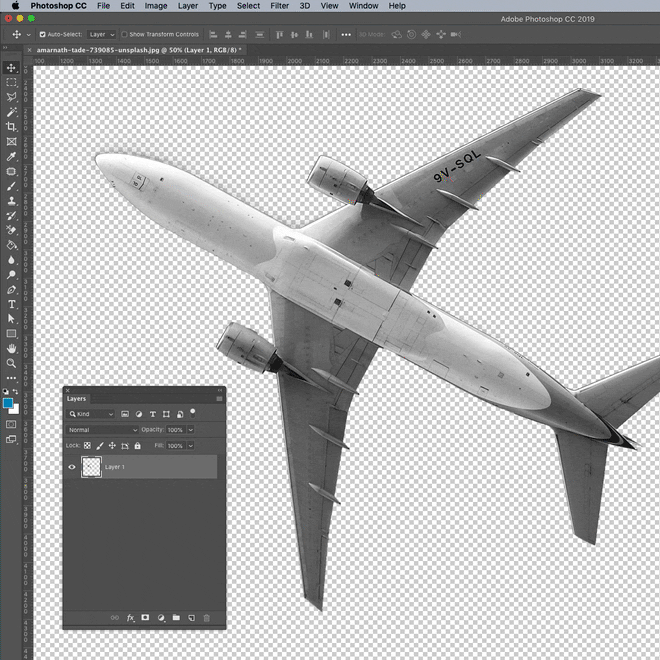
The Behind blending mode allows you to edit or paint only on the transparent part of a layer. It’s effectively the opposite of the ‘Lock Transparent Pixels’ option at the top of the layers panel, which confines editing to the opaque portions of the layer. Using the Behind blending mode has the same effect as painting on a layer below the existing artwork, except everything is contained within a single layer. However, since layers are so useful for non-destructive editing, the only advantage I can see is it could help keep your layer management concise.
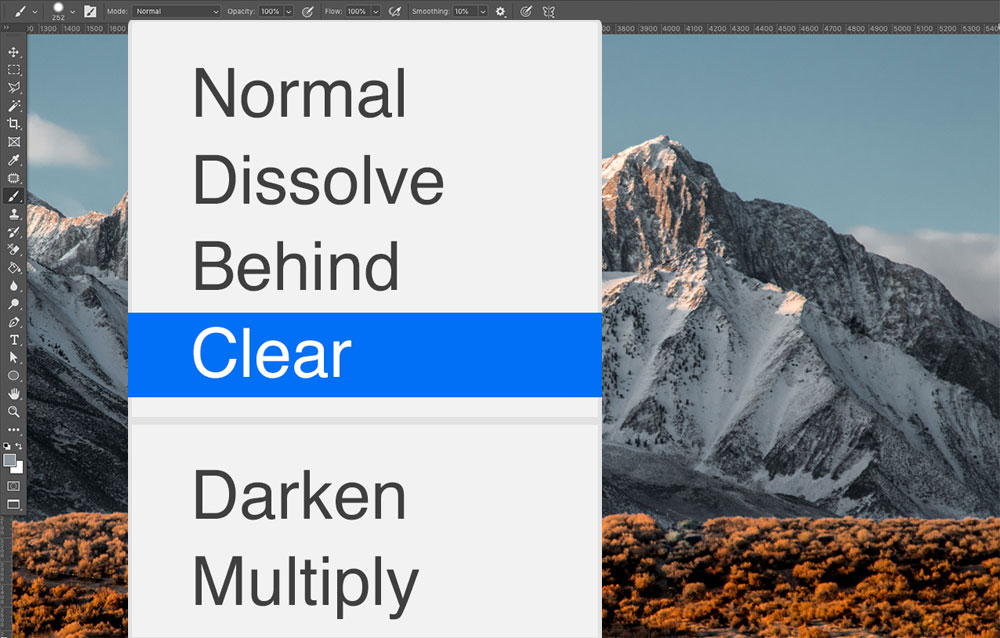
What does the Clear blending mode do?
The Clear blending mode edits or paints each pixel and makes it transparent. Its effect is similar to that of the Eraser, or hitting the Backspace key to delete a selection from a layer, but everything is done without having to swap tools, thus cutting out any unnecessary steps. The Clear blending mode could help speed up your workflow by eliminating the need to switch to the Eraser when using the Brush, or having to make a selection of a shape to delete from a layer. Instead, quickly activating the blending mode using its shortcut allows you to erase your desired pixels directly.
Are they worth using?
In summary, both these blending modes provide a slightly quicker process to achieve a result that could be created using alternative methods, but it’s a trade-off between saving an extra step versus editing your artwork non-destructively. In my example of the Behind mode above, painting the sky on an additional layer would preserve the clipping of the airplane. In the Clear example, drawing the circle within a Layer Mask would preserve the full image.

Thanks for pointing that out! That actually might be kind of handy to know and it’s hard to keep up with the nitty-gritty details of so many of Photoshop’s many, many, many features.
Thanks Chris, for taking the time to demonstrate these two additional, little-known Blend Modes.
I use the Clear feature quite a bit when I am painting faces. It would be better if there was a shortcut to it, rather than having to go up to the drop down menu each time. I suppose I could make one. LOL
On that note, Erase can be initiated with the Control function, while in Brush mode, can’t it?
It’s six of one and half a dozen of the other! LOL
Thanks, Chris.
Sure, the uses for these two options are debatable, but I’d rather know than not know!
Thanks for the explanation Chris. I was eager to see how it applied to shapes as I’ve seen the ‘behind’ as a blend mode in a plaid template but couldn’t figure where to find it. However, that doesn’t exactly make sense now that I know what it does, as to why it would be in a plaid template to begin with. I guess I’ll have to continue to search the answer to that mystery. At least now I now what the functions do!
This is great.. Very useful!!
Thanks for the best blog.it was very useful for me.keep sharing such ideas in the future as well.this was actually what i was looking for,and i am glad to came here!
Chris, thank you very much! Actually, I had a kind of a blind spot looking at the list of blending modes. Now I can see these two points :)
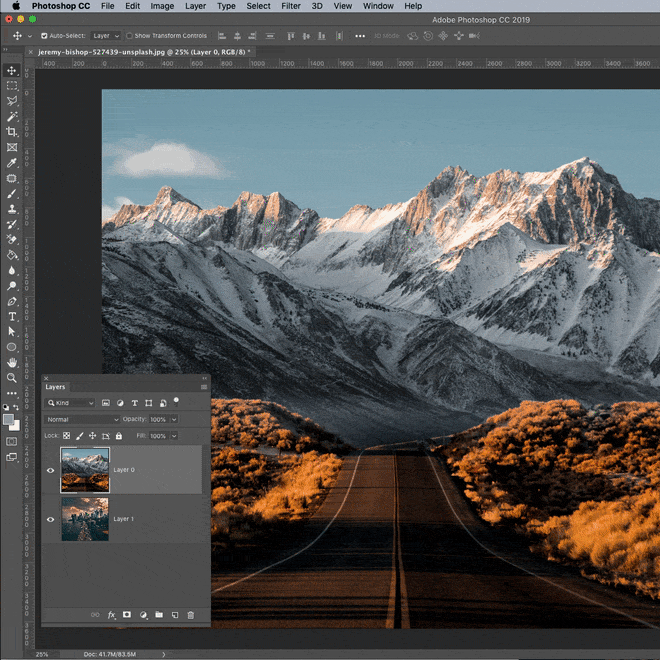
Can I ask where you got the photo of the mountains and road? I’m working on a project it would be perfect for.
I liked the article very much especially the blogs for graphic design is very useful information, but I use this website http://bit.ly/2TsyMpu is very good and helped me to believe and have very good support I recommend them
Great tips…It really interesting..
Really, such a great article regards Photoshop information
Thanks for sharing this helpful post…Keep the work you are doing on…
This is some great stuff and really useful to know some more about photoshop …….the visual explanation helps alot
great article thank you
Hey,
I really like your contribution to such a great collective approach, I just loved reading it! I would really appreciate if you add me as well in your collection to land me a thumbs up as well
Thank you :)
912168 447060Someone essentially assist to make severely posts I may state. That is the really initial time I frequented your website page and so far? I surprised with the analysis you produced to create this certain submit incredible. Magnificent task! 771214