Create a Simple Vibrant Light Effect in Photoshop

Starting away from the computer, we’ll use a few household objects to create some photographic resources. Then follow this Adobe Photoshop tutorial to manipulate the images with various tools and techiques to produce a vibrant design made up of intense light streams effect.

My previous How to Create Intense Light Streaks in Photoshop article turned out to become the most popular tutorial here on Blog.SpoonGraphics, so it seems to be quite a hot topic! It makes sense, therefore to take another look at the intense light effects area of design and experiment with a range of techniques to produce our own vibrant artwork.
In this article we’ll be starting from scratch, working away from the computer to gather together the resources which we’ll be manipulating later. If you would prefer to skip straight to the digital techniques, download the ready-made resources from the Six Free High-Res Glowing Light Stream Images post and head on down the page!
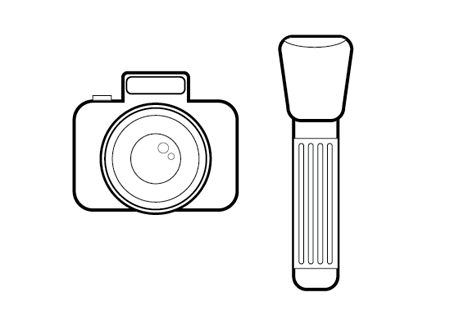
To begin, you’d need a couple of items, namely a digital camera some kind of torch. Ideally an SLR type camera would be the better option, as an extremely long exposure time and small aperture setting are required. Torch wise, any household light emitting device will do, but feel free to experiment with various styles of torches, bulb, LED etc.

Find yourself a large space, close all curtains and turn out the lights making the area as dark as possible. Setup your camera on a tripod or sturdily rest on a hard surface, in manual mode set the camera to a high Aperture F value to increase the depth of field, and lengthen the shutter speed to around 20 to 30 seconds.
With torch in hand and camera active, wave your arms around like a mad-man/mad-woman until the shutter closes. Experiment with various camera settings and movement techniques to record a collection of images to choose from.
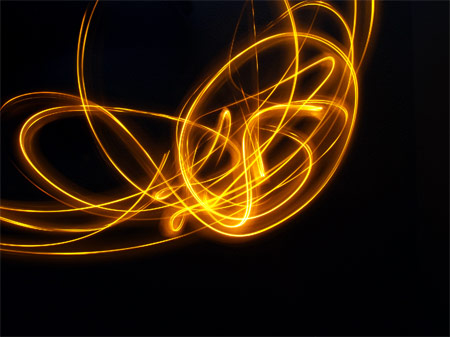
After a few attempts you’ll have a good selection of images to work with. Here’s my example we’ll be working with in this article. Feel free to download it yourself.

Open up the light stream image into Photoshop, adjust the Levels, Curves and Hue/Saturation to darken out the background and brighten up the light streams.
Import the image into a new document and erase out the edges to blend smoothly into a black background.

On a new layer, use the Gradient Tool to overlay three bright colours from the edges of the document. Change the blend mode to Color.

Press CTRL/CMD + U to open up the Hue/Saturation window and move the slider to adjust the colours to a palette that takes your preference.

Choose a dark purple colour and select a soft brush tip.

Create a new layer and set the blending mode to Color Dodge. Paint over areas of the light stream with the purple brush to intensify specific areas, such as the crossing of two points. The Color Dodge setting burns into the colours producing a vibrant effect.

Create a new 4px by 4px document. Zoom right in and draw a line diagonally across the document with the Pencil Tool. Go to Edit > Define Pattern.

Back in the main document, fill a new layer with the pattern using the Fill Tool set to Pattern from the drop down menu. Change the blending mode to Overlay and reduce the opacity to around 25%.

Create a Layer Mask on this layer and paint areas of black onto the mask to erase out sections of the scan lines.

Create another pattern swatch, this time based on a single square, which will repeat to form a tiny dotted pattern.

Fill another new layer, again set to Overlay at 25% with this new swatch and erase out areas using a Layer Mask.

Draw a large gradient of dark purple onto a new layer, reduce the opacity right down to 15%. This will be needed for the next step, the overlaying technique we’ll be using won’t work on pure black, so the subtle purple is added to allow the effect to shine through.

In the Brush options palette create a custom brush that is made up of multiple particles. Start by reducing the hardness of a standard circular brush to 0, and setting the spacing to 100.

Under Shape Dynamics, adjust the size Jitter to 100%. If you’re using a Pen Tablet the option of Pen Pressure will allow the effect of the brush by manipulated depending on the force used with the tablet.

Under Scattering, adjust the Scatter to 1000%.

On a new layer set to Color Dodge, paint over areas of the light streams to add a range of particles, adding to the vibrant style of the design.

Create a new brush, this time with similar settings but using a larger and harder brush tip.

Sampling a light blue from the design, paint in a range of lens flare style shapes. Use the Blur tool to add depth by blurring some of the flare shapes.

Change the layer style to Color Dodge and reduce the opacity to 60%.

Use the same colour to fill a range of diagonal strips, drawn with the Polygonal Lasso Tool.

Erase out the edges of the strips to blend them into the document.

Change the layer style of these strips to Soft Light to allow the colour mix to add to the vibrant design.
Make any final tweaks and adjust the design into a composition that suits. Here I’ve simply added some text, also using the Color Dodge blending mode to tie it into the design.
Overall, while light streaks can just as easily be created digitally on the computer, I think using hand crafted light streaks from a camera and real light source gives that extra element of detail to the design.

Great Tutorial!! , VERY informative , learned something new and will definitely give it a try! thanks for sharing!
Nice tut here, great step by step instruction going on.
Best tutorial I have seen in a while!! I love how simple you keep everything but it looks great! :)
Very nice tutorial…That effect is so cool. I love how you started out with a raw photograph. You are so creative and all your tutorials are amazing! Thanks!
I love light effects. I haven’t tried long exposures using lights before, but I know you can get interesting results using several methods. Thanks for the stellar tutorial!
Really nice one mate. I love the hands on approach of the torch photography.
This is a new way of doing compared to a lot of the tutorials out there. But is anyone else getting a little worn out on this effect? I see it on everything and anything.
So simple, yet so creative – Just what we (readers) expect from you. Amazing outcome Chris, really love it!
Keep up the good work!
ace tutorial! very creative!
Thankyou for the kind comments everyone, glad to hear some of the steps helped out.
Very good tutorial, good job!
Wow this is a beautiful tut! I will definately try it out very soon! Thanks for posting :)
Am tweeting it now!
Awesome effect, I love the colors you used, nice tut :o)
Nice one Chris Like the way you explain the use of the torch and Camera, quite a lot of people don’t understand the way to create these effects.
Keep up the good work mate.
I’ve always wondered what the camera settings for those light paintings are. Thanks for the tutorial :D
very good outcome and detailed description, thanks! :)
Great tut Chris.
This kind of effect is popping up all over the place. I guess your clear and detailed explanation will mean we’ll see it even more ;)
VERY nice tutorial… very very nice work. Thanks a bunch! (c:
WOW!!! Really cool, very good tut!
I’ll try it!
Really cool tut!
Excellent tutorial!
Always wanted to know how to create these effects.
My hat is off to you!
Great image. Thanks for a great tutorial!!!
Great tutorial thanks. Keep them coming ;)
Thanks – another stunning tutorial.
Keep up the good work!
cool effect:)nice one chris:)
simple and pleasing!!
I tried out this tutorial and boy! the effects keeps getting better!!
especially just blending layer styles..so much cool fx!!
thanx once again!
Awesome tut! Will try!
Will try when I learn how to navigate my camera.
Great tutorial! It was really easy to follow and the results are excellent.
Great tutorial :D
Very ‘abduzeedo’ – I like it!
Woow very nice!!
Some great light effects there. Good job done.
One of the many downfalls of Paint Shop Pro — you can’t use tutorials like this one! Great job, I might be purchasing a photoshop package soon instead. Impressive.
Wow! Great tutorial. This open ups a lot of texture and background options. I love the fact that you showed how to gather the light sources as opposed to using something already on the net. Thanks!
Really good indepth tutorial, I really enjoyed how you went into detail and took it that step further than normal tuturials – I am a fan.
nice attention to detail. great tutorial.
very nice
One wicked tutorial man…
WOW! Thank you very much! Nice tutorial!! Looking forward another great tutorial!!
Woooow…
really cool.. :)
Excellent tut, Chris! I’m diggin’ the photo technique rather than creating it digitally. Agreed on the extra level of detail it creates as well.
Congratulations for site!!
Congratulations for tutorial!!
Great Tutorial. I learned something new.
I made a similar effect while camping.
I took a stick and made the end start to smolder then spun it around and it produced this:
^http://www.flickr.com/photos/samleh/412858165/in/photostream/
A nice extensive tutorial for sure. I have this in my favorites.
what a great tutorial! Consider it bookmarked.
Sick tutorial, thanks for the tips!
Once in a while, someone comes along and leads you by the hand to show the immense simplicity in technology…You are a great teacher. Thank you for the great tutorials….