This post was originally published in 2011
The tips and techniques explained may be outdated.
The post-processing stage of photography is definitely the most fun and creative. It’s where you can really transform your otherwise bland and boring photos into really intense images that draw in the viewer. In this tutorial we’ll cover the process of editing your landscape photos in Photoshop to give an epic, almost fantasy style appearance with bright colours, high contrast and lots of fine detail.
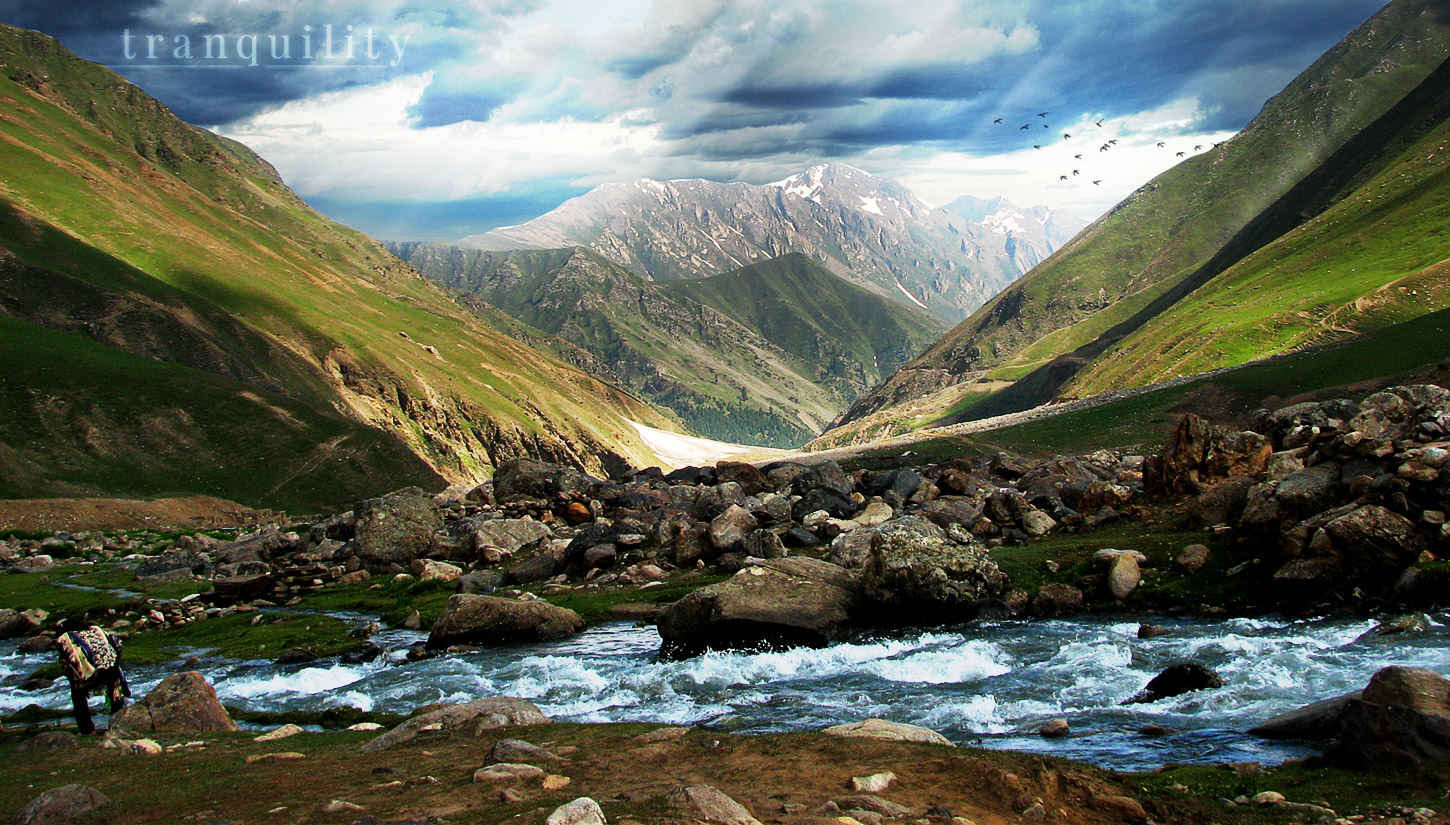
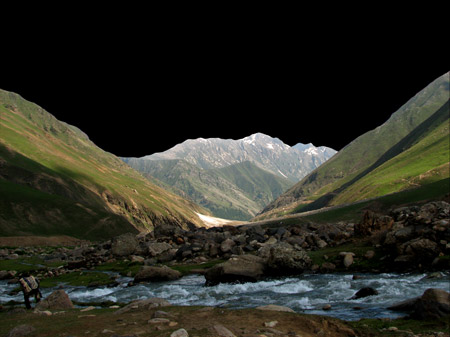
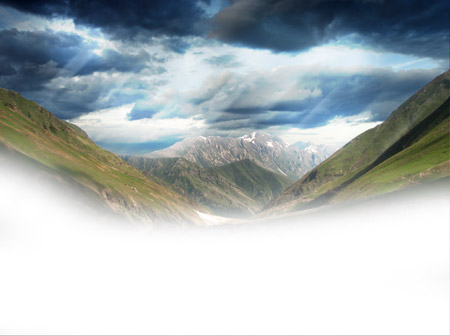
The theme of this tutorial will be converting this quite beautiful landscape shot into a dreamy scene of epicness. Just comparing the two you can see how much impact the post processing effects give the photograph, transforming it from an everyday snapshot into an unbelievable fantasy scene.
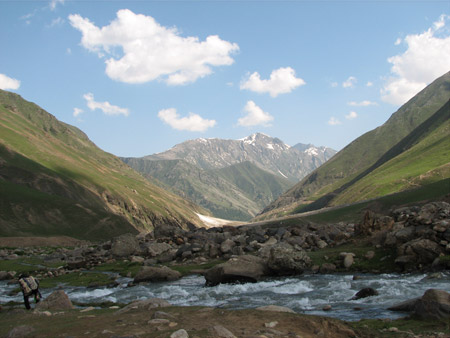
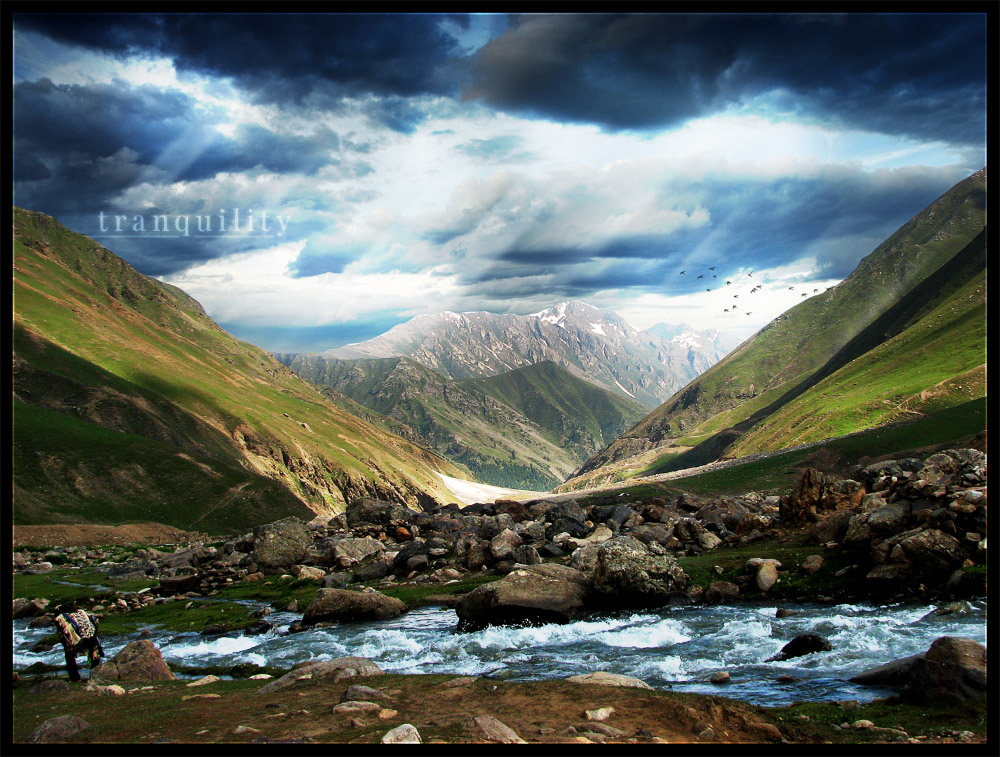
I’m neither much of a photographer or a global explorer so I don’t have many landscape photographs to hand, but thankfully some of the more adventurous photographers out there share their work online for others to download and use. This particular image is a free image named Tranquility from SXC.hu.
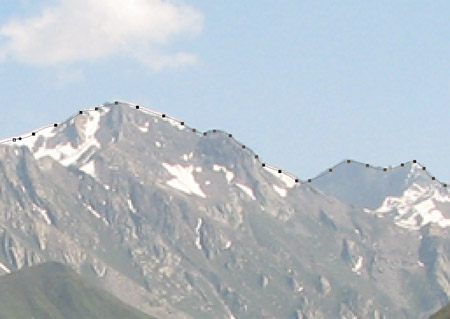
The sky and clouds in the original look pretty calm and serene, which fits into the name of the image, but we can inject extra intensity into our edited version. Use the Pen tool to carefully trace the outline of the mountains from the scene.
Copy the mountains onto a new layer and fill the background with black.
Find a stock photo featuring stormy clouds and paste it into the document. Place this new sky layer underneath the mountain cutout to hide the grassy field from view.
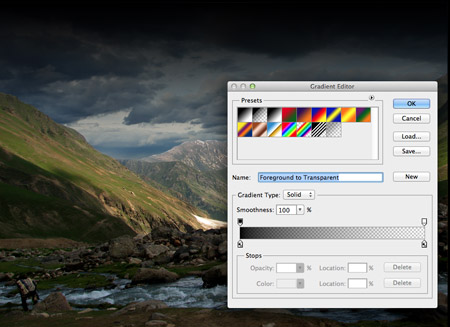
Draw a black to transparent gradient from the top edge on a new layer above the clouds. Change this layer’s blending mode to Soft Light to darken the clouds for a more intense atmosphere.
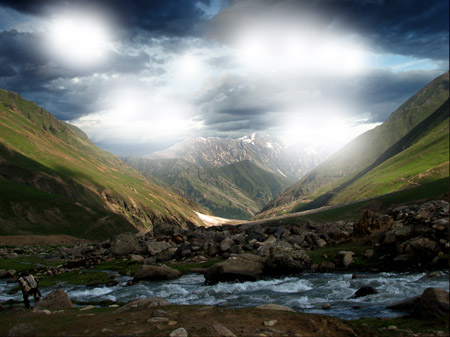
Dab a few spots of white with a soft brush across the sky to fill the gaps between the clouds.
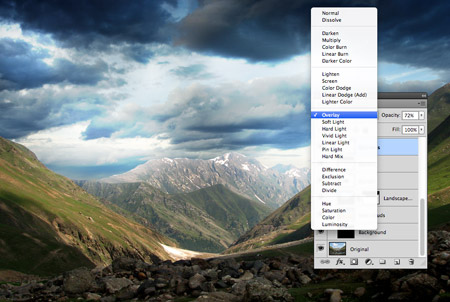
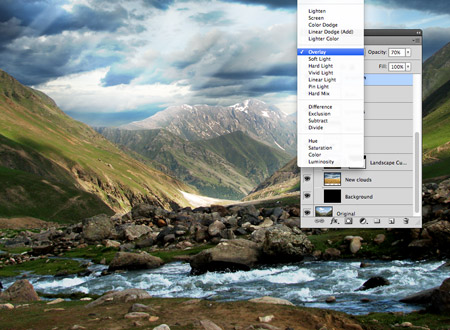
Change this layer to Overlay to give the impression of bright sunlight shining behind the clouds. Reduce the opacity to around 70% to tone down the effect.
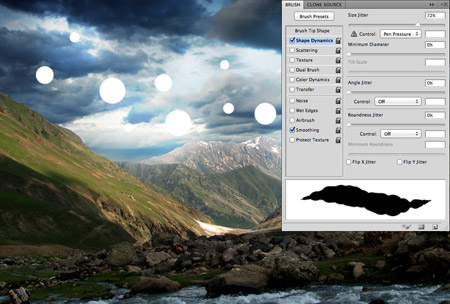
Adjust the settings of a hard round brush to enable size jitter, then add spots of alternating sizes across the sky.
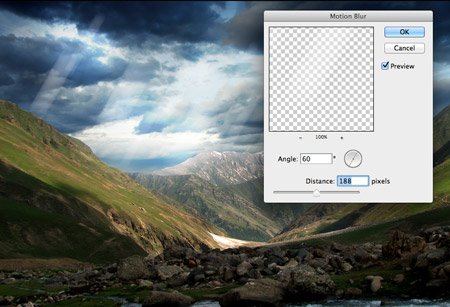
Go to Filter > Blur > Motion Blur and adjust the angle to around 60 degrees. Increase the distance to transform the basic spots into heavenly light rays.
Change the blending mode of the light rays to Soft Light to allow the colours to interact with the colours of the sky and lower the opacity to increase the subtlety of the rays.
The foreground of the photograph is pretty dark in contrast to the background, but we can alter this by roughly painting over the foreground area with a soft white brush.
Change this layer’s blending mode to Overlay to brighten up the foreground area with intense colours. Reduce the opacity to tone down to effect to suit.
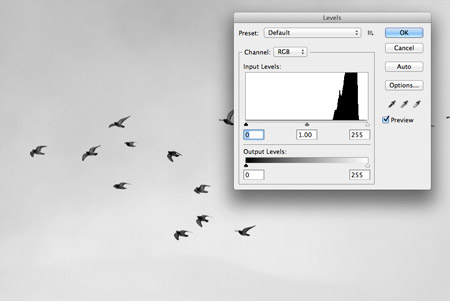
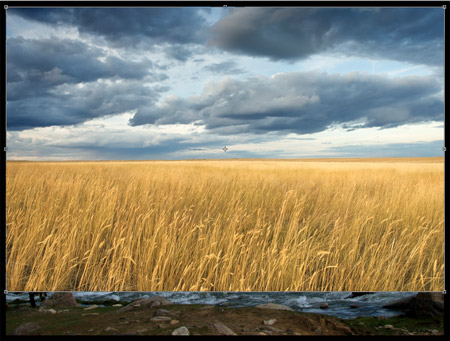
Open a stock image of a flock of birds and press CMD+Shift+U to desaturate. Open up the Levels window and use the eyedropper tool to set the white point to isolate the birds from the background.
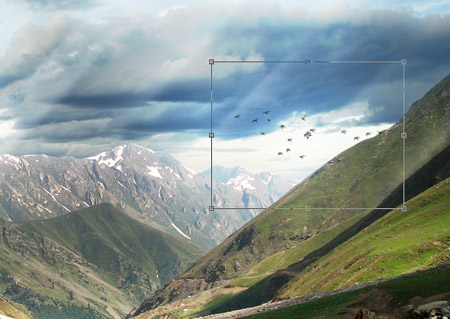
Paste the birds imagery into the main document and set the blending mode to Multiply to render the white areas transparent. Scale and position the flock of birds in the scene to add an extra touch of detail.
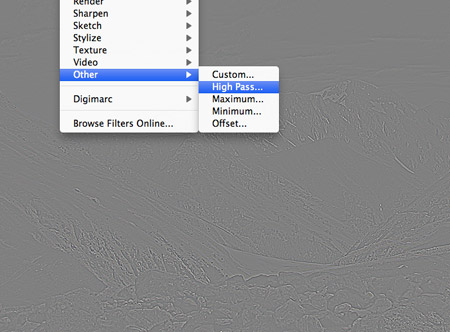
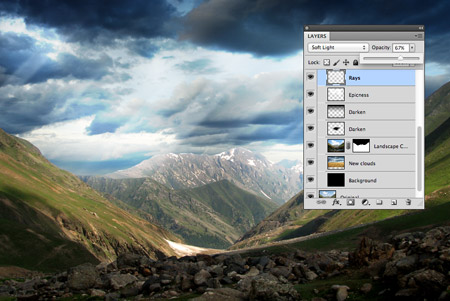
Press CMD+A to Select All, then use the shortcut CMD+Shift+C to Copy Merged. Paste this duplicate of the image onto a new layer and add a High Pass filter (Filter > Other > High Pass). Adjust the amount to around 1.5px until the detail is just visible in the grey preview window. Change the blending mode to Hard Light at 50% to really bright out the fine detail of the image.

Paste in another duplicate of the image, but this time change the blending mode to Overlay to add one final adjustment to the overall contrast and intensity. Tone down the effect by adjusting the opacity to around 30%.
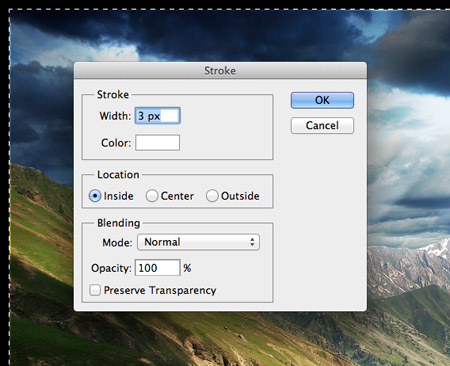
Finish off the image with a subtle border by adding a 3px white stroke on a new layer, then set this layer’s blending mode to Overlay.
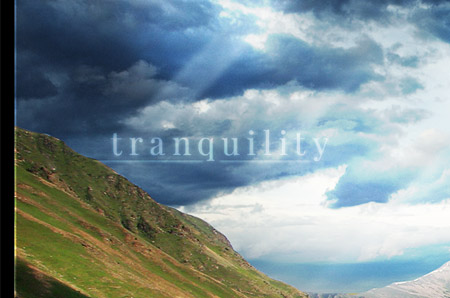
One finishing touch to the image would be to add some kind of title. Choose a suitable font and blend the text in with the background with more Overlay effects.
The final image is a real transformation from the original. Not only has the new sky provided a whole new atmosphere, but the increased contrast and saturation all help add extra intensity to create a beautiful picture. Even without the more fantasy style elements such as the rays of light, the darkening and lightening of areas help increase the dynamic range of the basic image.

This is the bestest ever! I will be using this within the next week for sure!
Another goodie, cheers Chris. :)
Nice. I think the heavenly light rays and the text are a couple of steps too far, but the rest is great. Cheers.
genial!!!
Gorgeous pic, great work,
but please kick the typography. The letter spacing and the underline ruin the overall experience.
I like it, but part of having nice photos is going easy on the PS edits, think this one goes a tiny bit overboard ;)
I agree, this tutorial should be named “how to create an epic landscape composition in Photoshop.” this is a little too much editing to feel honest as a landscape photo. In fact even just the color correction and maybe even the light rays without the fake clouds and birds would have been more than enough to create a fantastic “intensified” photo.
This is beautiful and very clever it looks so simple to do
this tutorial should be named “how to create an epic landscape composition in Photoshop.” this is a little too much editing to feel honest as a landscape photo.
Too much. The key to photos like this (are you listening to me HDR enthusiasts on Flickr?) is subtlety.
totally looks like the person in the stock photo is having a poo.
Man, you should not do that to photos…
I appreciate your work as web designer and designer, really, but this is touch to much.
Mho.
Cheers.
Nice and useful article. I will spend some time to improve my photos
You are an absolue genius.
Great result! Thanks for the tutorial.
Really nice quick tip…..I wud’ve never manipulated the image like dat…
Wonderful tip. This makes the image look really catchy!
Okay…, but that’s not intensify… that’s more like how to make an obviously fake landscape from an almost good photo.
Totally on time, im working with my post processing now