This post was originally published in 2009
The tips and techniques explained may be outdated.
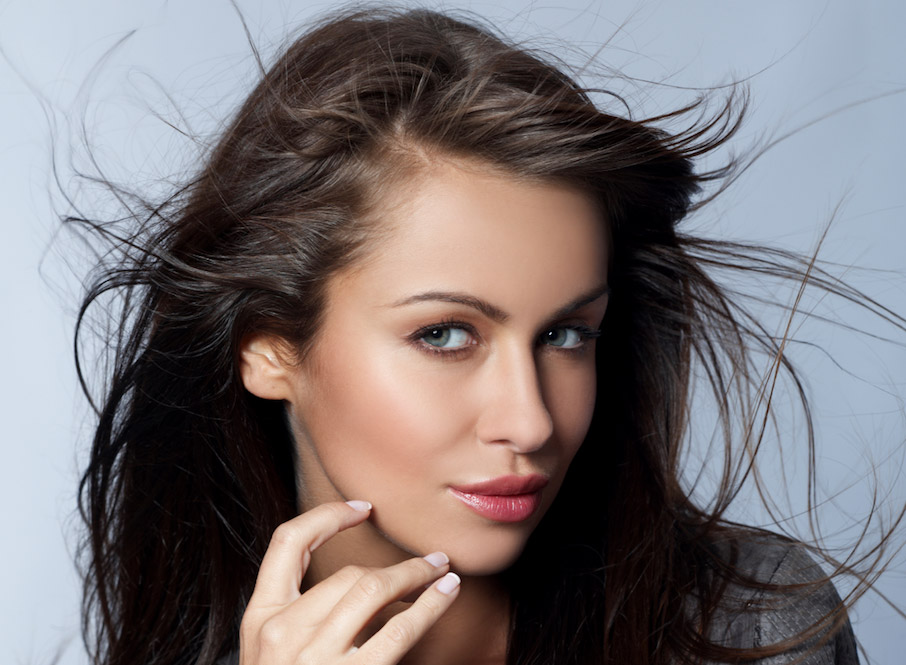
When trimming out images in Photoshop, human hair or animal fur always proves troublesome and can be tricky to achieve a realistic look. Here are two techniques I use on images with both plain backgrounds, and those with a varied background tones, each achieving pretty decent end results.
Technique One: Images with Plain Backgrounds
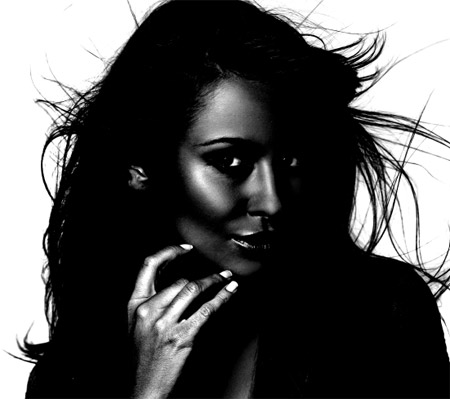
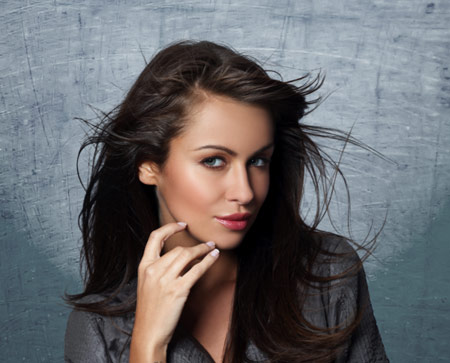
The best photos are those professional studio type shots that are taken against a plain white background. These shots make it much easier to find the edges of the subject, but trimming out fine hairs can still be a little tricky. In this example we’ll be using the common Channel technique to trim out this lovely lady.
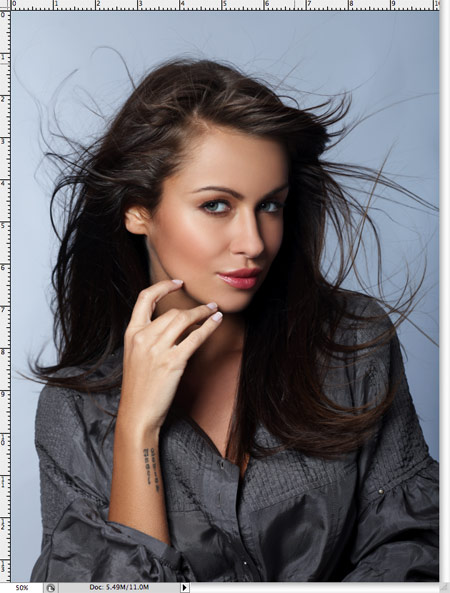
Open up your image in Photoshop. This particular image doesn’t have a pure white background, but it is a plain colour and has good contrast between the subject and grey backdrop.
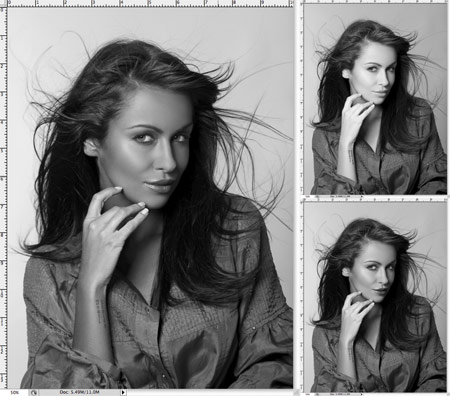
Head over to the Channels palette and review each of the Red, Green and Blue channels. Each one will be made up of slightly different tones, pick the one with the most contrast between foreground and background. Drag this channel onto the new channel icon to duplicate it.
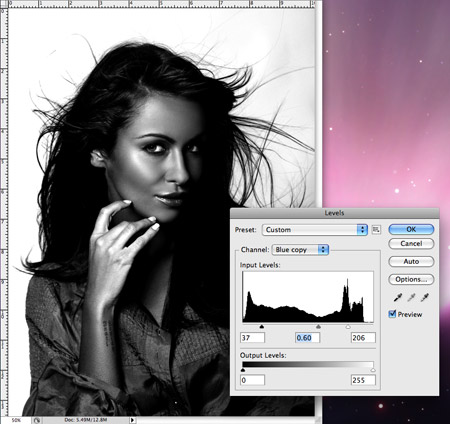
With only the new channel selected, adjust the Levels (CMD+L) to dramatically increase the contrast between light and dark areas. However, don’t go too far, as you’ll notice some horrendous pixilation appearing in the fine areas.
Due to the slight variation in tone of the background, it appears grey in the darker areas. Use the Dodge tool set to a low Opacity to target the highlights and brush over this background area to really brighten it up.
Switch over to the Burn tool and target the shadows to dramatically darken down the inner areas of the image to pure black.
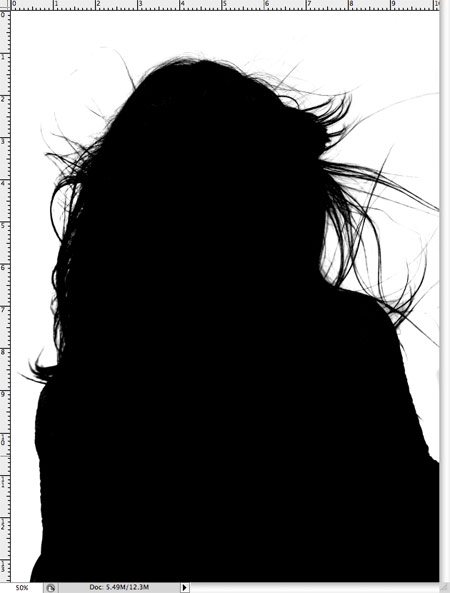
Use the brush tool to finish off the blacks by painting over the remaining areas of the inner section of the image.

Inverse the image to switch over the black and white areas (CMD+I), and give a quick check for any stray areas that may have been missed by the brush.
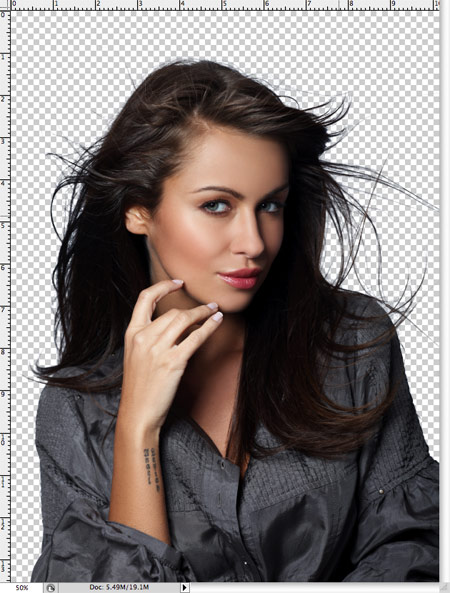
CMD+Click the Channel thumbnail to load the selection, then turn back on the visibility of the original channels. Head back over to the Layers palette and copy the selection. Paste it on a new layer and hide the original to see the cut out image against transparency.
The selection has managed to trim out even the finest of hairs to give a realistic cut. Paste the photo against an alternate background. Zoom in and check for any light coloured fringes around the edges, especially if placed against a darker background. These can be reduced using the Burn tool set to Highlights and gently brushed over the outline of the image.
Technique Two: Images with Detailed Backgrounds
The Channels technique is all well and good for studio photography with plain backgrounds, but it gets a little more difficult on standard shots with detailed backgrounds getting in the way.

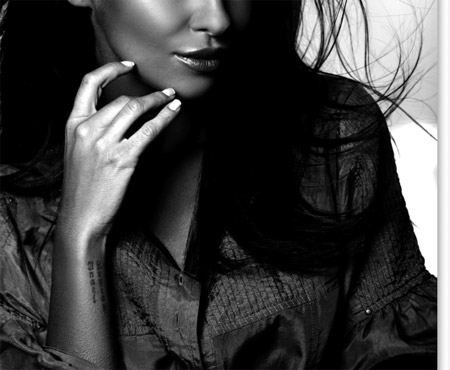
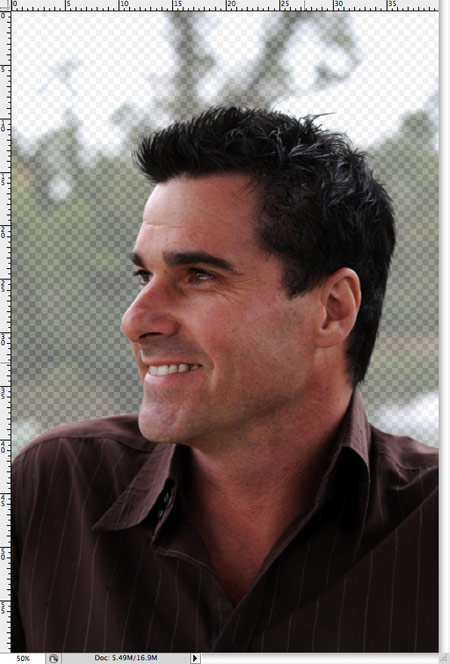
Open up your image in Photoshop. This image has a decent contrast between foreground and background, but certain areas of the hair do blend in with the darker tones of the backdrop.
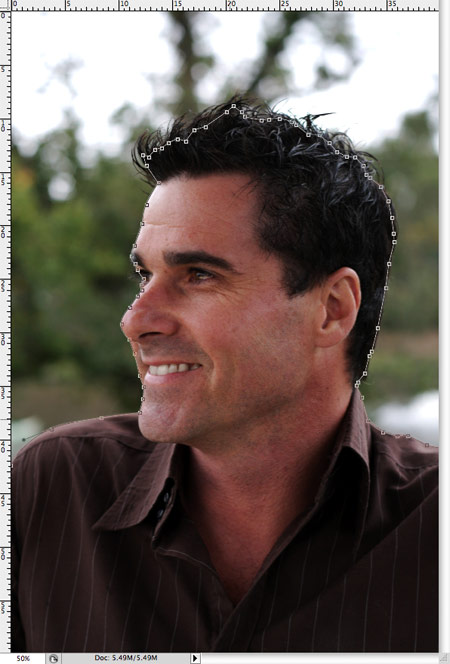
Start by trimming out the clear edges with the Pen Tool, but when you reach the hair simply create a rough tracing.
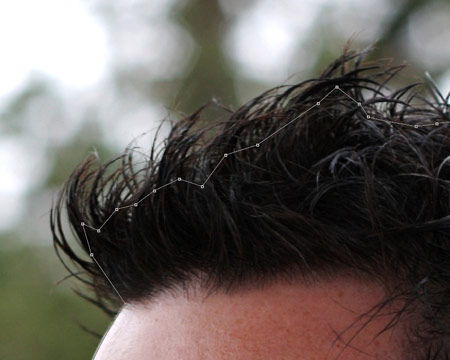
Around the hair portion, aim to include only solid areas of hair that aren’t merging with the background, otherwise the lighter tones will mess things up later.
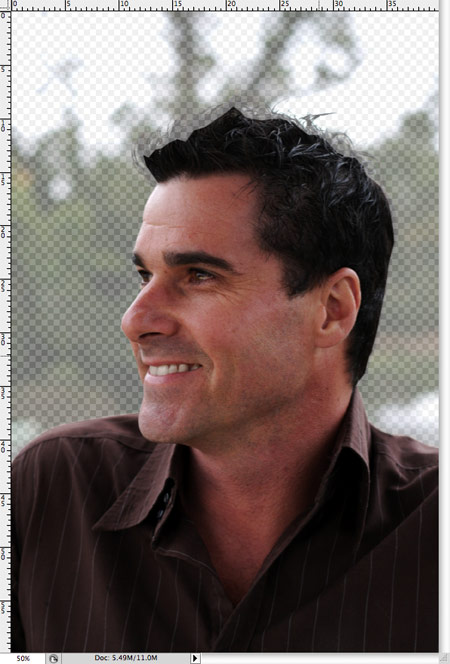
Make a selection with a feathering of 0.2 pixels to remove any harsh edges then paste onto a new layer. Reduce the transparency of the image so that the original hair line can just be seen.
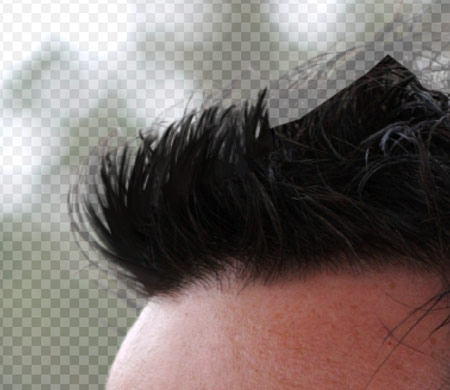
Here’s where the fun begins! Use the Smudge Tool to draw in areas of new hair, using the original outline as a template. Begin with a 4px brush to flesh out the thick base hair and disguise the jaggy lines from the path. A Wacom Graphics Tablet really comes in handy here to speed up the process and help add varied line thicknesses.
The new hair will soon flesh out the image back to its original appearance. It doesn’t look too bad at this stage, but repeating the process with a thinner brush will draw in those individual hairs.
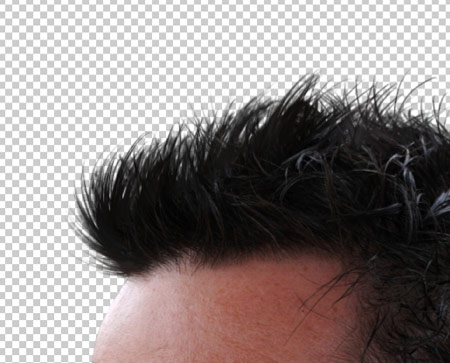
Use a 2px brush with the Smudge Tool to draw thin stray hairs in varied directions to add realism to the image.

The photo can then be placed on any background with ease, and displays a crisp cut-out with no fringing or loss of fine detail.

Loved this one Chris – well done! It’s always a huge pain in the *** to cut out hair, but this might do the trick.
Thanks for sharing!
Thanks a lot. I too have faced the difficulty many times.
Really useful techniques, it would be very interesting and richer if you include an example of an animal picture, maybe a a squirrel (they very tricky to cut).
Great tricks, this kind of techniques are really important in photoshop, I use really often the first one, but it doesn’t work all the time so thanks!!!
These look like interesting alternatives to the very annoying Extract filter. Thanks, Chris.
This just shows there’s no magic button in photoshop. And cutting out hair with a 50 pixel blured brush won’t cut it (:P)
Nice tutorial! wish i had a wacom… :/
First method is awesome, I’m definitely gonna use it!
Really nice tutorial! But isn’t it easier/faster to use >select>color range for the studio photo?
anyway thx for this very useful tut!
The channels technique is cool, have been using that for years after learning it from the crazy Russell Brown; nice to see it published again for the next generation :-)
Nice tip!
Nice one Chris!
Pretty awesome :) – the second technique is a novel way – don’t think I’d have thought of that!
Thanks :) really enjoyed going through this one.
very nice tip! thanks for sharing.
GREAT…tips n trick here,,,,
thanks for share…
thanks for sharing, great tutorial (again!) :)
Thanks (from Italy!)
I use the first technique all the time. I’d suggest a layer mask instead of copying and pasting the selection (Load Selection> Layers Panel > Add Layer Mask. That way, you can paint and smudge the mask to refine the knockout, and it’s non- destructive
I would have never thought of using the smudge tool to simulate hair. What a fantastic idea!
I use the first technique most of the time with one additional step. Using the Filter>Other>High Pass filter before the levels adjustment puts a ghostly halo around the figure that really separates it from the background. It makes the selection that much easier.
Thanks for those tips. I used extract to do this and got some really good results before.
big up for chris!
The second is pretty cool! I’ve seen something like this on masking fur. To many more techniques on masking I recommend Photoshop CS4 Channels and Masks authored by Deke MacCleland, on Lynda.com. ;)
Sweet! Can’t wait to try these out on my next project! Thanks, Chris!
These will come in really handy, coz here in Hong Kong everyone’s got crazy mental Dragon Ball Z haircuts!!!!
finally hair cuts……..
Wow it can see these techniques coming in useful for other things too, like grass and trees. I particularly liked the second technique, its a very novel idea and seems to work really well!
Hey, cutting out hair in photoshop is one of the most difficult task. But it seems you do it without any effort :D. Thanks for the tutorial.
Awesome. This might actually make me do some cutting myself instead of shipping it to China :)
Awesome tut bro thanks a lot :)
very clever stuff. thx
Wow! This is probably one of the best and easiest tutorials for cutting out hair in PS. I love it!
thanks for the tips! we always just used a half-assed feather at my last job, because nobody know what else to do lol. can’t wait to try it out!
Thank you so much for this! Super useful not only for cutting out hair, but for putting it back on the heads of people who, ahem, want to take off a few years – in house creatives who get stuck with ‘tweaking’ pictures of the Board: you know what I’m talking about ;)
This will save a ton of time, thanks so much.
What a create tutorial! Oh…if every picture was only taken in front of a green screen…perfect picture everytime!
WOW….!!!
it´s is wonderfull…!!!
Very nice men.
Lovely :D Nice and easy!
~~
ty for share :D
Fantastic as always!
Cool!
Oh thanks! I needed it!
Great Tutorial, Thanks!! I’m constantly cropping out perople for work and these will come in handy
wow, thx!
Wow..i was looking for something like this..This is great!
Awesome job man!
Thats mental! Cutting out hair has always been an issue for me. Not any more! Thank you for sharing :)
Wow! great lesson! I didn’t know about smuge tool
Covered rather well. always a pleasure to read.
thank you
Great techinque, used the first one without any problems. Thanks!
great tutorial will try them out. thanks.
WOW, thats is so cool i needed this so much, thanx Chris ;)
wonderful work
The second method is new to me in this form but seems to be really handy. Thanx for sharing!
thanks! ;)
thax alot man
You can also use channels to separate the hair from hard backgrounds. Its a lil bit faster than using a pen. :)
I’d swear I saw my phone number on her wrist in the first photo !
This is a very nice tutorial
ref: http://twitter.com/chriscoyier/status/2567445648
Hi,
This is a very easy way to get sharp and excellent results.
Thanks for all your help. Keep it up!
Angela
Great tutorial, the channels method looks really useful.
Legend!
Nice one! Was looking for ideas for cutting out hair.
Very handy, I think I will try it for sure.
hey
i hadnt known that now that i know i should be practicing more
keep up for the good job.
Cheers!!!!!
awesome! want to see more of that stuff..
Thanks
Hi! Excelent! but in the 2nd case, the new hair dosn´t look similar to the old hair, the color is not real
How can we put the same texture and color?
Thanks!
Heeey no more lasso tool for me.. Thanks!
thanx to help us this izz really awsome thanx again
2nd techique was very useful thank you thank you thak you so much…old man, grey/white hair, white background…and an 8meter outdoor waiting for him! it was true hell!!!
it’s wonderfull. thx.
this is great tuts! awsome! thanks for sharing!
Ahh! I’m having a lightbulb moment… so *thats* how you do it. Good tutorial, I’ll definitely end up using the techniques.
thanks man.
Very nice methods here, it was a fun read!
@Javier : hair is a problematic selection no matter what technique you use and unfortunately it seems like we always get the toughest jobs; it’s never that nice high res person on a white backdrop.
If you want to select without having color bleeding from the original image then you’re going to have to manually draw the hair lines yourself. That’s like the best possible outcome you will get. Also, the most time consuming method by far.
You could try a quick fix by selecting using the second technique Chris has written here and then adding a color filter to them to match your background.
Personally I prefer using the Quick Mask technique because I can literally see the various degrees of transparency I am doing and I get pixel level control.
grade……………
thx lot…………….
nice tutorial gj
That’s really cool, I didn’t know about the second technique. Something to keep in mind :)
excellent tutorial… thxs ;)
now thats cool:)nice tips Chris :)
Thank you, this will same me soooo much time
really its very good tutorial for photoshop..thanks
Fantastic, thank you very much.
Really good techniques both of which I have never used, but as for the 2nd one I have used a small variation. Rather then using feathering or the smudge tool, I just used a soft brush in a layer mask to make a good selection for a person.
It’s very good,thanks very much.
This is premium man, thanks!
cool!
Excellent write-up! For those who have money to spare on an excellent program, check out Vertus FluidMask. Works similar to this and is deadly accurate when used correctly, one of my favorite plugins for Photoshop when doing placement of elements into other locales.
Price is a little steep, but well worth the investment, shaved a LOT of time off my workflow.
Cheers from NY!
These are different techniques of cutting hair and image also.really photoshop has various features.