Fun Vector Monster Character Illustrator Tutorial

My old Illustrator vector monster character tutorials were one of the main reasons this blog took off back in 2007, so today I thought I’d go back to my roots and create a new character based on my old design style. Follow this step by step Adobe Illustrator tutorial to create a fun vector monster. We’ll use only basic shapes to construct the monster’s features, but combined they create a fun and friendly character.

The monster character we’ll be creating is made up of lots of rounded shapes to develop a friendly personality. This also keeps the construction process pretty simple, and allows us to experiment with various tools in Illustrator to tweak those basic shapes into recognisable features.
View the final vector monster character design
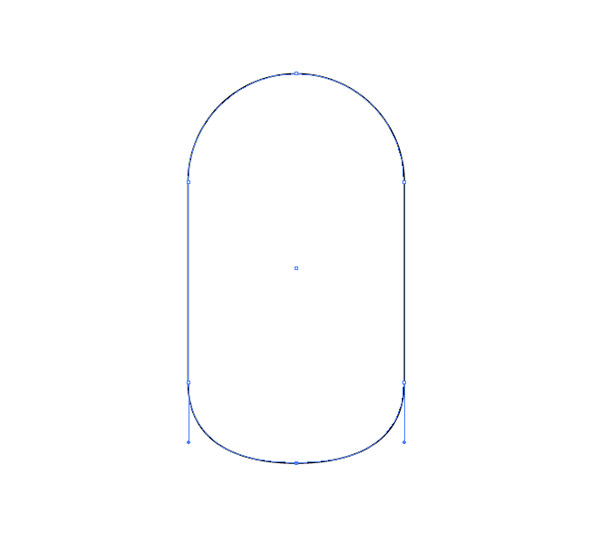
Open up Adobe Illustrator and draw a rounded rectangle on the artboard. Hit the right cursor key while dragging the shape to maximise the corner radius. Use the Direct Selection tool to select and move the lower most point vertically upwards to flatten out the bottom edge.
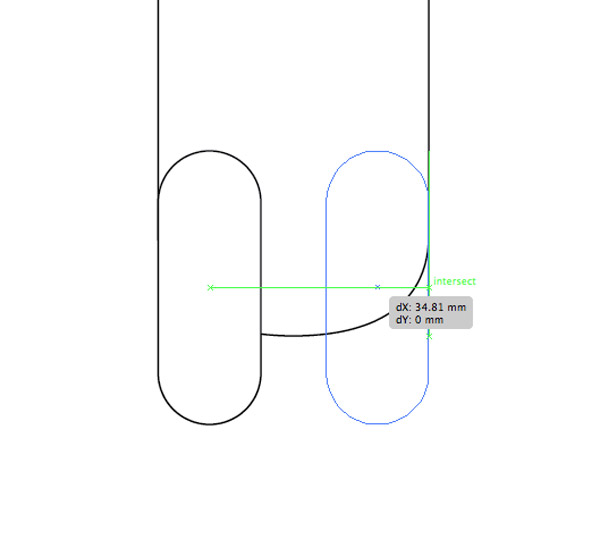
Press CMD+U to toggle on Smart Guides, this makes it easy to line up a long thin rounded rectangle to the main body. Hold ALT and Shift then click and drag a duplicate of the rectangle and align it to the other side to create a pair of legs.
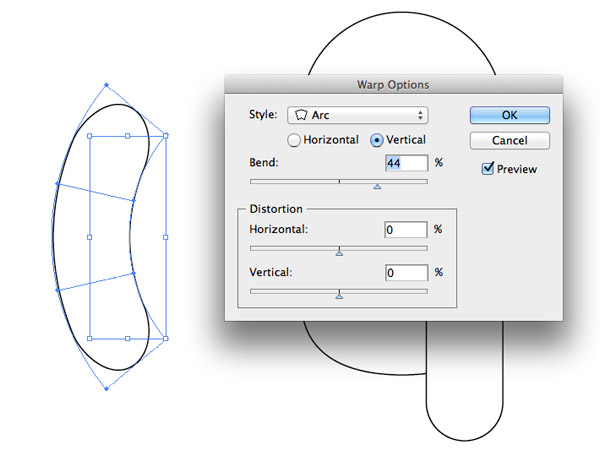
Make another duplicate of the rectangle then head to Object > Envelope Distort > Make with Warp. Select an Arc at 44% Vertical to bend the rectangle.
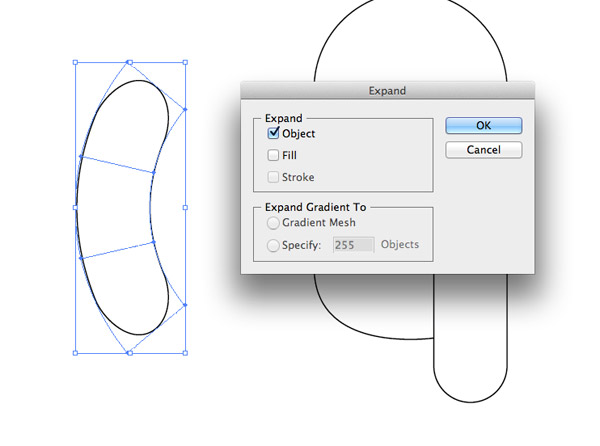
Go to Object > Expand and check just the Object checkbox to confirm the warping and convert the object back into a solid shape.
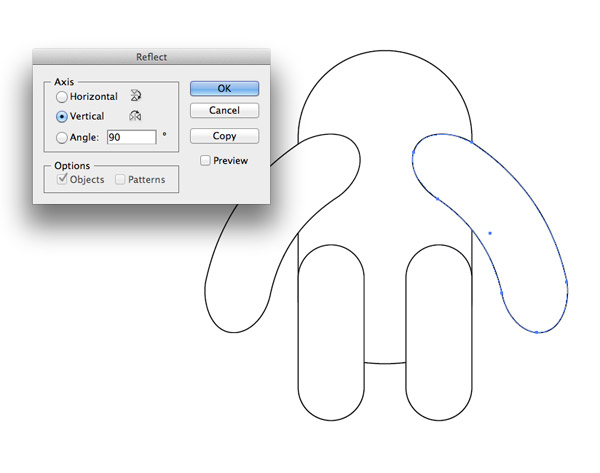
Position the bendy rectangle onto the body as an arm, then make a duplicate and reflect (Object > Transform > Reflect) it onto the other side.
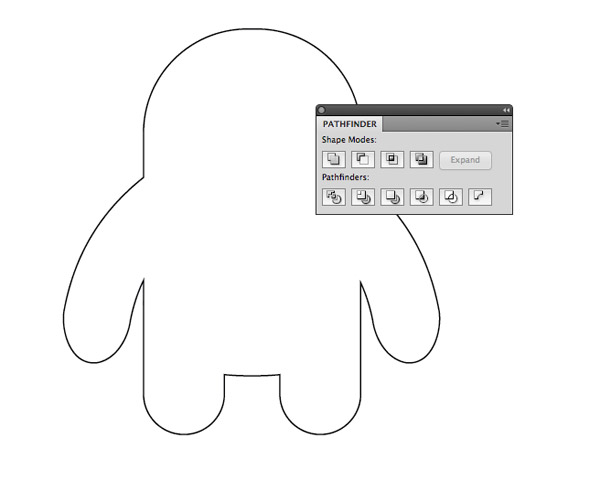
Select all the elements that make up the monster body and limbs then hit the Merge option from the Pathfinder palette to blend them all together into one shape.
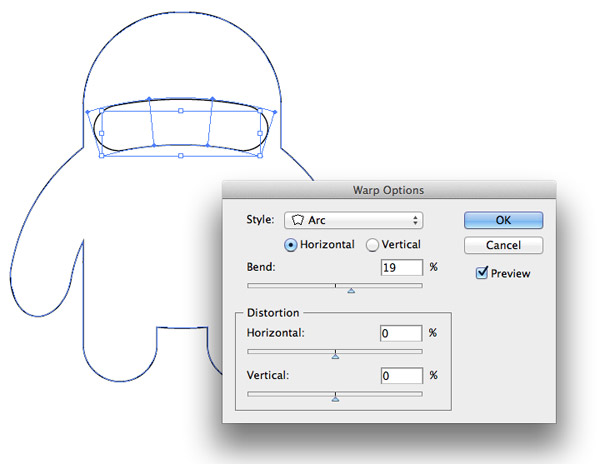
Draw a rounded rectangle to represent the mouth, then give it a Warp, this time of 19% Horizontal.
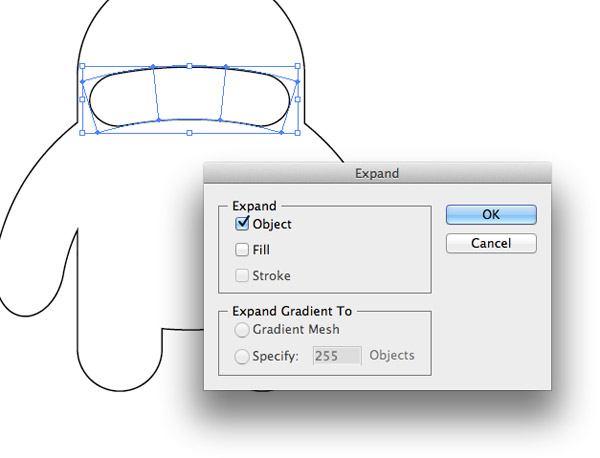
Go to Object > Expand and select just the Object checkbox to convert this mouth object into a solid shape.
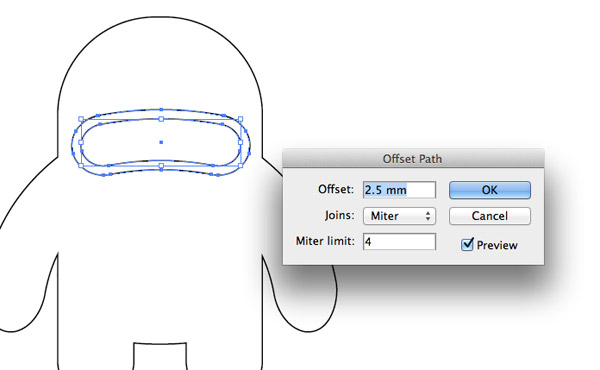
Next, go to Object > Path > Offset Path, enter 2.5mm in the options window and hit OK. Right click this shape and select Ungroup to separate the two elements.
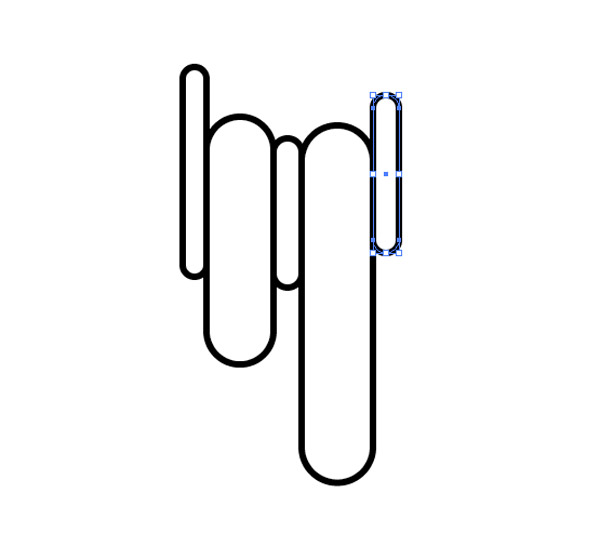
Elsewhere on the artboard zoom in and draw a series of small rounded rectangles. Draw a narrow rectangle followed by a wider rectangle, each one a different length.
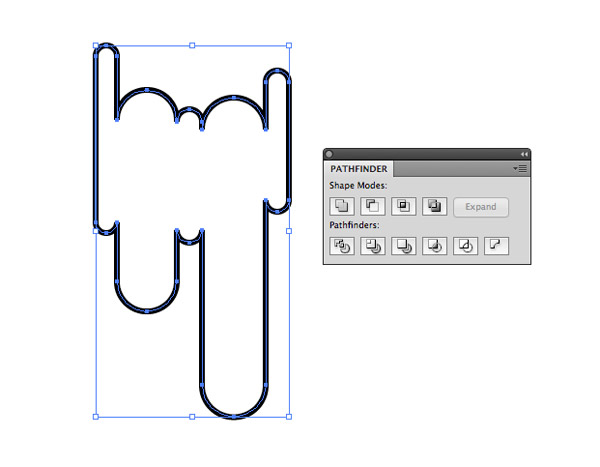
Select all these small rectangles and blend them together using the Pathfinder tool.
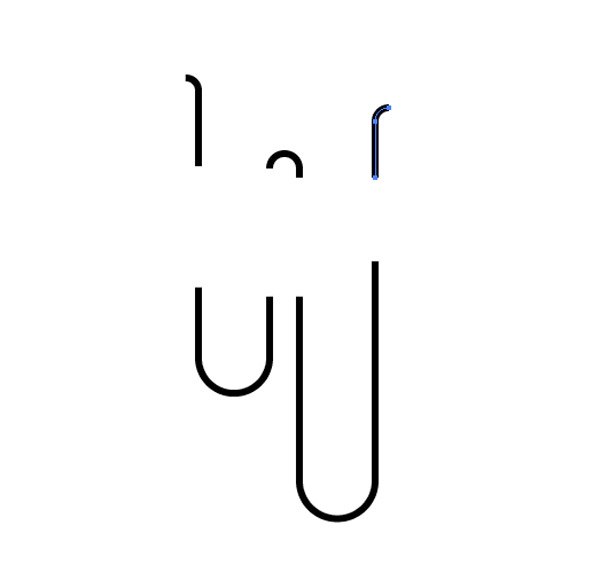
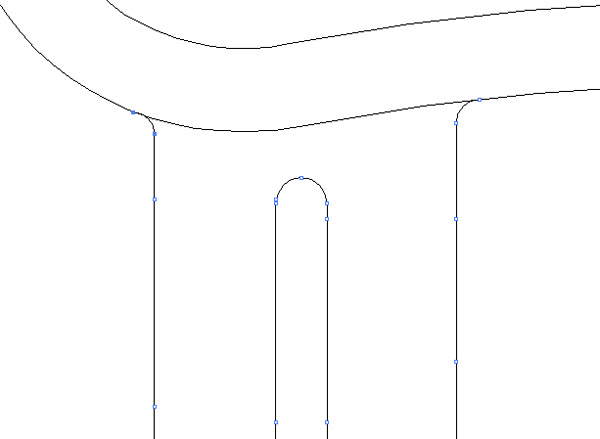
Use the Direct Selection tool to select individual points around the shape and hit delete to remove them. Alternate between removing the lower curve followed by the upper curve on the next shape.
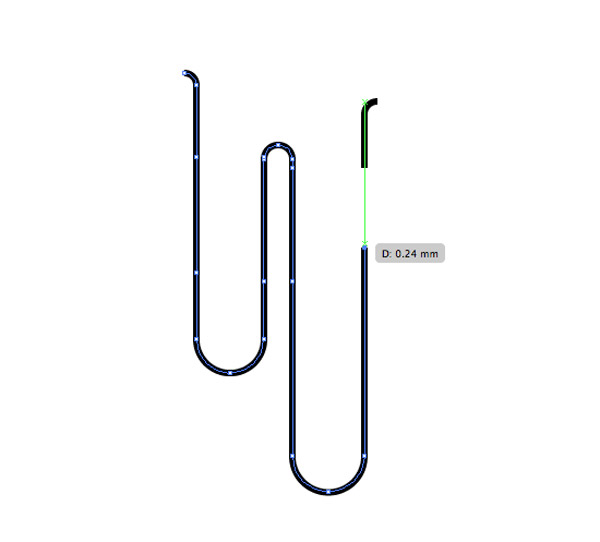
Use the Pen tool to join the open ends together on each vertical line to create a continuous path. This new shape will be used as the saliva drips from the monster’s mouth.
Toggle Outline Mode (CMD+Y) and zoom in to the mouth area to carefully align the open ends of the saliva drips to the mouth outline. Use the Direct Selection tool to move individual end points into position to line them up.
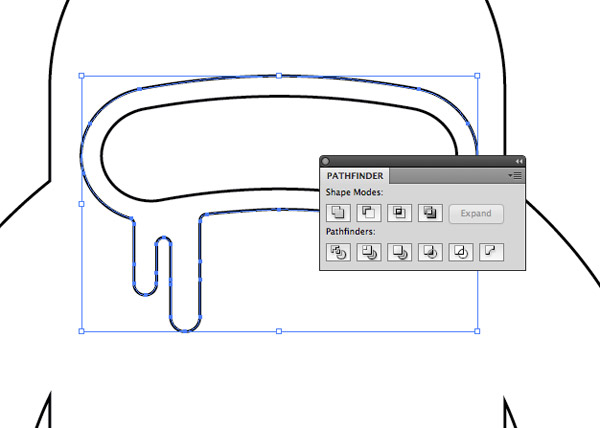
Select both the outer mouth shape and the saliva drips and merge them together with the Pathfinder tool. If any strange angles or artefacts appear the two shapes might not have been perfectly lined up, so zoom in and remove any unwanted points with the Pen tool.
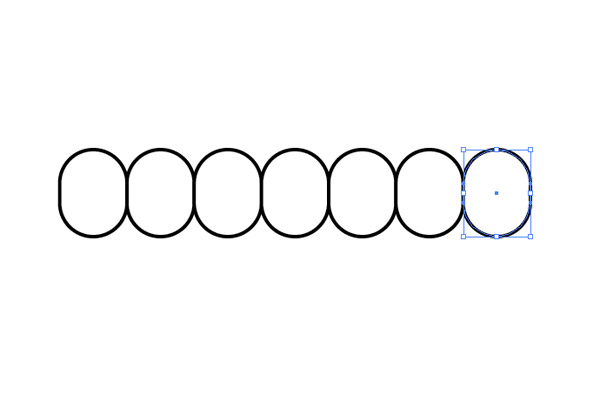
Elsewhere on the artboard draw a short rounded rectangle. Hold ALT and Shift while dragging a shape horizontally to create a duplicate. Those green smart guides will make it easy to align the duplicate to the right edge of the original. Hit CMD+D to repeat the transformation to create a series of 6 shapes.
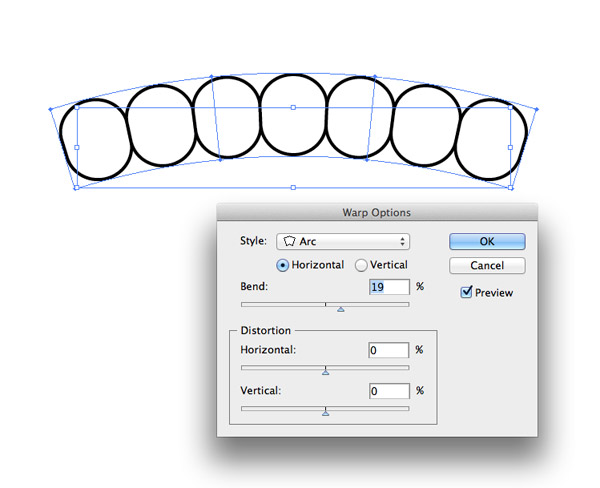
Draw a selection around all the shapes then go to Object > Envelope Distort > Make with Warp and add the same 19% Horizontal Warp as the mouth piece.
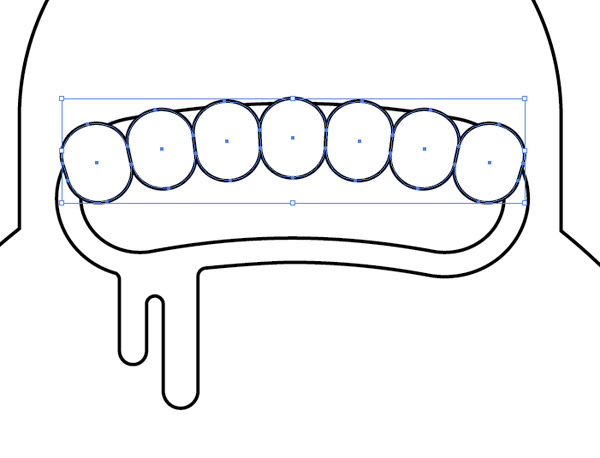
Scale and position the shapes over the mouth area to represent a series of teeth.
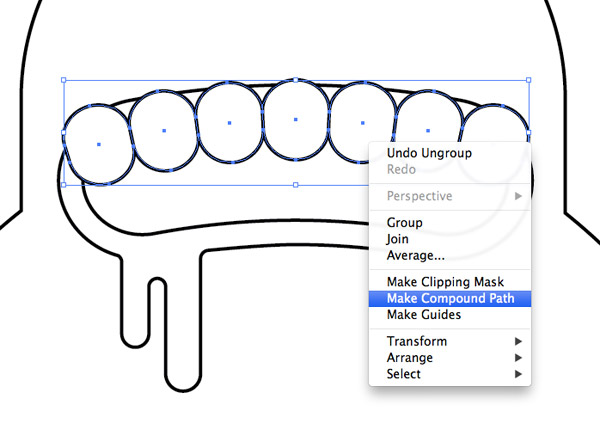
Right click and select Ungroup to separate the teeth shapes, then create a Compound Path.
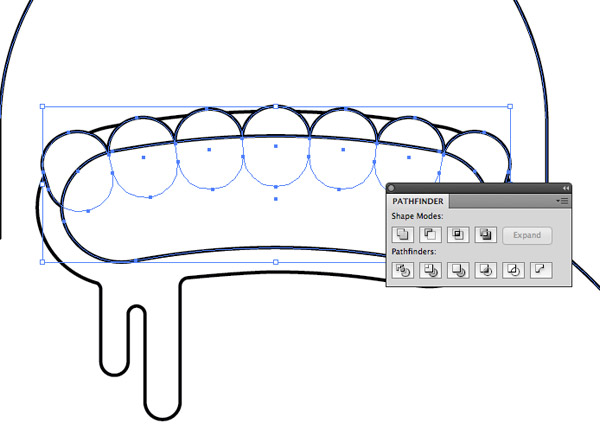
Copy and Paste in Front (CMD+F) a duplicate of the mouth piece then send it to the top of the stack (CMD+Shift+]). Select both the teeth shapes and the duplicate mouth shape and hit the Intersect option from the Pathfinder palette to trim the teeth to size.
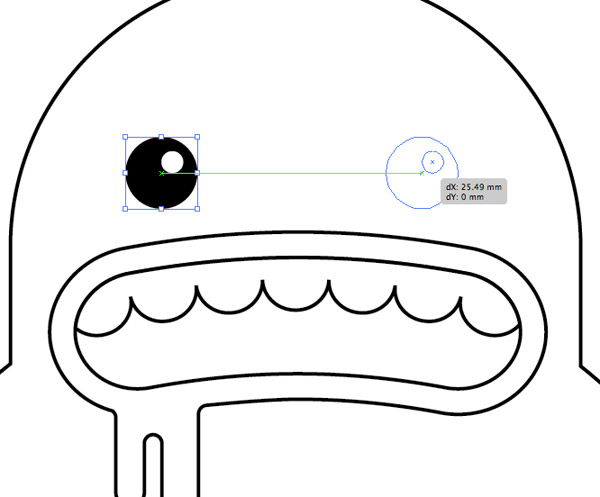
Use the circle tool to draw an eye. Start with a black filled circle then add a smaller white highlight. Duplicate the eye shapes and position them on the other side of the head.

Draw a circle on the belly area and use the Direct Selection tool to move the lower most point vertically to flatten off the bottom edge.
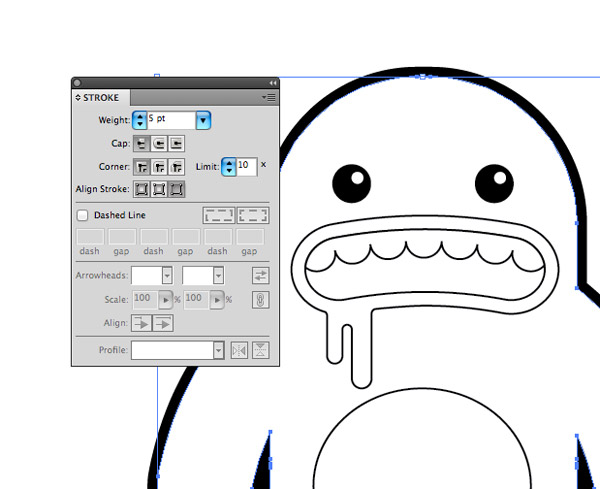
The main character construction is complete, so now let’s make it look cool. Select the main body outline and increase the stroke to 5pt. Click the little icon to align it to the outside.
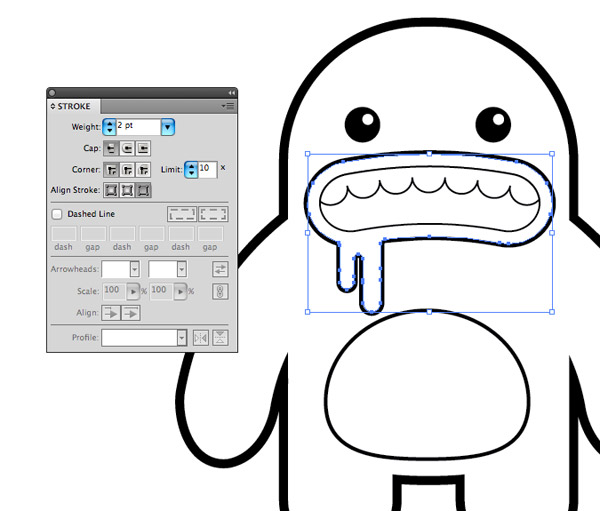
Increase the stroke size on the outer mouth shape and the belly to 2pt and align the strokes to the outside.
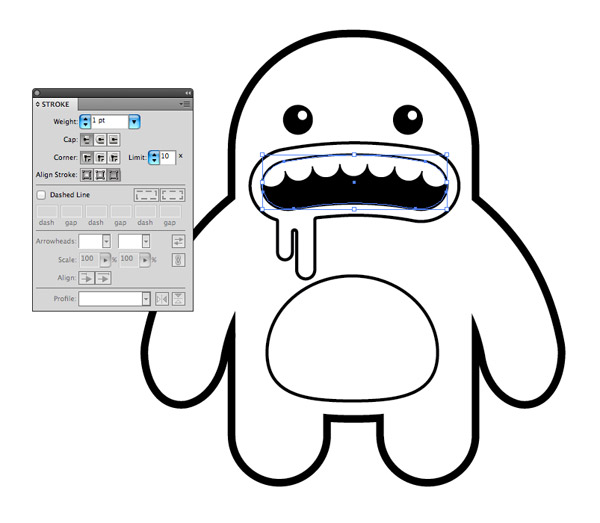
Fill the inner shape with black and give it a 1pt stroke aligned to the outside.

Now to add some colour! Select the main body shape and give it a monsterous green fill.

Add a light cyan fill to the mouth area and a pale green/yellow fill to the belly shape.
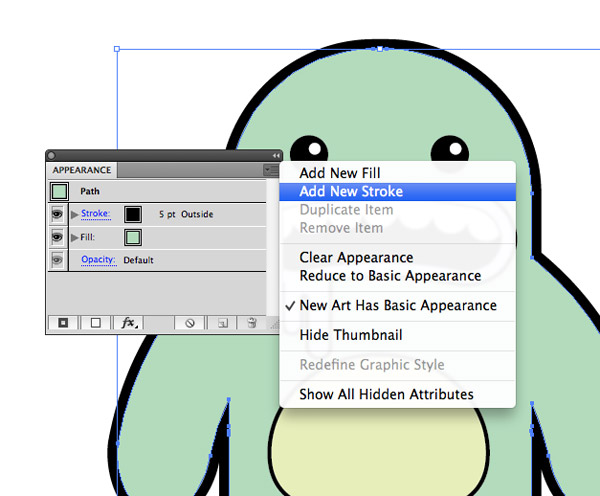
Select the main body shape once again and choose the Add New Stroke option from the flyout menu on the Appearance palette.
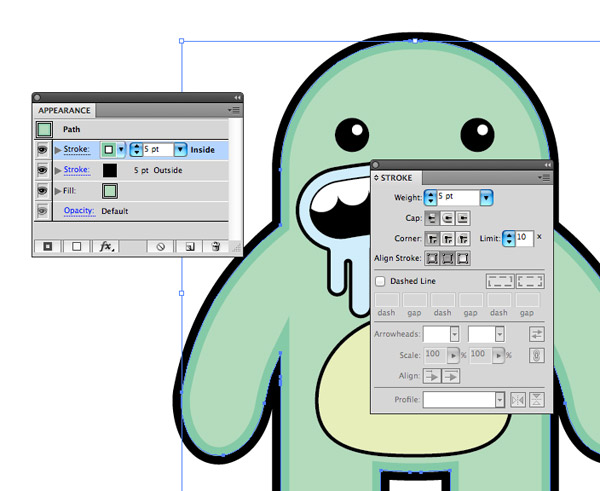
Set this new stroke up with a darker green colour and 5pt size but this time aligned to the inside.
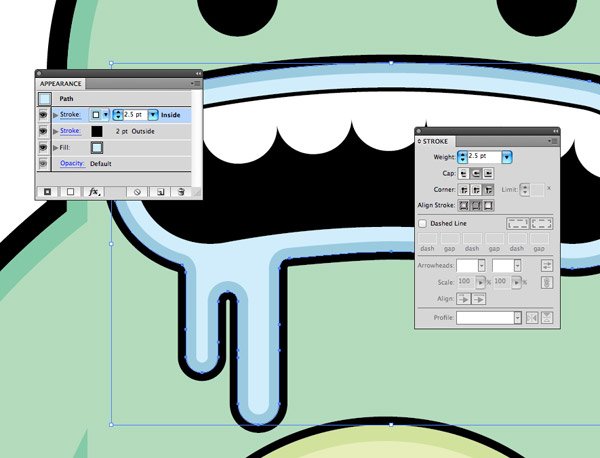
Repeat the process with the mouthpiece and belly shapes, choosing a darker shade of the fill colour and aligning the stroke to the inside.
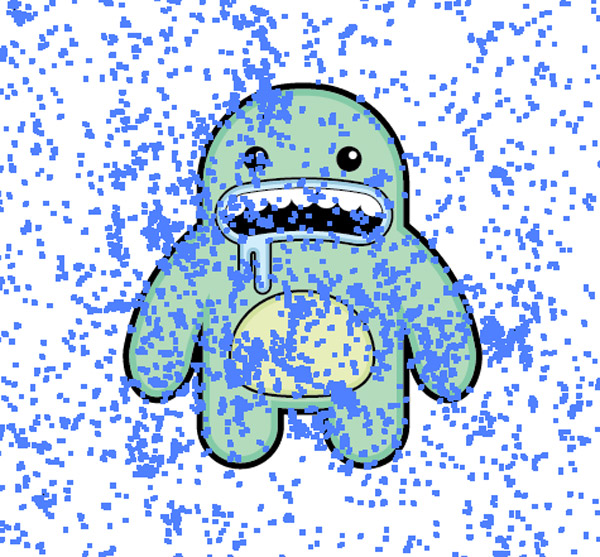
Copy and paste a vector texture from my Vector Bumper Pack and move it into place over the monster.
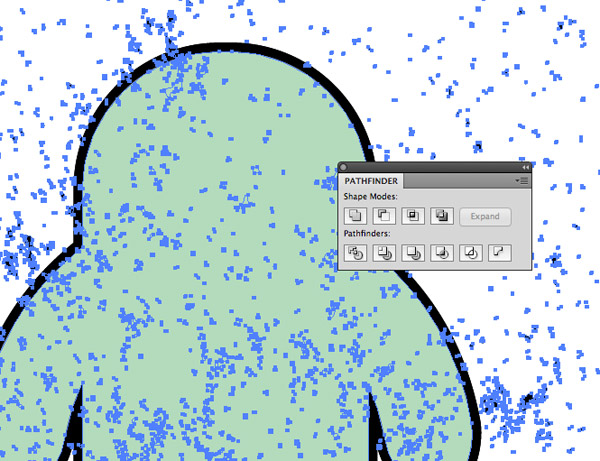
Copy and Paste in Front (CMD+F) a duplicate of the main body shape and remove all Stroke effects from the Appearance palette. Use this shape as a tool with the Pathfinder’s Intersect option to trim the texture to size.
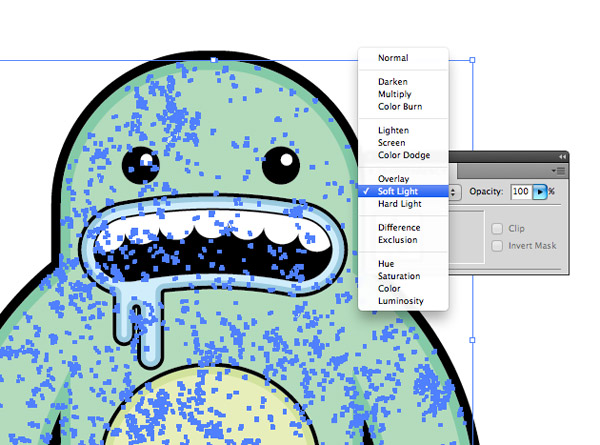
Change the texture’s black fill to Soft Light to allow it to create subtle highlights across the character.

Move the elements that make up the mouth and teeth to the top of the stack to remove the texturing form those particular objects.
This leaves our cute little monster character complete. The simple rounded shapes help create a stylized character with a friendly appearance, then it’s really brought to life with the colour fills, texture and stroke effects.

A great little illustration and a very clear and concise tutorial. Thanks Chris!
The final preview is really friendly. I just wish that the exact colors used (hex #) were given.
Easy! Just use the eyedropper tool and select the color – you can even use the tool outside of the Illustrator window as long as you click the selection first in the window, then you can go and grab directly from your browser!
Nice and quick!
Awesome tutorial. I created monster . Thanks.
I wanna try this one. Thanks Chris!
Brilliant tutorial! Loads of handy little tricks I didn’t know about in Illustrator! Thanks
I like the simplicity of this design. I’m definitely trying this one. (with minor changes of course). Thanks for posting Chris!
At last! I found a very detailed and simple tutorial. Thanks for sharing.
Wow, what a great tutorial. AI is a powerful tool, and this sums up how simple and effective it can be. Thanks!
What a lovely tutorial. Nice one Chris. Think I’m gonna go and try this for myself right now
Thanks for another great tutorial Chris, this was really easy to follow and great for learning the basics.
Great character tutorial!
Great tutorial!
i cant wait to give this one a go.
Très intéressant, merci !
Excellent tutorial! How would I go about hnivag the text line up with the banner? I tried to match the text by hnivag the same properties using the envelope flag warp, but have had little success.Any help would be appreciated.