
This post was originally published in 2012
The tips and techniques explained may be outdated.
Follow this step by step Illustrator tutorial to create a cool vector Yeti character. We’ll use as many basic shapes as possible to achieve that quirky style of illustration, then bring the character to life with a palette of cold colours. Despite the use of basic shapes this tutorial includes a good spread of intermediate to advanced tools and techniques.

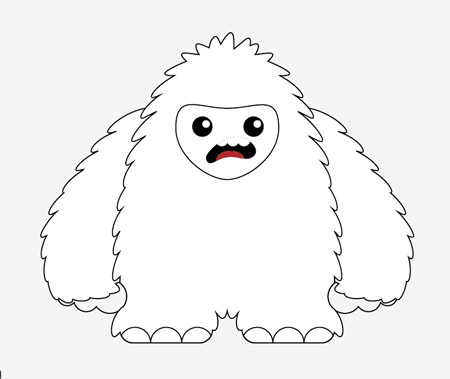
The Yeti character we’ll be creating is made up of basic shapes to maintain that simple illustration feel. The plump round shapes all help create a friendly and loveable character while the high shoulders and wide stance give him a slow and lazy personality.
View the vector Yeti character design

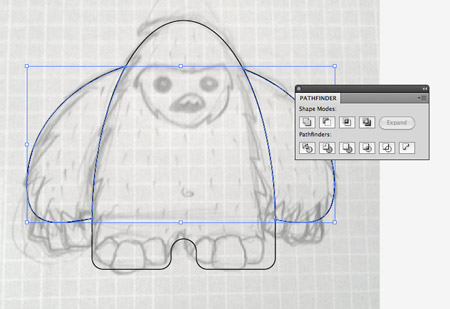
Whenever you start a character design it’s always worth creating a rough sketch to base any vector element on. Place the sketch (included in the member’s source file download) into an Illustrator document and use a large oval to outline the main body shape. Intersect the lower half of the oval with a temporary rectangle and use it to clip away the excess with the Subtract button from the Pathfinder palette.
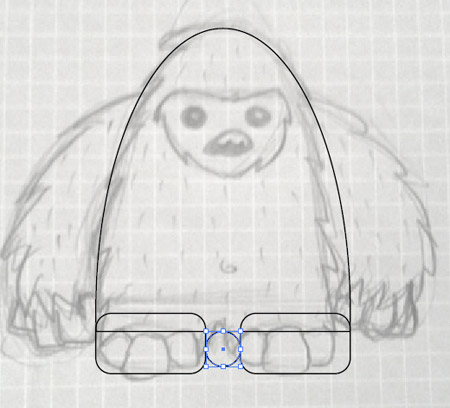
Match up basic shapes to flesh out the overall appearance of the character. Toggle on Smart Guides (CMD+U) to make aligning elements super easy. Here I’m using two rounded rectangles for each leg, then a smaller circle aligned in the center which will be used to create a smooth join between them.
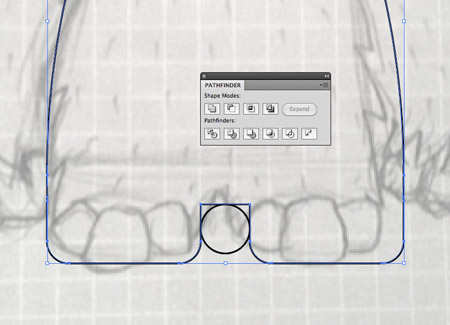
Blend the rectangle legs with the main oval body using the Merge button from the Pathfinder palette, then use the Direct Selection tool to delete out the upper points from the rectangles and lower point of the circle to leave two open paths.
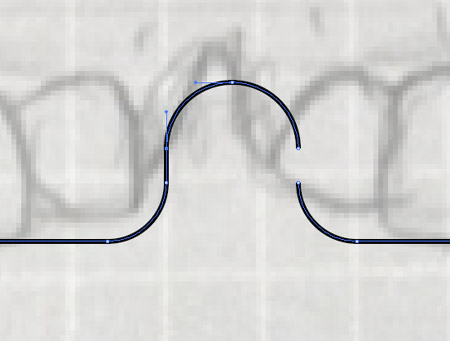
Select one end of the open path and join it to fill the gap. Repeat this on the opposite side to leave a complete path outlining the whole body.
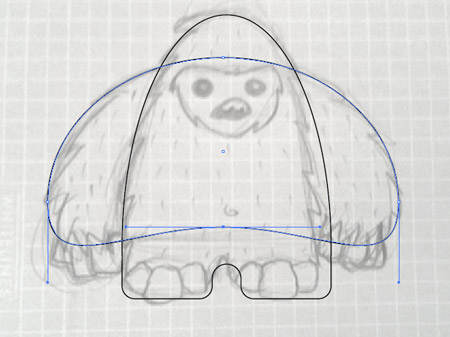
Draw a large circle to match the profile of the arms. Drag the lowermost point upwards to round off the arms near the hands.
Press CMD+C and CMD+F to copy and paste a duplicate of the main body shape, press CMD+Shift+] to send it to the top, then use this shape as a tool with the Pathfinder to ‘Subtract’ this shape from the arms. Right click and select Ungroup to split the arms into two separate elements.
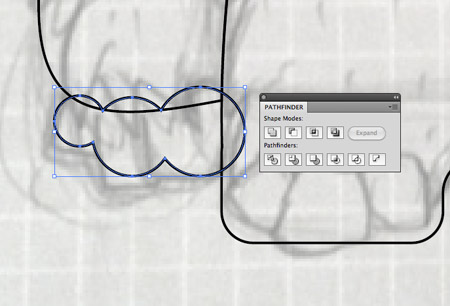
Draw three increasingly sized circles at the bottom of the arm to represent a simple hand. Merge the circles together, then make a duplicate of the arm shape. Make sure the arm is positioned at the top of the stack (CMD+Shift+]), then use it to clip away the overlap.
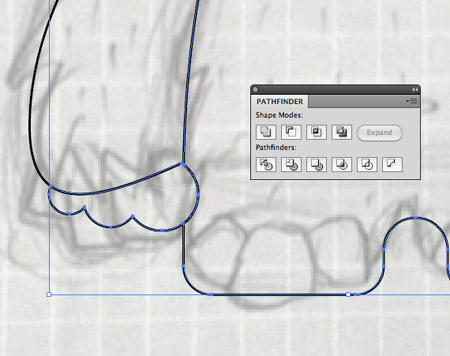
Make a duplicate of the hand shape, send it to the top, select both the temporary hand shape and the body shape, then hit the Subtract button from the Pathfinder tool to clip away the overlap between the hand and the main body.
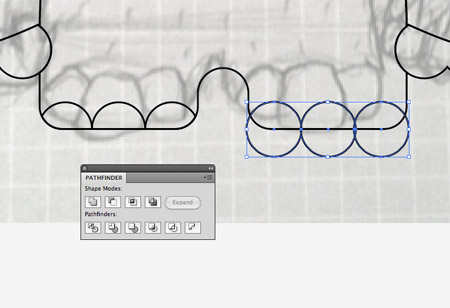
Draw three circles aligned side by side and align them to the foot area. Select the three circles and hit CMD+8 to create a Compound Path then make a duplicate of the main body shape and use the Pathfinder to ‘Intersect’ the circles to create a set of toes.
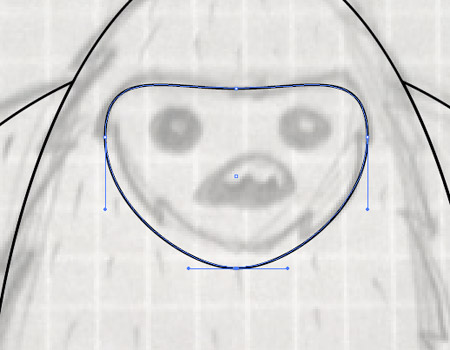
Draw a circle as a base of the facial outline, then use the Direct Selection tool to manipulate its shape by dragging the top and bottom points into place.
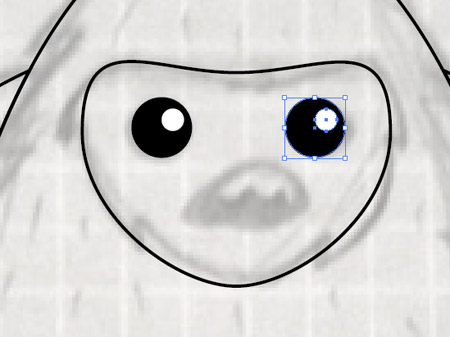
Use a black filled circle with a smaller white circle to create a simple eye, then hold ALT and drag the shapes to create a copy.
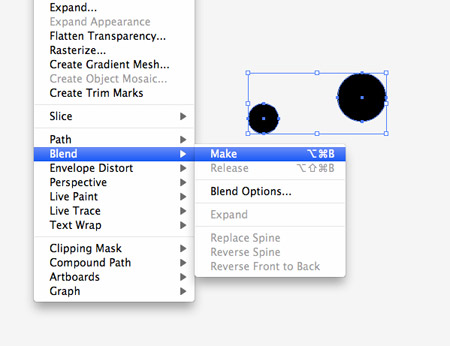
Draw a large and small circle elsewhere on the document and create a Blend between them by going to Object > Blend > Make.
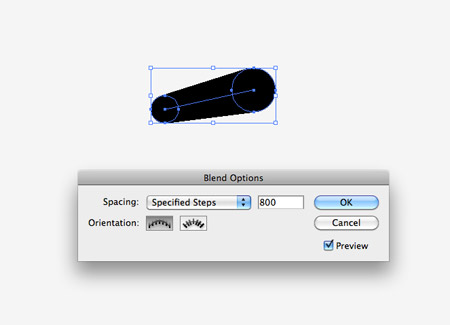
Head back into the Blend options (Object > Blend > Blend Options) and change the settings to Specified Steps with a super high value of say 800.
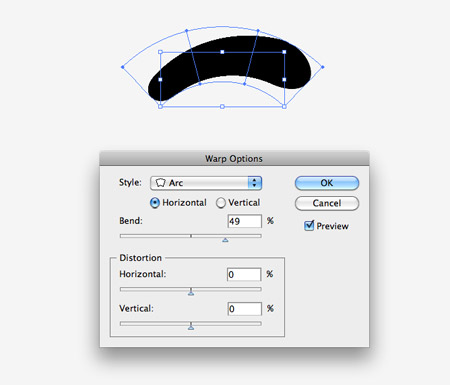
Next, give the shape a Warp with the Envelope Distort feature (Object > Envelope Distort > Make with Warp). Use the Arc option and adjust the amount to bend the shape.
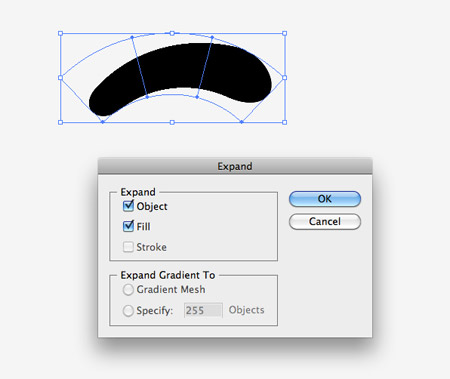
Reset the shape back into an editable object by going to Object > Expand. Select both the Object and Fill options.
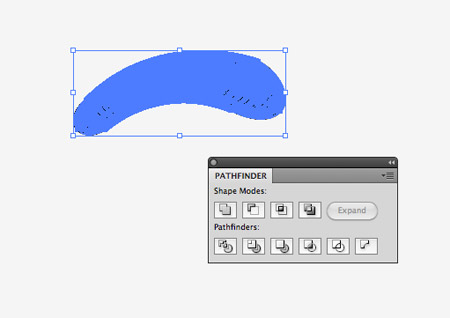
The shape is currently made up of around 800 facets, so merge them all together with the Pathfinder to simplify it.
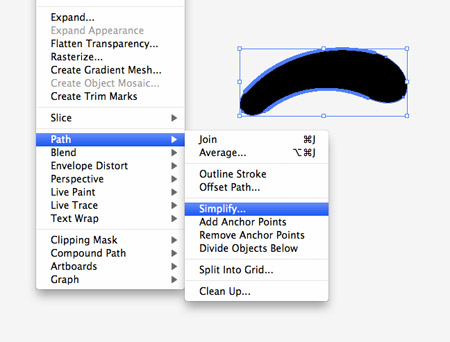
The outline of the shape still has lots of unnecessary points, so use the Simplify option from the Path menu to reduce to number of points while maintaining the same overall shape.
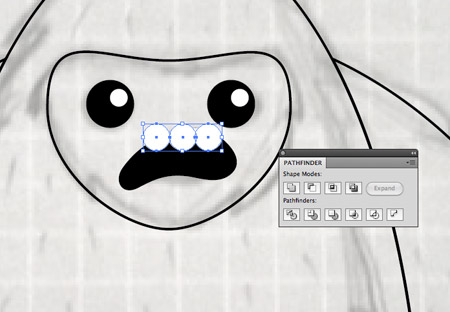
Position this random shape onto the face to represent the mouth, then draw three white circles as teeth. Merge the teeth into a single shape, make a duplicate of the mouth shape, send it to the top then use the Intersect option from the Pathfinder to clip them to size.

Repeat the process, but this time using a red circle to represent the tongue.
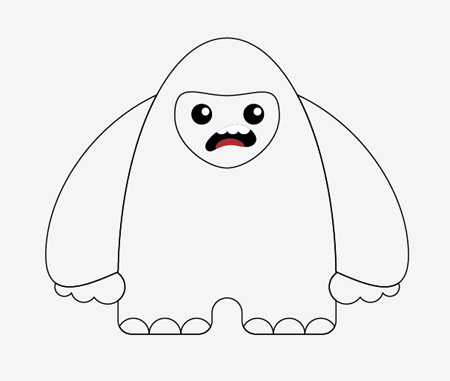
The overall structure of the character is complete, but yetis are generally quite furry. Ours looks pretty bald…
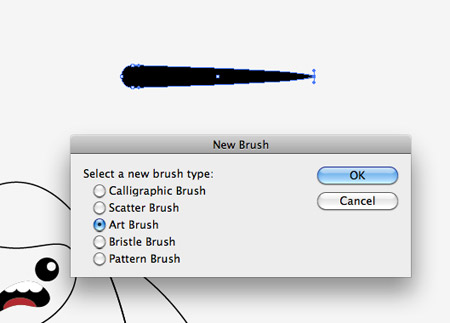
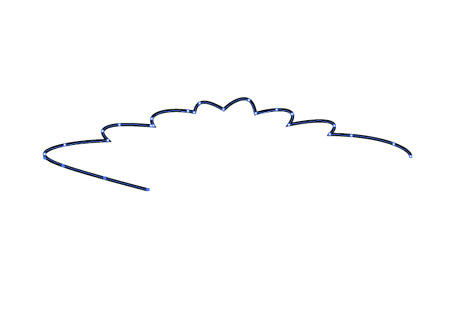
Draw a circle elsewhere on the artboard and drag out the right most point with the Direct Selection tool. Add this to the Brush palette as a new brush and select the Art Brush option. In the options make sure the direction of the brush is correct, then change the Method dropdown to Tints.

Use the Brush tool to draw in thick strands of fur around one half of the character’s body and arm. Don’t worry about the inner areas of the shapes, just pay attention to the new outline the brush strokes are creating.
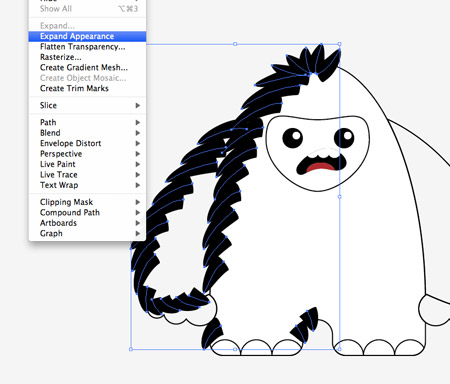
Once brush strokes have been added to one half of the character select them all and go to Object > Expand Appearance to convert the strokes into solid shapes.
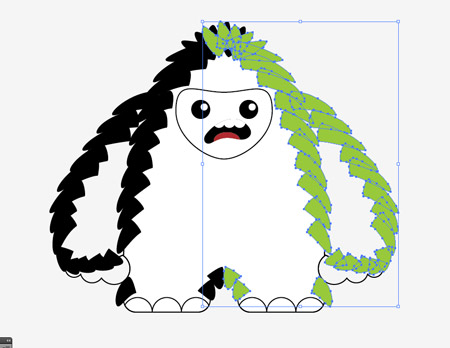
Copy and Paste the series of strokes then go to Object > Transform > Reflect to mirror them on the opposite side. Add a random colour fill to make it easy to see any overlaps, particularly on the top of the head.
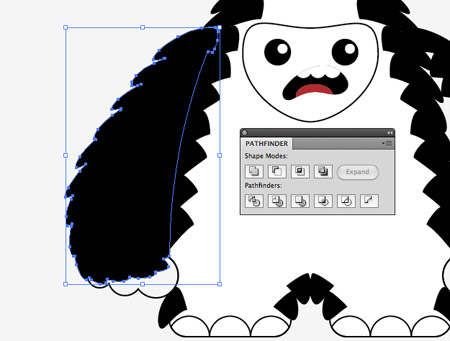
Starting with an arm, select all the brush strokes along with the main arm shape and merge them together with the Pathfinder palette.
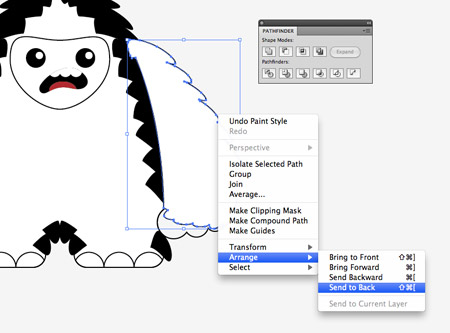
Repeat the process on the second arm, then replace the fill/stroke to white/black and send the arms to the bottom of the stack so they don’t overlap the body.
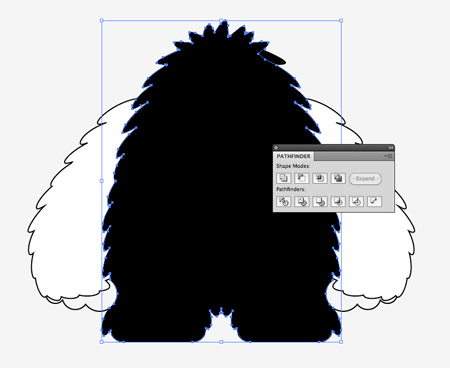
Select the body shape along with all the remaining brush strokes and merge them together. Replace the fill and stroke and adjust the stacking order so the facial features are visible again.
The series of brush strokes around the character gives him a loveable furriness!
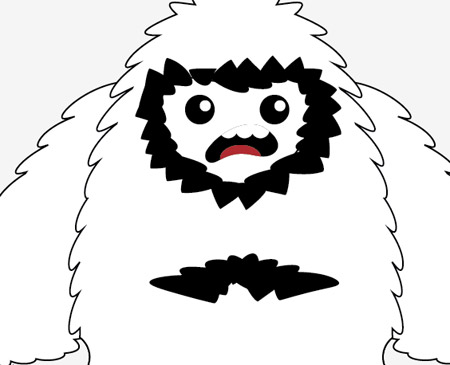
Use more brush strokes to surround the facial outline and to add a belly outline. The strokes around the face should be directed inwards as opposed to outwards like the main body shapes.

Expand and blend the facial outline stroke together but this time use the Subtract option from the Pathfinder to clip out the outline from the facial outline shape. Increase the size of the face if necessary.
Expand and merge the belly outline shapes then use the Direct Selection tool to delete out all the points along the lower edge to leave a single line.
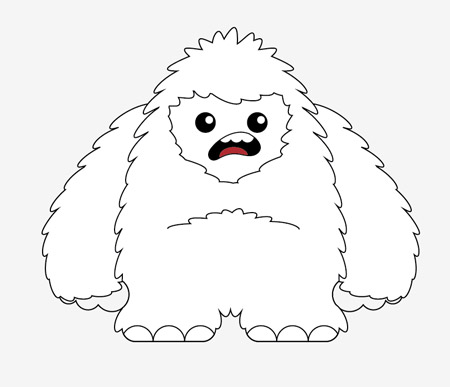
The character linework is now complete and is ready for an injection of colour to bring him to life.
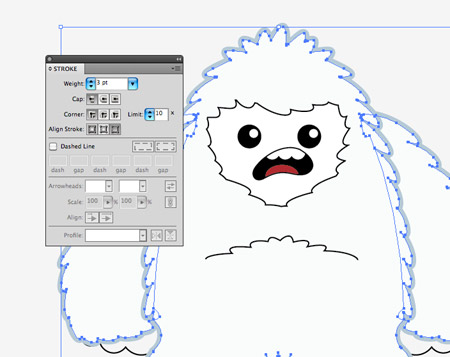
Replace the white fills with a subtle blue/grey, then add a 3pt blue/grey stroke. Align the stroke to the Outside using the icons in the Stroke palette.
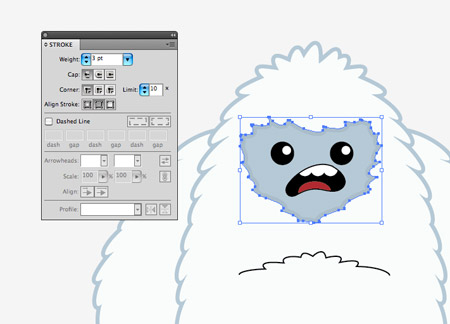
Fill the facial area with a slightly lighter blue tone and add the 3pt stroke, this time aligned to the inside.

Use these same colours to fill the hands and feet. These fills help inject some life to the character but it still looks a little flat.
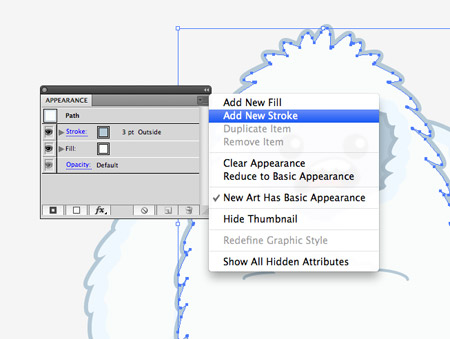
Open the Appearance palette and select the Add New Stroke option to the body and arm shapes.
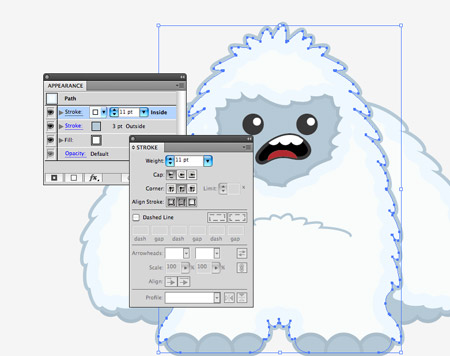
Adjust this fill to a light blue with the settings of 11pt in size aligned to the inside. Add the same fill to the facial outline, but aligned to the outside.
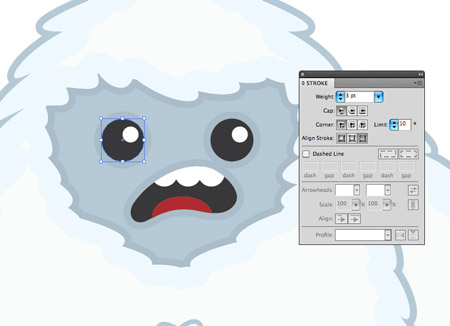
Tone down the impact of the eyes/mouth fills by making them a 90% black then add a couple of blue/grey strokes to the outside to help define them.
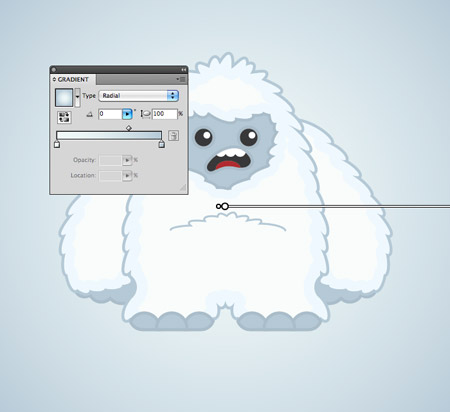
Draw a background for the Yeti and fill it with a complementing gradient to finish off the character design.

Add a simple radial gradient fill to a circle then squash it into a flat oval.
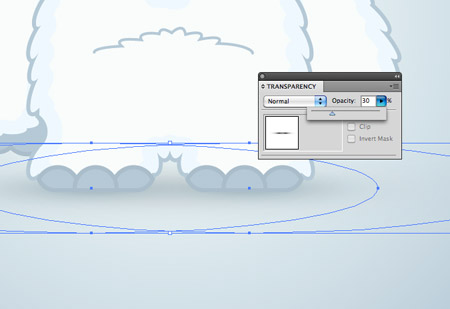
Position these shapes underneath the Yeti’s feet to add a touch of shading to help ground the character.
This leaves our cool vector Yeti character complete! Group together all the shapes that make up the figure so it’s ready for use as a mascot for your product or website.

Love it!
f u
i love it!! :)
Wow, I like it!
Cool…
great tut!…
Beautiful outcome!
This is so beautiful! like to see this tutorial.
This is so weird and awesome. I really wished I had the use of a vector yeti, right now. Well, guess I have to wait.
BTW – found your blog seconds ago and love it already.
Wow this is awesome! Thanks for the tut!
It looks kind of cute and helpless, are you sure it is Yeti? :)
Feel like taking an icecream! Looks really good, thanks for the tutorial.
Ayuda!!!! no puedo bajar ningún archivo, ya pague por la membresia y no logro bajar nada, que puede ser????:(
Help! I can not download any file, and pay for the membership and I can not download anything, it can be????: (
This is an extremely amazing technique and you so much simplified it.Well done!
Thanks a lot for your post.
Very cool character. Maybe we can see a yeti on the beach tutorial in a few months? :)
Online tutorials are the always great source on knowledge and always helpful when needed. I have learned a lot from such tutorials as it’s very detailed and anyone with little knowledge can follow the instruction on it. Thanks for sharing.
Well done Chris. Loved it. Awesome is the word. :)
Awesome tutorial. I’ve learnt a lot from this one, thank you so much for sharing.
Very good design, I will try to do it today
Thanks for sharing
Joseph
Good job, I like this
Thanks for sharing.
funky yeti! nice tut. tx
That art brush trick is amazing!!! lol
I wish you could write your tutorials properly, with elaboration on the pathfinder tool, I am making these extra copies of certain body shapes and it doesn’t even let me intersect or whatever, I had to use the eraser tool for the hands, and can’t do anything with the toes. Very frustrating tutorial. Maybe you could put skill rates on your tutorials so people who have never used certain tools before know not to bother with this one.
Nice tut. Your post very useful with me. Thanks
Oh yeah ! I’m lovin’ it :)
Just had to tell you, I think your website rocks! Nice work and great information. Thank you! Inspiring to say the least. :-)
Linda