This post was originally published in 2015
The tips and techniques explained may be outdated.
Since posting this showcase of inspiring artwork combining geometry & photography back in 2014 I’ve wanted to give this trendy style of art a try myself. I finally sat down with Illustrator & Photoshop and devised a method of transforming a photograph into an abstract collage of geometric shapes. We’ll begin with Illustrator to build up a series of geometric lines, then cut up an image in Photoshop to create an interesting composition. A series of textures and curves adjustments will then help give the design a trendy retro style with plenty of processed colours and grain.

See the full size geometric photo collage artwork
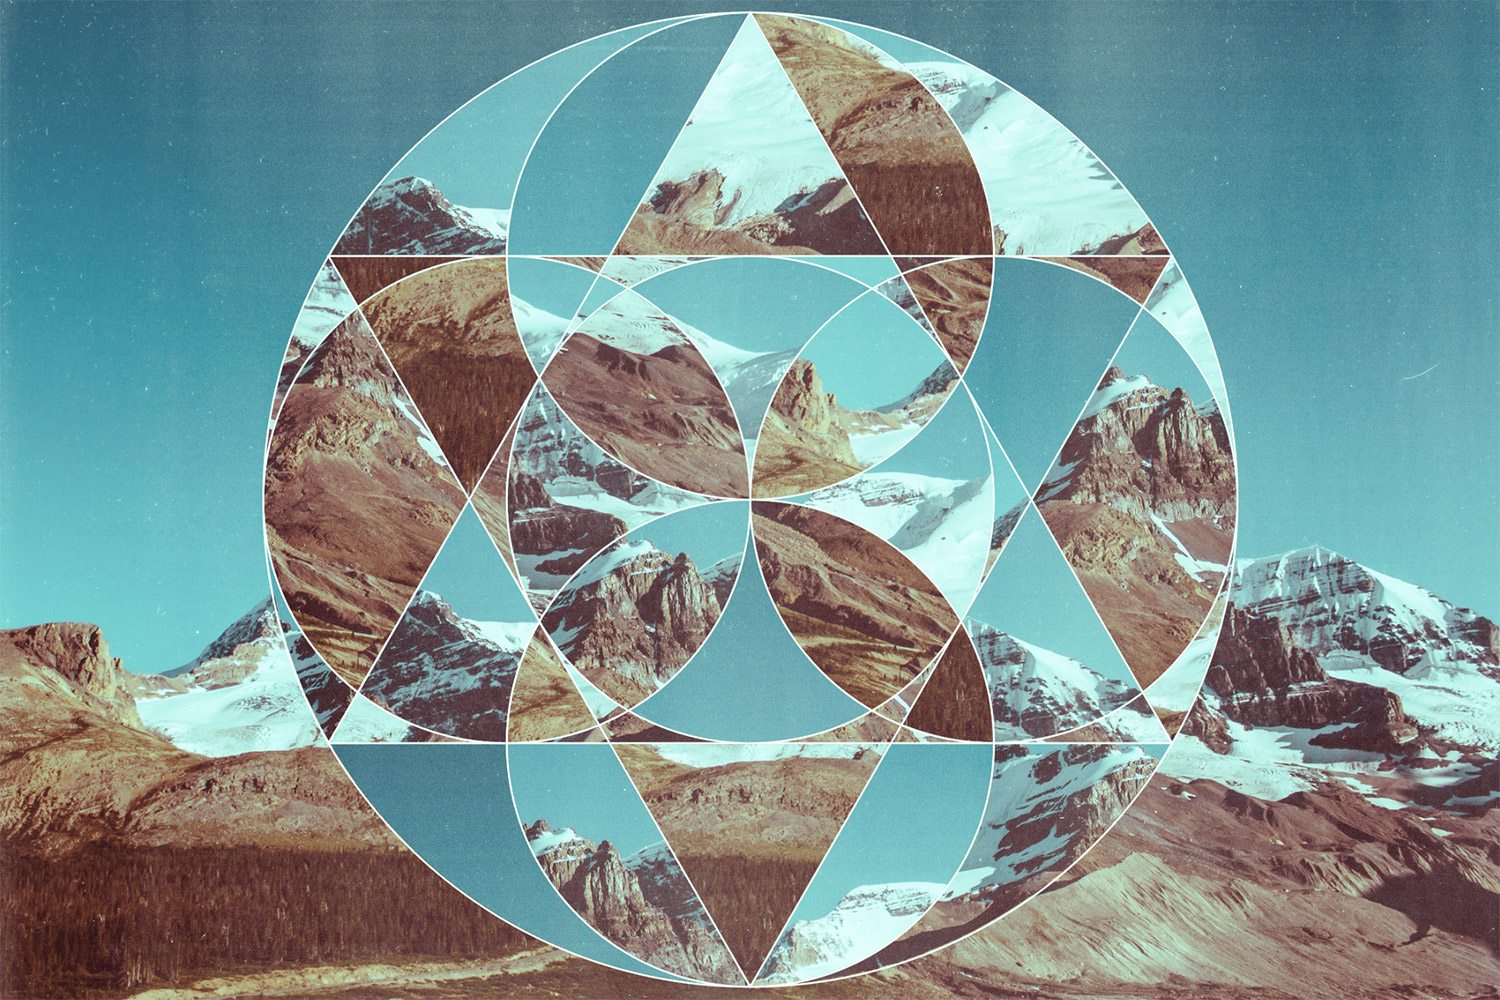
The artwork we’ll be creating in this tutorial has an old retro collage vibe with snippets of a photograph being cut out and rearranged into perfectly symmetrical geometric shapes.
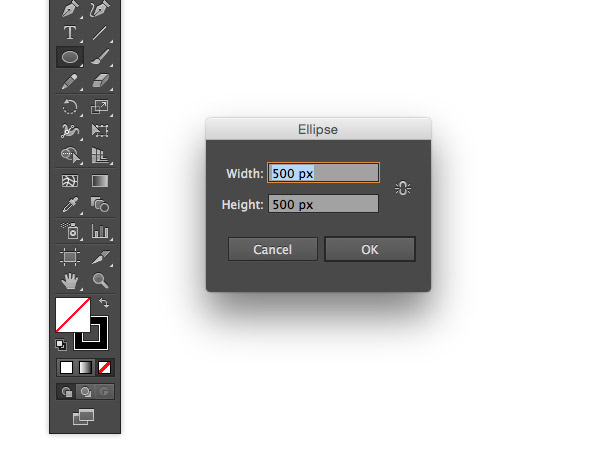
We’ll begin in Adobe Illustrator to create a template for our geometric shapes. Create a new document then select the Ellipse tool. Remove the fill colour, but leave a black stroke then click on the artboard and enter 500px for both the Width and Height.
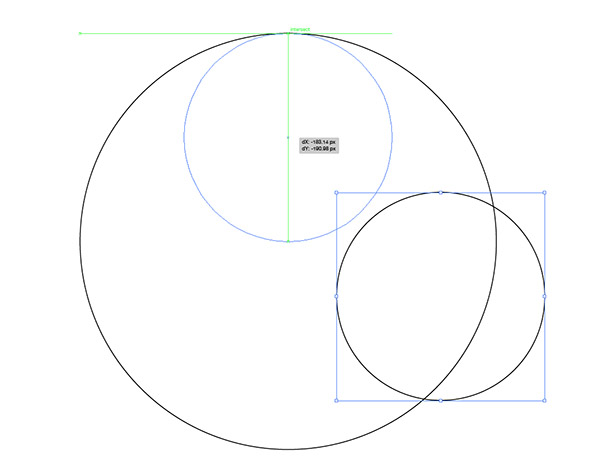
Create another Ellipse, but this time enter 250px to create a smaller circle half the size of the original. Use Smart Guides (CMD+U) to accurately align the small circle to the top of the larger circle.
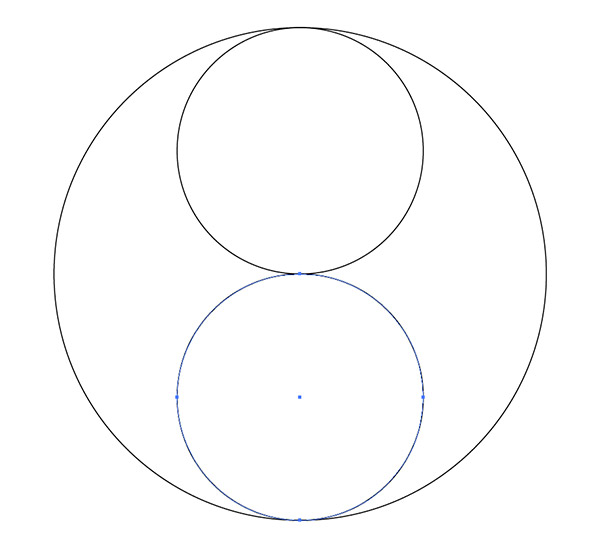
Hold the ALT key and drag out a duplicate of the small circle. Align it to fit perfectly into the remaining space of the larger circle outline.
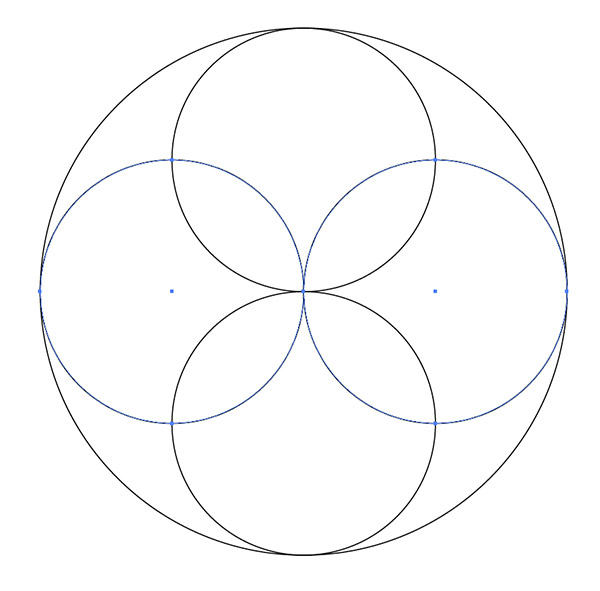
Select the two small circles and press CMD+C to Copy, then CMD+F to Paste in Front. Hold Shift and rotate these shapes by 90°
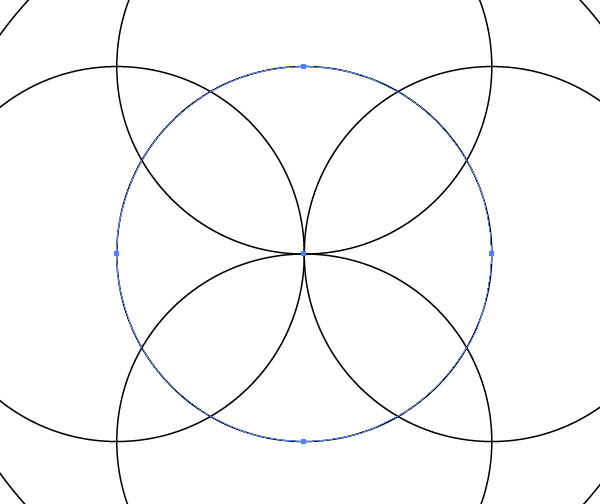
Copy and paste a single circle, then use the Smart Guides to align this shape to the centre of all the elements.
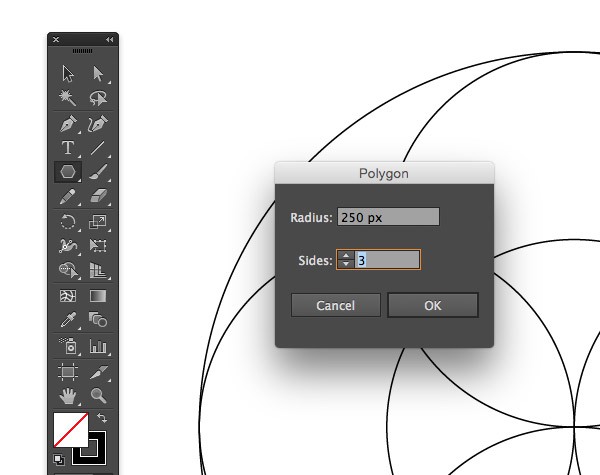
Select the Polygon tool and click on the artboard to bring up the options window. Enter 250px and change the number of sides to 3 to form a triangle.
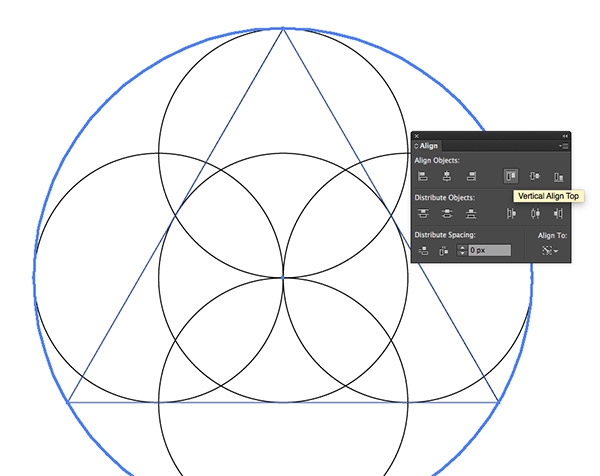
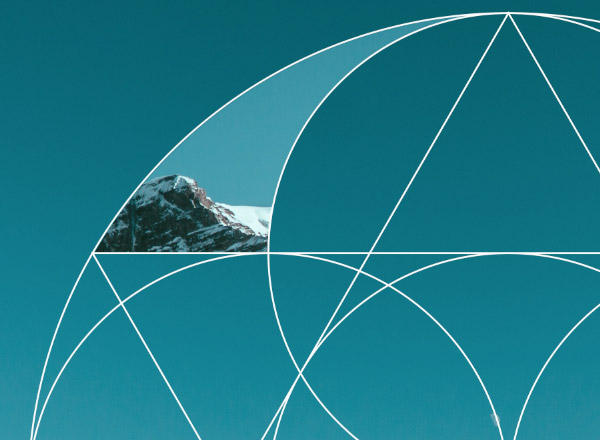
At 250px in size this triangle will fit perfectly inside the circle. Shift click to select both the large circle and the triangle, then release the Shift key and give the circle an extra click to make it the key object. Use the Align panel to line up the triangle along the vertical axis, then align to top.
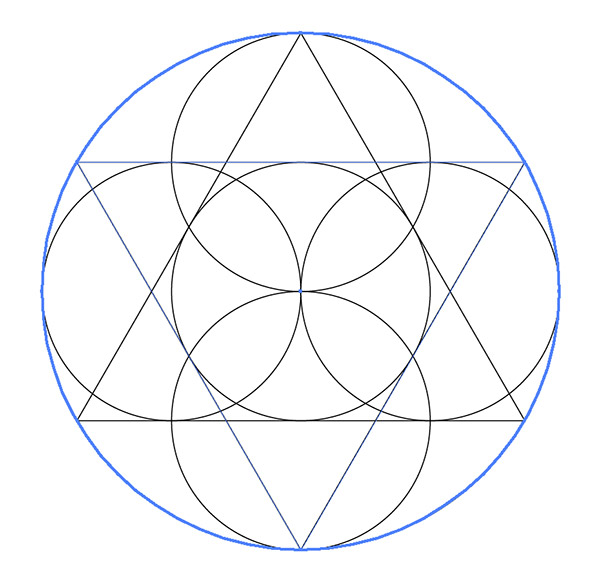
Copy and paste a duplicate of the triangle, then rotate it by 180°. Use the Align panel to line this shape up to the bottom of the circle to form a 6 pointed star shape.
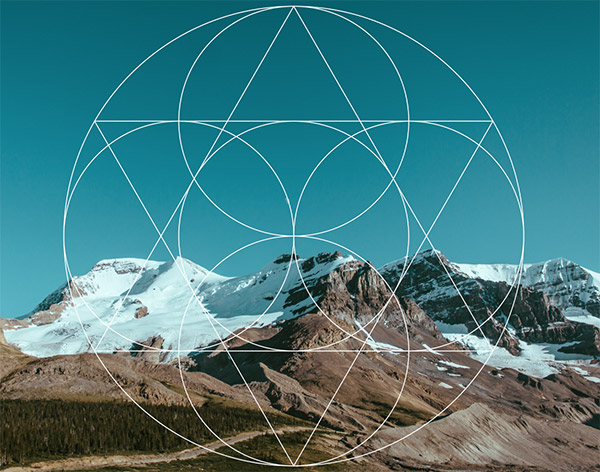
Select all (CMD+A) and copy all the shapes that form the geometric pattern. Paste the graphic into your Photoshop document on top of a cool photograph. Press CMD+I to Invert the colours so the lines are white.
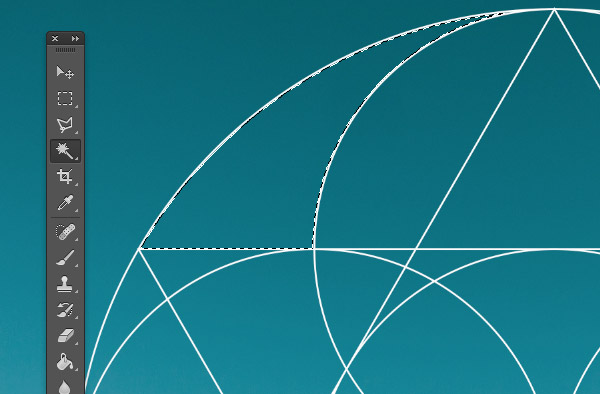
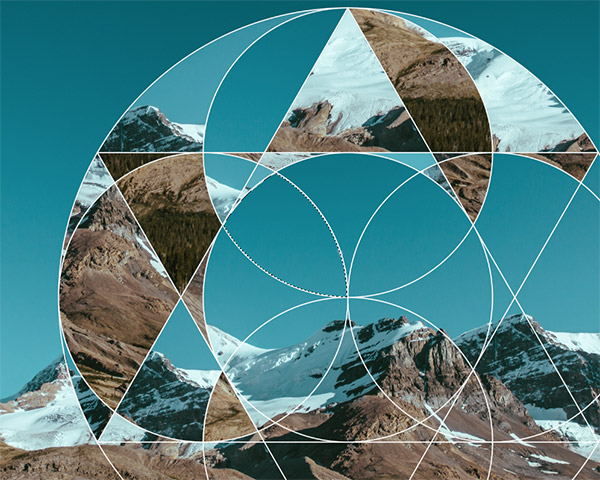
Activate the Magic Wand tool, then with the Lines layer highlighted, click to make a selection of the first geometric shape.
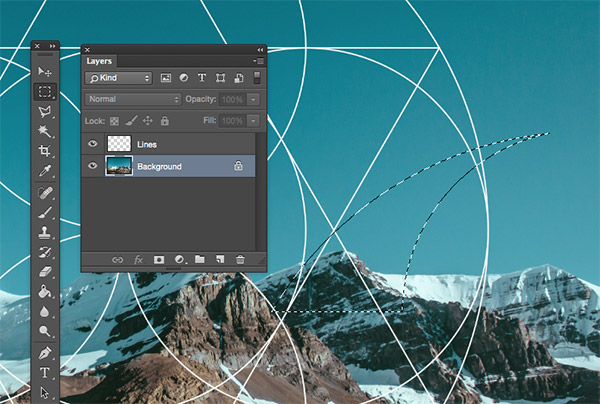
Highlight the Background photograph layer, then select the Marquee tool to allow the selection to be moved elsewhere in the document.
Copy and paste a selection of the Background in a random place, then move this segment back into place within the geometric lines.

Select the Lines layer again and make another Magic Wand selection, then swap to the Marquee tool and move the selection to a random area. Copy and paste this selection and move it back into place in the design.
Continue methodically working through the design to make new selections. Speed up your workflow by using the shortcuts W for the Magic Wand, M for the Marquee tool, CMD+C & CMD+V for Copy & Paste, and turn on Snapping from the View menu to easily piece the design together.
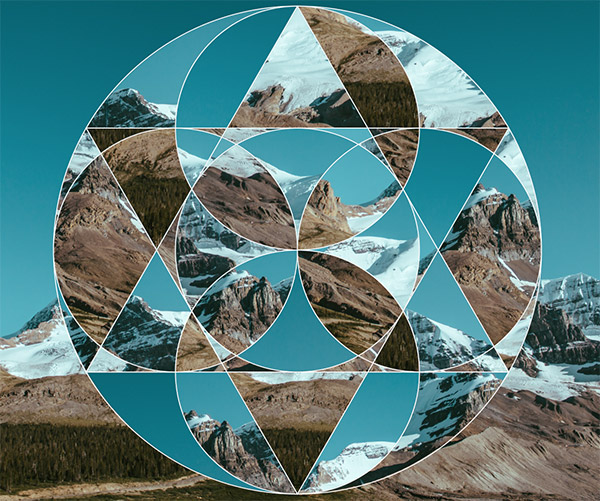
The design soon takes on a cool collage effect as pieces are randomly placed in unnatural positions, but the symmetry of the geometric shapes keeps the composition structured and balanced.
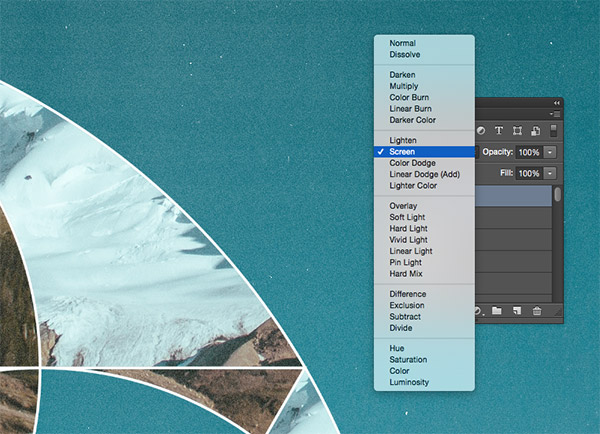
Let’s add some finishing touches to give the design an aged retro look. Paste in one of my Grungy Photocopy Textures and change the blending mode to Screen to render the black areas transparent.
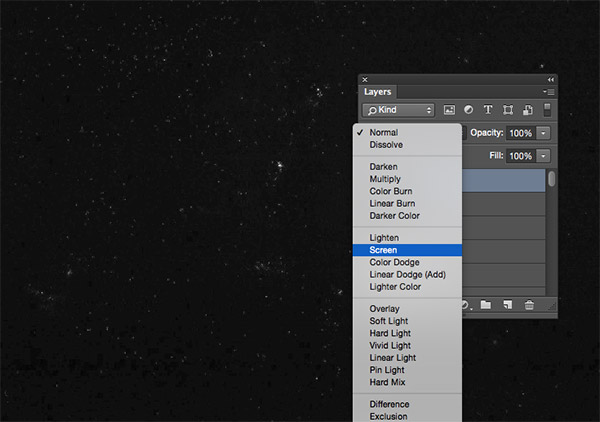
My Dust & Scratches Textures also help add distressed marks. Paste in the image and change the blending mode to Screen to composite and build up the texturing.
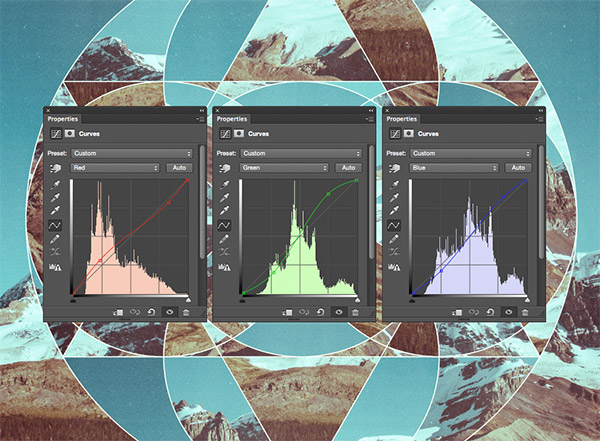
Add a new Curves Adjustment Layer at the top of the layer stack. We can tweak the curves to produce a retro style cross processed film effect. Change the dropdown menu to the Red channel and tweak the curves to add more red in the shadows but less in the highlights. Give the Green and Blue curves the opposite values while using the live preview to achieve a cool colour cast.
The final result is an abstract piece of art with portions of the image cut out and recomposed into a collage effect. The geometric lines keep everything balanced while the additional texturing and colour adjustment finishes off the image with an aged retro style appearance. Why not explore this technique further by creating a series of images using different geometric patterns?
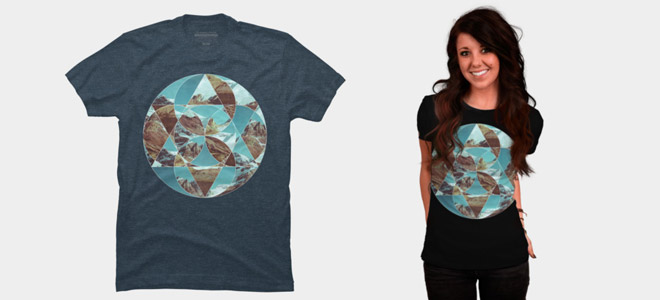
Love this design? Get the t-shirt!

Great tutorial. I love these effects and so many possibilities.
Although it may not be quite as convenient as using Illustrator first I am sure it would be possible to achieve similar effects using only Photoshop, using shapes and paths.
No doubt it’s all possible in Photoshop but I find just switching over to Illustrator and making use of vector shapes and Smart Guides is so much easier!
Oh for sure — I’m just being a bit stingy at the moment and haven’t invested in a package which includes Illustrator ;)
Thank You for an inspiration!
It’s a great idea!
Sirje
dragging out all 3 channel curves… Mind blown…
As much as I wish you could have 3 separate Channels panels open at once, the screenshot in my tutorial was made with some Photohop trickery combining 3 images
Thanks for this Chris.!!
It’s really useful….!!!!!!!!!
Thank you, so glad it’s been useful to you!
This is so cool! I love how easy it is! Thank you so much!
Su
That’s real cool. Easy too! Thanks man! I love the other page too, the one with the collection of this artwork style. Real fun too look at. Keep it up :)
Thank you for your comment Eli, that means so much. :D
Great Tutorial! Thanks!
Cheers Sarah!
Nice tutorial and great idea… loved it
Just saw your blog its way too impressive :)
Cool Tutorial! Though I stuck to Illustrator instead of switching over to PS.
Thanks for this, Chris!
Just one thing in case anyone else runs into this like I did: When you click on the magic wand to start selecting the inner shapes, make sure the “Contiguous” box is checked. If it isn’t, you’ll be selecting all the shapes at once.
Awesome blog.
Lisa
This Photo Collage is what I needed for my college event cover pic :) I would upload pic here when i create it
so nice , will be helpful for newbies also
Gr8 Tutorial, Thanks a lot