
This post was originally published in 2015
The tips and techniques explained may be outdated.
I recently received an email from a reader who asked for advice on how to create ropes and knots in Illustrator, which are particularly common with nautical themed designs. A custom Illustrator brush immediately sprung to mind, so I played around and perfected a technique that can be used to make any path look like a twisted, knotted and entangled length of rope.
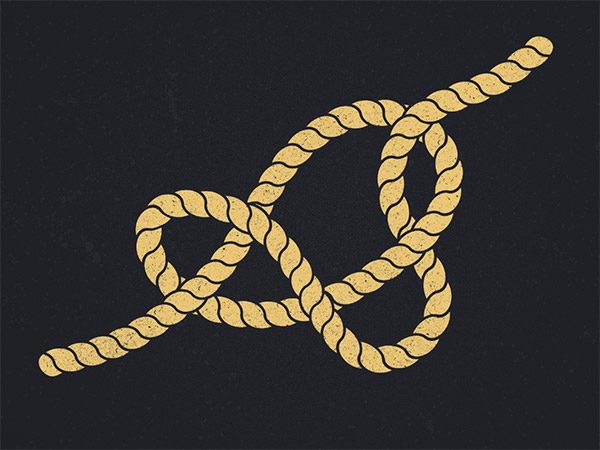
Follow this step by step tutorial to create a knotted length of rope using brushes in Illustrator. We’ll learn how to build a custom pattern brush, then overcome some problems that prevent the rope from weaving under and over itself. We’ll then take things a step further and use the very same technique to create some cool typographic art.
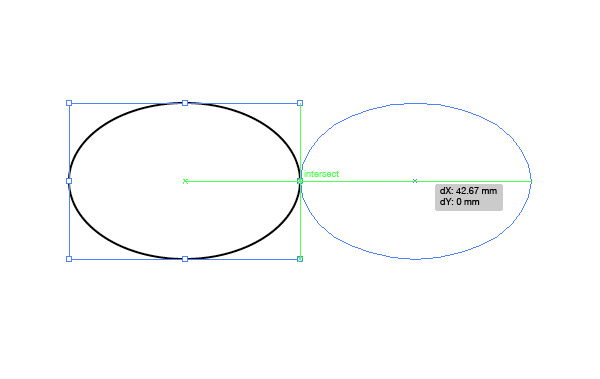
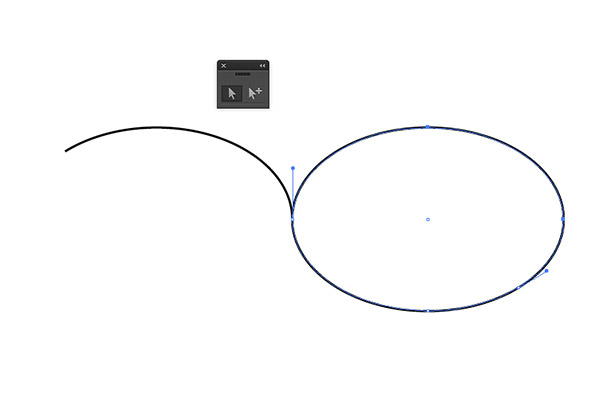
Let’s begin by creating the basic pattern that will form our rope. Open Adobe Illustrator and draw an ellipse on the artboard. Turn on Smart Guides (CMD+U), then ALT+Drag a duplicate of the shape and align it perfectly next to the original.
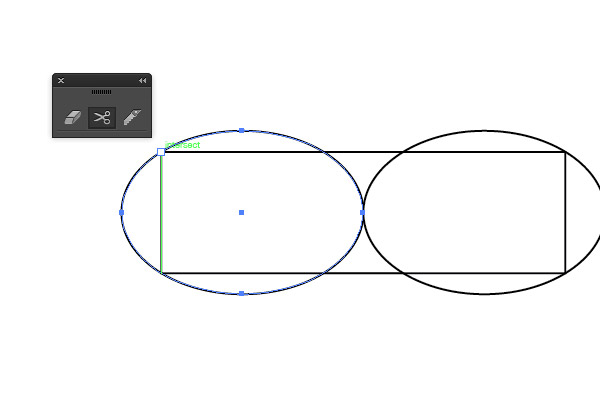
Use the Smart Guide indicator to snap the corner of a rectangle to the upper left portion of the first ellipse. Enlarge the rectangle to snap to the lower right path of the second ellipse.
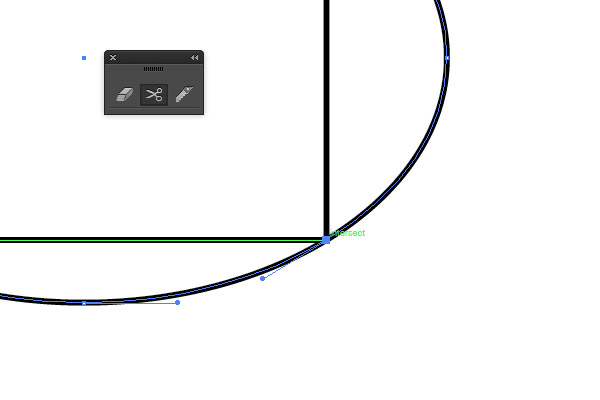
Use the Scissors tool to snip the path of the two circles where the rectangle intersects in these two places.
Select and delete the bottom and left points of the first ellipse and the top and right points of the second ellipse to leave a curved line.
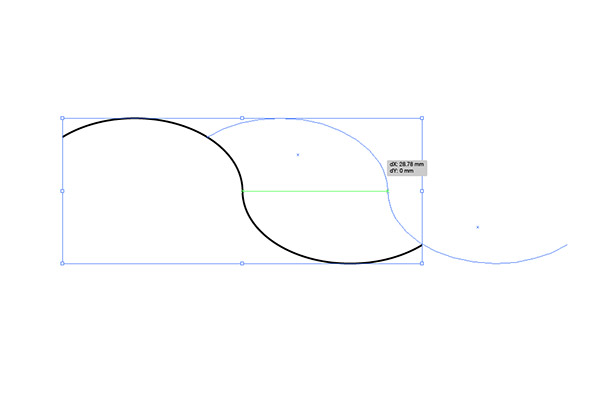
Be sure to select both halves of this curvy line, then ALT+Drag a copy until it aligns with the original.
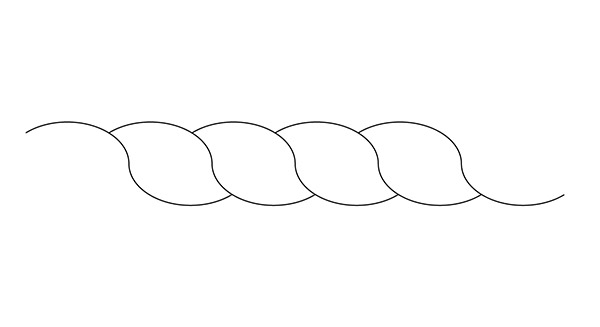
Repeatedly press the shortcut CMD+D to repeat the transformation a few times to simulate a short length of rope.
Grab the Scissors tool and clip the stray path from the end of the shape where it intersects with the next path.

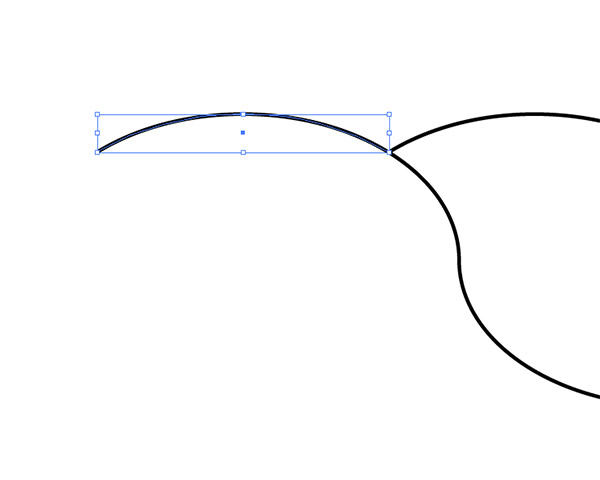
Draw a circle and adjust its size to match the rope and position to align with the open end point. Snip the path in two places with the Scissors tool to remove the unwanted overlap.
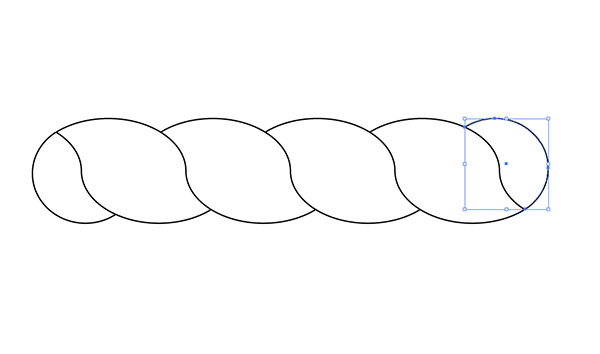
Repeat the process on the other end. This semi-circle shape can be re-used by rotating it by 180°.
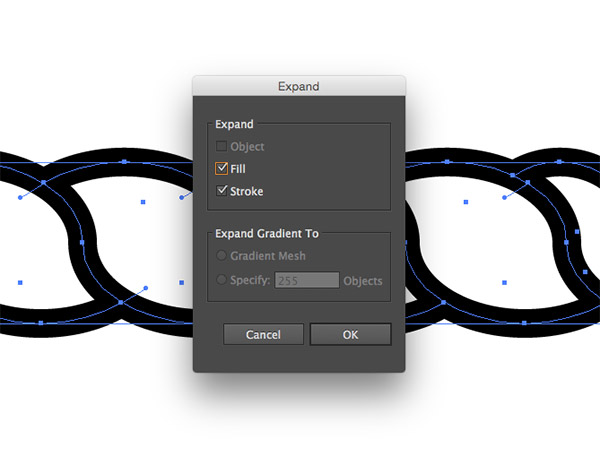
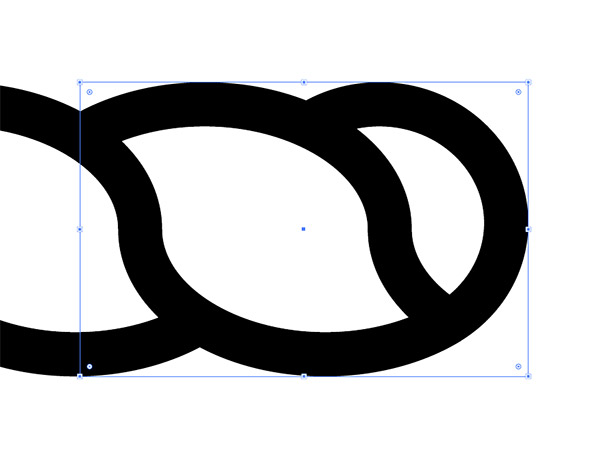
Draw a selection around all the paths and increase the stroke weight. Go to Object > Expand and hit OK to convert the strokes into solid shapes.
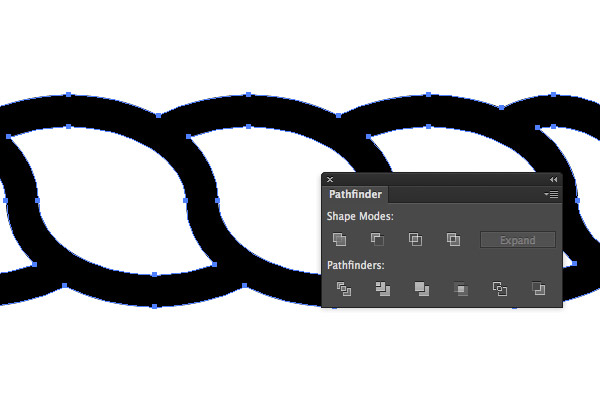
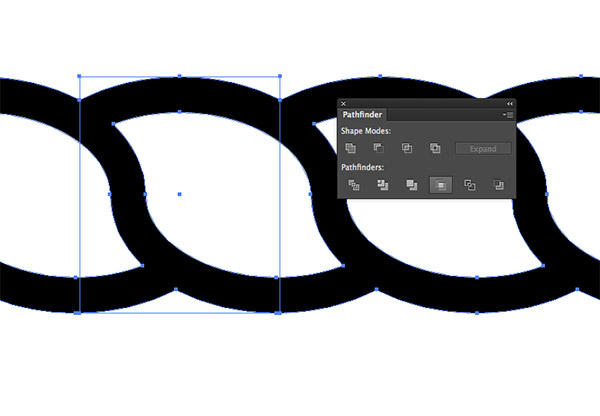
Bring up the Pathfinder panel and select the Unite option to blend all the individual sections into one continuous shape.
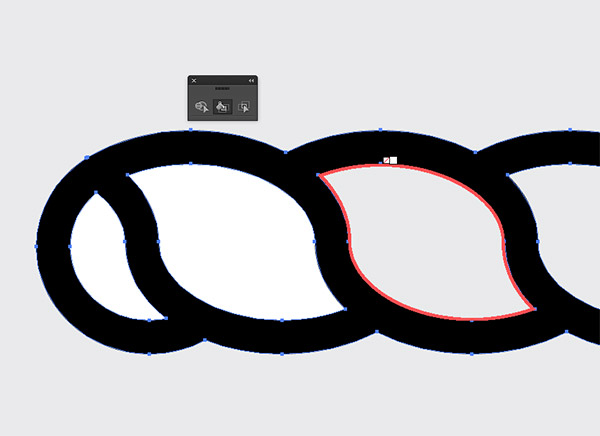
Select the Live Paint tool and click on the rope graphic to activate it, then set the fill colour to white and apply it to all the enclosed areas.
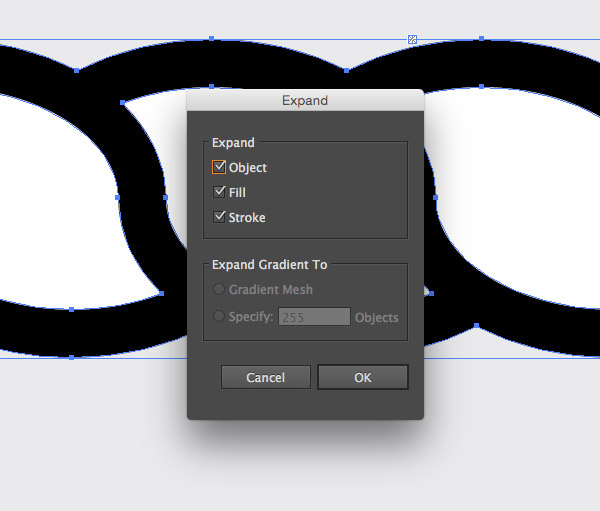
Expand the graphic once again to convert the live painted elements into editable elements.
Hold the ALT key while dragging the graphic with the Selection tool to create two duplicates.
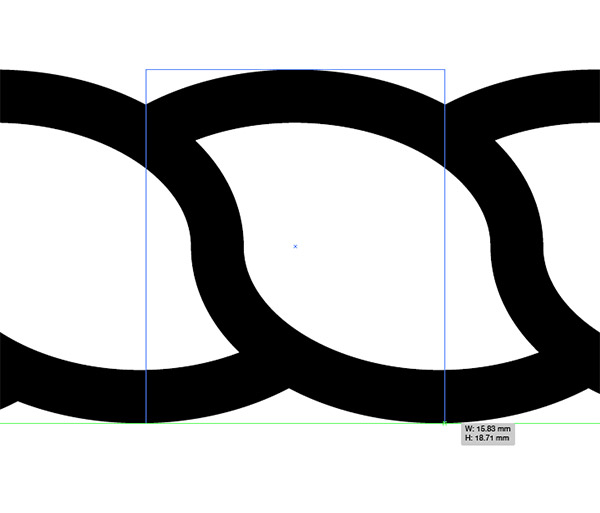
Carefully align a rectangle with no fill or stroke between two segments of the rope pattern on the first graphic, using the corner as reference to the start and end points.
On the second graphic, draw a similar rectangle that encompasses the end of the rope, but extends to the same reference point.
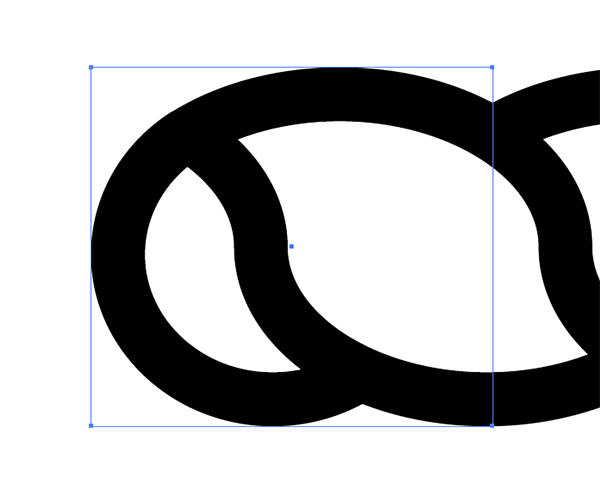
Draw a third rectangle around the opposite end of the rope on the third graphic, also aligning the rectangle to the same reference point between the rope segments so the pattern will match perfectly.
Individually select each rope graphic and its rectangle then click the Crop option from the Pathfinder panel to trim the shape to size.
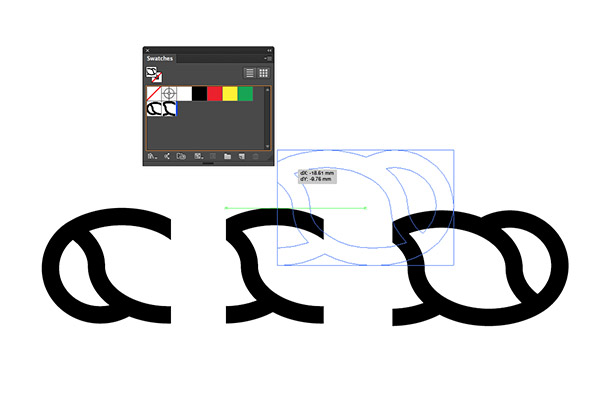
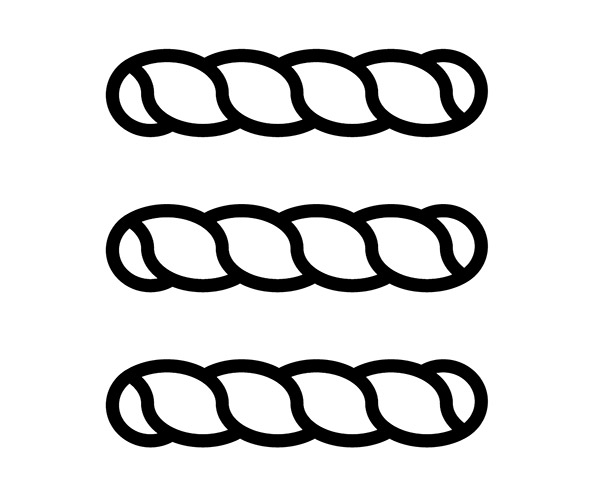
Collate the three separate pieces and drag each one into the Swatches panel.
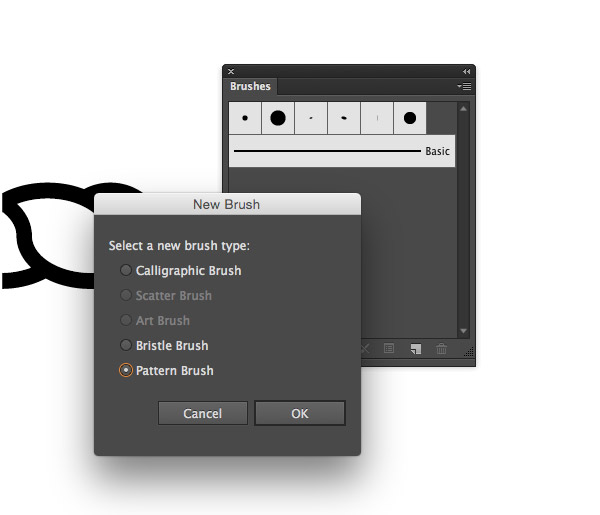
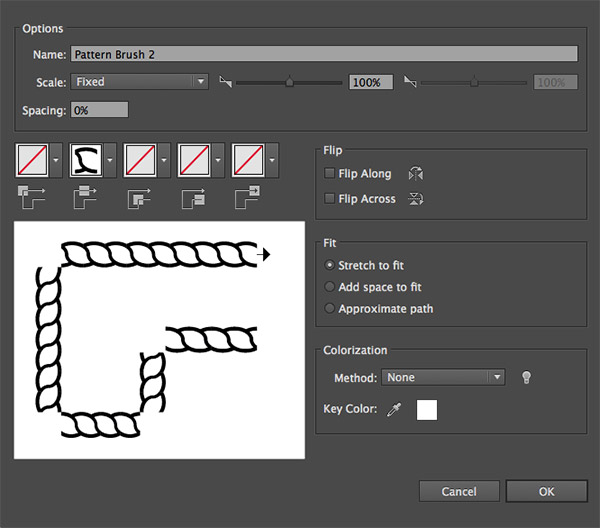
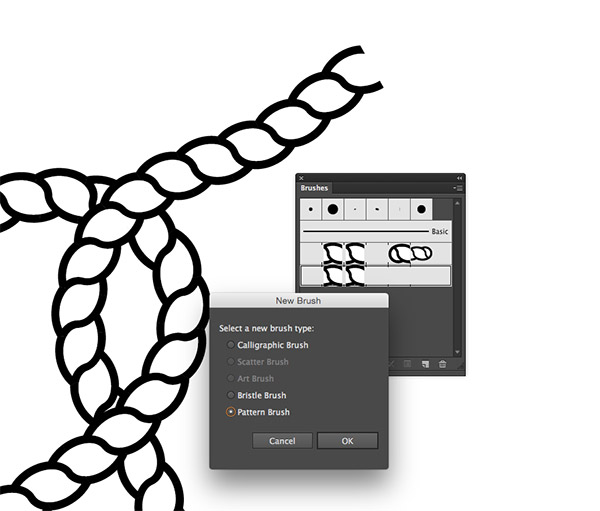
Open up Illustrator’s Brushes panel and click the New icon to create a new brush. Select the Pattern Brush option.
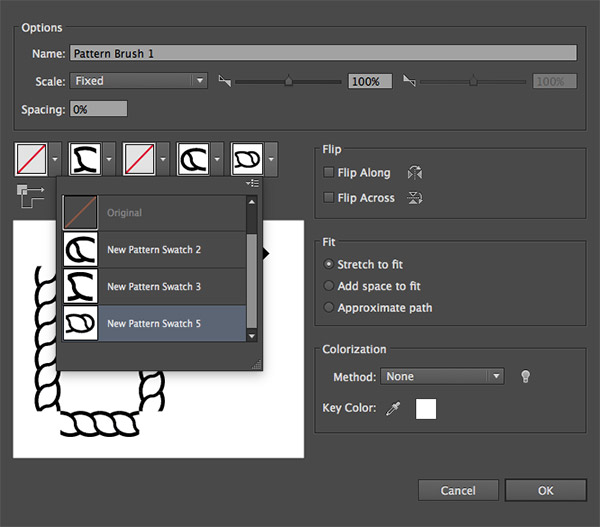
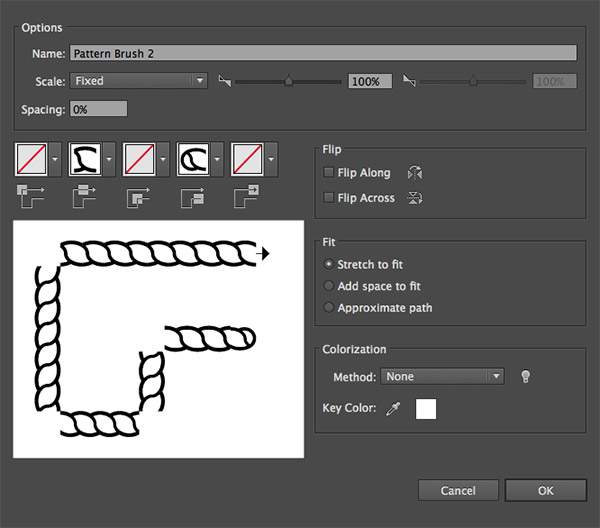
Next we need to configure the pattern brush using those three swatches by placing them in the correct tiles in the Brush options. Select the centre piece in the second dropdown menu and apply the end pieces to the last two dropdowns.
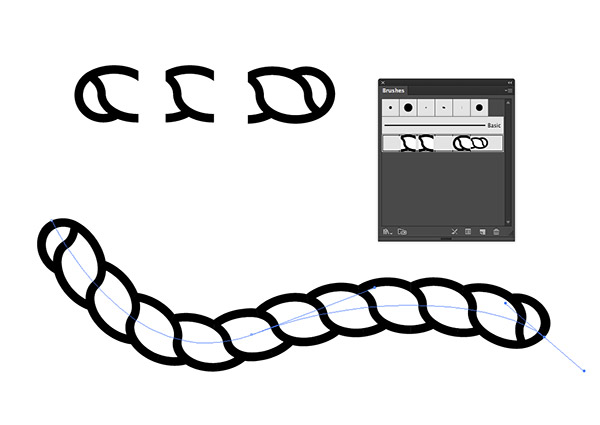
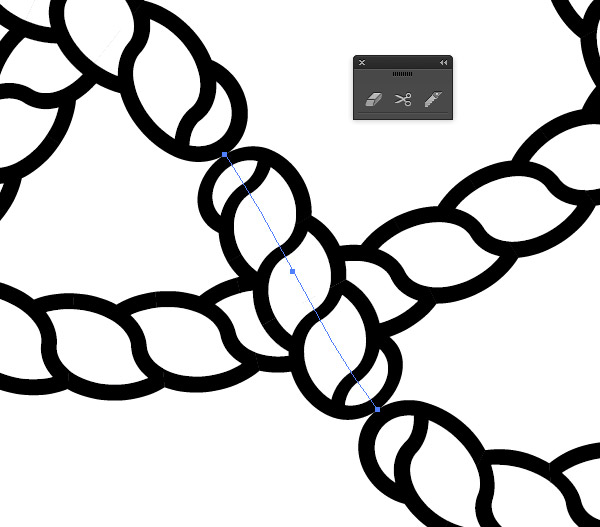
Draw a path using the Pen tool and apply the newly created brush to test it out.
This brush can now be applied to any path. Use the Pencil tool to freehand a knot shape then apply the brush to transform it into a length of rope.
But wait, there’s a problem!
To accurately depict a knot, the rope needs to weave in and out, but the path in Illustrator only overlaps itself. Lame.
It’s a shame that Illustrator doesn’t offer the ability to alter the stacking order of individual points. The old fashioned technique is to clip the path into a separate piece, which can be placed above or below the other segments. Unfortunately this doesn’t work with our rope brush because the end pieces will be automatically applied, which breaks the flow of the path.
Back to the drawing board
Create a new Pattern brush, but this time just select the centre piece.
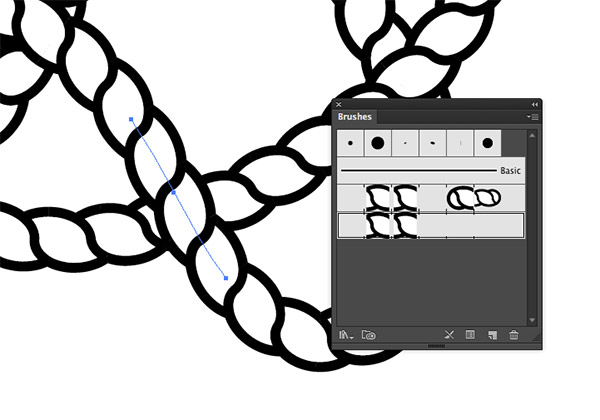
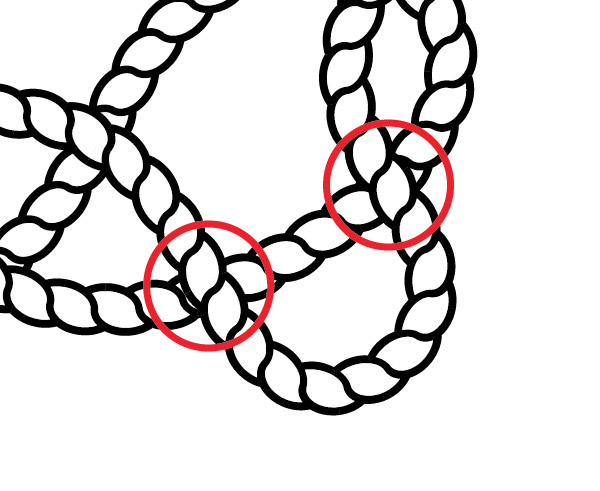
Apply this new brush to the knot path. Clipping a segment using the Scissors tool now allows the path to be placed above or below the other paths while retaining the perfect alignment of the rope pattern.
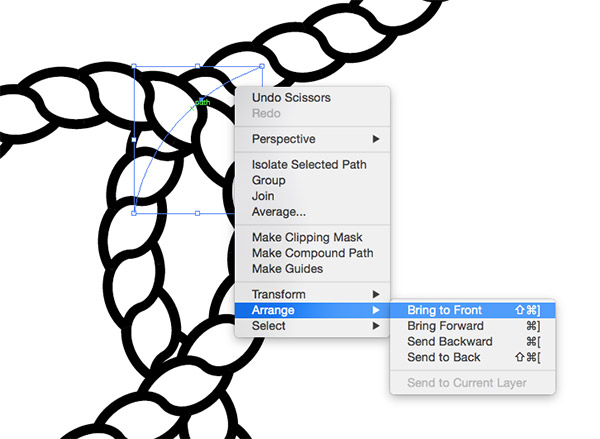
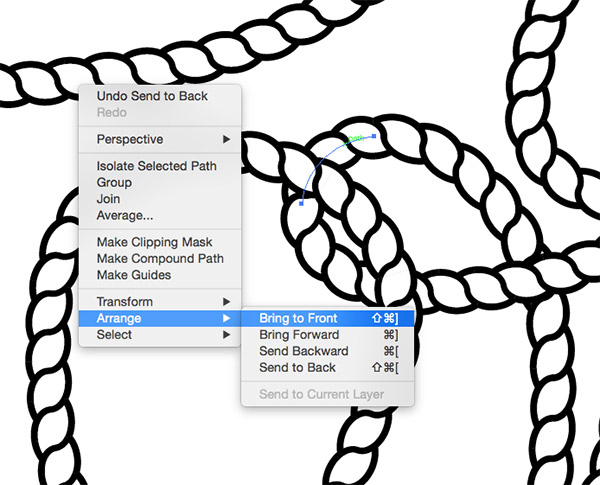
Snip the path before and after each area where the rope overlaps then use the shortcuts CMD+{ or CMD+} to alter the stacking order of the clipped pieces.
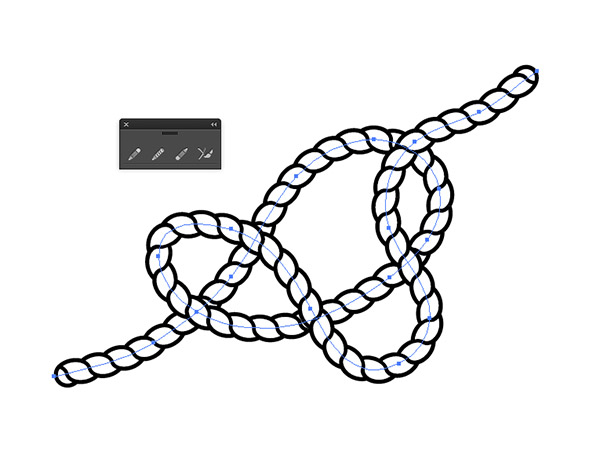
This solves the overlapping problem, but our rope no longer has any end pieces. Let’s fix this by creating another Pattern Brush.
Apply the centre piece as usual, but this time select the swatch that corresponds to the start tile. Repeat the process with yet another brush, but choose the other swatch for the end tile.

These two new brushes can now be applied to the first and last portions of the path. They both only have a tile at one end, so the pattern will continue to match up perfectly where the path is split.
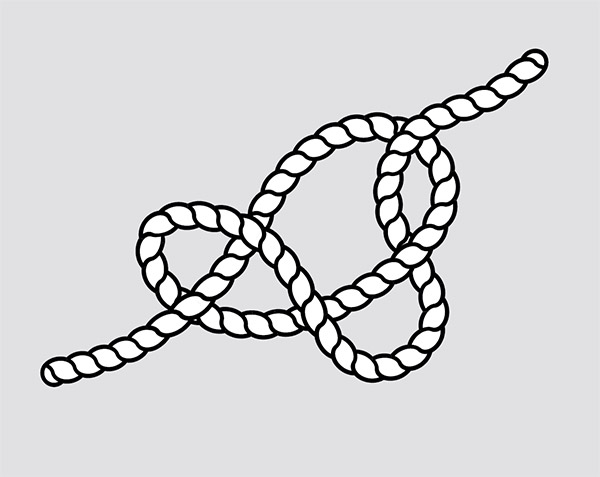
Using a combination of three variants of the same brush all kinds of complex paths can be created.
Let’s take it a step further
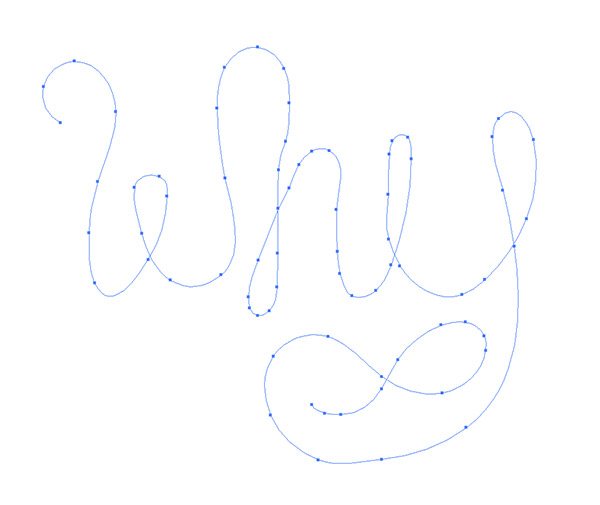
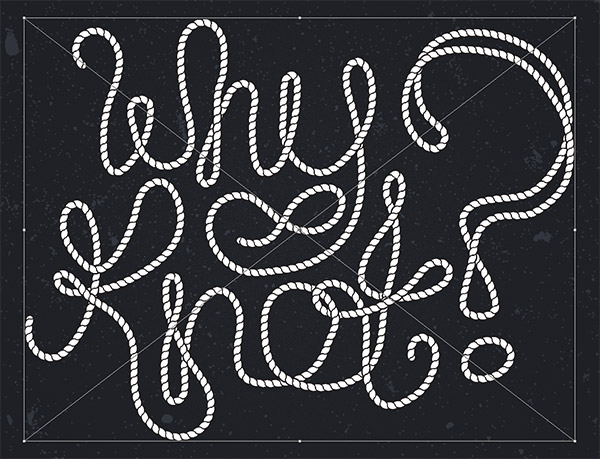
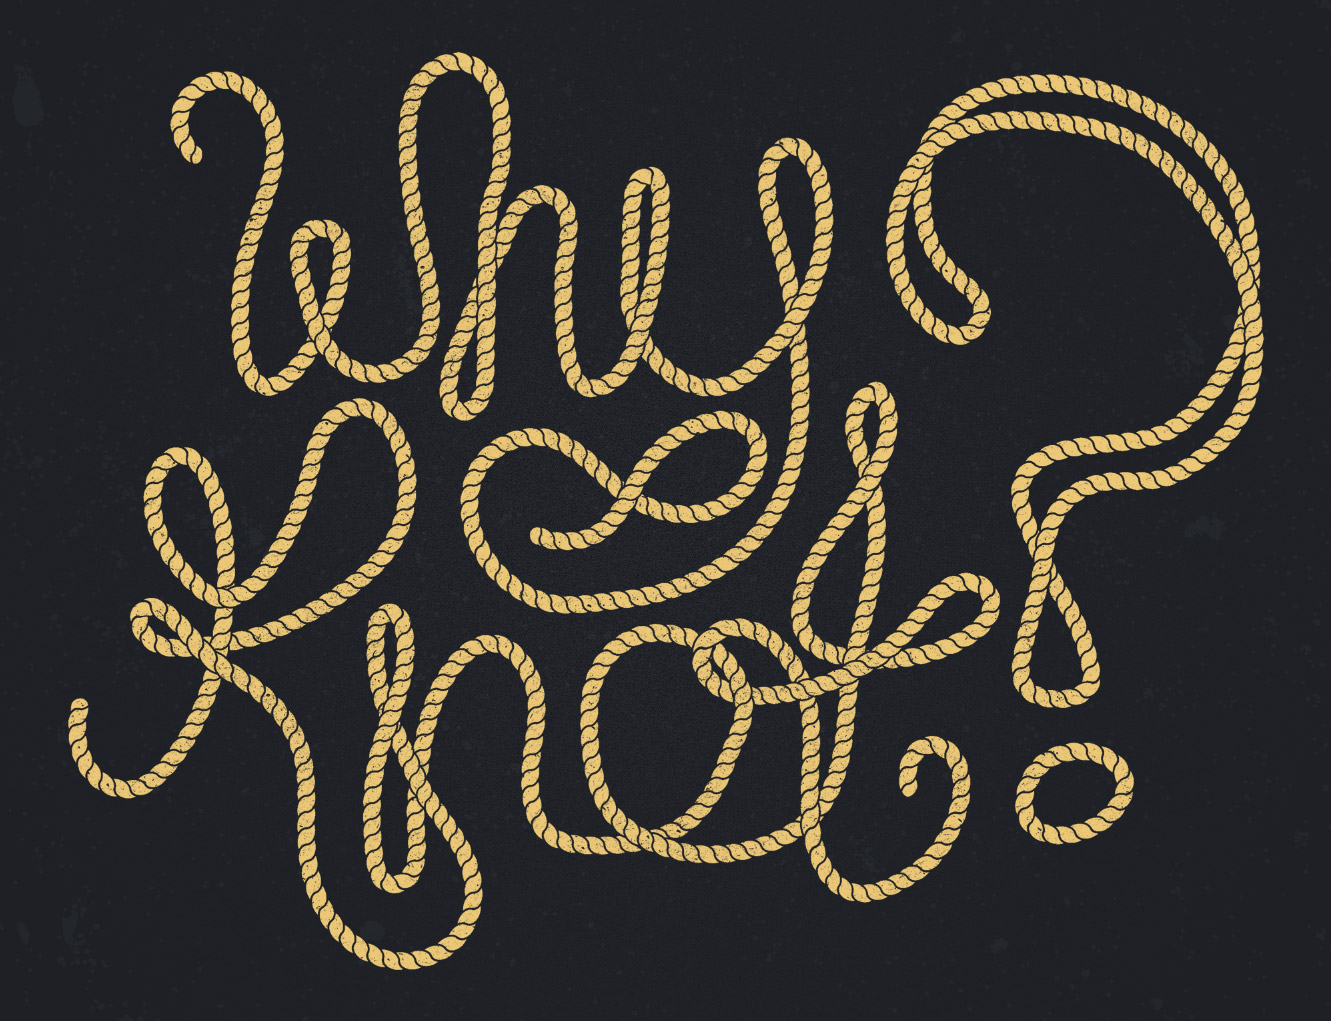
One clever use of our new rope brush is to easily create cool typography. Use the Pencil tool to freehand a word on the artboard. Remember, you can double click the Pencil tool and configure it to Edit Selected Paths, so you can re-draw and modify any mistakes.
Use the Scissors tool to snip the path and alter the stacking order to weave the rope under or over the other segments.
Switch over to Photoshop and paste your rope typography over a nice background texture for some final polishing.
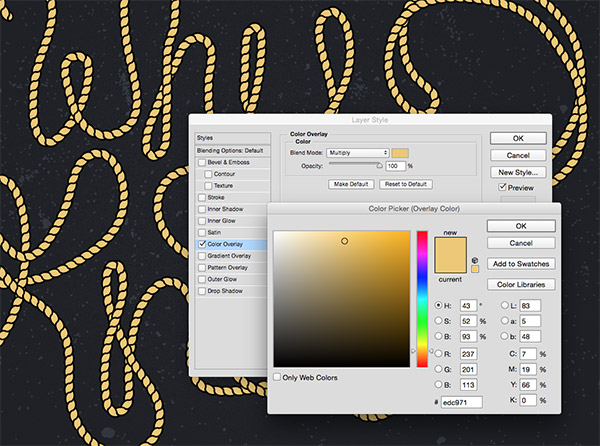
Apply a Color Overlay with the blending mode set to Multiply, while setting the layer to Screen to leave only the white area visible.
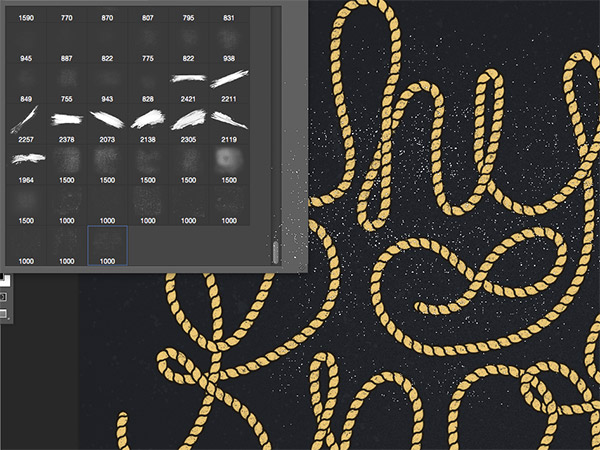
Add a layer mask to the typography layer and use Photoshop brushes to erase away portions of the text to give it a distressed appearance.
While this tutorial is based on the idea of ropes and knots, the same technique could be used to create all kinds of artwork using cables, snakes or even festive decorations!
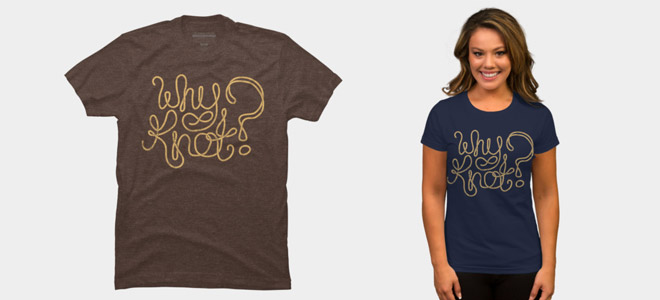
Love this design? Get the T-shirt!

Good job Chris!
This really shows how powerful the pattern brush can be. Brilliant result.
I really appreciate the comment Liz, thank you so much. :)
Excellent tutorial!
Thanks!
Always a good idea to add some typography tricks to the repertoire, thanks Chris!
No problem, Travis.
I’ve been trying to figure out how to create a convincing rope frame with overlaps, but I was getting nowhere. Using two brushes is brilliant. Thanks!
I’m happy I’ve helped you out, Deb!
Chris – you’re an animal! Fabulous work!
HAHA! Thank you, Lance. :D
successful course! Thank you :)
I’m happy you think so.
Chris,
Very ambitious. I’ve done some of my own rope border effects but nothing that compares to this. Will try this ASAP.
Great job!
Greg
I hope it helps in some way. Thanks, Greg.
Loving it.
Cheers, Josie.
So goood man thanks for sharing this !!!
No problem, Marcos.
Pretty! This was an incredibly wonderful post.,many thanks for supplying these details!
Thank you.
Brilliant! This looks like a really cool technique that could work for lots of things. Great idea using it for lettering. Looks great!
Thank you, Laura! I’m thrilled you like the technique. :D
LOVE IT! Perfect timing as I was working on a boy’s pajama bottoms pattern with whales and ships. Thanks!
Brilliant! Hope your pattern goes well. :D
Awesome! Thanks for sharing Chris!
AWESOME tutorial, the effect is amazing and it’s so simple to use! thanks a lot!
Thanks Chris – I’ve never really understood the brush tool so this is an awesome demonstration in how it can be used. Love your work :)
Awesome tutorial thanks
Hi Chris, Can you do a video tut for this?
wow, that awesome. I think you are a photoshop specialist.
—————-
Suppleir Tas Online
thank you so much for sharing.
I was just looking for an rope illustrator brush! LOL, it was staring right at me. THANK YOU in advance :)
Hy Chris Spooner Absoletly Brilliant! Very nice tutorial and wonderful news about Illustrator Brushes.I’ve been following your blog for some time now and I must say it’s quite awesome. I have learned new things and I haven’t even finished the post, but wanted to let you know how much I appreciate your sharing your knowledge. Carry on really nice and imperative optimize post :) Great Work :)
Superb tutorial! Tried it and succeed! Thanks, Chris!