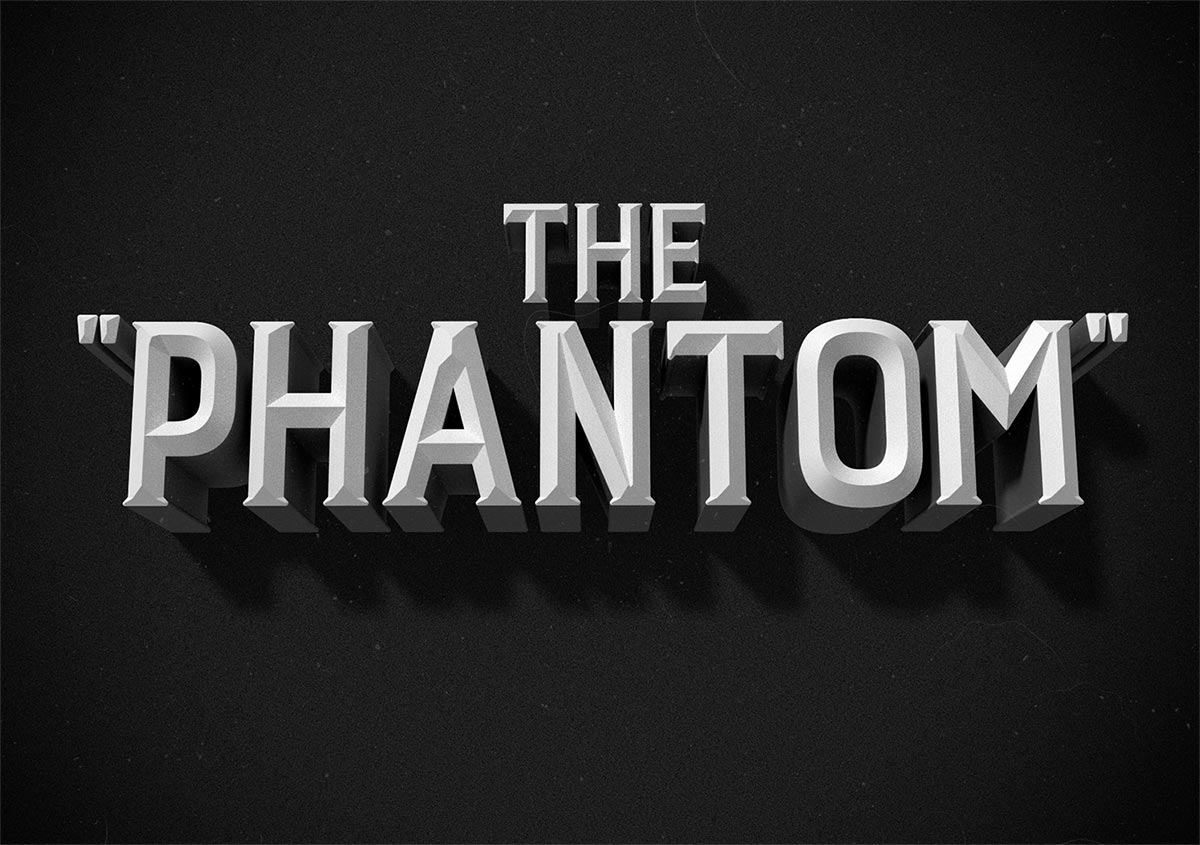
In today’s Adobe Photoshop tutorial we’re going to have some fun replicating the classic film title styles from old black and white movies of the 30s and 40s. Three dimensional effects were often used, along with low key lighting. To replicate these aesthetics in Photoshop, we’ll make use of the 3D feature available in version CS6 and beyond, which will automatically generate realistic lighting and shading to our text.

The artwork I’ll be creating for this tutorial is based on the fictional movie title “The Phantom”. Most of the hard work is done by Photoshop’s 3D functionality. Just some configuration of the settings is all that’s required to produce the three dimensional effects and the chamfered text face, along with the associated lighting and shadows. These effects would otherwise have to be created from scratch, but the 3D features provide a quick and easy way to produce the effects with life-like illumination.
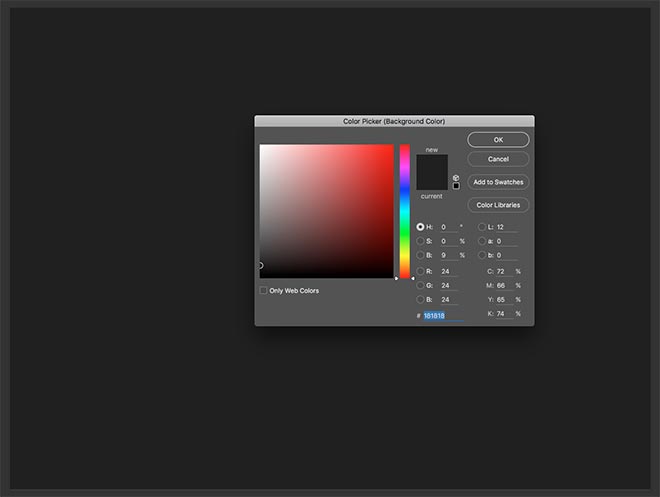
Begin by creating a canvas at your chosen dimensions. I’m working with a document of around 3000x2000px. Change the background colour selector to a dark grey, such as #181818, then use the CMD+Backspace shortcut to fill the Background layer.
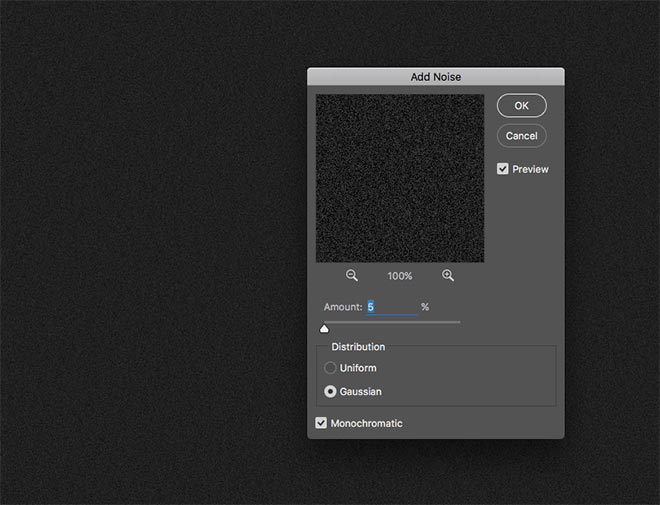
Go to Filter > Noise > Add Noise and configure the settings to 5%, Gaussian and Monochromatic to add some heavy film grain to the background layer.
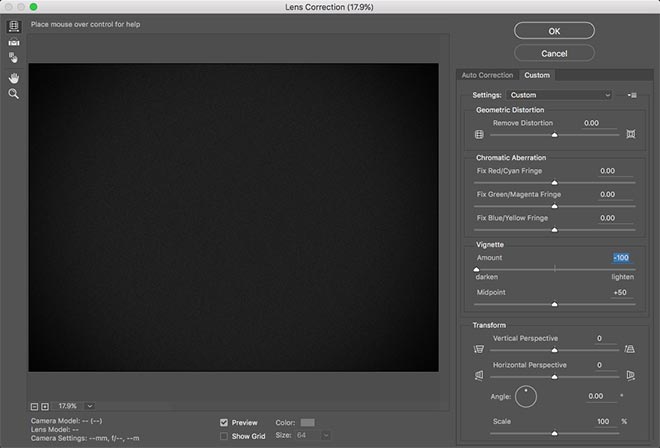
Head to the Filter menu again and select Lens Correction. Under the Custom tab, move the Vignette Amount slider all the way to the left to apply a dark halo around the canvas.
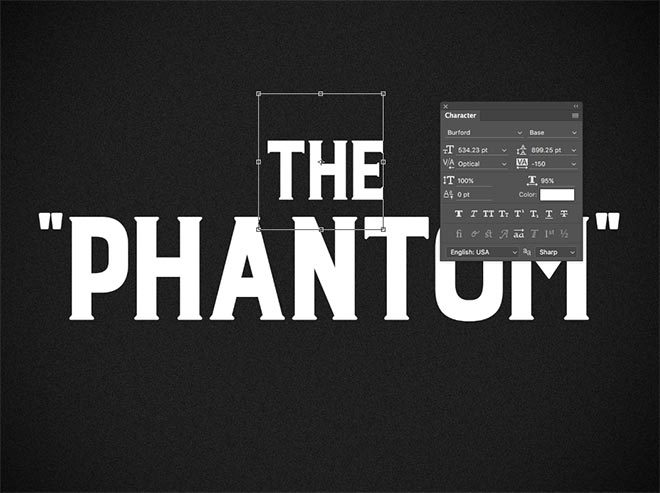
Use the Type tool to lay out your chosen film title. I’m using the font Burford for my example. The first portion of the title is scaled down and centred. This could always be done in a single text element, but using multiple text layers allows for more complex layouts that might incorporate warped effects.
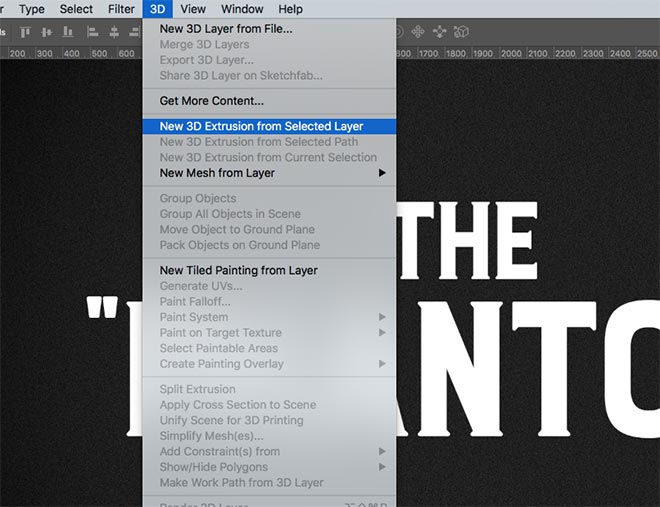
Select each text layer in turn and go to 3D > New 3D Extrusion from Selected Layer. Doing so will change the workspace into 3D mode and create individual models out of the text.
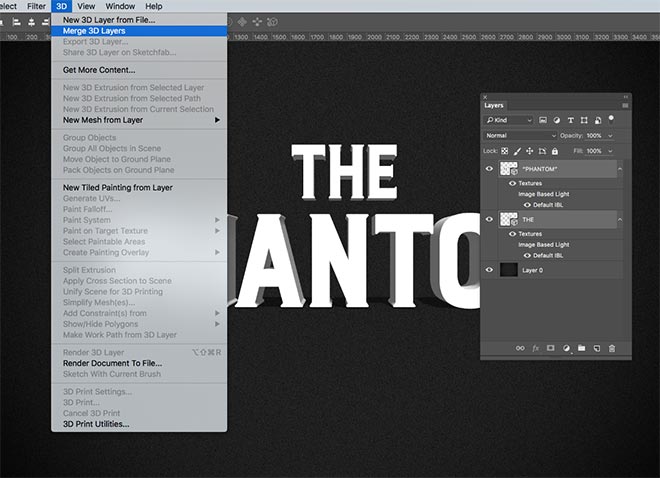
Hold the Shift key and select each of the 3D layers in the Layers panel, then go to 3D > Merge 3D Layers. This will combine the separate models into one 3D scene.
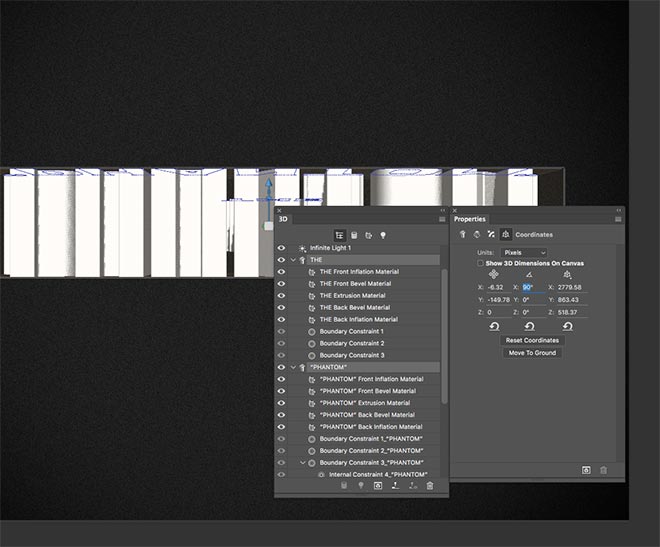
By default the 3D text is stood upright against the ground plane, but we need the text to be laid on its back for this film title effect. Select each 3D object in the 3D panel, then navigate to the Coordinates section of the Properties panel. Change the X rotation value to 90°.
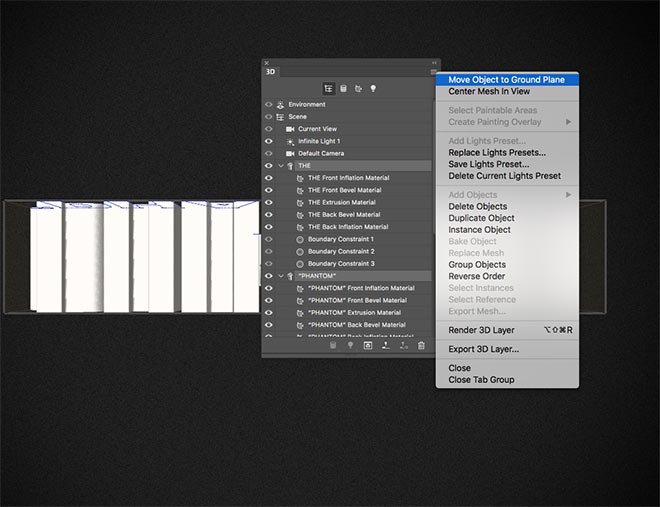
Click the small menu icon in the corner of the Proerties panel, then select Move Object to Ground Plane. This will ensure the item isn’t floating in 3D space.
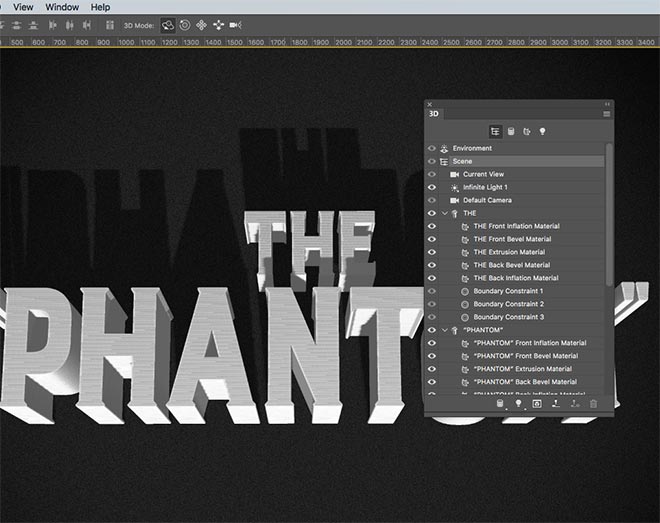
Although we’ve rotated the 3D text, the default camera view is now looking at the models from the side. Activate the Scene in the 3D panel, then select the 3D Rotate tool in the top toolbar. Click and drag to orbit the scene into a position so that the face of the text is visible, while looking at the text at a slight angle.
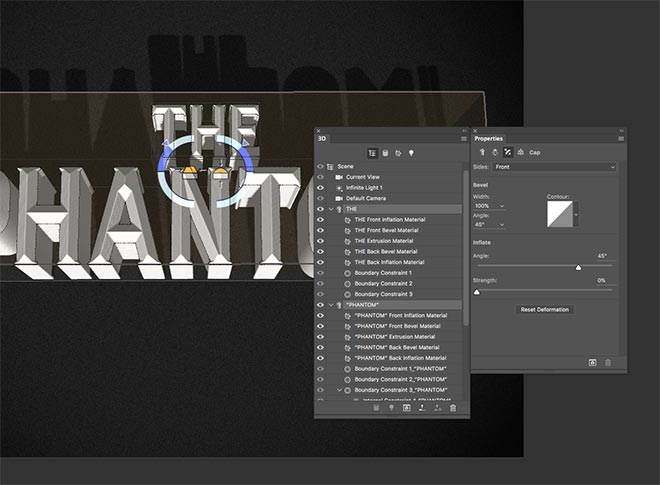
Select both the 3D text models by holding the CMD key to add them both to the selection, then configure the Cap options in the Properties panel to 100% width with the default 45° Angle. This will apply a ‘King Kong’ style chamfered to the text face.
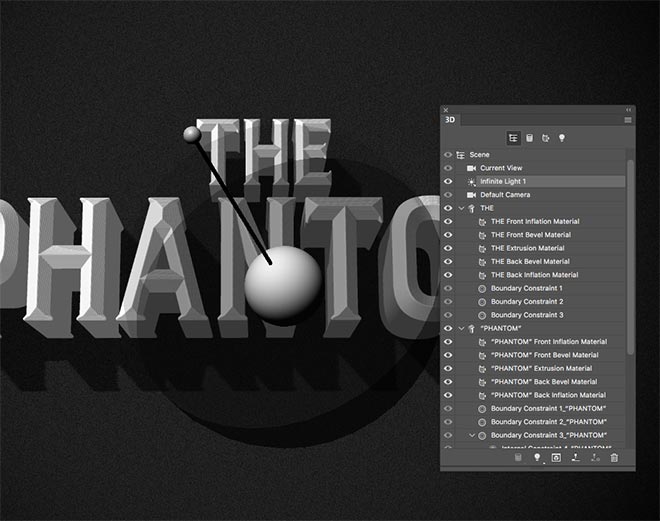
In the 3D panel, select the Infinite Light 1 object. The interface will display a large icon that can be rotated to alter the direction of the light source. Click and drag the smaller end of the graphic to generate a long shadow by shining the light at an acute angle.
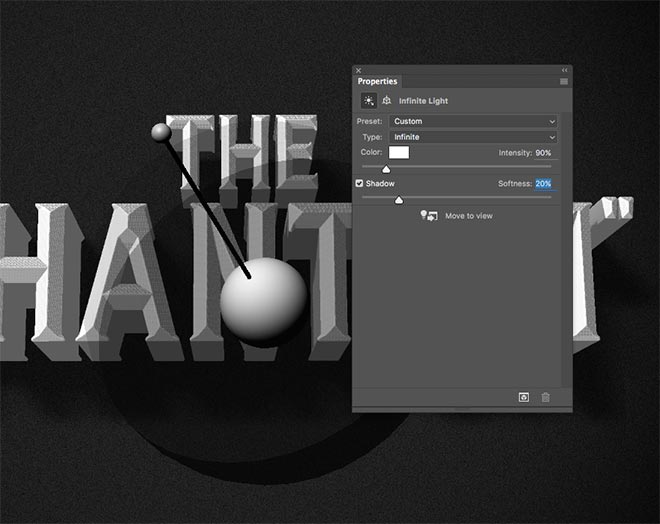
With the Infinite Light still selected, alter the Shadow Softness under the Properties panel to blur the shadows. If the angle of your light settings is blowing out the text faces in white, turn down the Intensity within these options too.
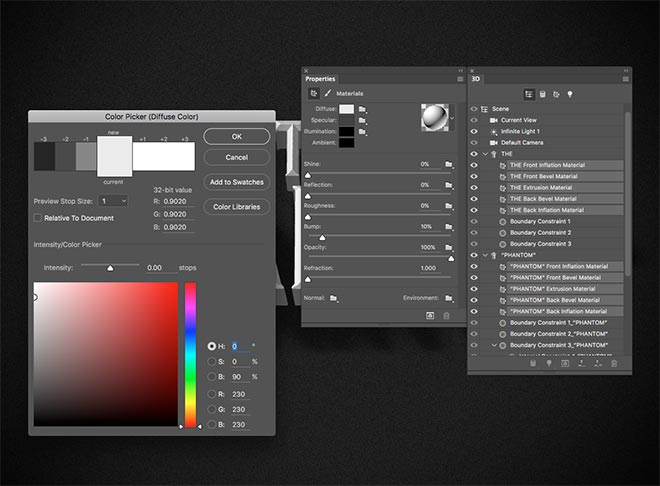
Back in the 3D panel, shift and click between all the levels ending in ‘Material’ to highlight them all. Reduce the Shine to zero and change the Diffuse colour from white to a light grey from within the Properties panel.
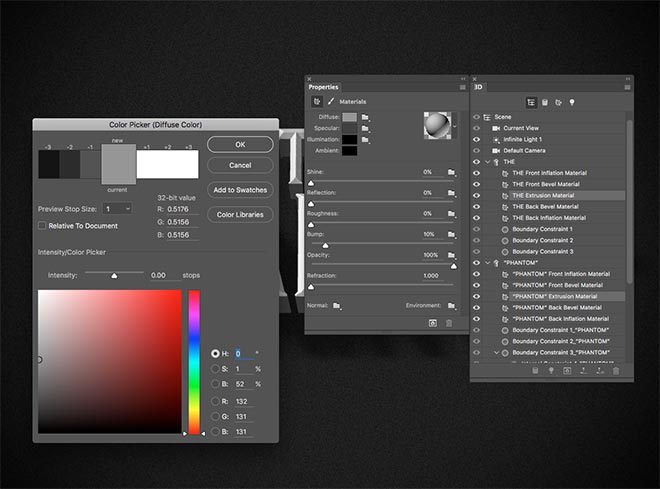
Select just the Extrusion Materials for both models in the 3D panel, then change the Diffuse colour for these faces to a mid-grey in the Properties panel.
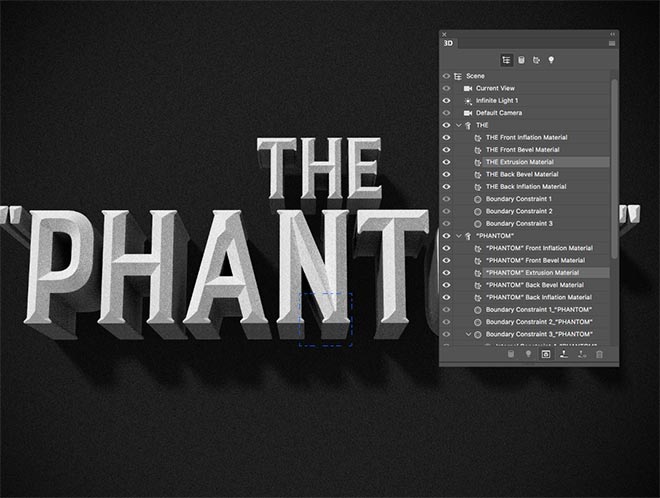
Click the Render icon at the bottom of the 3D panel to begin rendering the final 3D scene with full quality lighting and shadows. It can take a while for a full render to complete, so I prefer to allow the blue square to make a couple of passes, before pressing the Escape key. The grainy result of an incomplete render actually adds to the vintage film effect.
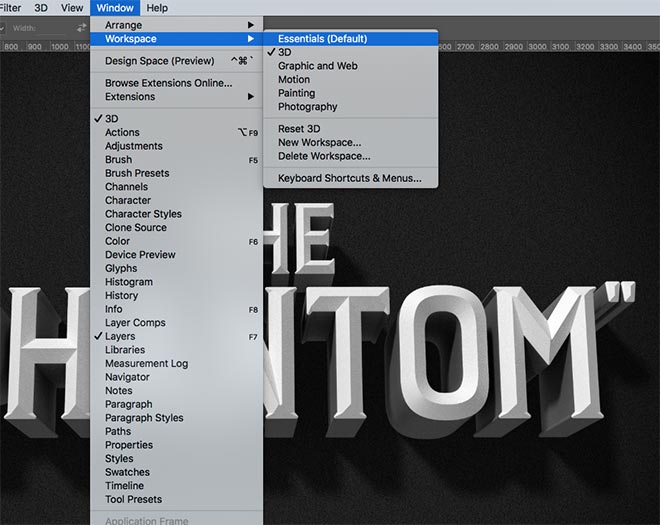
Switch back to the default Photoshop layout under the Window > Workspace > Essentials menu to clear up the 3D tools.
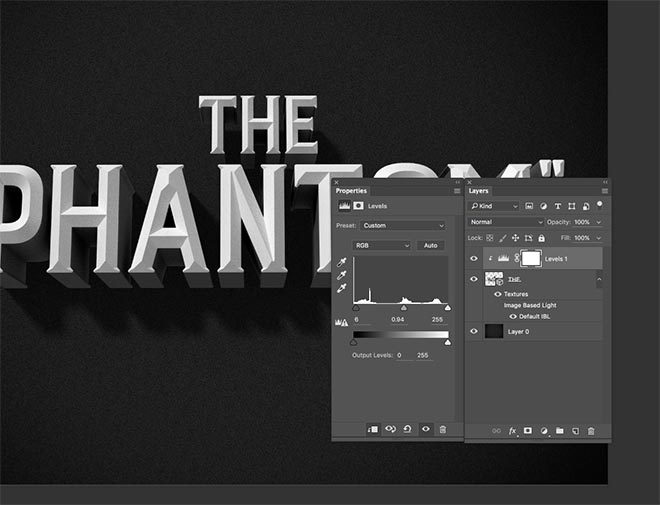
Add a Levels adjustment layer, then hold the ALT key while clicking between the adjustment layer and the 3D layer to clip the Levels so it only applies to the text, not the background. Adjust the shadows and midtones sliders by a couple of units to improve the contrast of the 3D text.

All that’s left to finish off a vintage themed design is to overlay a grainy texture. My free Dust and Scratches textures perfectly suit the style of classic film. Paste, rotate and scale one of the textures onto the canvas, then change the blending mode to Screen and reduce the opacity to suit. I chose 15% to leave some subtle grainy texturing.
The final result replicates style of old film titles perfectly with three dimensional text effects and grainy textures. Photoshop’s 3D tools did a great job of producing realistic lighting effects with natural looking shadows, which would be difficult to create manually, especially in the areas where each individual letter casts a shadow upon the next.

Hi, I’m trying to follow the steps in this tutorial, and I got stuck at the part with the Infinite Light. When I select it in the 3D-panel, no graphic appears. I work with CC2017, (the interface seems to be a bit different at the caps part too).
It looks like I have some updates pending for Photoshop! I’ll report back when I’ve experimented with the CC2017 interface.
Awesome tutorial! Easy to follow and I love the effect. This one will be fun to play with – thank you!
That’s great Rae, glad you like the tutorial!
Really good tutorial, easy to follow and the results are fantastic. Thank you :)
Thank you Steven, good to know it was easy to follow.
The 3D option is greyed out.
Any idea how to turn it on?
I had the same problem, Photoshop wasn’t picking up my graphic card. try: Edit > Preferences > Performance, and make sure “Use Graphics Processor” is checked. That worked for me…
I’m learning Photoshop, Hope! this tutorial will help me to make my further steps, Thanks for sharing.
Hey Pete, hopefully you will find the tutorial useful! Let us know how you get on…
Really Great! Good for me, will help in our projects.
Thanks.
Good to hear Nikhil!
Easy and to the point. Thank you also for doing a step by step as opposed to a video ;-)
Thank you Simon, it’s good to hear feedback on the tutorial format.
Without the doubt, this is beautiful vintage film title! You have quite an eye for creativity, and I’m thankful for this step by step tutorial you have shared with us.
Wow really old vintage looking font, exactly what I was looking for, easy to follow tutorial too.