
This post was originally published in 2012
The tips and techniques explained may be outdated.
Follow this step by step guide to creating a cool little skull and crossbones sticker design in Adobe Illustrator. This tutorial will hopefully be a great one for Illustrator beginners, as we’ll not only be creating the skull and crossbones design using all the important tools found in Illustrator, we’ll also be setting up the basic print document with bleeds and guides.
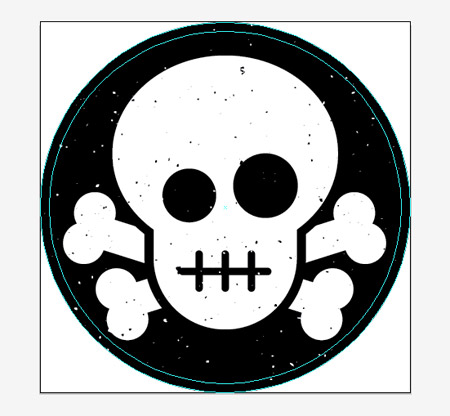
The skull and crossbones design we’ll be designing is made up of simple vector shapes to create a cute cartoonish appearance. We’ll also use some vector textures to distress the design to give it that old school aged look.

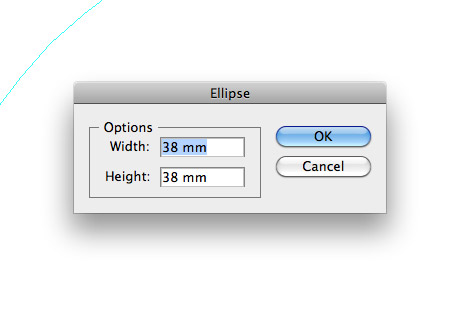
The dimensions of your own sticker will all depend on the printer you’re using. My printer of choice creates stickers at 38x38mm, so with the required 1mm bleed the overall artwork size equates to 40x40mm. In any normal print job we could use Illustrator’s bleed settings to add guides for us, but seeing as this sticker is circular those bleed margins won’t help out.

In order to create our own circular guides we must first create a circle of the desired size to match the artboard. Click anywhere on the artboard with the Ellipse tool to enter exact dimensions.
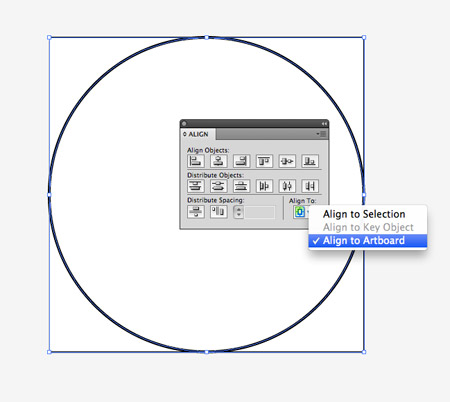
Use the Align palette to fit this circle exactly into the artboard. Make sure the Align to Artboard setting is checked in the options.
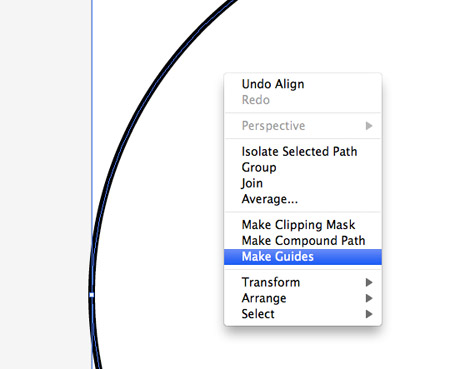
Once the temporary circle is in place right click and select Make Guides to transform this object into a guideline that won’t appear as artwork in the final print document.
We have the guide that highlights the edge of the total sticker artwork including bleed, but we also need a guide to determine where the final artwork will be cut. Designing the sticker according to this guide will avoid any elements being cropped when the prints are trimmed to size.
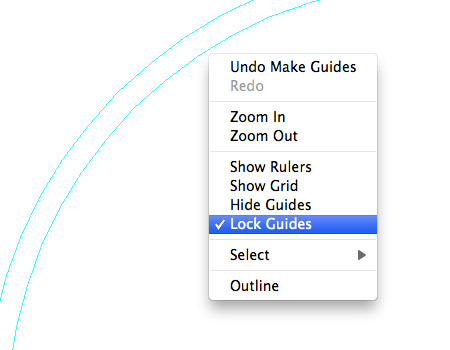
Once the two guides are in place, right click and select Lock Guides so they can’t be accidentally selected or moved out of position.
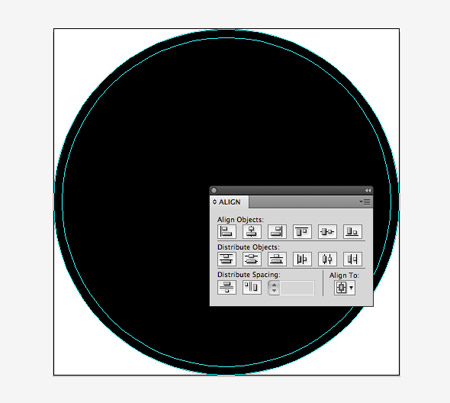
The design we’re be creating features a black background, so add a 40x40mm circle to the artboard and align it centrally.
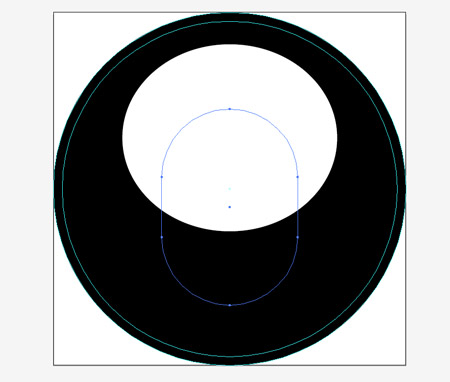
Use the Ellipse tool to create the main portion of the skull, then switch to the Rounded Rectangle tool to draw the jaw piece. Hit the cursor keys are adjust the corner radius before releasing the mouse.
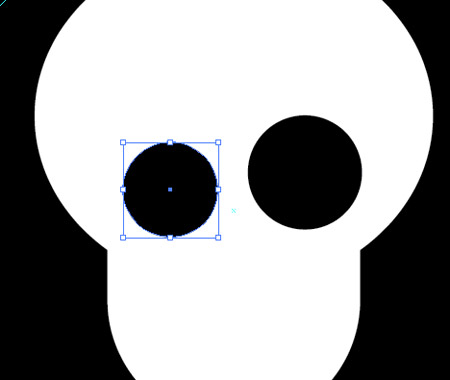
Create two eye sockets using basic black circles, scale one of the eyes down slightly to create a confused expression.
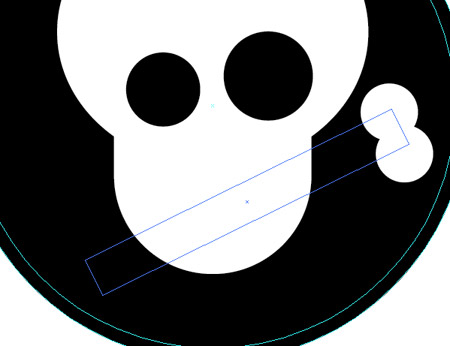
Draw the basics of a bone shape by first overlapping two circles. Once the first circle is drawn, hold ALT while dragging the shape to create a duplicate. Add a rotated rectangle to create the shaft between the two sockets.
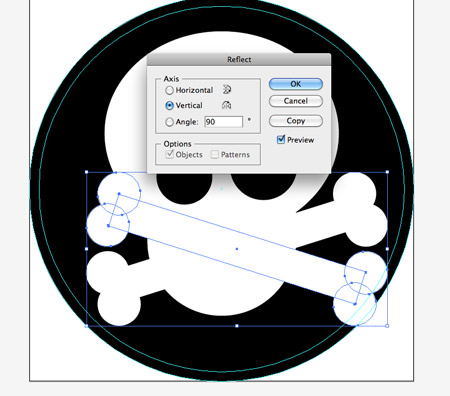
Select all the shapes that make up a bone and hit CMD+G to group them. Copy (CMD+C) then Paste in Front (CMD+F) a duplicate then head to Object > Transform > Reflect to flip the copy in the opposite direction.
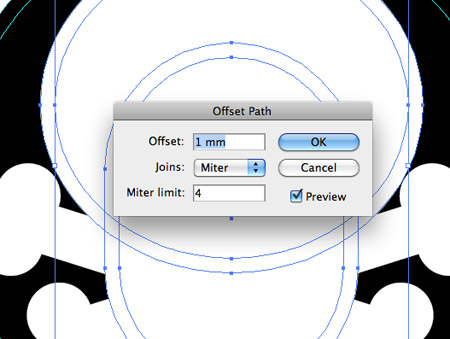
The bones currently blend into the main skull shape, so to create a border around the skull select the two elements and go to Object > Path > Offset Path. Add an offset of 1mm then give these new shapes a black fill.

The new black border and the crossed bones will all need stacking correctly to create the desired effect. Use the shortcuts CMD+[ and CMD+] to send each element forward and backward until the black border sits on top of the bones.
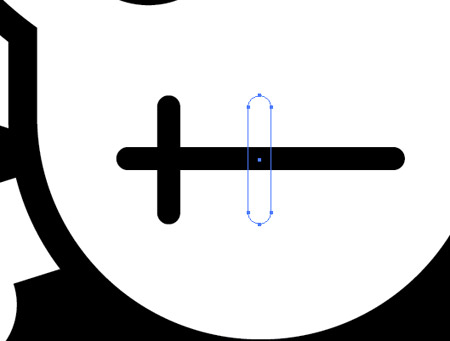
Finish off the skull face with a simple mouth. When creating a duplicate of the vertical lines hold the ALT key and drag a copy, then press CMD+D to repeat the transformation to create a series of equally spaced lines.
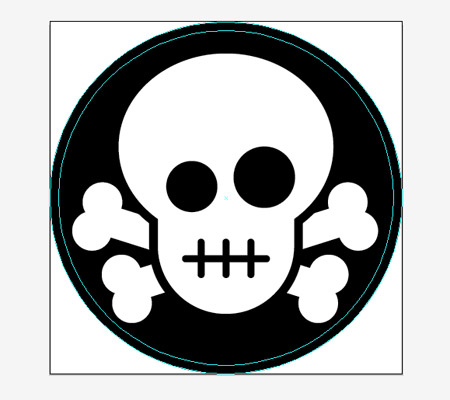
The sticker design is looking pretty good so far. Using those simple shapes will really help define the skull seeing as the sticker is pretty small in size.
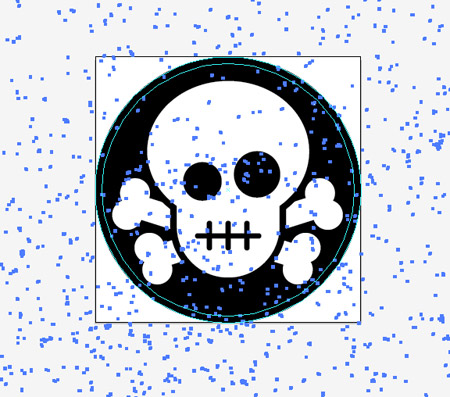
Everything looks better with some distressed treatment. Copy a texture from my vector bumper pack into the design.
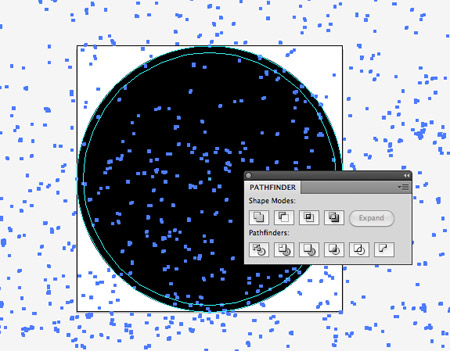
Copy and Paste in Front a duplicate of the background circle and send it to the top of the stack with the shortcut CMD+Shift+]. Select this shape along with the texture and hit the Crop button from the Pathfinder palette. All the excess texture beyond the edge of the sticker will be removed, so give the texture a white fill to rough up the black background.
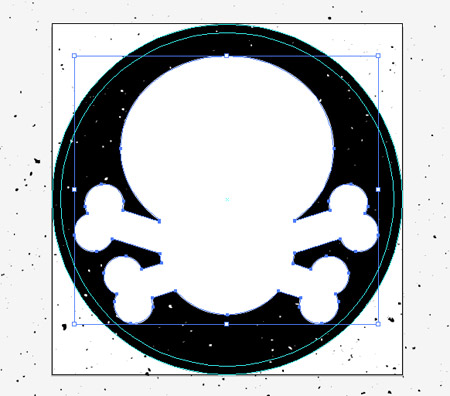
Paste in another texture but this time make a copy of all the elements that make up the skull and crossbones design. Hit the Merge button from the Pathfinder to blend them into one shape.
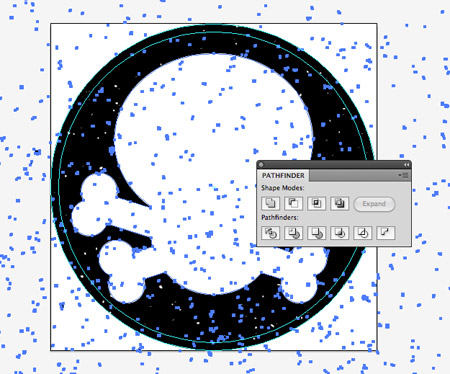
Send the blended skull and crossbones shape to the top, then use it as a tool to crop down the second texture. These texture overlays give the design that awesome old school appearance as if the sticker has been exposed to the elements for years.
This leaves the design ready to save as a JPEG or EPS file and send off for printing. Remember those guides won’t appear on the final prints, but they highlight the bleed margin so we can be sure the artwork won’t be cropped when the stickers are trimmed to size.

nice tutorial just done it now :)
Although couldnt understand the last bit about the texture, so i just made it smaller so it fits over the button area rather than clipping it etc…
looks cool tho :)
I got stuck on the last crop too Stuart
I like the texture, I think it added some feel to it. If make the sticker a bit larger can add some text too.
Hello, okay? I really wanted you to help me! I’m making a poster of a party to publish on the Internet, but I guess I’m not saving the file correctly, the image loses quality when placed in social networks. So what is the correct format to save and publish on the Internet without losing quality? Thank you.
Only for display use (social networks) :
On AI : Export > PNG / Use Artboard checked / 72dpi
On PS : Save For Web And Devices > PNG 24 / Transparency checked
nicee
Great tutorial Chris. Easy enough for me to follow :)
Your tutorials are always short but precise. Super great job! Thank you!! :)
Good tutorial, thank you ;-)
I like the tutorial very detailed..
This is a great tutorial. Nice techniques!
Cheers mate, this has come in very handy for a project I am working on at the moment.
it’s good tut. it’s very detailed and cool
Really enjoyed this tutorial but I got stuck on the offset border to create a border line skull between the skull and jaw. I also struggled with the end crop to remove the black spots from the white background. Any advice on where I might have gone wrong? Thanks, Laura