
This post was originally published in 2016
The tips and techniques explained may be outdated.
In today’s tutorial we’re going to play around in Adobe Photoshop and have fun creating a faceless man with a window to his soooouuuul! We’ll use some simple photo manipulation techniques to digitally cut away the face and tidy up the edges, then we’ll place a vibrant cosmic space image inside the head and finish it all off with some refinements, lighting effects and a complementary quote to produce a surreal piece of artwork.
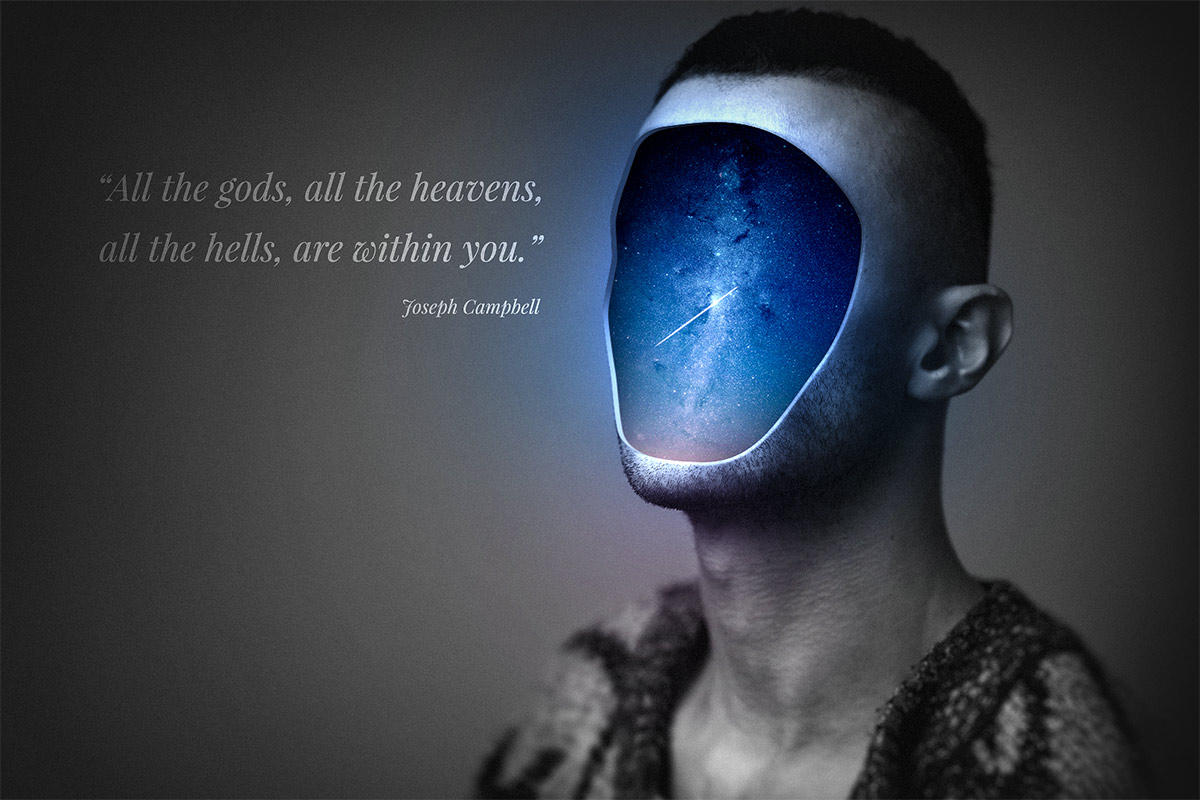
The artwork we’ll be creating in this tutorial is based on the Joseph Campbell quote “All the gods, all the heavens, all the hells, are within you”. We’re going to depict it quite literally with a man with no face, showing a beautiful galactic scene inside his hollow head!
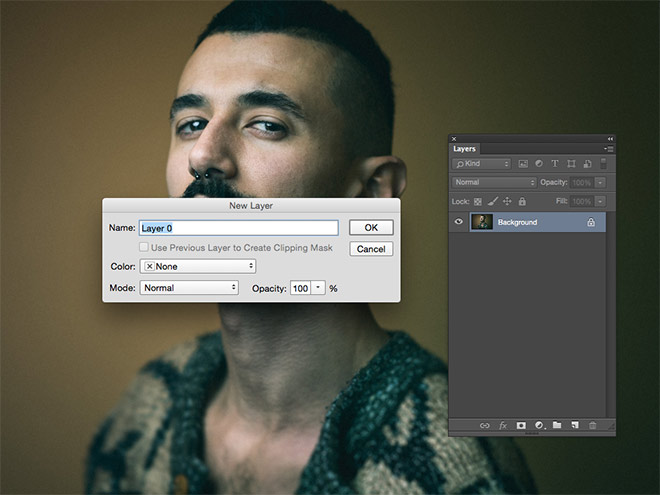
Begin by opening a portrait photo in Adobe Photoshop. I’m using this great Creative Commons image from Daniel Zedda. Double click the Background layer to convert it into a normal unlocked layer.
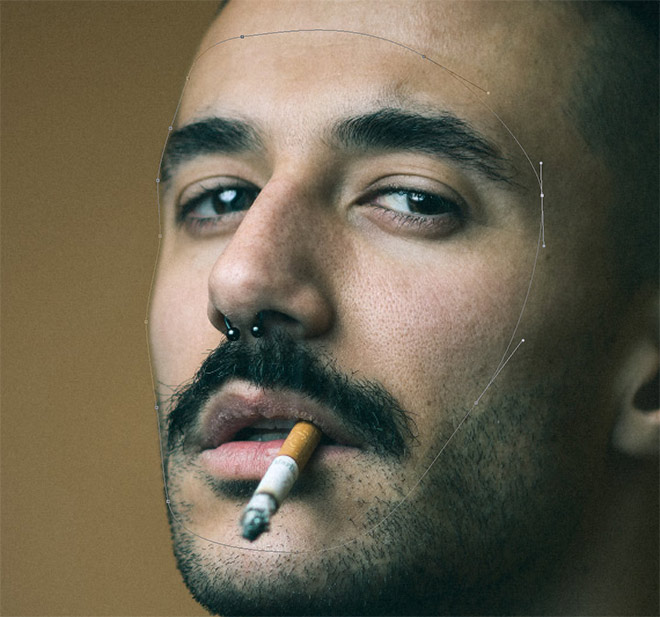
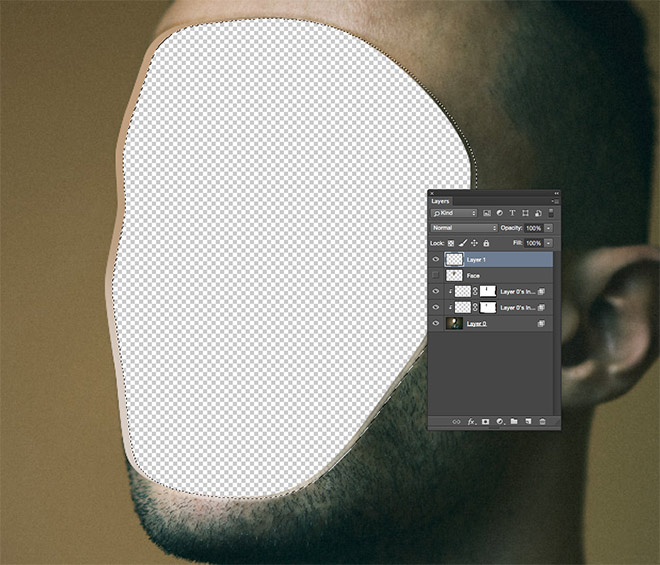
Select the Pen tool and begin tracing a smooth outline around the face, following the basic contours. Extend the path by a few pixels on the left edge to prevent any fine hairs from the eyebrows and beard protruding from the selection.
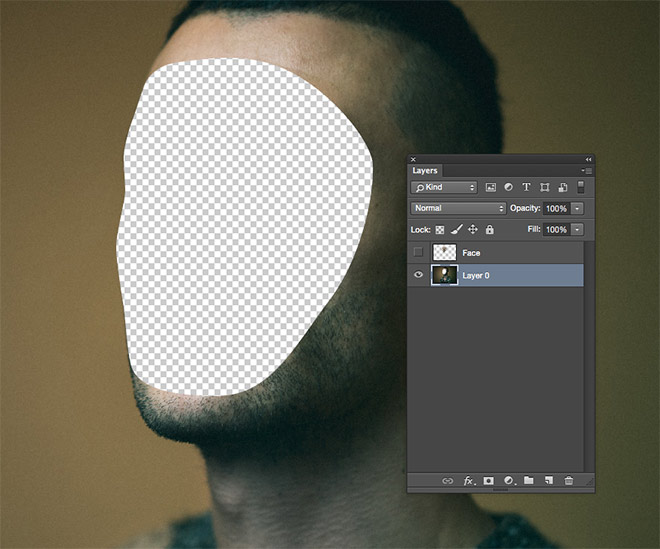
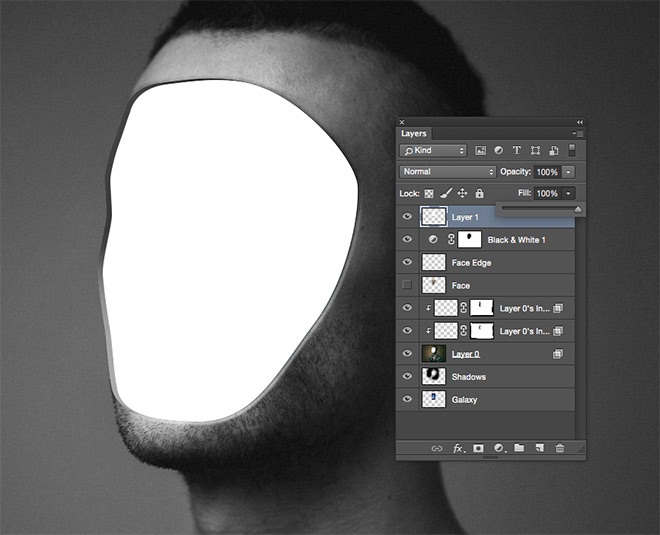
Right click and choose Make Selection, then press CMD+X to Cut, followed by CMD+V to Paste. Line the face back up with the head, then rename the layer and turn off the visibility.
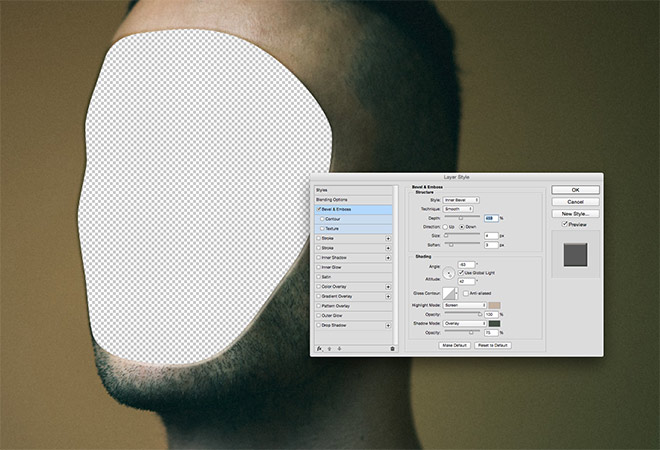
Double click the main image layer to add a Layer Style. Select Bevel & Emboss and configure the settings to Inner Bevel, Smooth, around 460% Depth, 4px Size and 3px Smooth. Then adjust the Angle so that the shading matches the lighting of the photograph. Sample new Highlight and Shadow colours from light and dark parts of the image, then change the blending modes to Screen at 100% and Overlay at 75%.
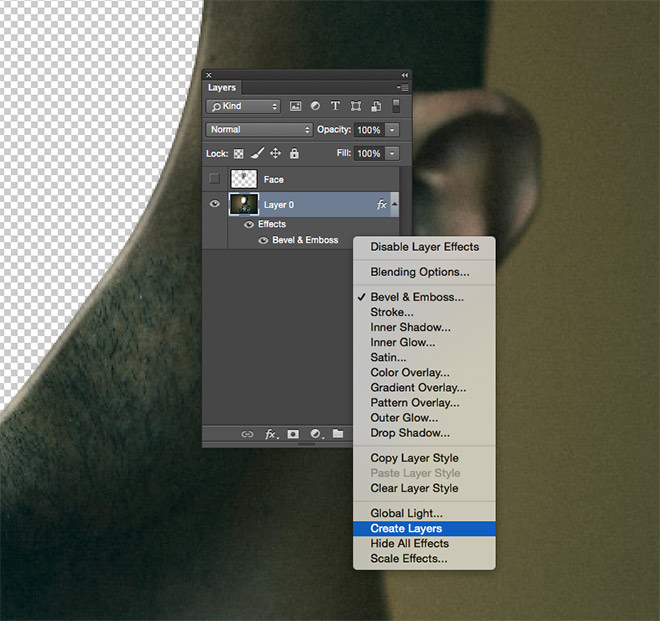
Right click the Bevel & Emboss effect from within the Layers panel and choose Create Layers to convert the layer style into editable artwork.

Add a Layer Mask to the Inner Bevel Shadows layer and use a black brush to erase the unwanted shading from the left edge, along with the beveling around the bottom and right edges of the canvas.
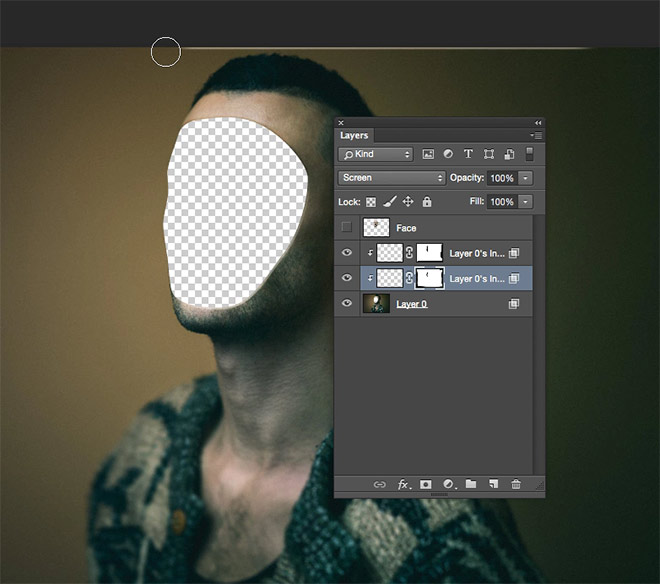
Add a Layer Mask to the Innver Bevel Highlights layer and erase the rest of the beveling along the top and left edges of the document.
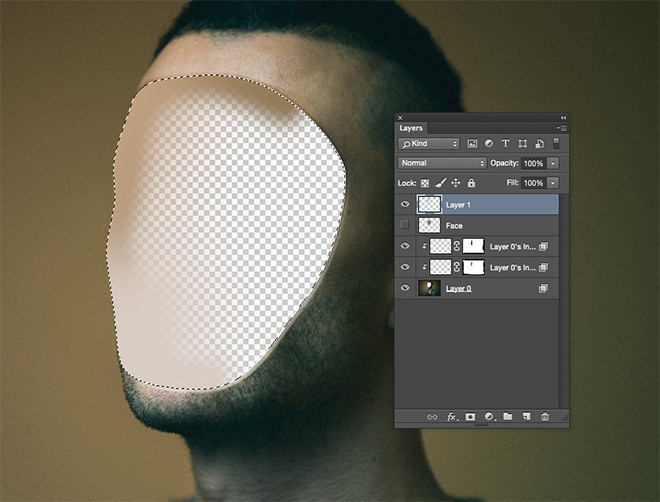
CMD+Click on the hidden Face layer’s thumbnail to load its selection, then create a new layer. Sample nearby colours from the image and paint around the mask with a soft brush.
With the Marquee tool selected, nudge the mask towards the right with the cursor keys, then hit the delete key to leave a thin strip. The painted colours should generate a gradual change of tone from top to bottom that matches the lighting of the image.
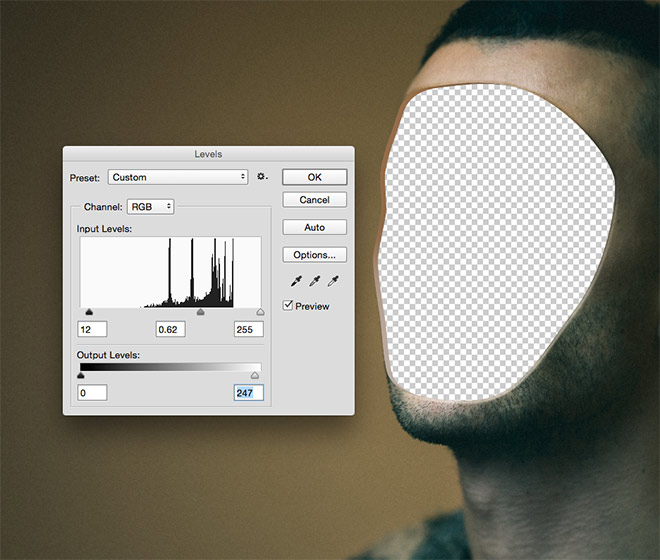
It might be necessary to adjust the Levels (CMD+L) to fine tune the overall brightness and contrast of this edge strip to give it a more realistic three dimensional appearance.

Paste a detailed space scene into the document, like this one from Juskteez Vu. Scale it down in size, then drag the layer to the bottom of the layer stack so it sits underneath the main portrait photograph.
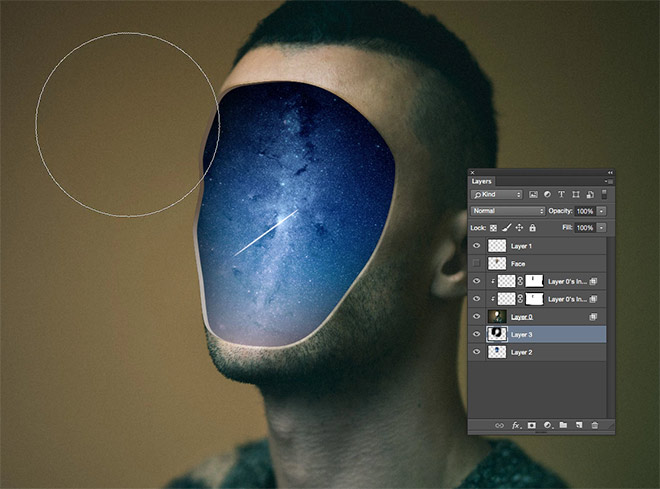
Add a new layer above the space scene and use a soft black brush to paint in some shading around the egde to give the image a sense of depth.
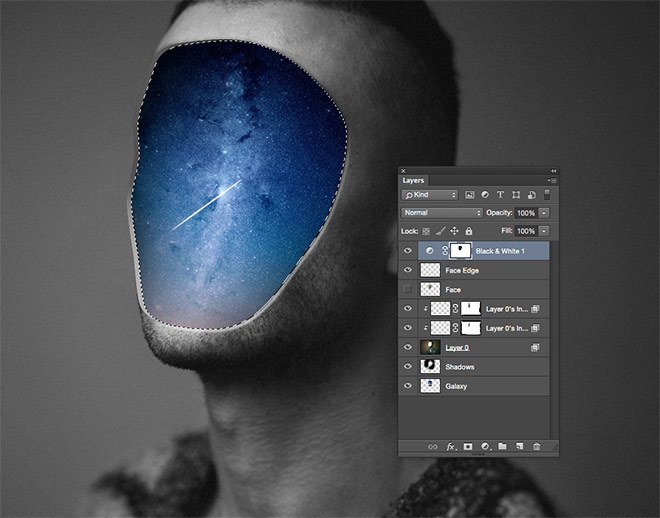
Click the top layer in the Layers panel, then add a Black and White adjustment layer and apply a layer mask. CMD+Click the Face layer’s thumbnail to loads its selection, then hold CMD+ALT while clicking the thumbnail of the Face Edge layer to subtract its selection to leave just an outline around the space scene. Fill this selection with black within the layer mask to allow the full colour artwork to show through.
Go to Select > Reselect to load the space scene outline again, then add a new layer and fill it with a random colour. Reduce the Fill slider to zero to make it transparent.
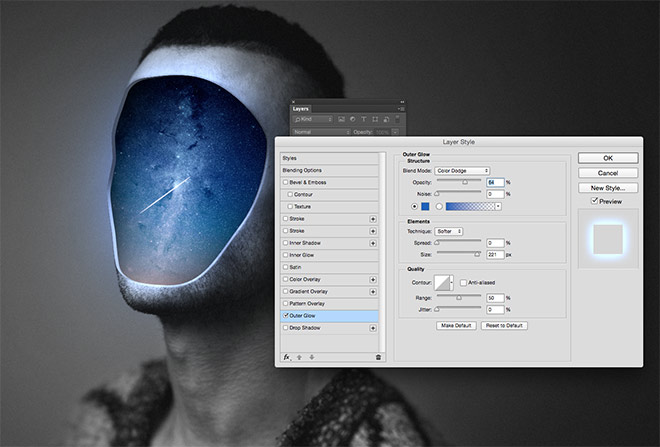
Double click the layer to add a Layer Style. Choose Outer Glow and adjust the settings to Color Dodge, around 65% opacity, a blue colour sampled from the space scene and a size of around 220px.
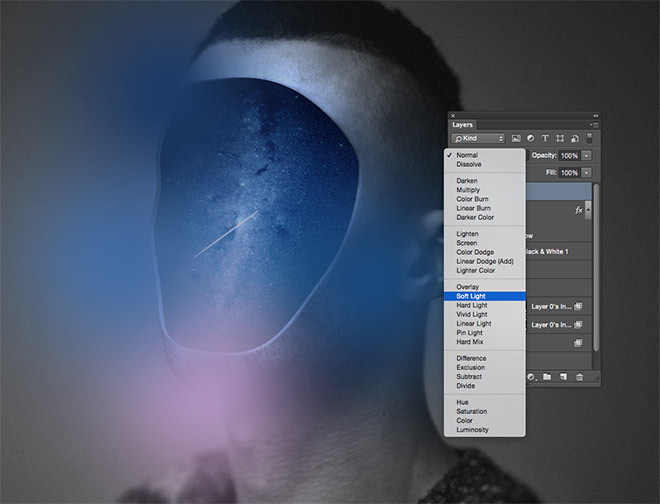
Add another new layer at the top of the layer stack. Click the foreground colour selector in the toolbar and sample a colour from the space scene. Dab spots of various hues around the face using a soft brush. Change the blending mode to Soft Light with an opacity of around 50%.
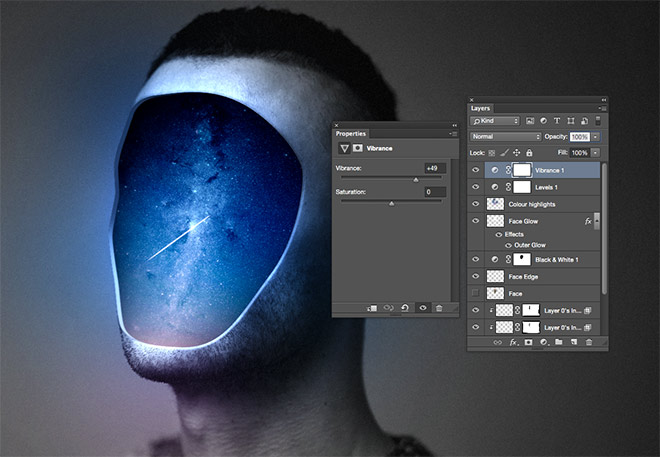
Enhance the artwork with a Levels and Vibrance adjustment layer. Drag the shadows and highlights inwards slightly in the Levels to boost the contrast, and increase the Vibrance to boost the colours of the space scene.
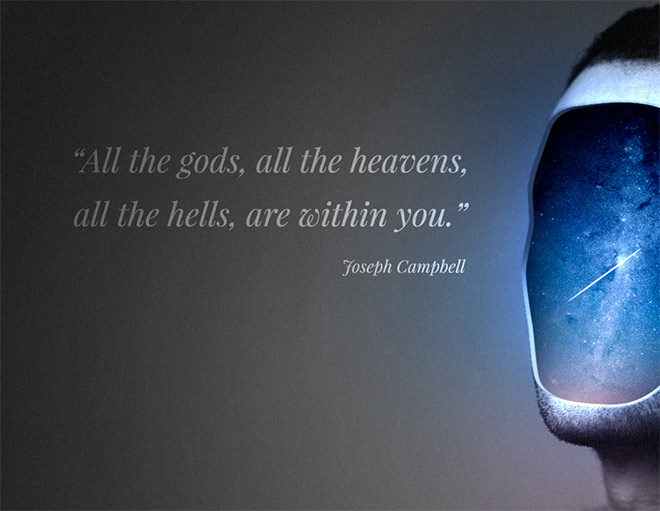
Finish off the artwork by adding a quote with the Type tool. Here I’m using the free font Playfair Display. Change the blending mode to Overlay to allow the typography to blend into the scene.
It’s always fun to experiment with abstract artwork like this to brush up on your photo manipulation skills. The challenge in this tutorial was to digitally refine the cut out to give it a realistic appearance. Using effects such as the Bevel and Emboss layer style plus the manually drawn shadows were important steps to add depth to the image.

could you please make the video tutorial for this? please.. please
This look good! Maybe my portfolio web need this type :D
Great portrait effect tutorial, thank you for sharing! I also like the quote :)
So cool! thank you :)
Very superb effective photo shop portrait.I saw this type of hollow face in english movie. I love to try this in my own face. Hope it will working well. Thanks for share this good-looking tutorial.
Good job, man !
This is such coool tutorial .. good work bro!
Great portrait effect tutorial, thank you for sharing! I also like the quote :)
Hi, As a newbie Graphic Designer . Honestly, I want to say that, I’m really impressed by your tutorial, Chris!. Bookmarked for better experience!
Nice effect and tutorial. Like wayan said, a video would be great too. I really like your tutorials, thank you!
Love your Tutorials !
I want to increase my skills on photoshop so I’m really happy to find your blog :)
Thank you for sharing so many ressources
thanks man, very informative
i wanna translate your tutorial to other languge ,i would you you give us your agreement
Awesome technique indeed. I’m going to practice the very thing. Hope be successful! Thank you.
Great effect and tutorial, I have one kind request..could you please make the video tutorial for this? really appropriate if you could.. thanks
Wow! What a creative Face Portrait design. Thanks for sharing
amazing tutorials, good job
Awesome tutorial. you’ve describe all steps perfectly & It really helps a lot!!