This post was originally published in 2015
The tips and techniques explained may be outdated.
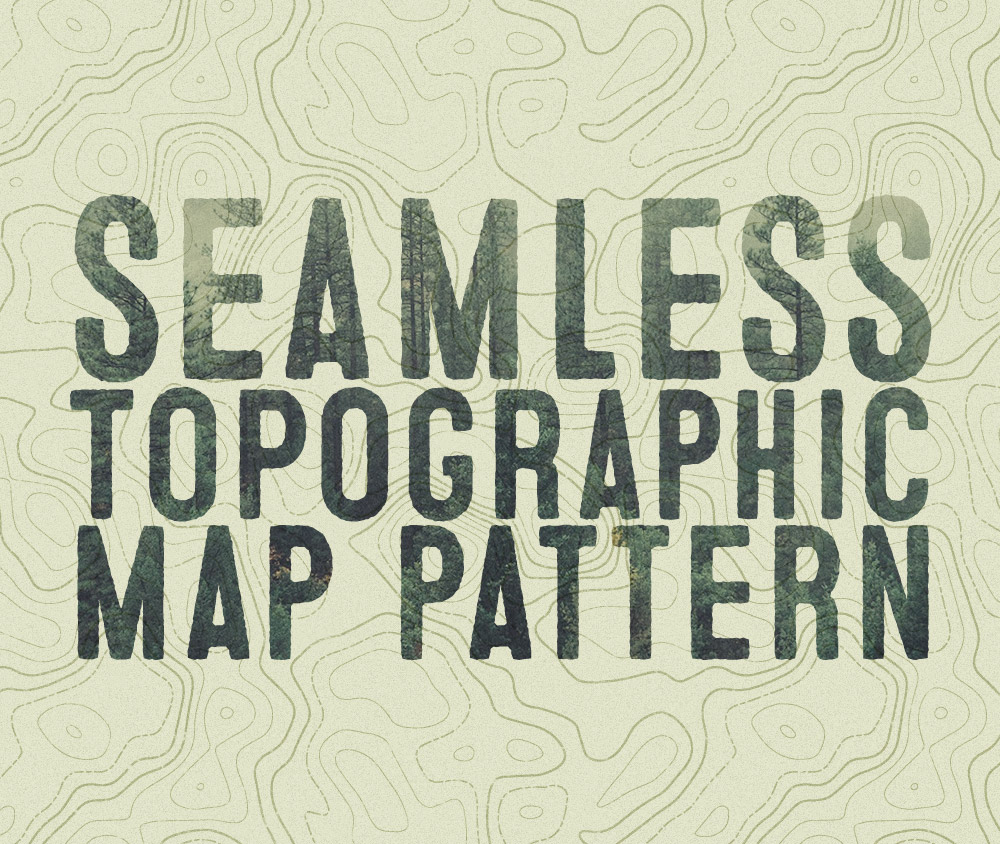
I’ve posted articles about topographic maps before on my blog, namely my contour map effect Illustrator tutorial and my free pack of topographic map patterns. My first tutorial used Illustrator’s Blend tool to draw a series of concentric lines. It worked pretty well, but I went on to develop a technique that would help create more detailed and repeatable patterns, which I used to create that freebie pack. I never explained those new techniques in a tutorial, so that’s the topic for today! Follow this how-to guide to learn how to create a detailed topographic map effect, then convert the design into a seamless pattern.

The effect we’ll be creating in this tutorial is a realistic topographic map. My original tutorial involved manually drawing the outlines, but this new technique generates much more complex designs with ease. I’ll also show how you can customise the effect to create a range of map styles, and convert the design into a seamless repeating pattern for use as backgrounds in your outdoors themed designs.
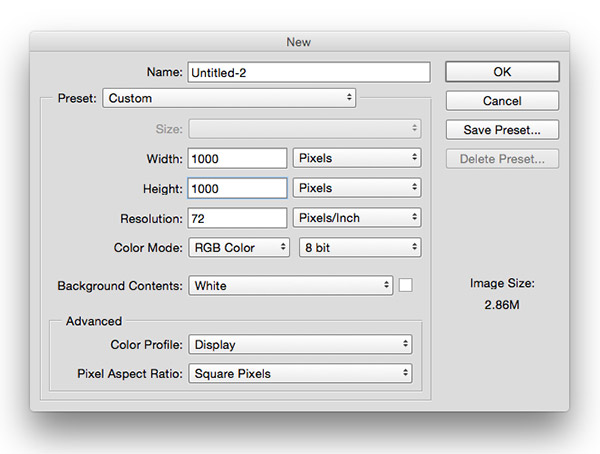
This tutorial begins with Photoshop, then switches over to Illustrator a little later. Create a new Photoshop document at around 1000x1000px.
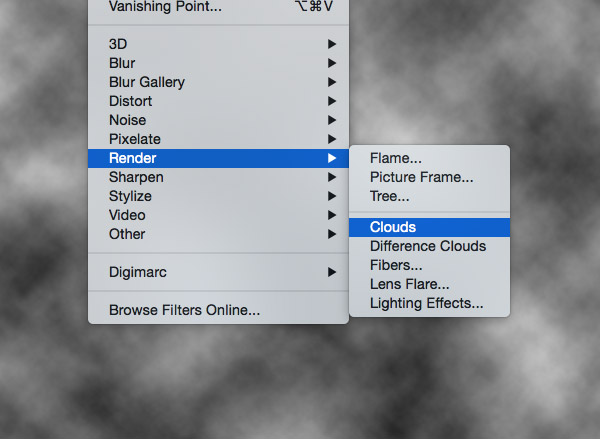
Press the D key to revert the foreground and background colours to the default black & white, then go to Filte > Render > Clouds.
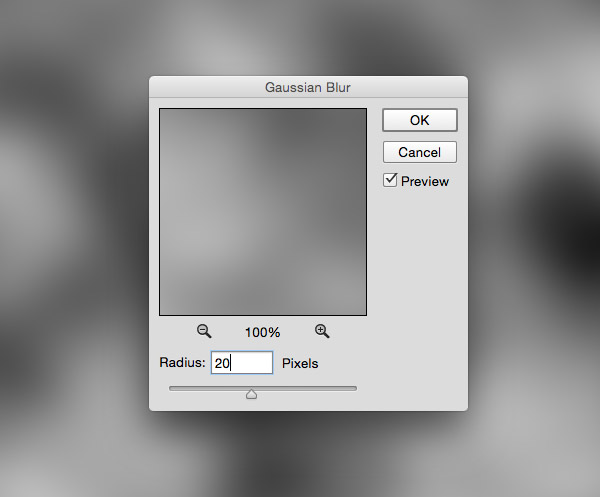
Next, head to Filter > Blur > Gaussian Blur. The amount of blur you add determines the smoothness of the contour map lines. 20 pixels is a good starting figure.
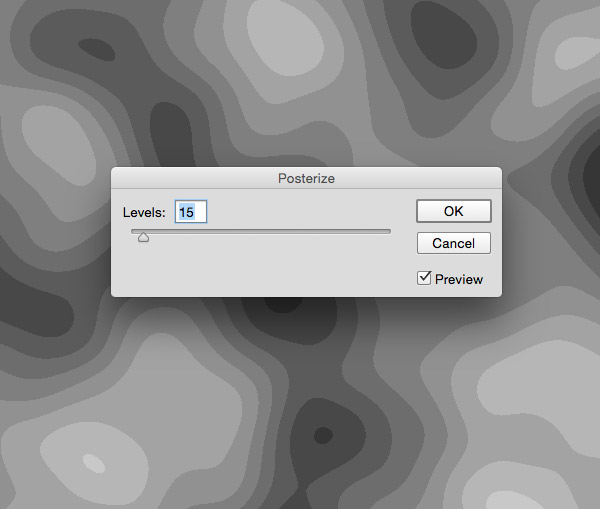
Go to Image > Adjustments > Posterize. This figure will determine the density of the contour map lines. Enter 15 in the levels option, or increase the figure for more detailed patterns.
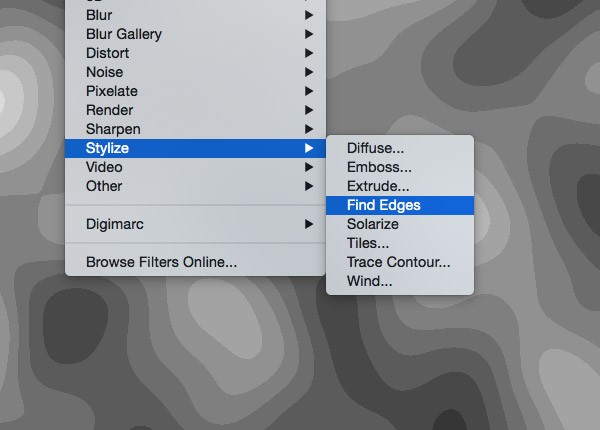
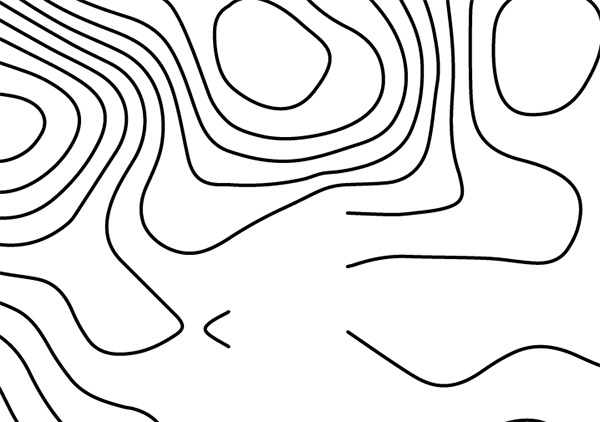
For the final Photoshop step, head to Filter > Stylize > Find Edges to convert these blobby shapes into contour map style outlines.
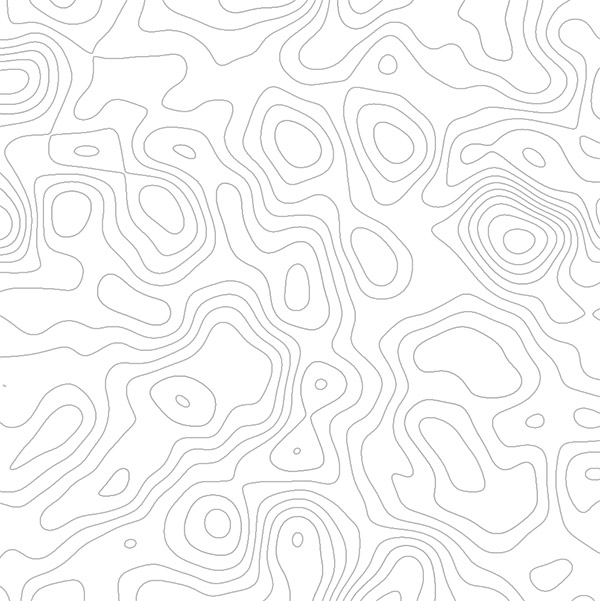
We could end here if you just wanted a simple non-repeating topographic map effect, but there’s a little more work to convert the design into a pattern.
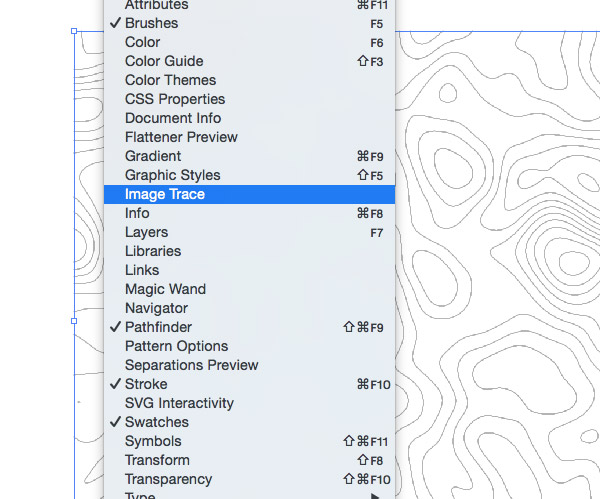
Copy the effect and paste it into a new Illustrator document, then open up the Image Trace window (previously Object > Live Trace).
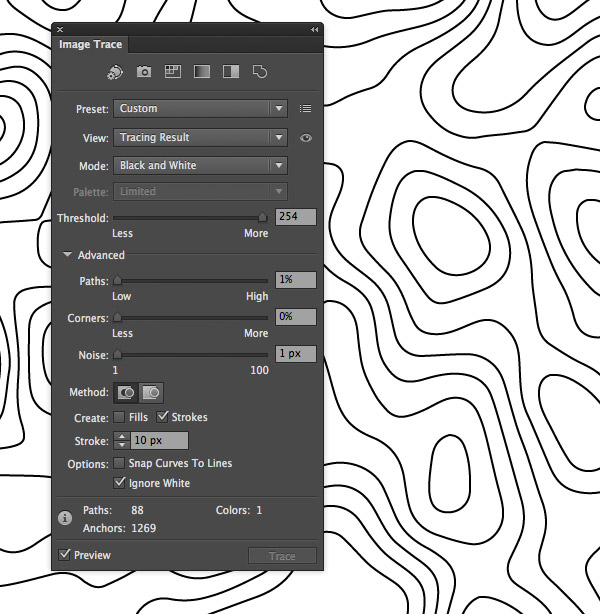
Configure the Image Trace options to generate an accurate vector conversion. The important options are the Strokes checkbox, Ignore White and a high enough Threshold to capture all the lines.
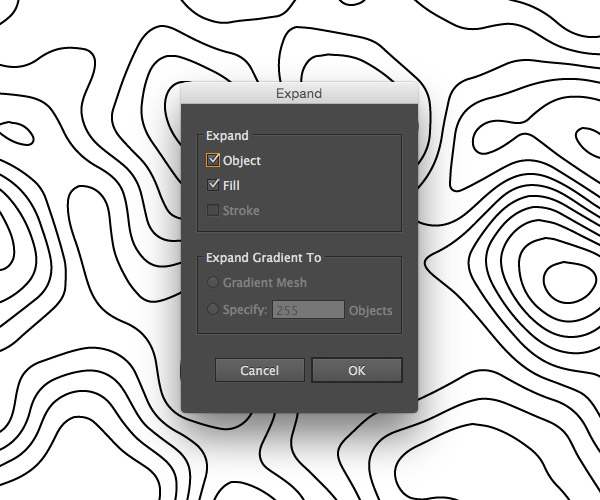
Apply the Image Tracing by going to Object > Expand. This will convert the lines into editable paths.
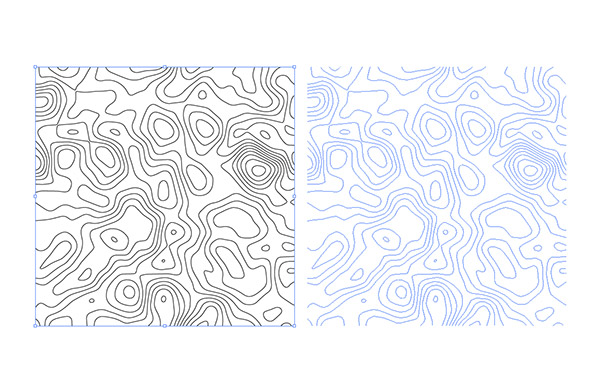
Hold the Alt and Shift keys then drag a duplicate of the whole map pattern to one side, leaving a small gap between them.

Repeatedly right click and select Ungroup for each of the two maps to break apart the strokes into individually selectable pieces.
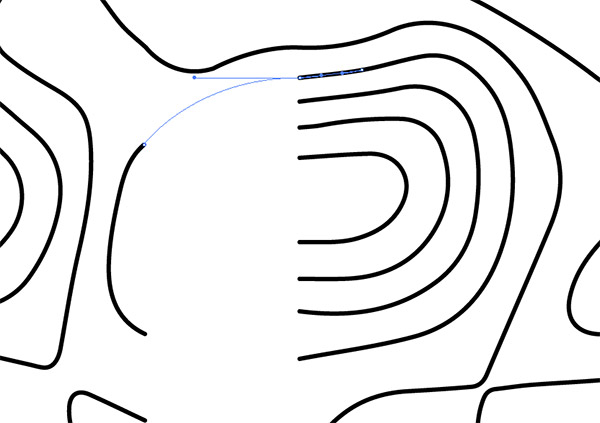
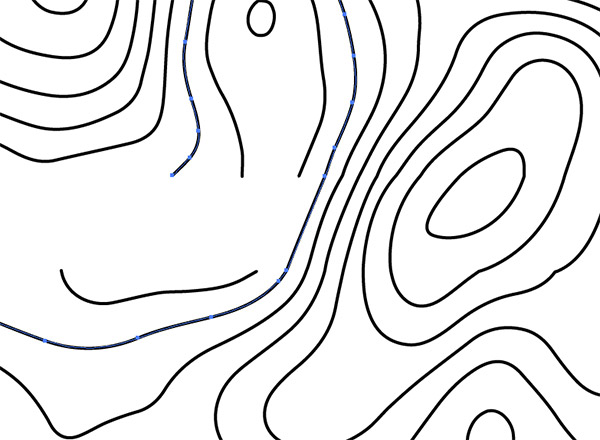
Use the Pen tool to join the open ends of each map line to the nearest stroke on the opposite map. Hovering the Pen tool over an open end will indicate the path will be joined with a little icon.
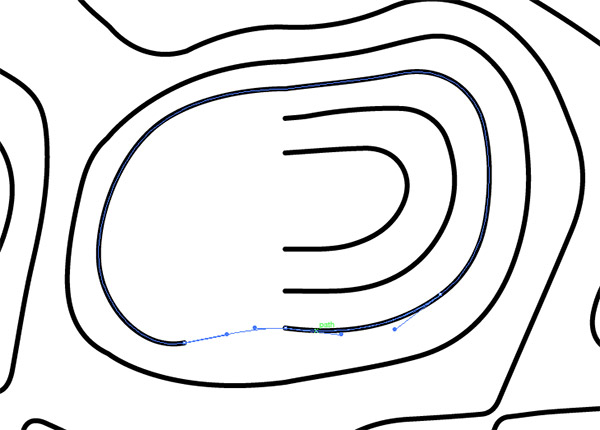
The number of open end points is unlikely the match up, so you might have to join two ends from the same map together to form new loops within the gap.
Use the Pencil tool to re-draw any wobbly lines or to iron out any kinks in the path. Make sure the Edit Select Paths option is enabled by double-clicking the Pencil icon in the toolbar.
You might need to get creative when the number of end points is particularly unbalanced, but avoid leaving any stray lines.
Once the two maps have been joined vertically, drag another duplicate below the originals, leaving a similar gap between them.
Continue the process of joining together the open end points to merge the two maps. Smooth out the lines as you go with the Pencil tool’s Edit Select Paths ability.
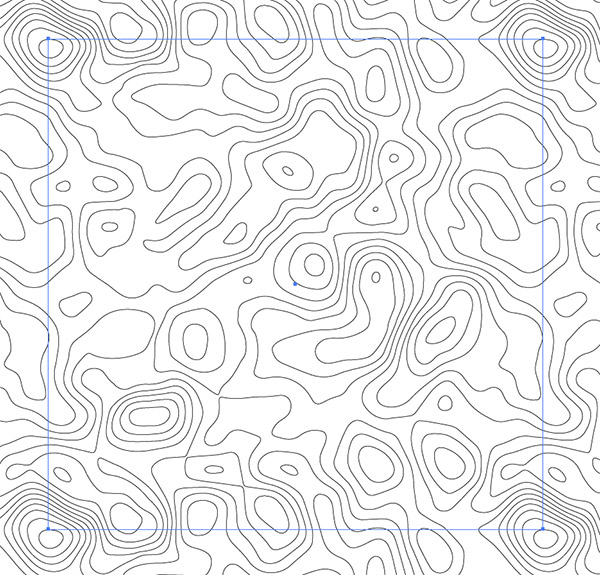
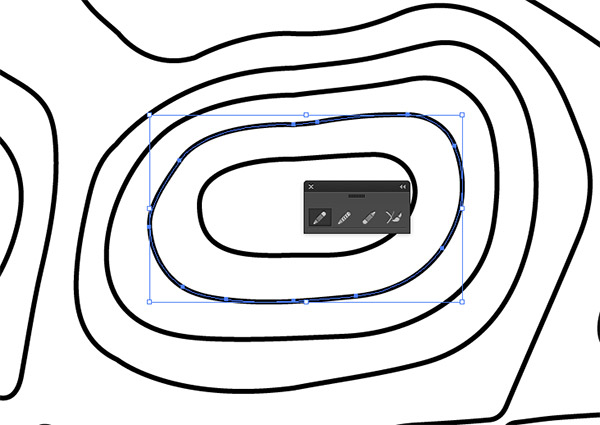
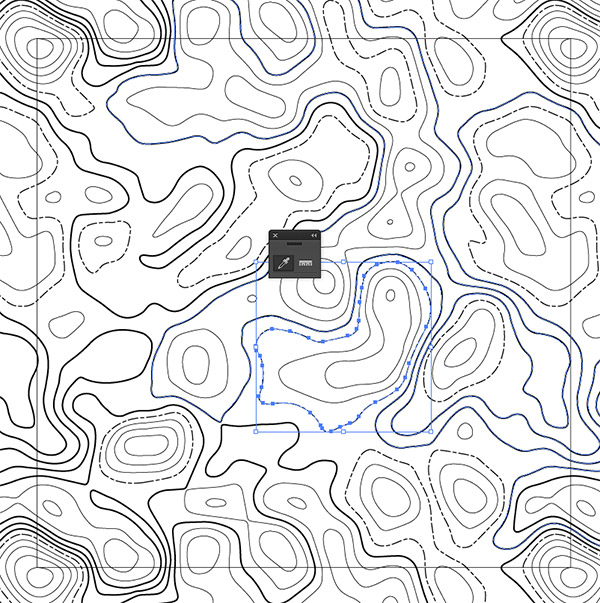
Once the maps are completely joined, pick out an identifiable point in the pattern and draw a rectangle between them. Turn on Smart Guides (CMD+U) to make it easy to snap to a specific anchor point in the design.
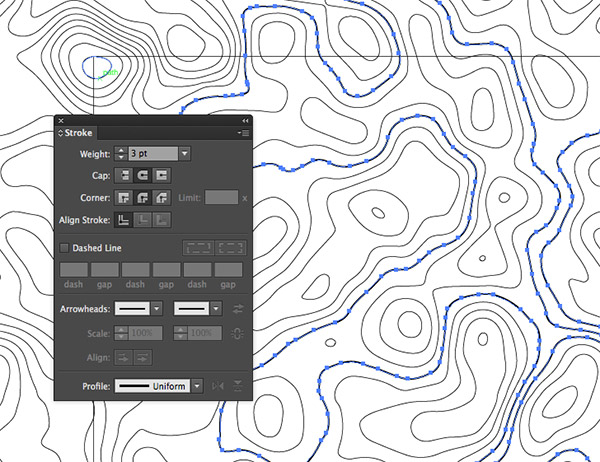
Additional details can be added to the contour map pattern by increasing the weight of some lines. Increase the stroke weight of certain paths to 3pt.

Wherever a line extends beyond the square outline, the same stroke must be applied to all other instances of the same path elsewhere in the pattern.
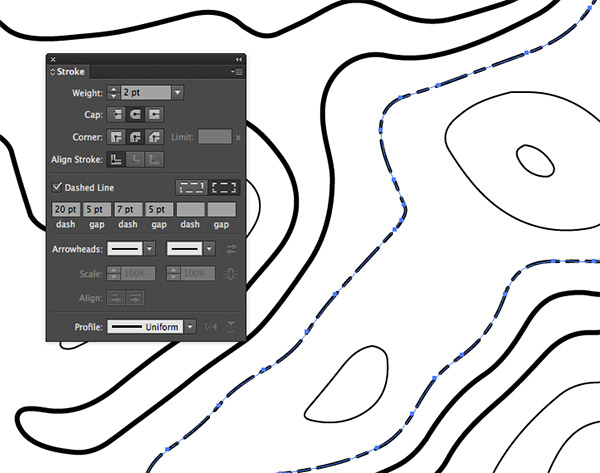
Another interesting effect is to use the Dashed Line feature in the Stroke options. Set up a 2pt stroke with alternating dash and gap figures.
Use the Eyedropper tool to quickly and easily apply this stroke effect to other paths to avoid having to enter the same figures every time. Remember to ensure the same stroke effect is applied to all paths that cross the square pattern outline.
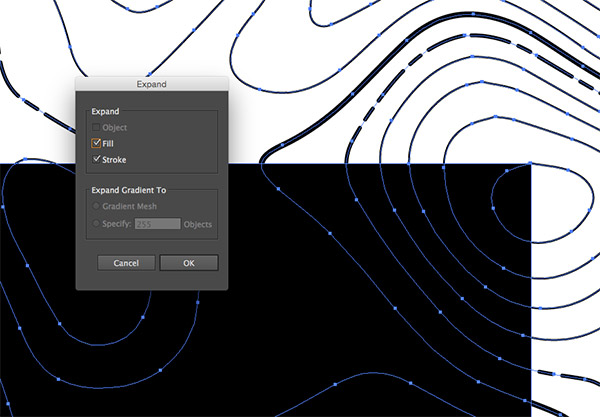
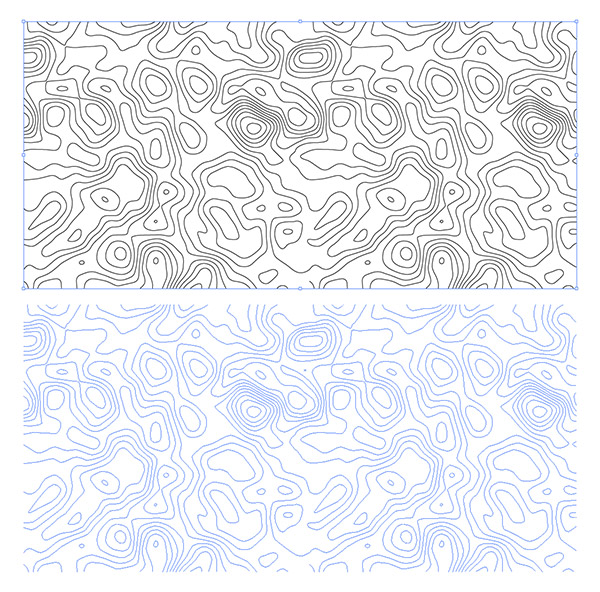
Give the pattern outline square a black fill with no stroke, then select all and go to Object > Expand.
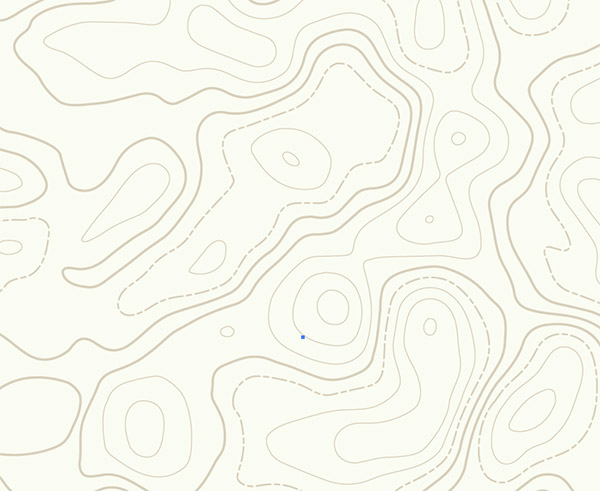
If you want to give your topographic map pattern a specific colour scheme, now is the time to select the appropriate fill colours for the elements. Use the shortcut CMD+Shift+[ to send the background square to the bottom of the stack.
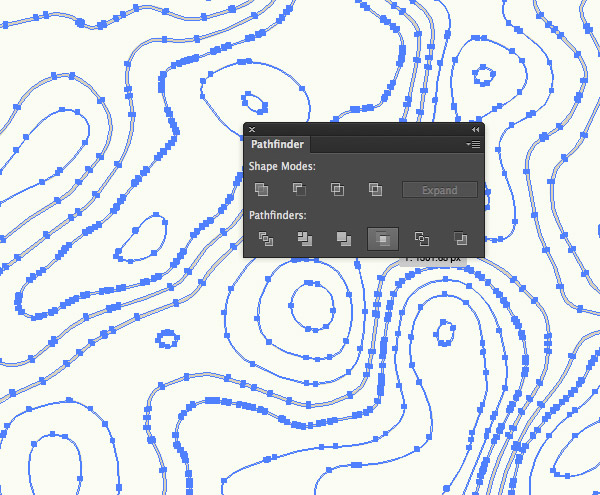
Copy (CMD+C) and Paste in Front (CMD+F) a duplicate of the background square, then with all elements selected, hit the Crop button from the Pathfinder window to trim the pattern to size.
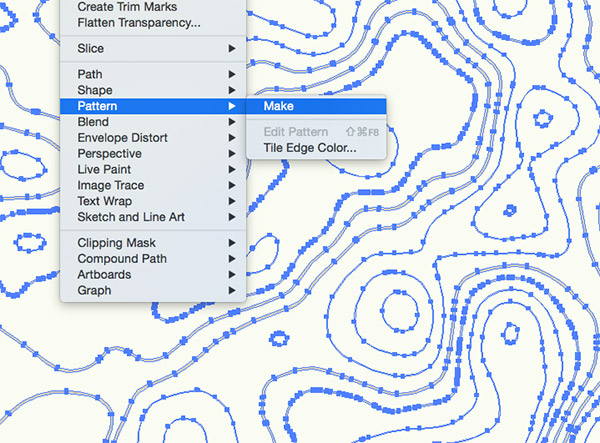
Add this pattern to the swatches palette by dragging it in directly, or test it out first using the Object > Pattern > Make feature.
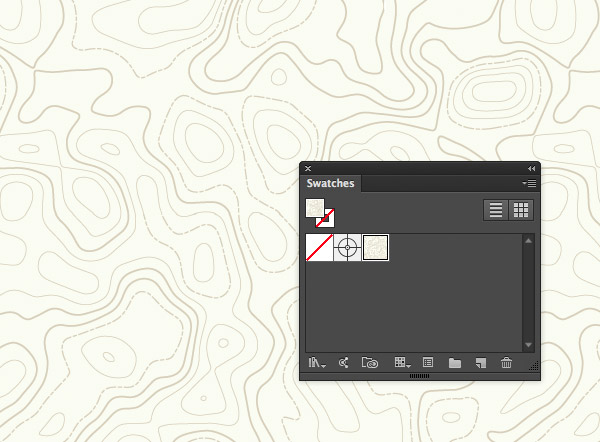
This new swatch can now be applied as a fill to any element in Illustrator and it will repeat seamlessly to cover the entire space. Alternatively, copy the cropped artwork over to Photoshop and define a pattern to use the contour map pattern directly in your Photoshop projects.
The final topographic map pattern is perfect for all your outdoors and adventure themed designs. The great thing about this seamlessly repeating pattern is it will fill areas of any size, so large format posters and website backgrounds are no problem. Play around with those blur and posterize settings in Photoshop to produce different map effects, then experiment with different strokes to add interesting details.

Man so sick as ever thank you so much for sharing this !!!
Thank you Marcos!
Great Tut! Thanks for this!
I’m glad you like it Steve, thank you.
SICK!!!!!
Cheers Joe.
This is still the best blog for walking a person through each step. Thank you for this!
Cool done! Thank for sharing man.
Really nice! as usual every post is golden one from chris! :)
Amazing tutorial – you always take the techniques one step beyond and then another step beyond. Thanks!
Love this :)
Great tutorial. I’ll try to design a similar map
I had two problems.
1. When pasting into Illustrator and tracing as per your screenshot, no paths were made. Solution was to use Grayscale and reduce the threshhold bar to halfway.
2. Also, “hit the Crop button from the Pathfinder window to trim the pattern to size” did not work. Solution was to make a clipping mask of the pattern with the square.
Love the guide though, as usual :)
Thanks
I found that selecting my pattern completely and expanding it, using the marquee with just a stroke and 0 fill, Ctrl + A, Pathfinder -> Crop. Worked like a charm
Its really nice.
Yeah this is quite cool
Thank you so much for sharing your skills.. These kind of tutorials makes beginners to professionals..