
This post was originally published in 2016
The tips and techniques explained may be outdated.
One of the classic Photoshop tutorial topics is the creation of a pencil drawing effect from a photograph. It’s one of those quick and simple techniques that produces a satisfying result, which makes the tutorial great for beginners. Throughout its history, Photoshop has featured lots of built-in filters that produce various sketch and artistic effects, but they don’t exactly produce a realistic outcome. In this tutorial I’ll show some clever steps that will transform a photograph into a hand drawn pencil sketch, which can even be fine tuned to find the most authentic look.
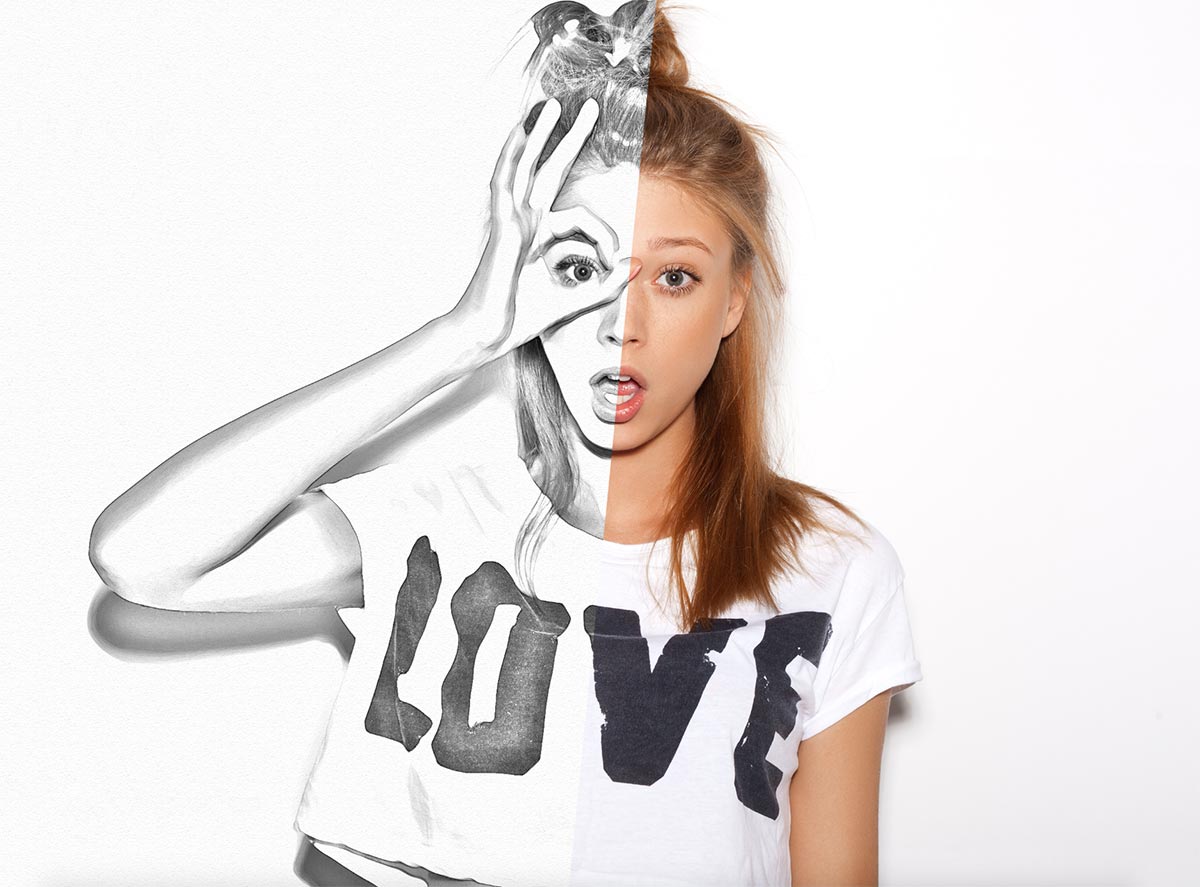
The effect we’ll be creating in this tutorial mimics the lines and shading of a pencil drawing. Producing this style of artwork for real would take hours of work for even the most talented artist, but the power of Photoshop gives us the ability to replicate it pretty well in just minutes. This makes it much more feasible to use the sketched look within your designs that might require an ‘artsy’ theme. If you don’t fancy creating this effect manually, you might be interested in my Artistic Paint, Sketch & Ink Photo Effect Actions.

Begin by opening up your chosen source photograph in Adobe Photoshop. The effect works best with images that have a clean background in good lighting and focus, so working with a professional studio shot like this stock image from Shutterstock provides the best results.
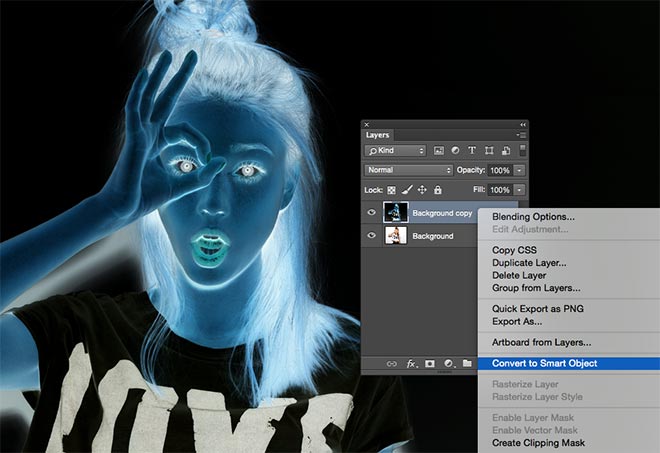
Drag the Background layer over the New Layer icon in the Layers panel, or use the shortcut CMD+J to create a duplicate of the layer. Go to Image > Adjustments > Invert (or hit CMD+I) then right click and select Convert to Smart Object.
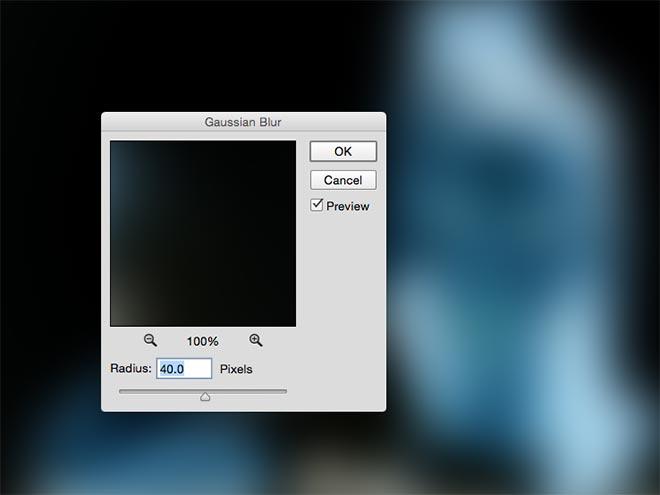
Under the Filter menu, select Gaussian Blur and alter the radius to around 40 pixels. The use of the Smart Object will apply this filter as a Smart Filter so we can fine tune the settings if necessary, rather than permanently apply the effect.
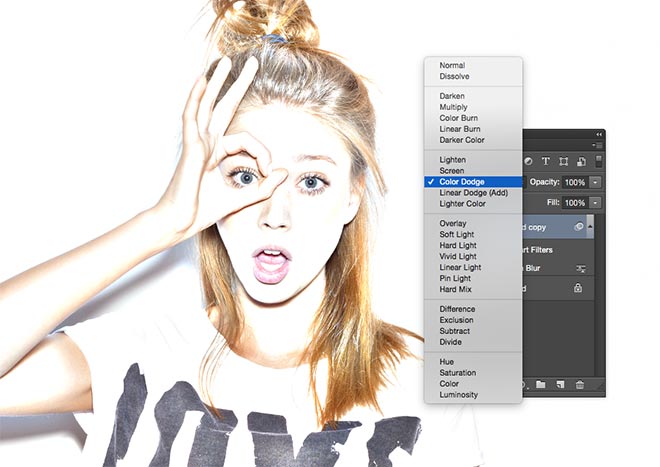
Change the blending mode of the duplicate background layer to Color Dodge, which dramatically boosts the contrast and brings out the grainy details of the image.
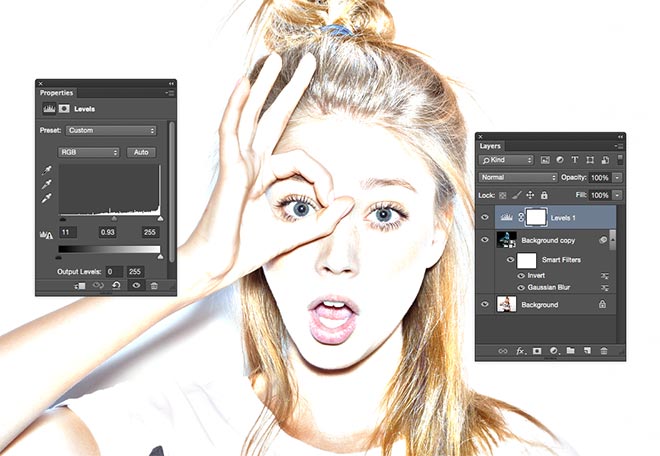
Click the Adjustment Layer icon at the bottom of the Layers panel and choose Levels. Move the shadows and midtones sliders slightly to the right to darken the image a little.
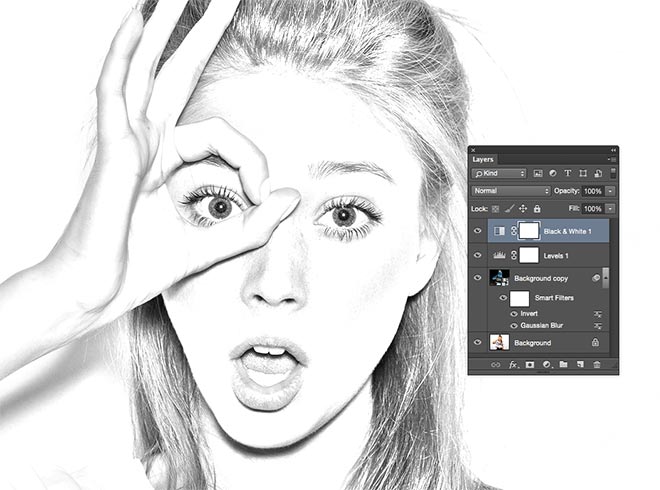
Add another Adjustment Layer, this time select the Black and White option. The default settings will suffice to remove the colour and generate more of a standard pencil appearance.
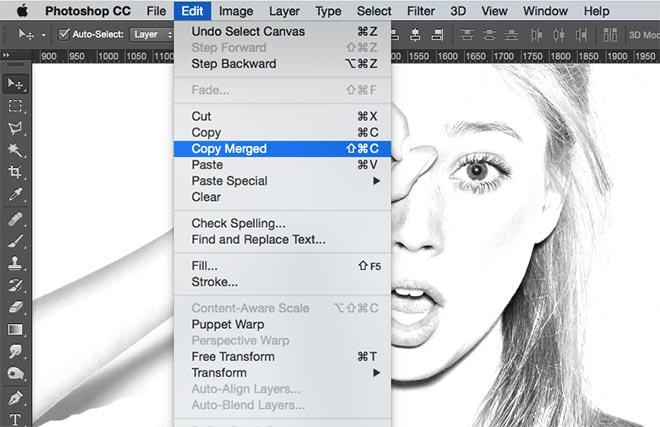
Use the shortcut CMD+A to Select All, then go to Edit > Copy Merged (or CMD+Shift+C). This will make a clipping of all the visible layers. Press CMD+V to paste this copy at the top of the layer stack.
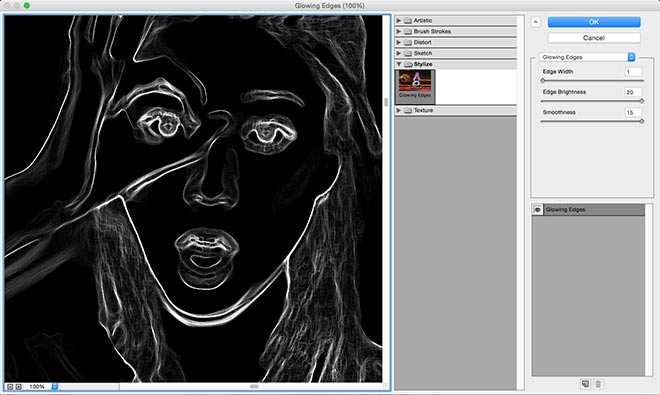
Go to Filter > Filter Gallery, then navigate to Glowing Edges from under the Stylize menu. Change the settings to 1 Edge Width, and maximum Edge Brightness and Smoothness.
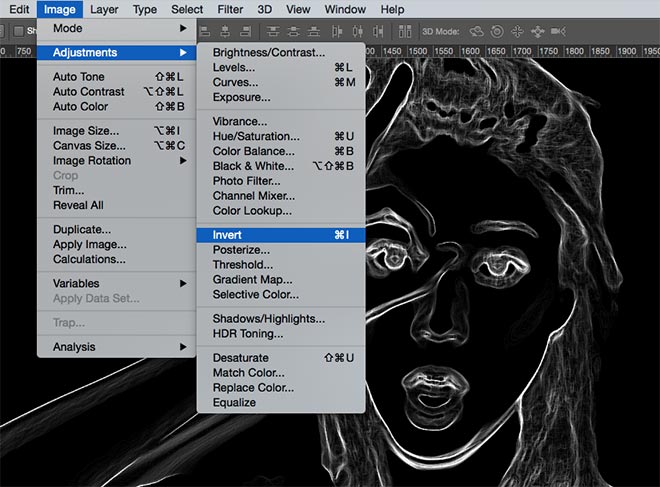
Invert the layer by heading to Image > Adjustments > Invert (or the CMD+I shortcut) to switch the colouring from white on black to black on white.
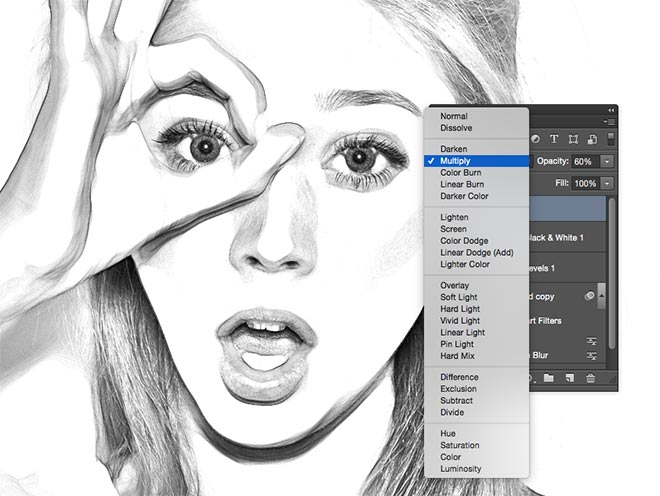
Change this glowing edges layer’s blending mode to Multiply to render the white background transparent, then reduce the opacity of the layer to around 50-60% to reduce the impact of these additional outlining sketch lines.
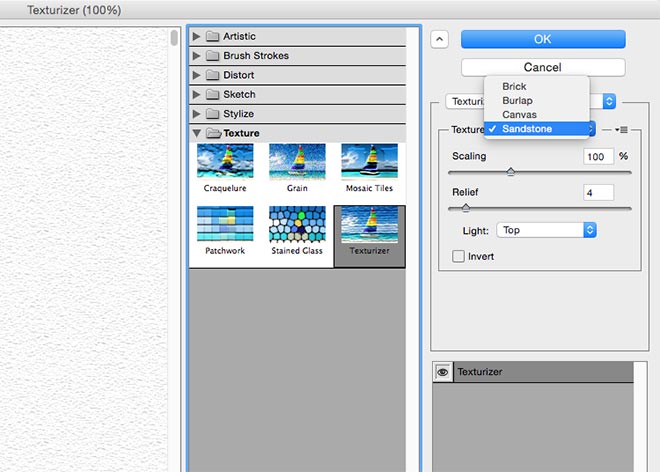
Click the New Layer icon at the bottom of the Layers panel, then press CMD+Backspace to fill the layer with white (the default background colour). Head back to the Filter Gallery but this time choose Texturizer. Change the setting to Sandstone.
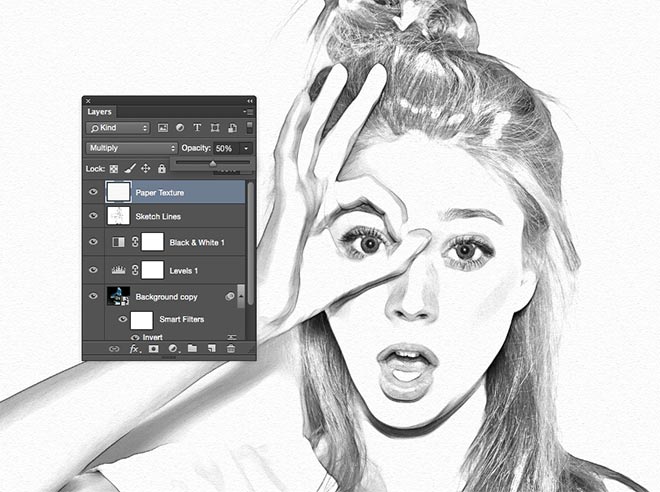
Change this layer’s blending mode to Multiply so the underlying artwork can be seen, then reduce the opacity of the layer to around 50% to produce a much more subtle paper texture effect.
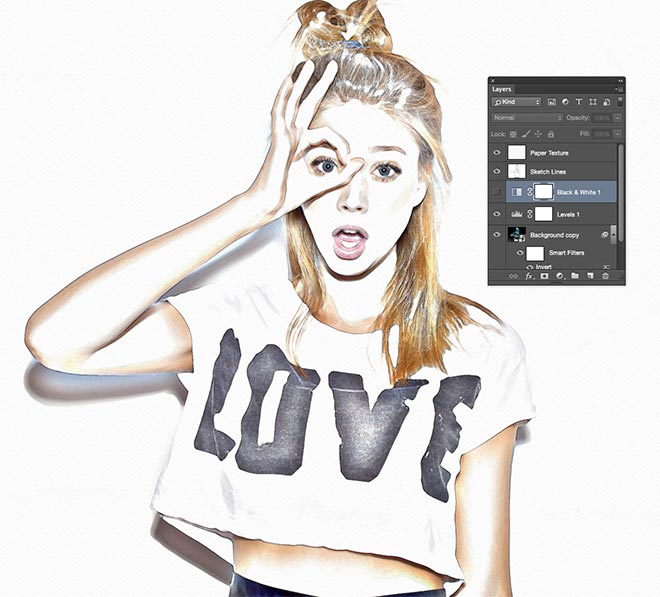
To achieve more of a coloured pencil drawing, the Black and White adjustment layer can be turned off to remove the desaturation effect.
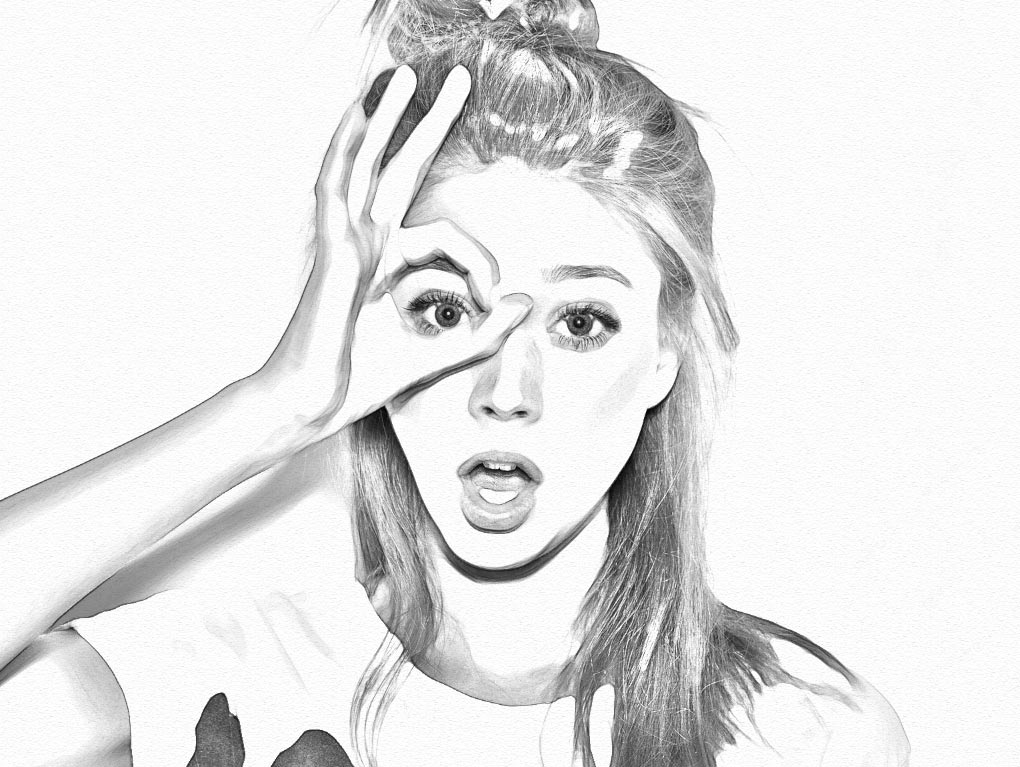
The final result is a realistic pencil sketch effect with authentic line work and shading. The blurred and inverted color dodge layer does the base work by boosting the contrast, but the additional effects like the glowing edges outline marks and the paper texture make the artwork much more believable. The use of the Smart Object also means you can adjust the amount of Gaussian Blur to fine tune the result.

Thank you Chris. It works wonderful on all sorts of images. I’ll bookmark this and use it when I need it. I love how just with a few simple steps, these effects can be achived. Thanks.
My pleasure Naomi! I love writing tutorials because it also documents the techniques for me to refer back to. There’s been many times where I’ve Googled something and ended up reading my own guide!
thank you so much, i never have the chance to go to college and i have learned so much with your blog! <3
you are awesome!
Great tut, will use it for sure. Thanks!
I have tried several techniques to turn a photo into a sketch. Some have been pretty good. This makes only the second one I have seen that uses ‘Glowing Edges’ filter. The other one made a difference. But, I wasn’t that satisfied, overall, with the results. I think maybe this may work. I’m going to give it a good go!
Thank you very much!
Su
Thanks Su! The Glowing Edges step is my favourite part of this process, it’s a simple touch that really improves the realism
love the effect, i saved my file as a psd, but when i try to create a jpeg the result is slightly different.
The usual ‘brilliant simplicity — brilliant results’ by Spoon Graphics.
Superb!! Thanks so much.
Thank you. It is realy a good trick of creativity.
Awesome tut ! Thanks for sharing it with us Chris!!
Thought that I saw a lot of “Find edges” and “High pass”, “Low pass” filters going on there. Maybe I should finally upgrade from CS4. But I’m also not a frequent PS user. Illustrator is my main tool of the trade.
Wow!!!! Thank you for sharing. It’s easy and wonderful
Being a veteran pencil and colored pencil illustrator of 30+ years, I was skeptical of how realistic the effect would appear. All I can say is hats off to you, sir. Excellent work and always fun to learn a new technique.
Great!! So easy and more than enough
Great tutorial Chris! The final product looks like a real pencil sketch.
Thank you for the tutorial it helped me a lot in my photography class. By the way, you look like one of my teachers and he agrees. I think you guys would get along.
just getting started on PS, gonna save this for the future. thanks!
Thanks for this Article, I m just Learning photoshop 7, but how to make this on it.. kindly update me !!
Cool!
Thank you for sharing!
Thanks for this article!! It really helps a lot!! Thanks for sharing this!! You’re amazing!!!
Thank you. it helped me a lot.
Thanks for the awesome tutorial!!
Meh.
I’ve been wondering how to do this! Now i know =)
Hi Chris!! you did a creative sketch effect in photoshop, also your tutorial help to improve my skill. thank you so much for your tutorial.
This is so cool! I’m a newbie in graphic design and I’m really impressed with what photoshop can do.
Can’t wait to try it. Just what I have needed.
Pretty impressive technique!
This was a useful tutorial. But what if we use plugins for Photoshop that can do the same job but with a single click. What are the drawbacks of that?
wow what a great software i really love it.
Hi Chris!! you did a creative sketch effect in photoshop, also your tutorial help to improve my skill. thank you so much for your tutorial.