This post was originally published in 2013
The tips and techniques explained may be outdated.
Lomography and the lomo effect is massively popular in Photography circles. The origins of the lomo effect come from a budget Russian camera called the Lomo LC-A, but we can recreate the imagery produced by this little cheap camera on our own digital photos with the help of Photoshop. Follow this step by step Photoshop tutorial to easily give your photos the vibrant characteristics of lomography.
The Lomo photo effect
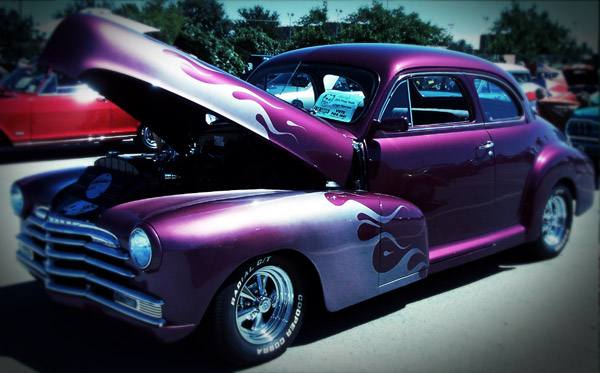
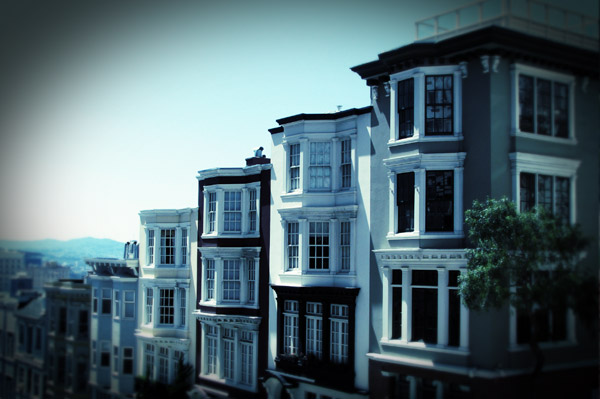
The poor construction of the Lomo LC-A and similar budget cameras meant that photos would often feature unusually high contrast, obscure colour reproduction, intense saturation and would sometimes be extremely blurry. Usually this would be classed as an absolute failure in terms of typical analogue photography, but with the Lomo it all added to the charm and character of the camera and the unusual images it produced.
Lomography effect in Photoshop
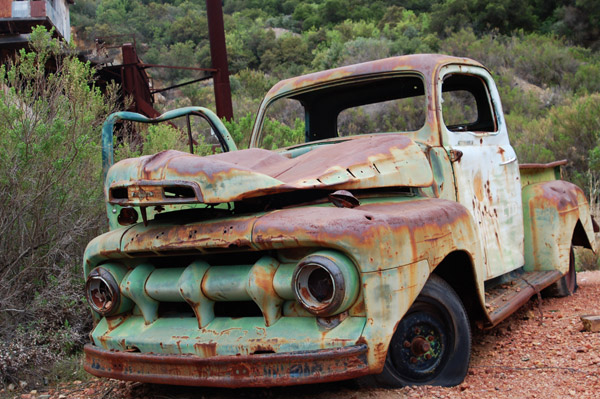
Open up an image of your choice to apply your Lomography photo effect in Photoshop. I’ve picked out an image of a rusty old truck from ThinkStock.
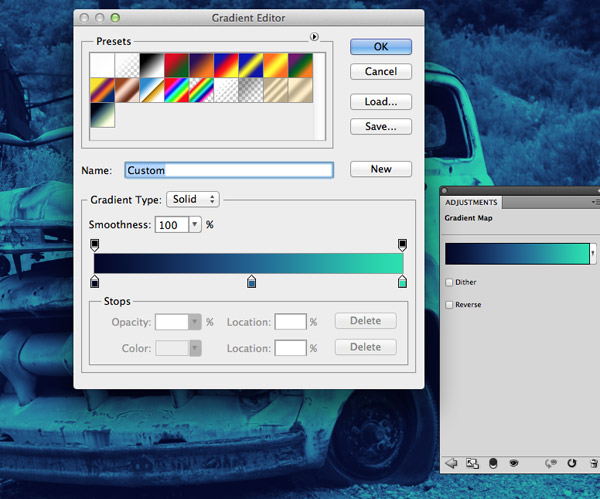
Lomo images often have unusual blue, green and yellow tints, so we can replicate this in Photoshop by applying a Gradient Map to replace all the photo’s original colours. Select the Gradient Map option from the Adjustment Layer menu then alter the gradient to flow from a dark blue (#030629) to a mid blue (#1f6393) to a vibrant green (#14e2af). These colours will be applied to the shadows, midtones and highlights of the image.
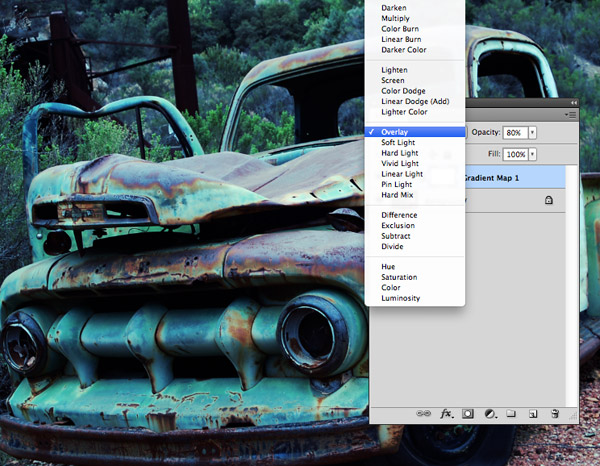
Change the blending mode of the Gradient Map to Overlay. This will allow the blues and greens to interact with the original colours of the image to preserve some of its natural appearance, but still give the photo the obscure colour reproduction of a Lomo photograph. Alter the opacity to adjust the amount of colour adjustment.
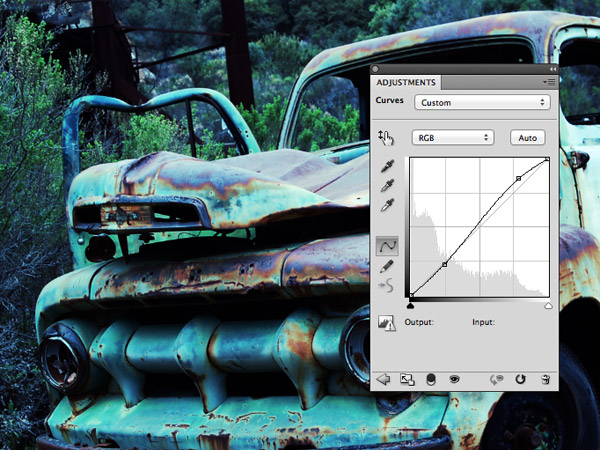
Lomo images also have excessively high contrast where shadows are really dark and highlights are blown out. Recreate this effect in Photoshop with a Curves adjustment layer. Move the curve to increase the highlights and shadows.
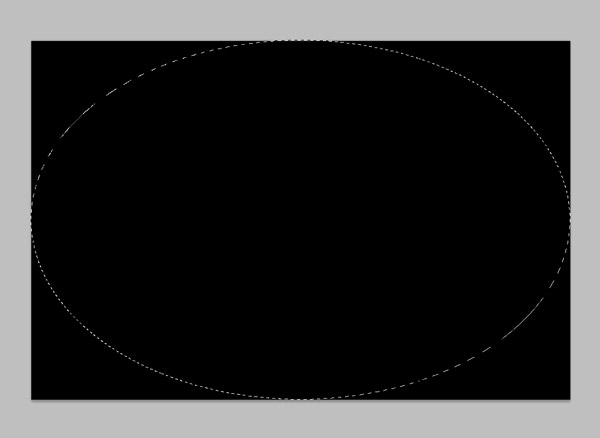
Create a new layer and fill it with black. Name this layer “Vignette” then use the Elliptical marquee tool to draw a selection from corner to corner.
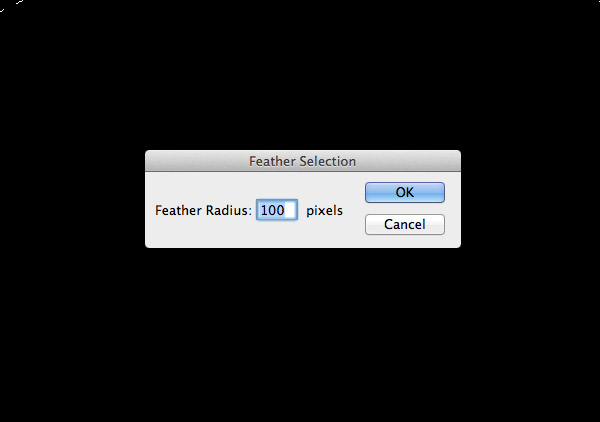
Go to Select > Modify > Feather and enter 100 pixels in the radius option. This will fade the selection out as opposed to creating a hard edge.
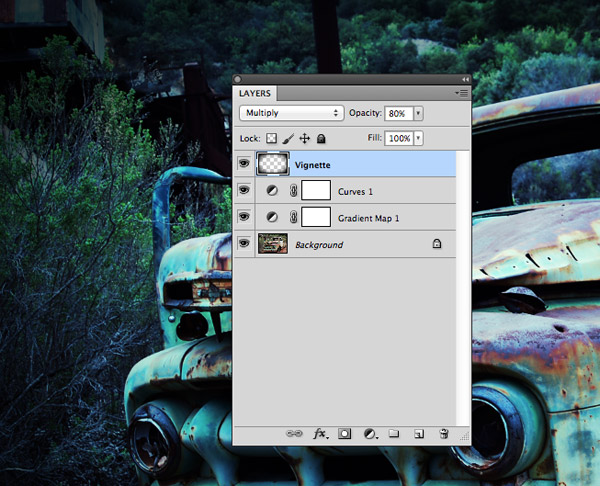
Hit the delete or backspace key to erase the centre area from the selection to form a vignette effect creeping in from the edges of the image. Alter the blending mode to Multiply and adjust the opacity to around 80%.
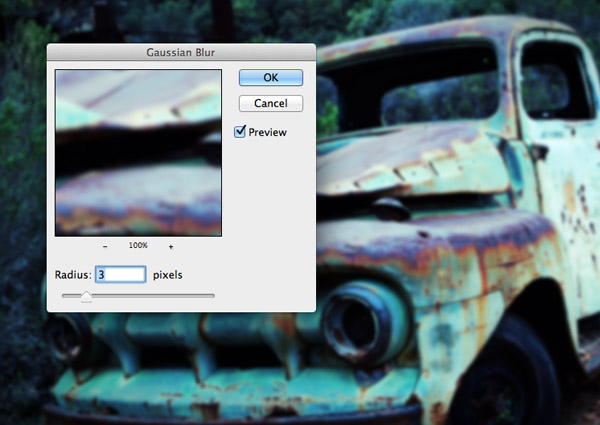
The final characteristic to recreate from original lomo photographs is the unusual blurriness. Press CMD+A to Select All, then hit CMD+Shift+C to Copy Merged. Paste this selection on a new layer at the top of the layer stack then add a 3px Gaussian Blur.
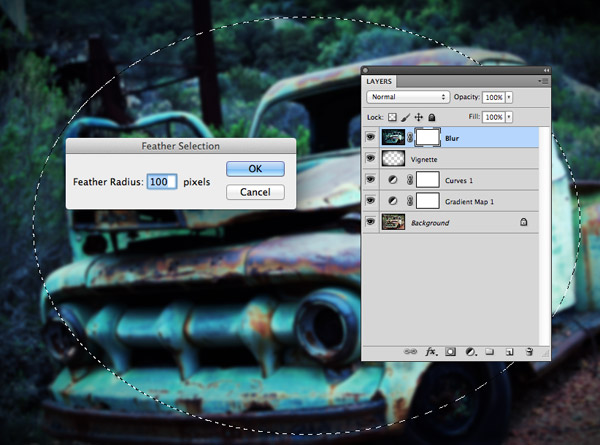
We don’t really want our whole image to be blurry, so add a Layer Mask to the Blur layer and draw an elliptical selection around the centre. Feather the selection then fill the area with black to render that portion of the layer mask transparent.

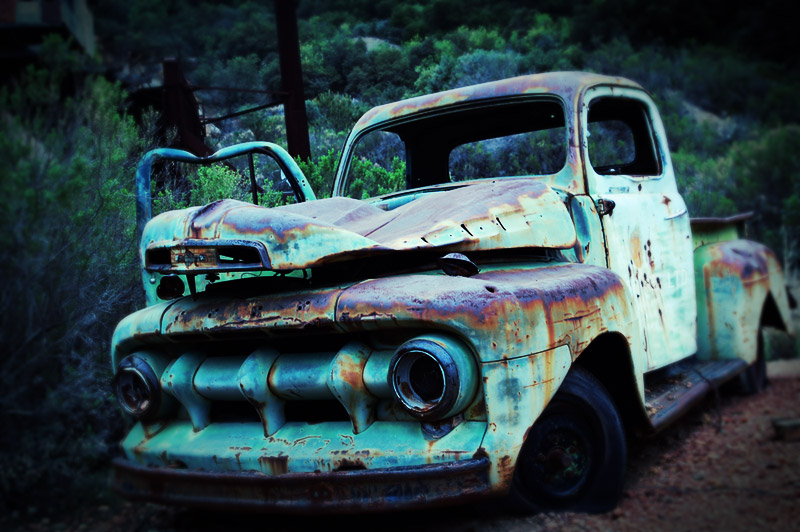
The blue/green tints, high contrast and blurry vignette all combine to mimic the characteristics of those old Lomo cameras. With the original analogue cameras it would be pot luck as to whether the image would turn out as expected, but with this Photoshop effect we can apply the tweaks to any image we wish and tweak every aspect to create the perfect lomography effect.


Nice one Chris!
This creates a brilliant retro effect.
Chris,
Even though I know there are plenty of variations of the Lomo effect and I do like TomAnder’s Lomo Photoshop action, I really like your take on Lomo. Also, your play-by-play are spot on for novices to follow along.
Justin
Hi Chris,
Brilliant !
Have learnt something from this Lomo Effect. It may be used creating any retro design.
Thanks a lot.
simple but beautiful.
Really nice effect. Thank you for the tutorial.
Really cool. Thanks for the help!
Thanks for this simple tutorial, Chris. I love all the ‘How-to’ posts on this blog! I frequently get clients who want the Lomo effect or something similar to it somewhere on their website! It is a bit popular!
Lovely tutorial !!! i have recently discovered lomo and fell in love with the crazy colours and feel. I do a lot of point and shooting type photography with with my digital camera while riding and this really add a lot to the look and to the end designs and photos that I use.
Amazing tutorial. Will definitely have to try this out. C:
I wanted to see how the “Lomo” technique, as presented by Chris, would look on a digital/photorealistic-like painting. The results are posted on my Behance profile (http://bit.ly/15yBIi4) in case you’re interested.
This is exactly what I’ve been doing the last couple of days. Funny that it shows up right when I’m in need of it. Your lomo effect is a lot easier than what I did, yet looks just as good. At least now I know a faster, simpler way. Keep up the great work, Chris.
A great tutorial, I find it so long time ago, Thank a lot
Great Chris,
Very Nicely you explain the whole process, All steps are clear without any confusion and this snapshot explanation is really understandable.
Thanks for this tutorial.. :)
very nice tutorial, thanks for sharing..
Neat effect. Thanks Chris.