This post was originally published in 2008
The tips and techniques explained may be outdated.
Last year I wrote about a nifty little feature in Photoshop called Automate Batch, which can dramatically reduce your working times when adjusting large numbers of images or photos.
Another of those useful options built right into Photoshop is the Contact Sheet generator. As with the Automate Batch, this is old news for those who already know about the feature but could make your day as a Photographer if you don’t!

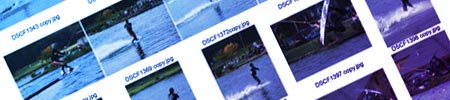
A common scenario for any Photographer or designer is presenting a batch of images from a photoshoot to a client to pick out the best shots to be used in the design material. This is fine when you are sat at a computer screen with Adobe Bridge sorting through the pictures, but often the photos need printing out onto paper to display at meetings etc. You would imagine this to be a labourous task; opening up each photograph, resizing it onto a new document, typing out the filename… but not with Photoshop's built in Contact Sheet generator…
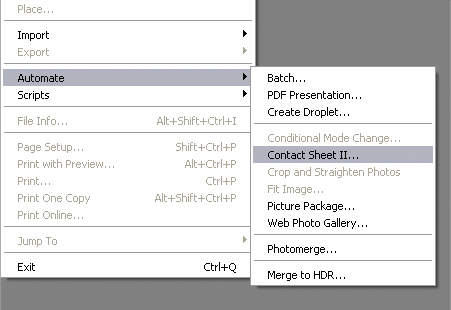
You can quickly and easily generate a single or multi-page preview of a large batch of images in a grid style layout; Open up Photoshop and go to File > Automate > Contact Sheet II
(I'm still a CS2 user so maybe there is an updated version in there for CS3 users?)

This opens up the options panel where you can specify the dimensions and layout of the images.
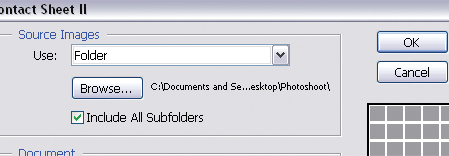
At the very top is the Source Images option box, select either your opened files or images from a directory on your computer, including sub-folders enables the processing of a large number of images.
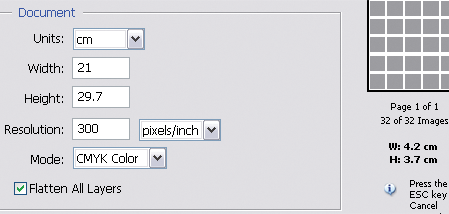
Next up is the Document Setup, enter the size of document you wish to print onto. Here I've set the size to A4 at 300dpi.
Selecting the option to Flatten All Layers will help keep your RAM usage down, deselecting this will keep each thumbnail and title on a separate layer for additional editing.
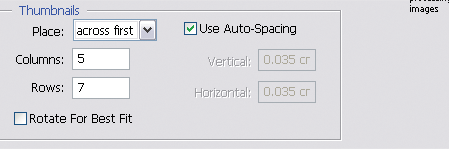
Adjust the options for the Thumbnails, use your Maths head to calculate how many rows and columns you will need to fit the bunch of images into your document. If you keep an eye on the preview on the right hand side of the panel it displays an overview of the layout and number of pages as well as the size of each thumbnail allowing you to estimate the optimal sizes.
Rotating for best fit will keep all your images in the same orientation making for a neater layout, but any portrait shots will be the wrong way up.

Finally set the option of adding the document filename as a caption for easy image recognition, choose from a set of basic fonts and set an appropriate size.
Click Ok and watch Photoshop do it's magic, after a short while all your photographs will be compiled into one (or multiple) thumbnail sheets. Save the files and print them out to present the collection to your client.

Just a note to say that the Contact Sheets thing appears to be just the same in CS3 (or at least the dialog box for it is!)
Another great tutorial – I’m beginning to really miss the sidebar now I have it turned off, I was relying on it to inform me when more of your fab tutorials were online!
Isaac
I clicked on this link simply by curiosity because I thought the title was stupid ( i thought you were talking about making pictures prettier with photoshop).
however this tutorial was really nice. I used the batch/action tool for the first time yesterday to resize thumbnails for my blog ( i knew it existed but I never wanted to take the time to learn it.. im stubborn i guess) I didnt know about the contact sheet though! it looks really helpful…if you have good naming conventions. consider your self bookmarked!
Oh no! How can this be?! No post for a week :'(.
Glad you found the post useful, it can cetainly help reduce workloads!
Isaac, you’re right, no post over the last week as I’ve been away skiiing. But don’t worry, as soon as the aches wear off I’ll be back on the computer thinking of another tutorial :-)
Chris
Hi friend, your blog’s very nice. Do you want to exchange Friends link with: http://smallgfx.blogspot.com/ ? Tell me what do you thing? :)
wow, great post, i definitely learnt something new!
Great job. Very helpful.
That was something I really need to know about Photoshop!!! Thx!