
This post was originally published in 2014
The tips and techniques explained may be outdated.
Today’s Illustrator and Photoshop design tutorial is based on a suggestion from one of my readers. Ella got in touch with some examples of cool geometric gradient designs that she had seen a lot lately and wondered how they were made. I always love receiving tutorial suggestions, so I’ve been busy playing around to figure out how to replicate this cool effect. Follow this step by step guide to create your own abstract gradient pattern art using a mix of Photoshop and Illustrator techniques.

I managed to track down a sample of the artwork Ella sent over back to the ISO50 blog, where Seth Hardie shows off some amazing designs that he created using nothing but a couple of iPhone apps! The designs are essentially a geometric gradient pattern placed over a vibrant blurry background, which results in a cool piece of abstract art that’s perfect for a print, or as a background to present your other design work. Rather than experiment with this unique form of iPhone art, I’ll show you how to create a similar effect with Photoshop and Illustrator.
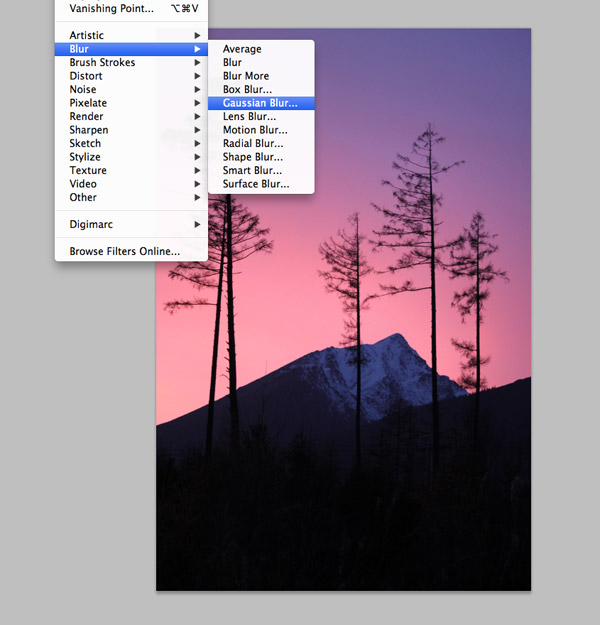
Open up a random image as the base for the blurry background. The more vibrant and colourful the image the better, so I’ve picked out a sunset image with lovely pinky purple hues. Open the image in Photoshop then add a Gaussian blur with the max settings. Repeat the blur to totally disguise the original subject of the image.
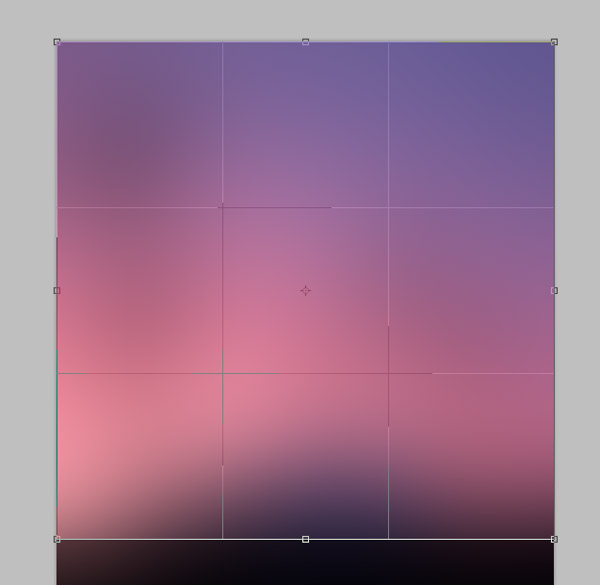
Hold Shift and drag the Crop tool across the document to trim the artwork into a square format and remove the completely black lower portion.
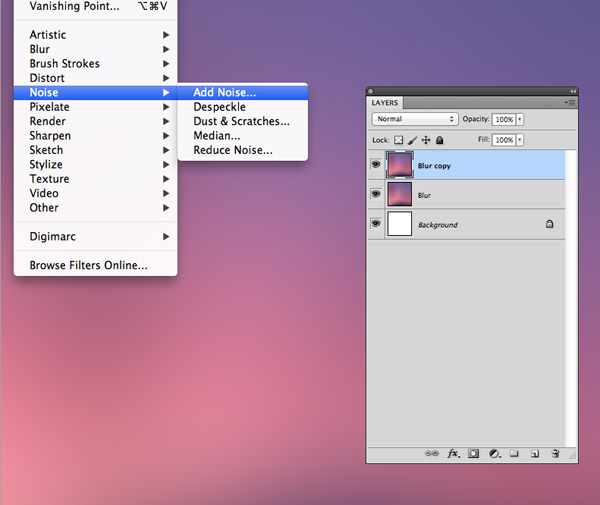
Press CMD+J to duplicate the current blur image layer, then go to Filter > Noise > Add Noise to add some subtle grain.
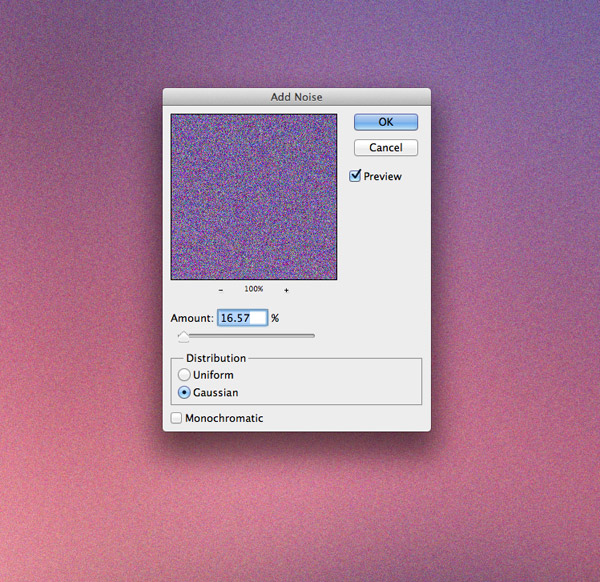
Select the Gaussian checkbox then crank up the noise amount to around 16% to add plenty of grainy speckles.
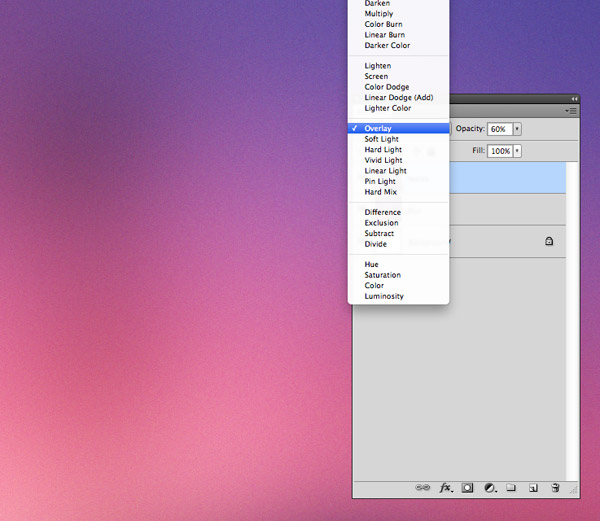
We can really intensify the colours by changing this noise layer to Overlay, then reduce the opacity to around 60% to balance the vibrancy of the colours.

I initially tried to keep this strictly a Photoshop tutorial, but there’s no denying that Illustrator is much more capable at creating cool patterns based on shapes. Switch over to Illustrator and draw a square on the artboard (hold shift to make it proportional). Rotate it by 45° to make a diamond.
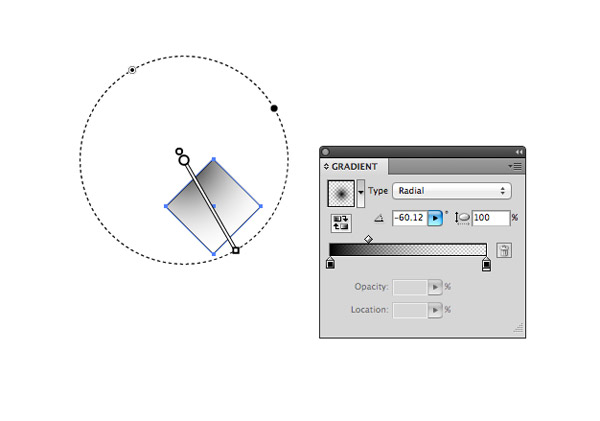
Add a black to transparent radial gradient fill, then adjust the flow using the Gradient tool by clicking and dragging across the shape.
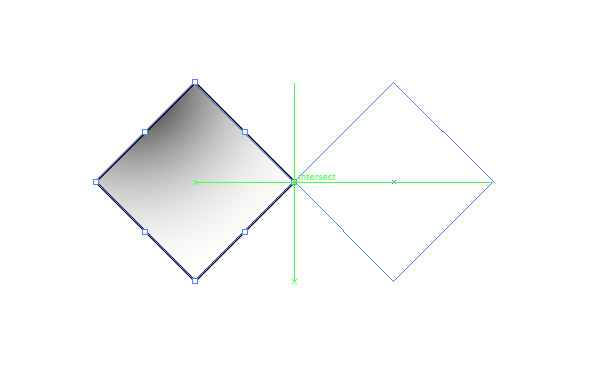
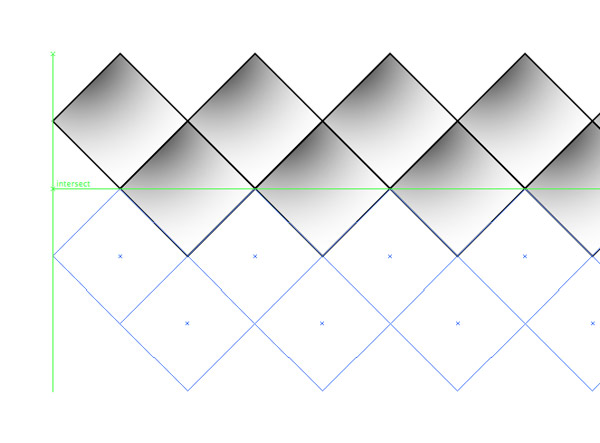
Turn on Smart Guides (CMD+U) to make the next few steps super easy. Hold the Alt and Shift keys then click and drag a duplicate of the original diamond. The green Smart Guides will snap perfectly to place the two elements side by side.
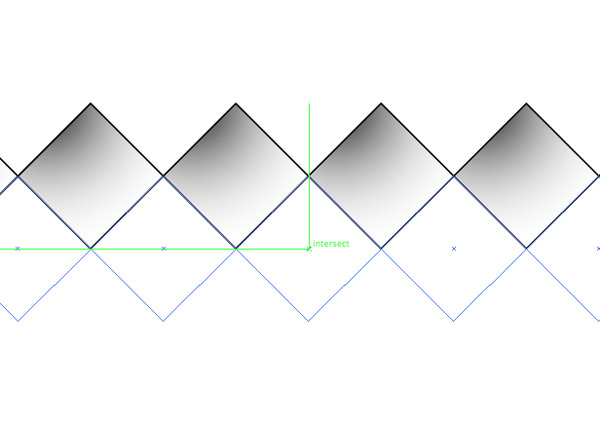
Repeatedly press the shortcut CMD+D to Transform Again to create a complete row of perfectly aligned diamond shapes. Select them all and drag out a duplicate row, this time offsetting them to fit underneath the original row.
Select all the shapes that make up the two rows and duplicate them again, aligning them to extend the pattern.
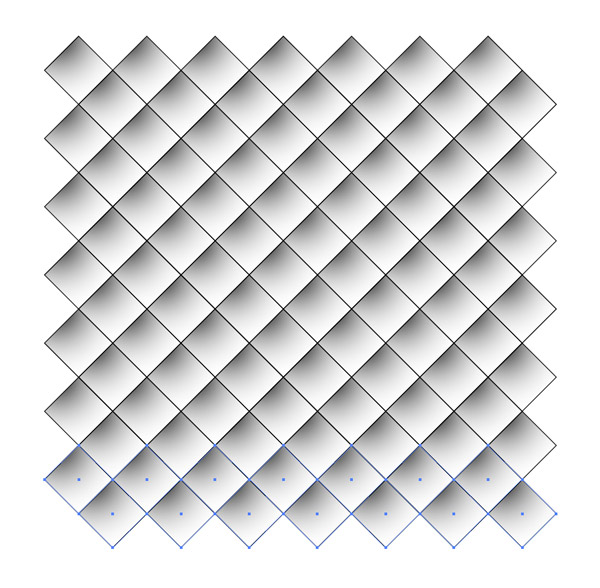
You can now hit the CMD+D shortcut to continue duplicating and aligning extra rows automatically until you have a nice series of vector gradient diamond shapes.
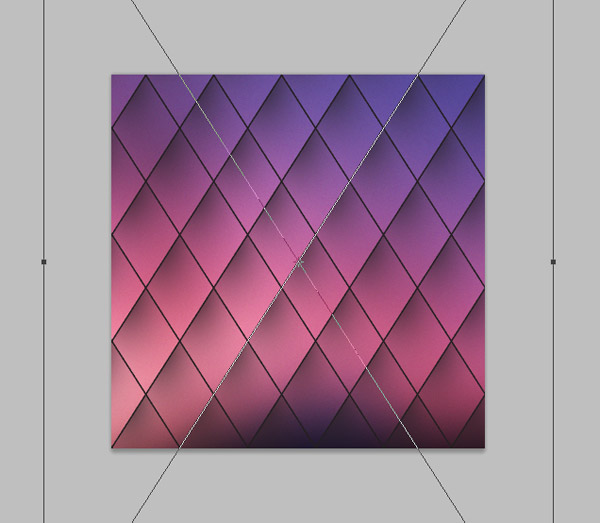
Draw a selection around all the shapes and press CMD+C to Copy, then switch over to Photoshop and press CMD+V to Paste. Select the Pixels option then scale the pattern to size over the blurry background. The elements will remain in vector format until you hit Enter, so don’t worry about scaling them up or squashing and stretching them to create a cool effect.
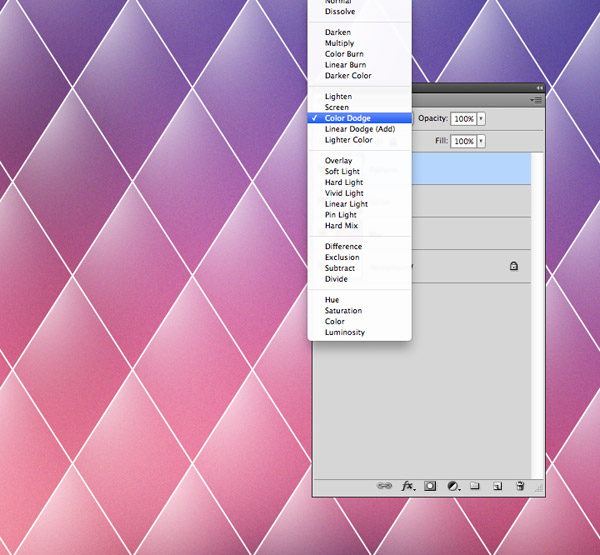
Press CMD+I to quickly Invert the pattern to turn the black artwork white, then change the blending mode to Color Dodge. This blending mode will allow the white pattern to interact with the vibrant colours of the background.
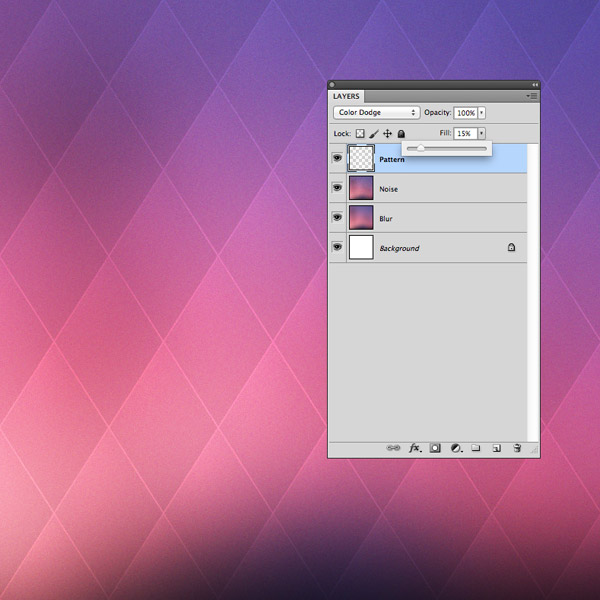
Reduce the Fill amount of the pattern layer to reduce the impact of the Color Dodge effect to create a subtle pattern overlay.
The combination of techniques in Photoshop and Illustrator makes this effect easy to produce. Creating the pattern overlay entirely in Photoshop would be much more time consuming and difficult to produce accurately, but thanks to Illustrator’s shape editing tools it’s easy to quickly create a repeating pattern to simply paste into our working document. Where Photoshop really shines is its ability to merge colours and create vibrant effects with blending modes, which is what gives this abstract artwork that cool intense appearance.

Beautiful. Thanks Chris.
Clean and great tutorial. Thanks!
Nice, easy to follow tutorial for an interesting effect. thanks!
Really easy and fun tutorial.
I should def combine the use of Illustrator and Photoshop more.
Thanks Chris!
Cool trick to get nice color palette!
It’s a beautiful tutorial. Not very complex, but still interesting. Good job! Ella should be eternally grateful :)
Thanks so much for the fantastic tutorial Chris! Really awesome work. @We TINK – Yes, I’m incredibly grateful! :D
Another new thing to learn. Amazing.
Thanks for this Chris another road of opportunities HNY..
Really it’s nice trick by you. I was looking for such a blur effect for some days and found easy and good trick. Thanks for sharing such useful post here.
Thanks, great tutorial! I’ll definitly try it.
Great tutorial, thanks for sharing! I love the effect you created.
Such a simple idea but so effective. Changing the image and pattern shape you can create a multitude of cool backgrounds! Nice one Chris.
Thanks for sharing! It is great idea of web design. I have to all point to abstraction of products. This is article all images very nice.
Awesome; really awesome :) Thanks for tutorial.
Great Tutorial Chris! So easy to do for such a beautiful result!
I loved this. Im always looking for ways to create unique backgrounds without purchasing or spending alot of time. Thanks!
I had some really good results following this tutorial so thought I would pop back to say THANKS! :)
Thank you for taking the time to share this tutorial, I am just about finished the step by step instructions are very clear and on point thank you.
Awesome! Thank you.
Nice tutorial… Since I do as a web designer more and more design with CSS, I completely neglect Photoshop and Illustrator tutorials like this. I should get back into that habit again, because it’s also fun.
Awesome technique. Thanks a lot for sharing :-)
nice and useful tutorial :) learned a lot from this :)
Awesome tutorial . I’ve learnt a lot through this tutorial .
Damn this is too good tutorial. Do you post tutorials on Corel Draw?
Wow, how cool! I love that you can do this with an image. Thanks for the very clear and thorough tutorial, will be sure to give it a go!
Thanks for the great tutorial man. It really helped!!
Great tutorial. It really helped me out a lot.
Sweet cheeks, what a byootiful tut.
Loved it, i will really use this technique when designing header areas for websites
Amazing, what an awesome tutorial, Thank you so much :)
Thank you for posting such amazing tutorial sir :)
This is such a great tutorial
Wow! It looks really an Impressive design. Wanting to try it. Thanks for sharing here.
This was so helpful!! You’re so talented and generous to post tutorials!! :-)
I appreciate your skills and try to implement for myself too. I am going to share this post with my designer friend.
Hey..I am beginner and learning designing techniques. I like your ways and love to create abstract blur pattern. Thanks for sharing and expecting more from you.
Really, spoongraphics creates creative designing tutorials always and I love to follow all articles. Thanks for sharing such a nice tutorial.
I love this!! So simple and sleek.
Thank you
I am looking creativity in these abstract design. I am really impressed with your technical skills and wanna see such a creative post again.
wow, I think the classiest thing you’ve done here is create some visually stunning that is make your post so awesome. Really very creative work, I can see you happen to be an expert at your field!
thanks sir for help me…..
Thanks so much for this tutorial. I got stuck a couple of time, but worked it out. lol. But don’t take that as criticism, this project is only my 2nd attempt at using Illustrator! Total noob!!
Thanks again x
Hello Chris,
Thank for the tutorial, it was easy to follow these intructions and make the same for me. :)
Wow! I love the end result.. Photoshop is my only love..