This post was originally published in 2008
The tips and techniques explained may be outdated.
Follow this Adobe Illustrator walkthrough to create a vector based reproduction of the popular Apple iMac computer. Using simple shapes and tools that can then be put into practice to create further icon style images.

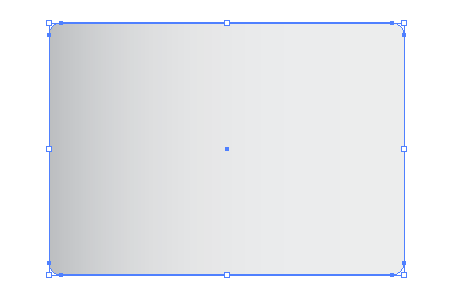
Open up Adobe Illustrator and create a new document, use the Rounded Rectangle Tool to draw the basics of the iMac screen. Use the up and down cursor keys to adjust the roundness of the corners while dragging.
Fill the rectangle with a soft grey gradient from left to right.

Draw another rounded rectangle within the previous shape as the frame around the iMac screen, adjust the corners slightly smaller in order for them to continue parallel to the outer shape. Fill this rectangle with black.
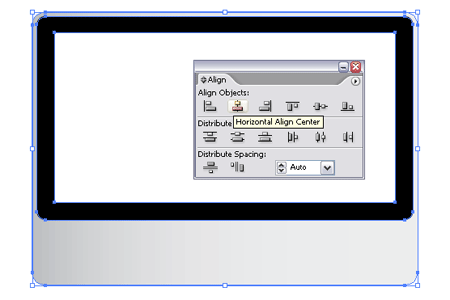
Create a third rectangle filled with white as the main screen area. Centre the objects together with the Align Palette.
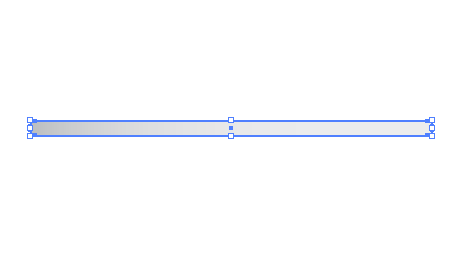
Create another new rounded rectangle as the front edge of the base, with very slight rounded corners. Use the same soft grey gradient as the outer screen.
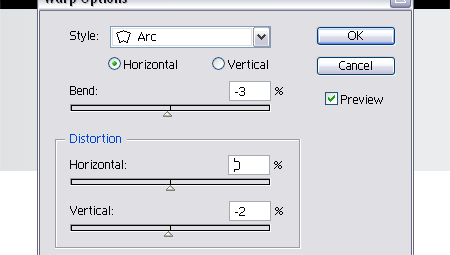
Go to Object > Envelope Distort > Make with Warp to apply a subtle curve to the base, using the settings of -3% Bend and -2% Vertical Distortion.
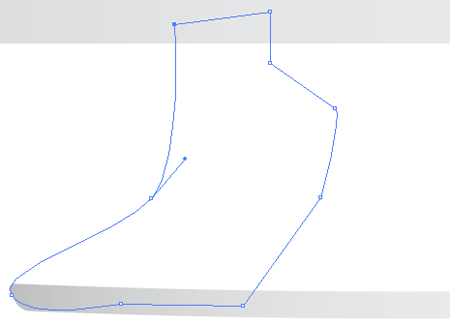
Use the Pen Tool to manually draw out the flowing shape of the base that leads up to the main unit. Concentrate on perfecting the outer curve then roughly complete the shape.
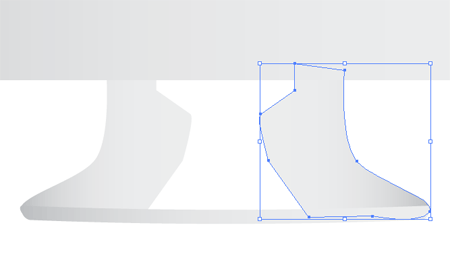
Copy and Paste the new object and carefully position on the opposite side.
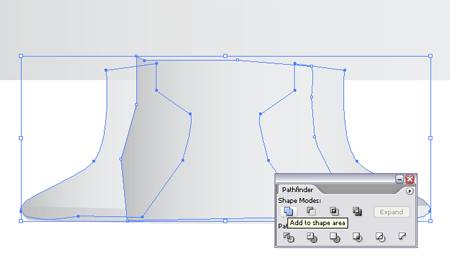
Fill out the remaining gap with a rough shape drawn with the Pen Tool. Send all three objects to the back by pressing CTRL/CMD, SHIFT, ]
With all three objects selected Merge them together using the Pathfinder tool.
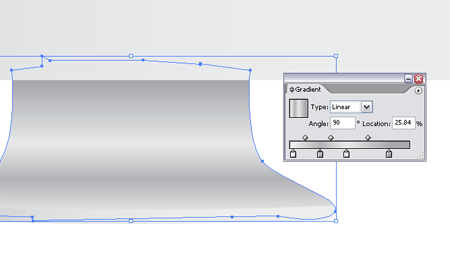
Fill this merged shape with a range of soft grey gradients spanning from light to dark to give the impression of the curved surface and shading.

Drop in a logo on the lower screen casing, I've used the SpoonGraphics circular logo however an accurate Apple logo can be downloaded at Brands of the World.

Fill the previously created white rectangle with a blue gradient spanning diagonally across the shape.
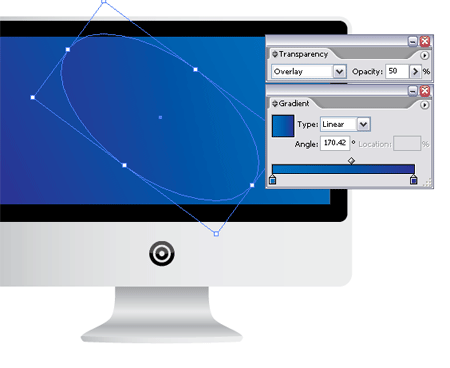
Using the same fill colours, draw an oval over the shape set at Overlay, 50% Opacity.

Duplicate and rotate multiple variations of the oval, overlapping each one to replicate the traditional Mac wallpaper.
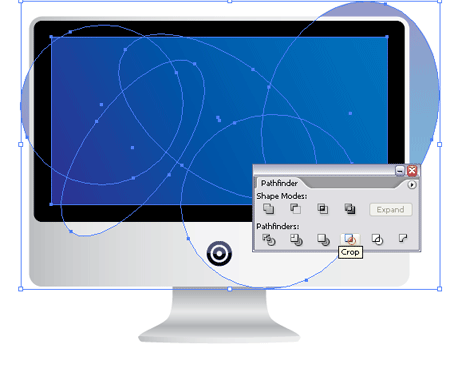
Group the ovals together and paste a copy of the screen rectangle at the top of the stack. With both rectangle and oval group selected use the Crop function of the Pathfinder tool to delete out the excess shapes.

The overall iMac graphic is coming together, but an Apple inspired image isn't complete without a glossy light cast.
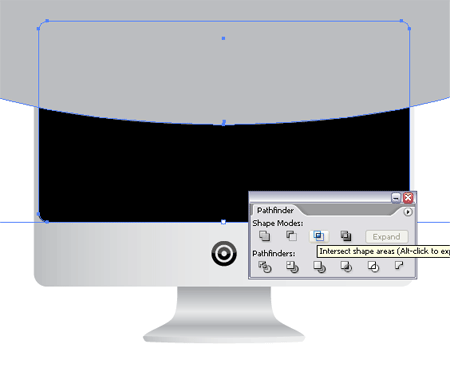
Copy the black frame rectangle and send to the top of the stack (CTRL/CMD, SHIFT, ]), then draw a temporary shape giving a slight curved edge halfway down the rectangle. Use the Intersect option from the Pathfinder to complete the shape.

Fill this new object with white and reduce the Opacity to suit.
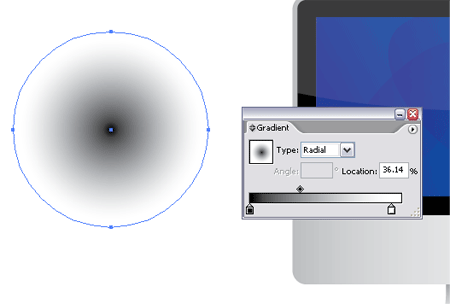
Finally give a sense of dimension by adding a subtle shadow underneath the iMac.
Draw a circle with a black to white radial gradient.

Squash the circle into a near flat oval and position under the base of the iMac, spreading outwards to the edges of the screen.
Reduce the opacity slightly to reduce the impact of the shading.


not the most practical thing to design but i liked it anyway :) good stuff.
You have some very nice tuts! Including this one! I’ve learned some very practical things about Illustrator!
Thanks!
@ Qvectors,
Not too practical, sure, but I also enjoyed viewing the process, and the same steps can be applied to much more.
Hope the weekend’s going well, Chris.
I’ve been meaning to learn Illustrator better. This is just the type of tutorial to start ramping up with, thanks.
BTW: I inserted the Apple logo by selecting the Type tool, choosing Helvetica (got lucky with a guess), and going to Type–>Glyphs and selecting the Apple symbol, which I then converted to paths.
Thanx, really good tuts !
Just Thanks
Good job on the pedestal and shading it!
The steps are very useful in many other designs and projects.
Nice finished illustration, thanks for the tips!
Good and very fast.
Very great tutorial! Thanks for posting it!
The graphic on the mac desktop is whatever. Looks kind of busted in my opinion.
Hi, great tutorial but I don’t use Illustrator so I have produced one for the Gimp using some of the techniques you used in your tutorial. Thanks
Tutorial: http://help-developer.com/index.php/2008/05/31/create-an-imac-vector-image-in-the-gimp/
very Good and very fast.
I enjoyed drawing the vector imac. Thanks alot for your cool tutorial…i’m lovin’ it
This is a great tutorial. I found a similar icon in png format but needed a vector version for a project I am working on. This was perfect!
I thoroughly enjoyed working through this tutorial. Great job.
Cool thanks this one was fun too.
its very good.. and its simple… nice thanks..
Nice again…