
This post was originally published in 2016
The tips and techniques explained may be outdated.
Today we’re going to have some fun mimicking the distortion effect of VHS tapes in Adobe Photoshop. This is quite an unusual topic, but hopefully it will come in handy for those rare projects where you might need to replicate such a style. We’ll take a photograph and distort it with a variety of techniques to simulate the warping associated with old analog film footage, then we’ll apply some OSD text as a finishing touch to give it the appearance of a home movie being played on a VCR.
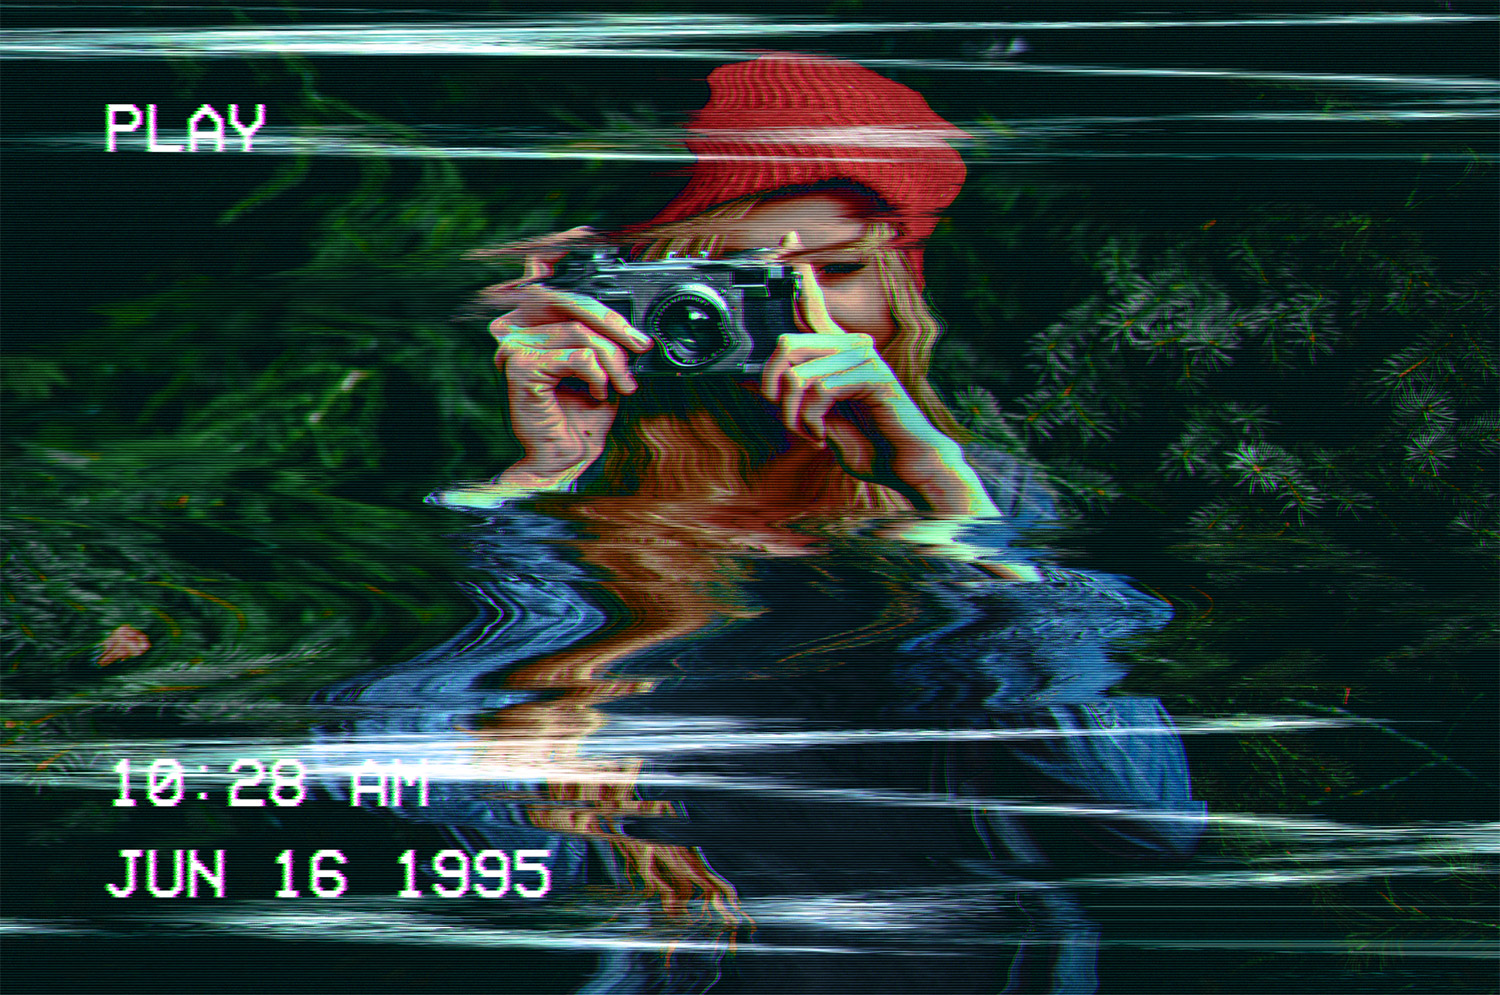
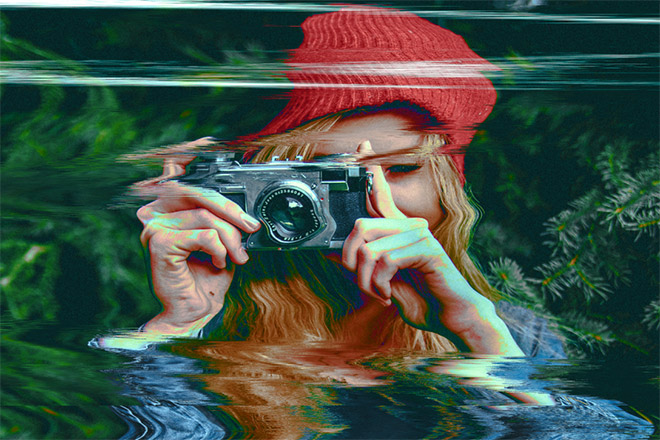
The result of this tutorial is a realistic VCR effect that simulates the various warping and distortion associated with VHS tapes, especially under pause or rewind. Photoshop’s collection of Distort filters will help us destroy our digital image, then we’ll add some finishing touches which capture the authentic characteristics of analog TV footage.
See the final distorted VHS effect
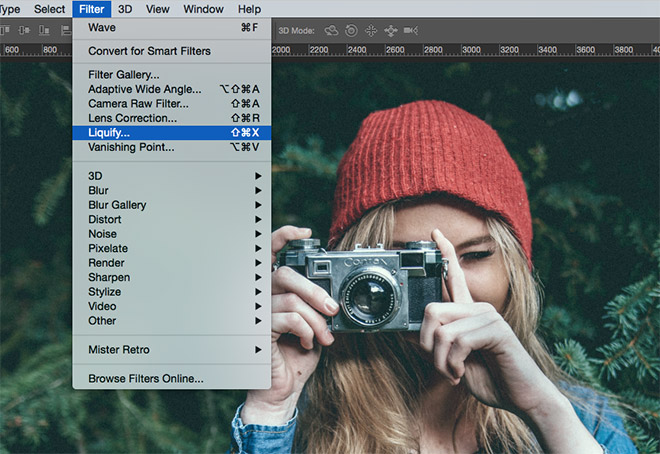
Open up your chosen image in Adobe Photoshop. I’m using this free image from unsplash. We’ll begin by warping the image with the Liquify tool, which can be found under Photoshop’s Filter menu.
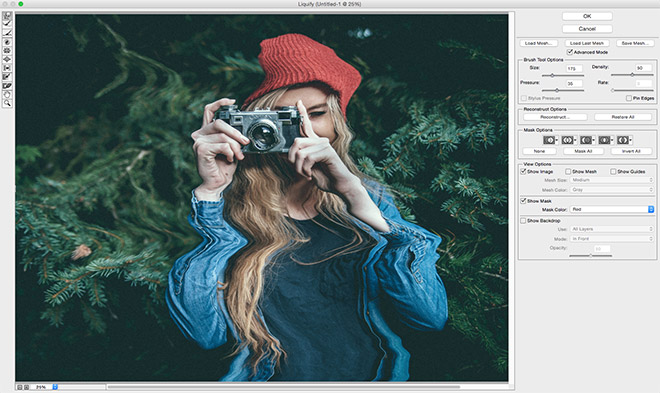
With the Forward Warp tool selected reduce the pressure to around 30, then begin dragging the tool from left to right across the image. Alter the brush size to vary between large and small distortions.

Confirm the Liquify adjustments with the OK button, then draw a marquee selection across a portion of the image. Press CMD+T to Transform, then stretch the segment to create a screen tear effect.
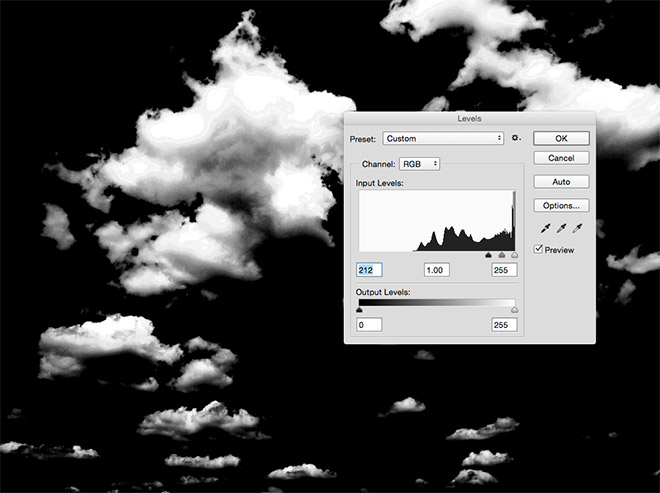
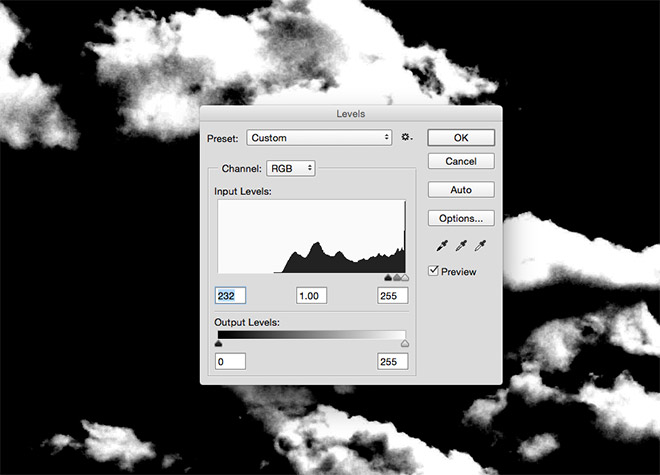
Search for a stock image of some clouds and open it up in Photoshop. Use the shortcut CMD+Shift+U to Desaturate the image, then adjust the Levels (CMD+L) and dramatically darken the shadows to black.
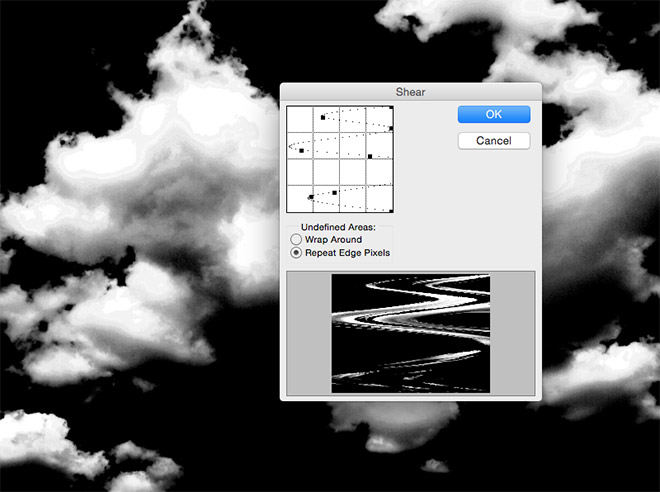
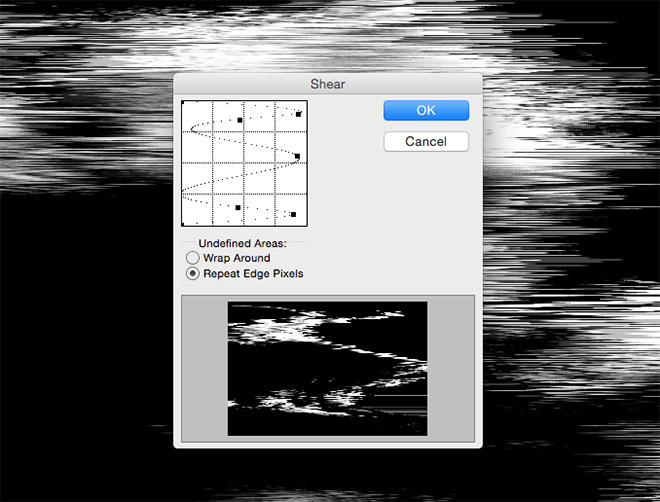
Next, head to Filter > Distort > Shear and add a series of points to the graph to warp the image from side to side.
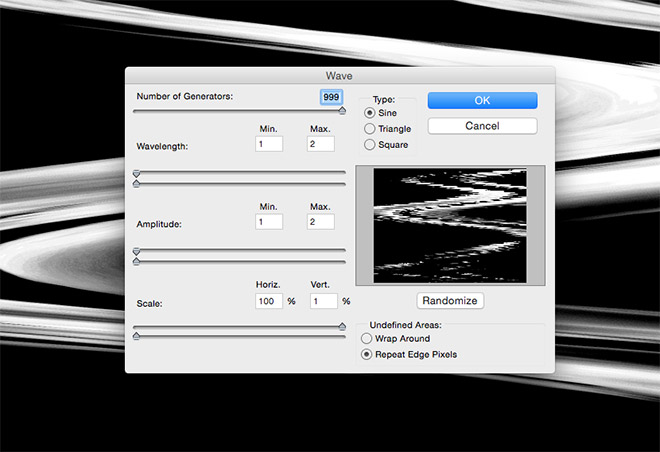
Go to Filter > Distort > Wave and alter the settings to 999 generators, minimum Wavelength, minimum Amplitude and 100% scale only on the Horizontal axis.
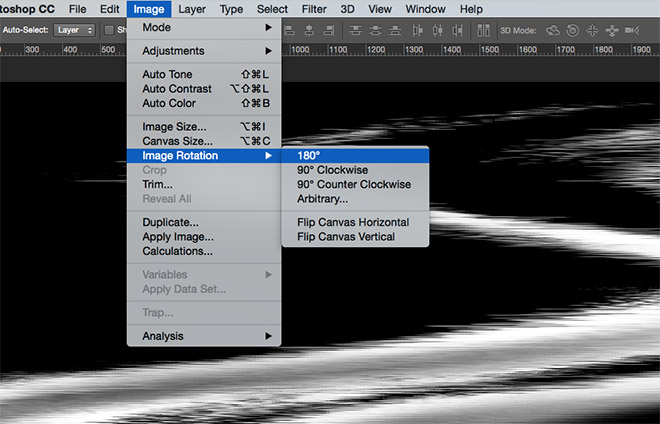
Depending on the layout of the photograph the effect is being applied to, it might be necessary to alter the orientation of this distortion file to avoid distorting key areas of the image such as a person’s face.
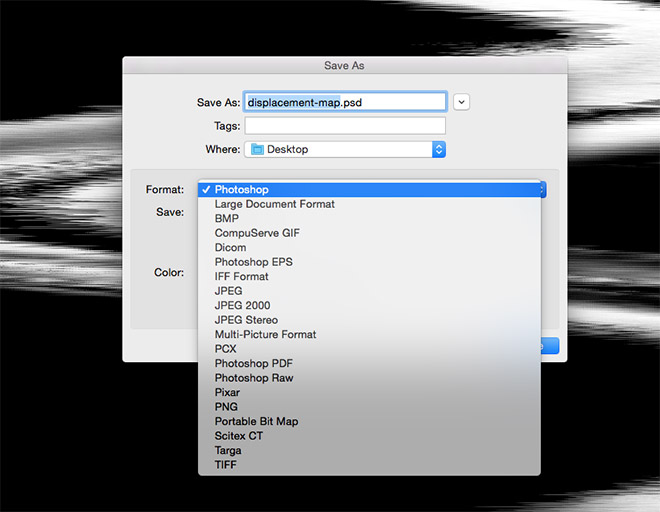
Save the image as a PSD and give it a recognisable name such as displacement-map.psd. This temporary file will be used in combination with Photoshop’s Displace filter.
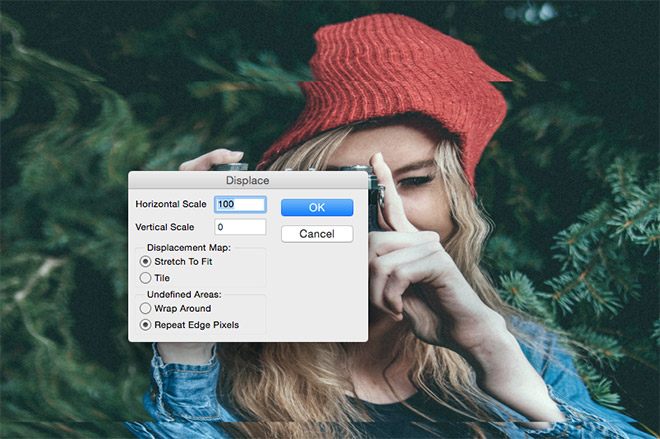
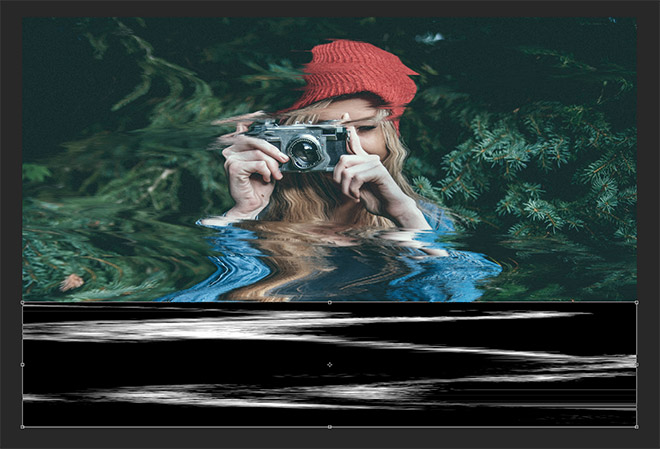
Back in the main working document, go to Filter > Distort > Displace. Change the settings to 100 Horizontal Scale by 0 Vertical Scale. After clicking OK, navigate to the displacement-map.psd file.
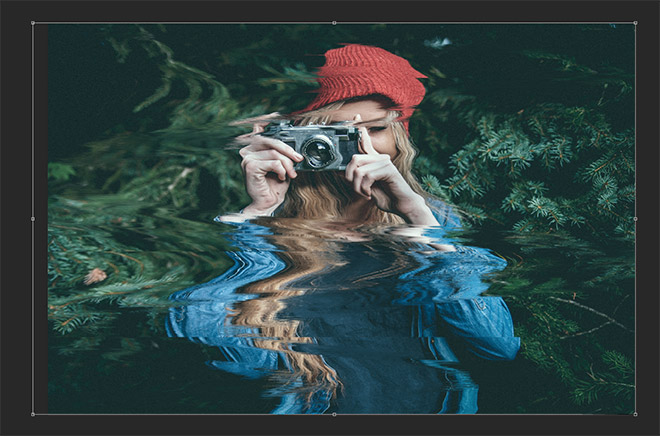
The displacement map warps the photograph according to the white areas of the map file. Draw a marquee selection around the entire image except the ugly pixels along the left edge, then press CMD+T and stretch the image to remove them.
Find another clouds photo and open it in Photoshop. Desaturate and adjust the levels to convert it into a harsh black and white image.

Add the Wave filter first this time, using the same settings of maximum generates and horizontal scale, but zero wavelength, amplitude and vertical scale.
Go to Filter > Distort > Shear and adjust the graph with a new layout of points to form a different warp effect.
Press CMD+A to Select All, followed by CMD+C to Copy. Paste this clipping (CMD+V) into the main working document, then scale and squash it to cover a portion of the image.
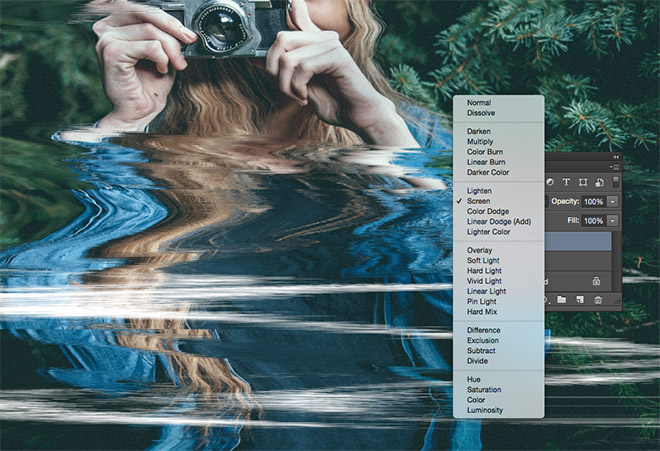
Change the blending mode to Screen to render the black background transparent, leaving just the white distortion lines that are a common characteristic of VHS tapes, especially during pause or rewind.
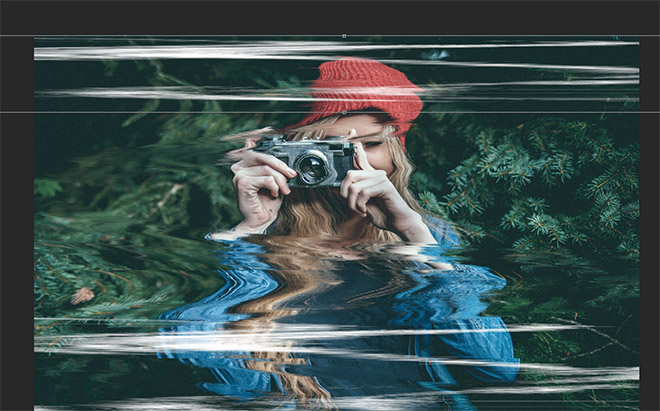
Duplicate the layer with the shortcut CMD+J, then Transform (CMD+T) and use a mixture of Flip Horizontally, Flip Vertically and basic resizing to produce a second set of distortion lines elsewhere on the image.
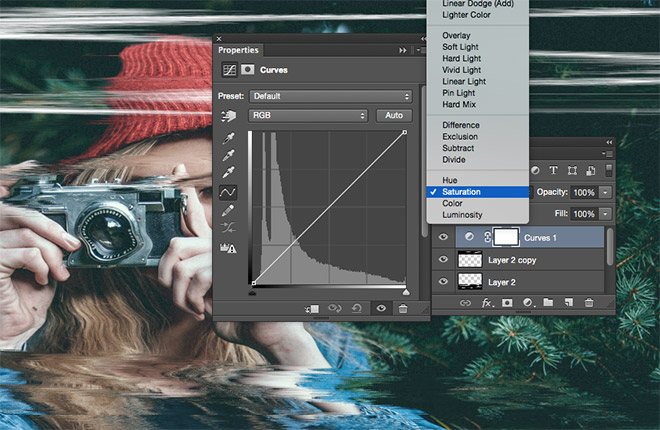
Create a new Curves adjustment layer, then change its blending mode to Saturation.
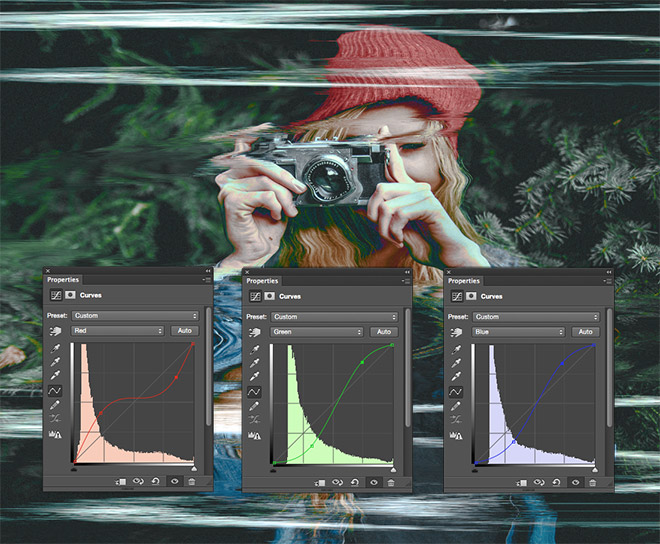
Change the dropdown menu to the Red channel and configure the curves into an S shape. Switch the channel to Green and create an inverted S layout. Change the channel to Blue and create a more subtle S bend.
These adjustments blow out the saturation in some areas of the image while reducing them elsewhere to mimic the poor colour reproduction of analog Televisions.
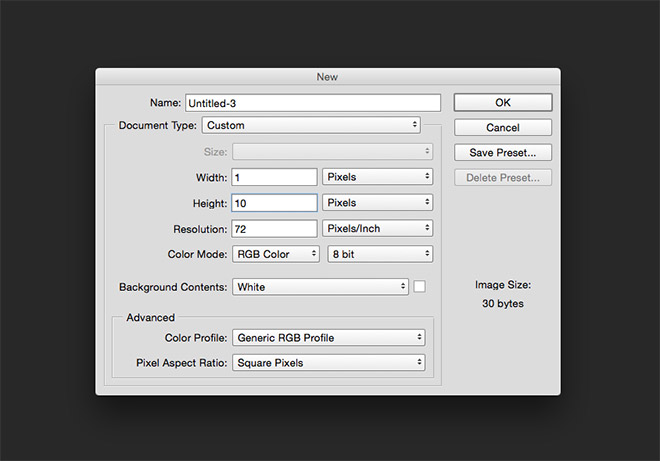
Create a new document with a size of 1 by 10px (this document size may vary depending on the resolution of your chosen photograph).
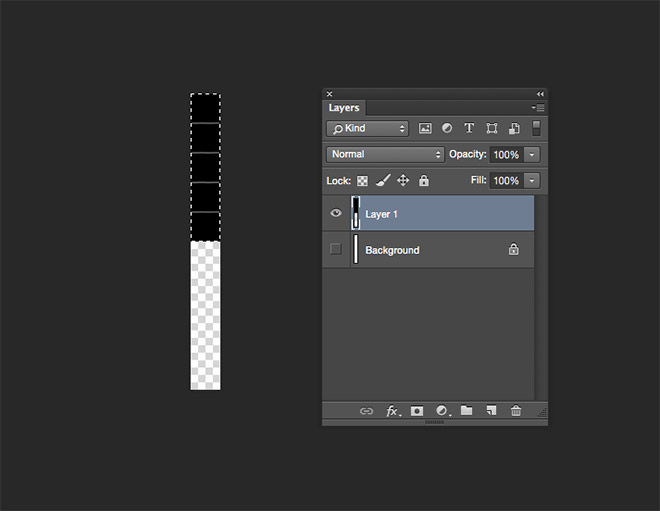
Toggle the visibility of the background layer then draw a selection across half of the canvas and fill it with black on a new layer.
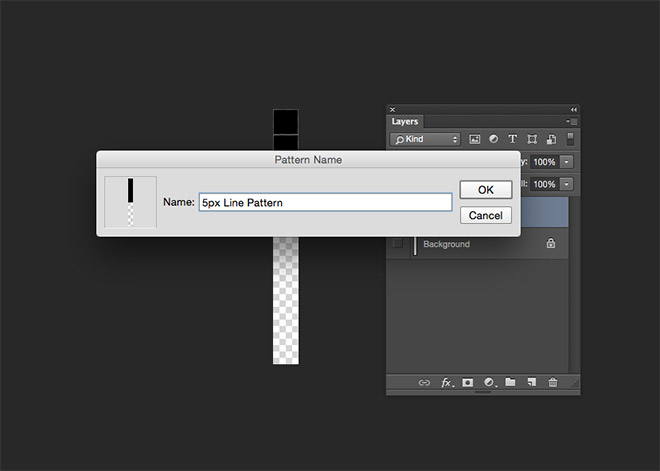
Press CMD+D to deselect, then go to Edit > Define Pattern. Give this pattern a recognisable name. This pattern will produce a series of 5px horizontal lines.
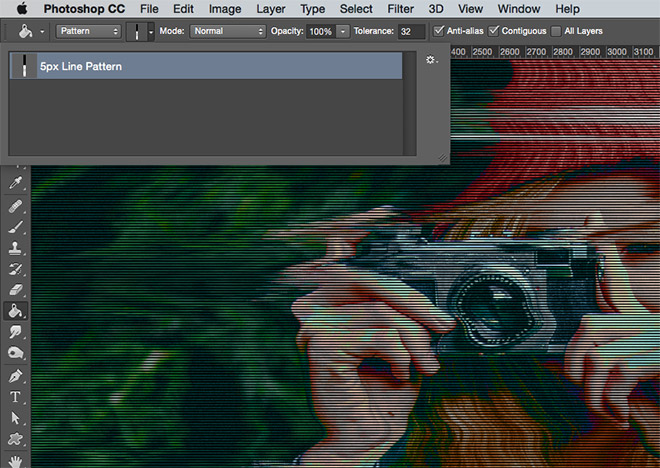
Back in the working document, select the Fill bucket tool, then in the top header bar change the setting to Pattern. Find the recently saved pattern within the menu.
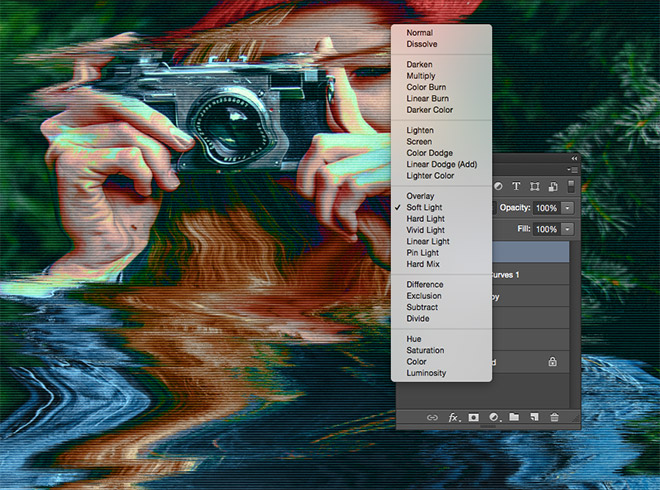
Create a new layer and click anywhere to fill it with a series of old TV style scan lines. Change this layer’s blending mode to Soft Light to allow it to interact with the colours.
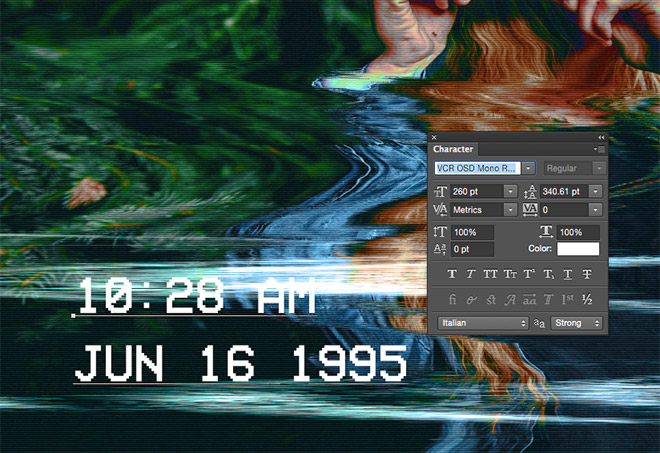
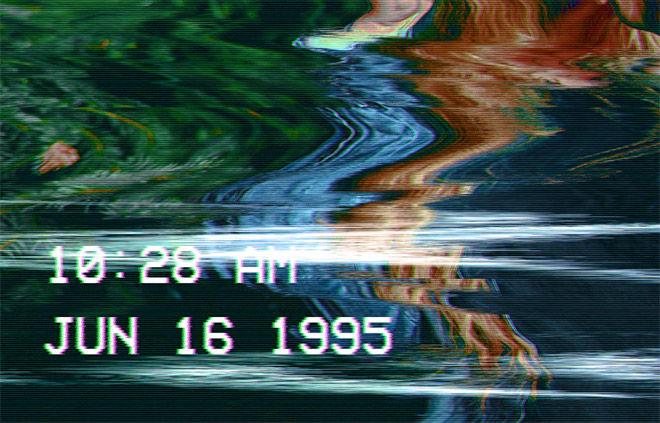
To finish off the effect with a retro home movie effect, use an OSD mono font to type out some VCR style on-screen information.
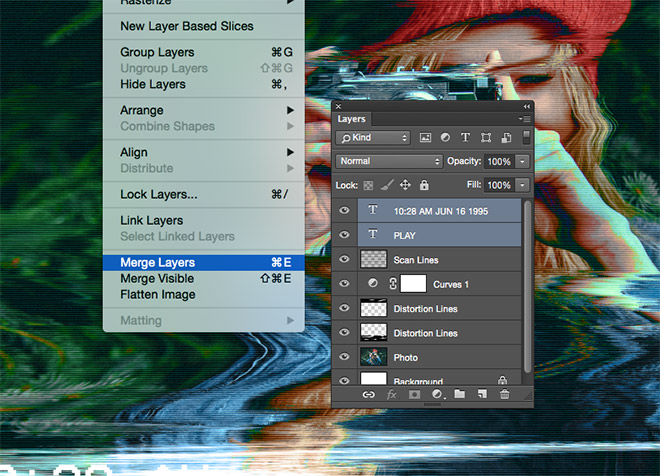
Select all the OSD text layers and go to Layer > Merge Layers to convert them into one editable raster layer.
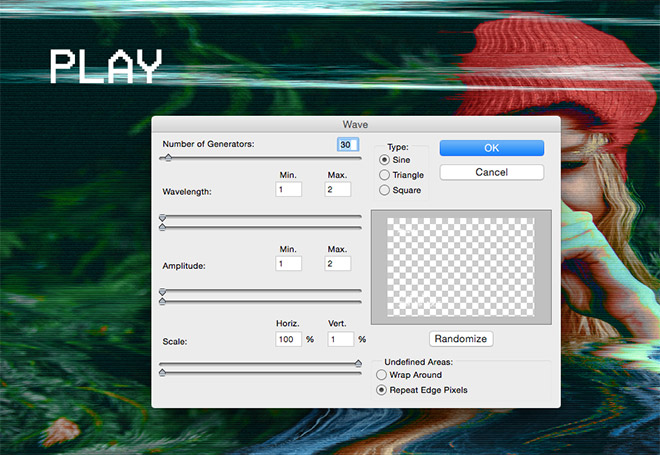
Go to Filter > Distort > Wave. Retain the previous settings, but reduce the number of generators to around 30.
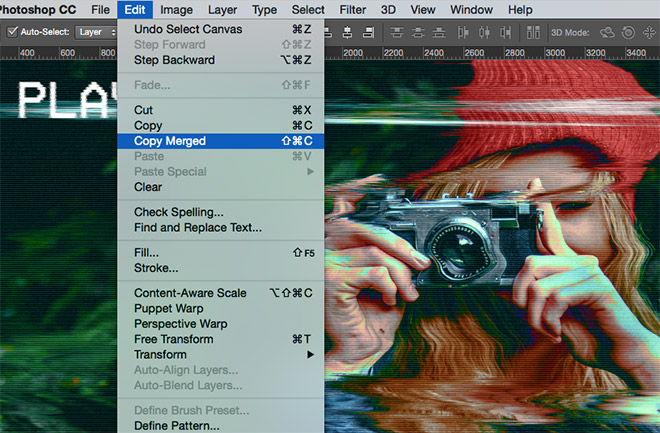
To create one last analog style effect, press CMD+A to Select All, followed by Edit > Copy Merged. Paste this flattened duplicate of the artwork on a new layer at the top of the stack.
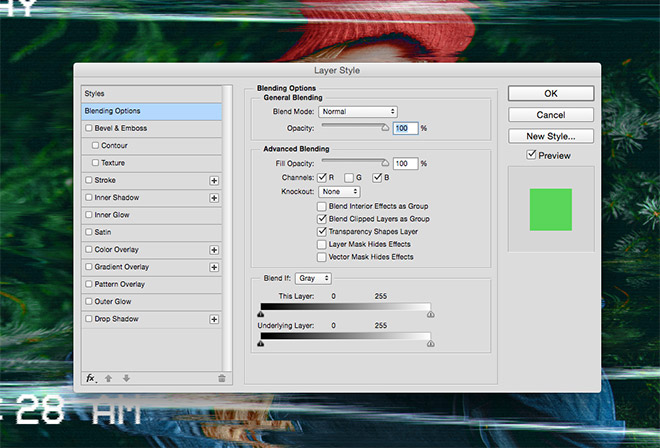
Double click the new layer to open the Layer Styles menu, then turn off the G (Green) channel in the Advanced Blending options.
Nudge the layer to the right a few pixels using the cursor keys to offset the image and produce a misalignment of the channels.
This combination of effects does a nice job of replicating the distortion often seen on old TVs, VCRs and VHS tapes. Use it to create authentic retro styles in your designs and artwork!

Just Amazing
This is cool…Thanks!!
Nice tut.
thanks
Shouldn’t the “play” and time stamp be distorted too since those would be “recorded” alongside the video?
:/
I agree with you..
mark ur a scrub if u knew anything you would know that you are very rude and very wrong. U just wish you were this TUTRIFIC lets see you try and do this by yourself. BTW um um i hope you have a horrible day u ruiner whiner weiner .
Interesting method. I would grab a VHS/glitch screen and use it as displace map do distort the image, thou.
Also: A E S T H E T I C S
Wow! nice tutorial.
Awesome work Chris!!! I’ve recently become an animator and was wondering if there was anyway to animate this effect in flash or animator. Cheers
Ah, we’re all exploring this effect these days ;-) I wrapped up a thing that has a slightly different approach than yours. It should be live within a week.
AWESOME!! Thanks for these tips, dude.
You’re awesome :)
This Indeed is AWESOME!!
Thanks for these tips,
Great article. Now I create this animation. Thank you
Ohhh yea. good work Chris. im waiting for this tutorial on your youtube channel. keep working
I was looking for a tutorial on vector illustration. Thanks a lot for sharing.
awesome ty for the tips you are great
This is Awesome,thanks
I’ve recently become an animator and was wondering if there was anyway to animate this effect in flash or animator.
I wrapped up a thing that has a slightly different approach than yours.
Always great tutorial Chris!! you’ve present all steps perfectly.
This is the first time using the Liquify Tool, so right at the beginning I have an issue. “With the Forward Warp tool selected reduce the pressure to around 30, then begin dragging the tool from left to right across the image. Alter the brush size to vary between large and small distortions.” I have selected the Forward Warp tool, changed the pressure to 30 and the size to 189. Nothing happens when I pan the brush across the photo. Please assist. Thank you.
Thanks for sharing this! It really helps a lot!! You’re a badass!!