This post was originally published in 2012
The tips and techniques explained may be outdated.
Follow this step by step Photoshop tutorial to create a cool cityscape poster design with the trendy retro style and effects that are so popular at the moment. We’ll use a range of texture resources and Photoshop techniques to give the design an aged and distressed appearance and send it back in time a few decades.

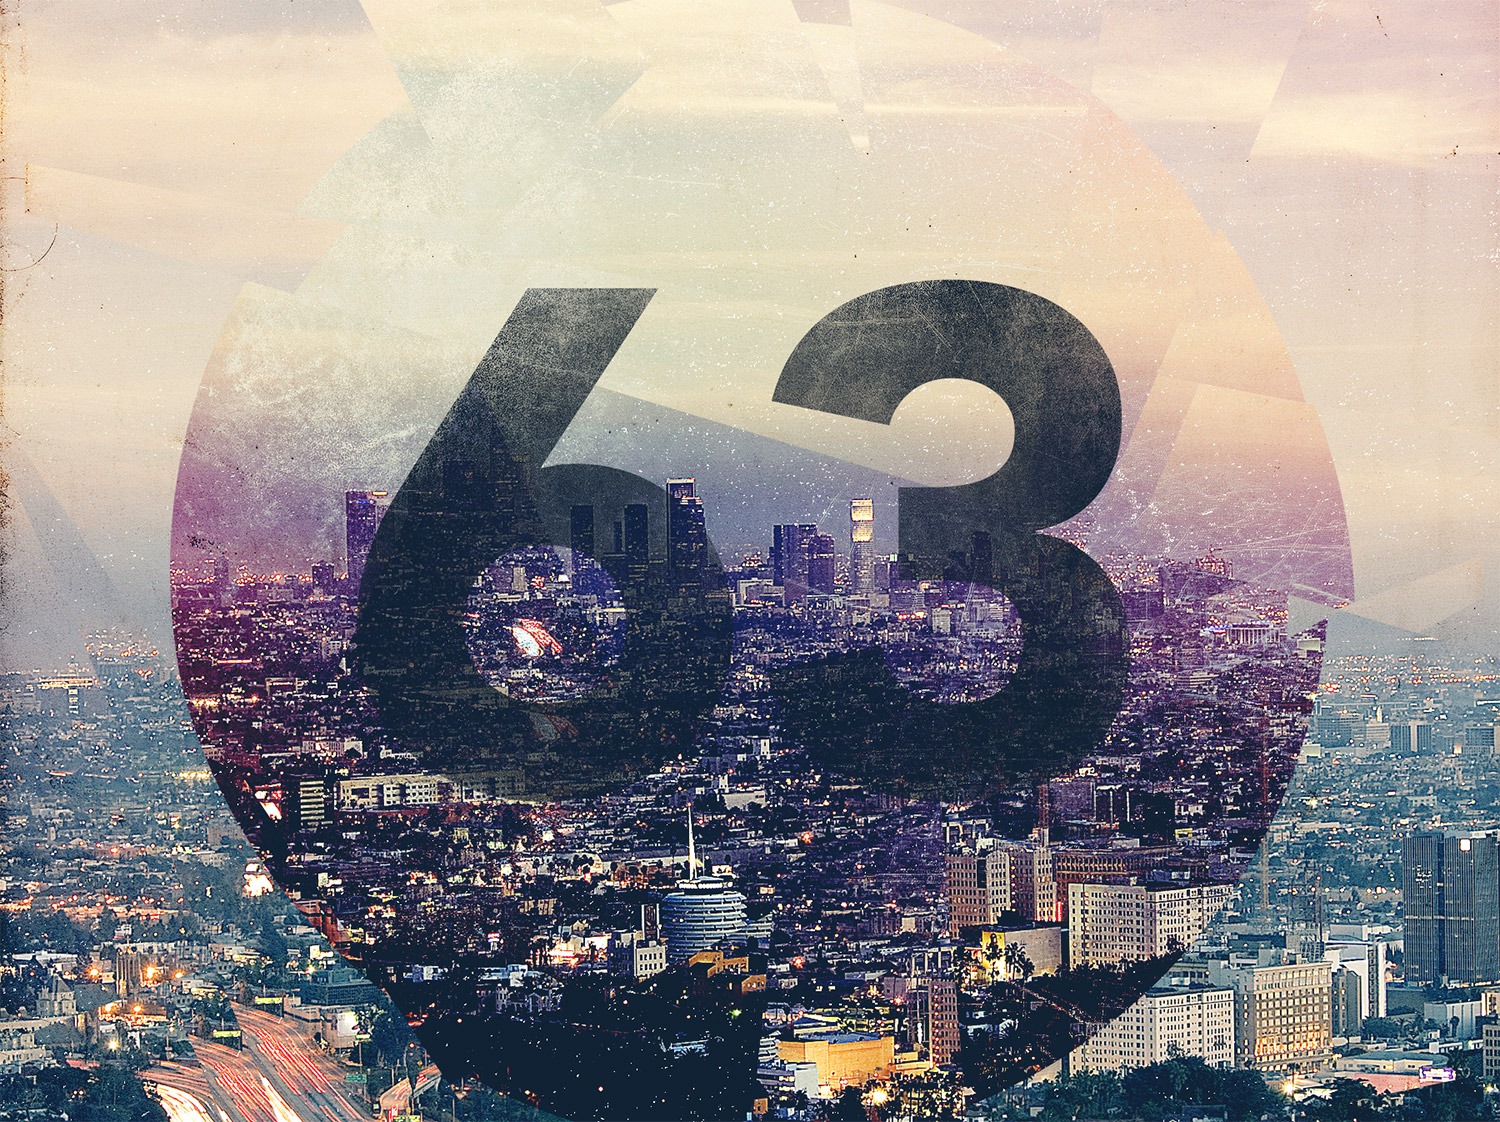
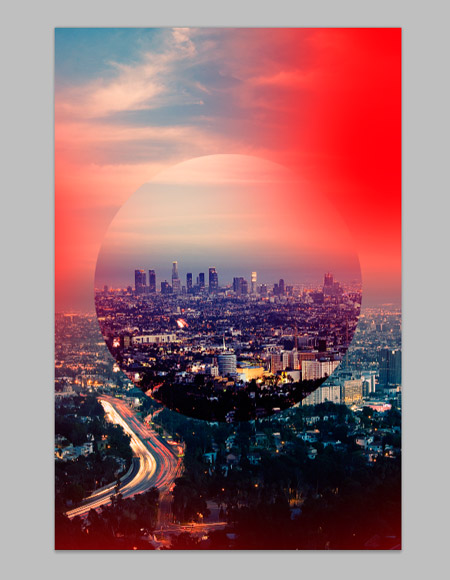
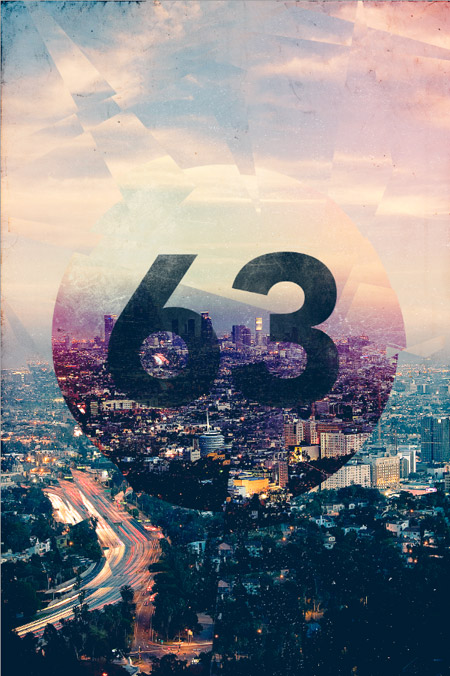
The artwork we’ll be creating features a cityscape modified with cross processing colour effects and texture overlays to create the appearance of a retro poster or magazine ad left to age since the 70’s.
View the retro cityscape design
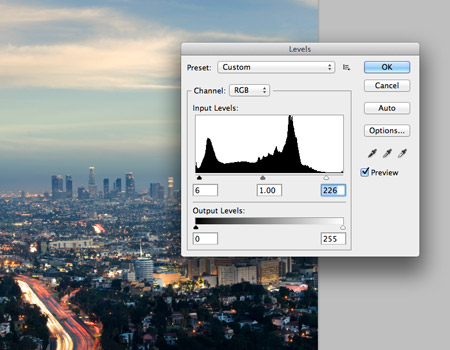
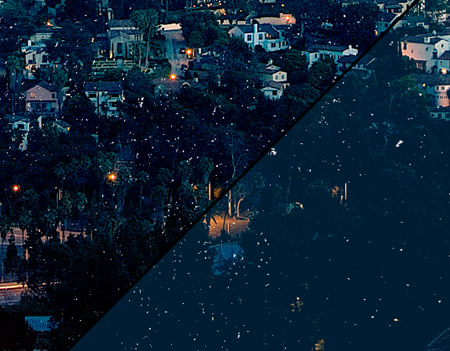
First up we’ll need to source a photo as the base of our retro style design. Landscapes and cityscapes seem to be popular choices for this type of artwork. Here I’ve sourced a cityscape photo of Los Angeles at dusk. Adjust the levels to match the histogram and increase the contrast of the image.
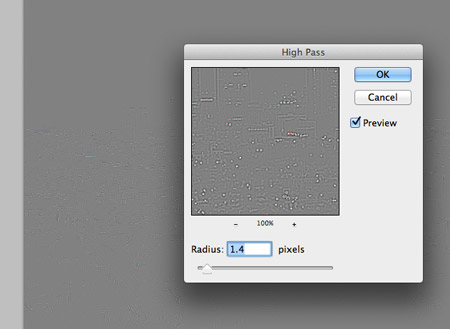
Press CMD+A to select all, then hit CMD+Shift+C to Copy Merged. Paste this copy on a new layer and add a High Pass filter (Filter > Other > High Pass). Alter the radius until just the finer details are visible through the grey background.
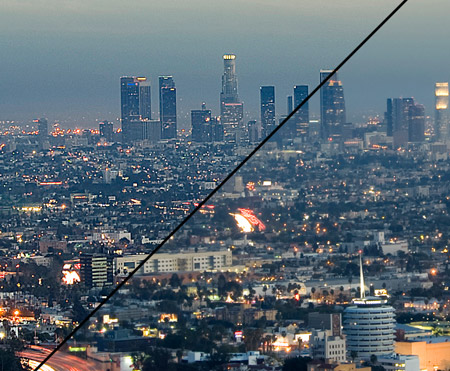
Change this high pass layer to Linear Light to sharpen up the image. The difference between the high pass sharpened image and the original is quite amazing.
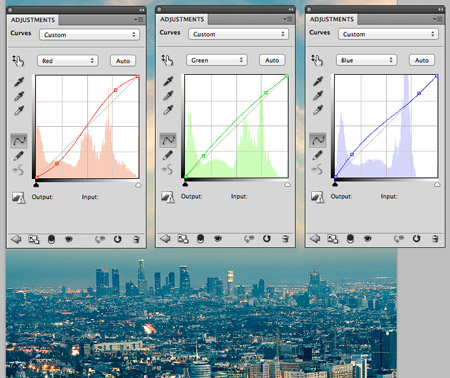
Add a Curves adjustment layer to begin altering the colours of the image to create an old school cross processing effect. Alter the Red channel into an S shape bend, bend the Green channel curve slightly then increase the amount of blue in the shadows.
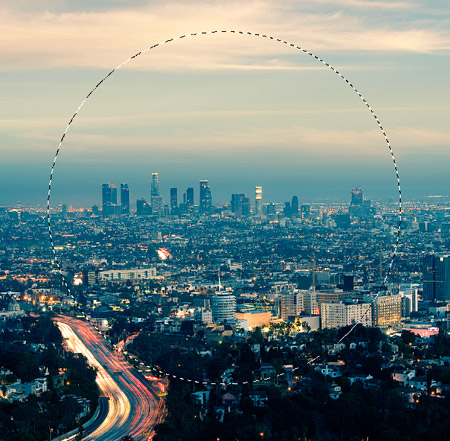
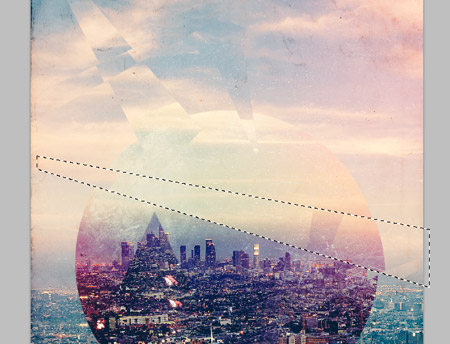
Use the Elliptical Marquee tool to draw a selection around the main skyline of the image. Copy and paste this selection onto a new layer.
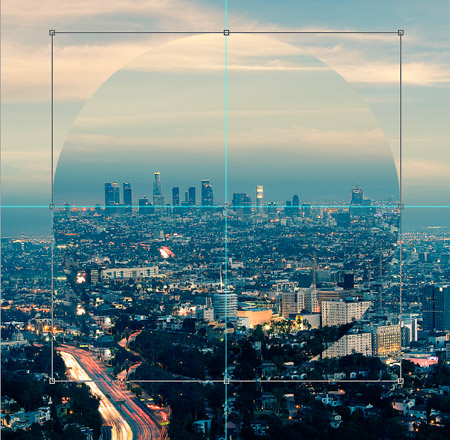
Add guides to identify the centre of the document then move the circle clipping into place to offset it from its background.
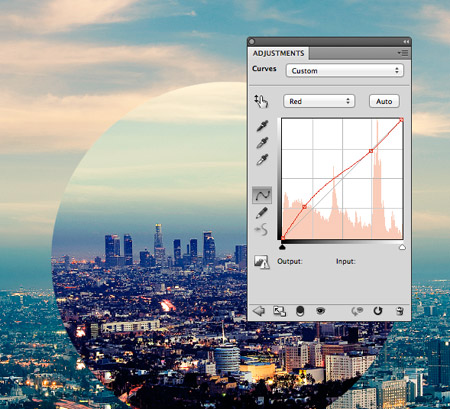
CMD-click on the circle layer’s thumbnail to load its selection then add another Curves adjustment layer. The selection will automatically mask the adjustment layer to the confines of the circle. Adjust the curves to add more red to the shadows so the tones of the circular clipping stand out from against the background.
Use a large soft brush to dab some spots of red around the edges of the design on a new layer. Change this layer to Screen at 50% opacity to create some trendy retro style light leaks.
Add a Layer Mask to the circular clipping layer and use some subtle Photoshop brushes to erase out portions of the image and create an aged textured finish.
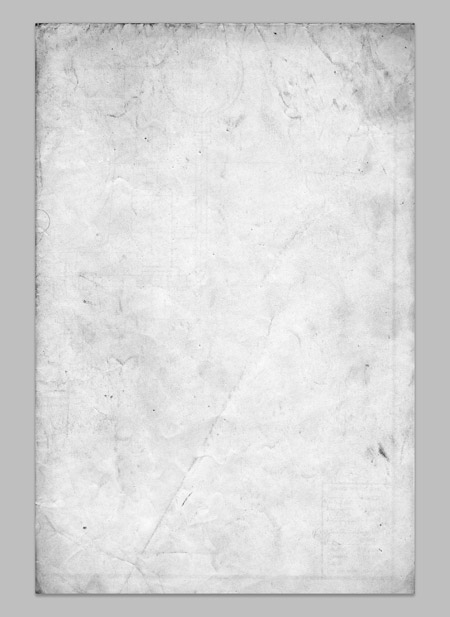
Download a grungy paper texture and paste it at the top of the layer stack. Change the blending mode to Color Burn.
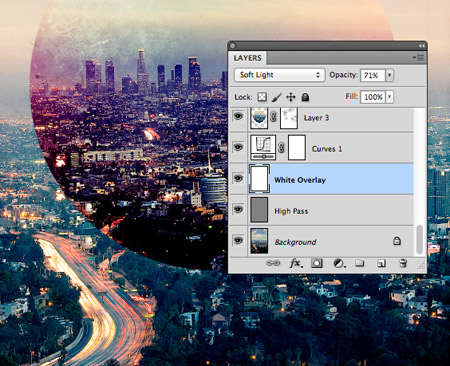
Add a new layer above the High Pass layer and fill it with white. Change this layer to Soft Light to brighten up the background to create a washed out effect.
Download a noise texture file and paste it on a new layer at the top of the stack. Change this layer to Screen to render the black area transparent.
Fill another new layer with a blue colour sample from the background image. Change this layer to Pin Light to add this colour to the shadows, giving the darker areas of the image a bluish tone for more of a retro effect.
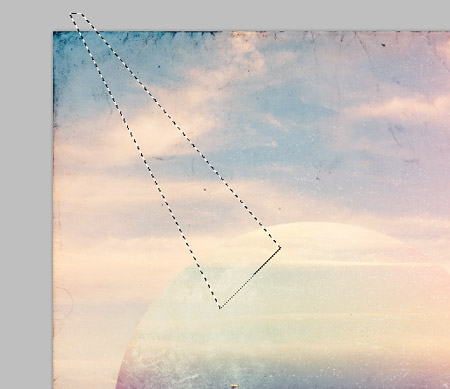
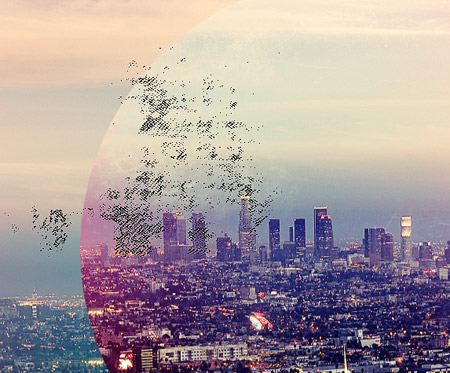
Use the Polygonal Lasso tool to draw a triangular selection on the design. Copy Merged (CMD+Shift+C) and paste this selection and offset it slightly from its original position.
Repeat the process of creating offset shards with random selections across the design.
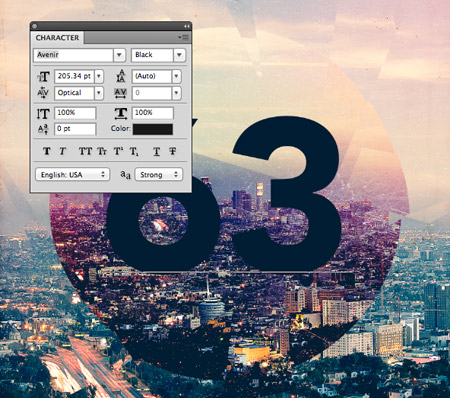
Finish off the design with a number in the centre of the circle, taking a touch of inspiration from retro “meatball” racing numbers. Select a deep blue fill from a dark area of the document.
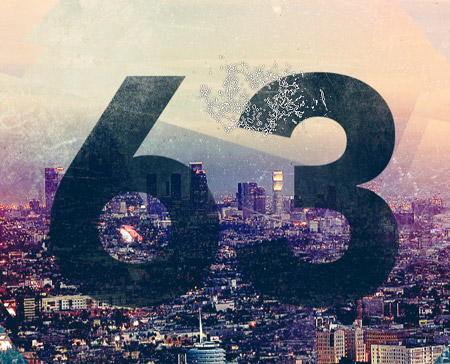
Add a layer mask to the number layer and use a range of Photoshop brushes to erase portions of the numbers to match the overall aged and distressed appearance of the artwork.

beautiful and attractive effects you put in this tutorial.
This is awesome! Thank you!
Some great effects here! Awesome design and tutorial, Chris! : )
A well presented tutorial and the finished montage looks really good. Thanks for sharing this.
I always love your tutorials, Chris! They’re very easy to follow and we get to learn some awesome tricks along the way! I hope you don’t stop posting good stuff like this! Thank you very much!
Thanks Chris … Good one … Will try it over the weekend
I like this poster design a lot! Nice work. Quick tip for you, this:
“Press CMD+A to select all, then hit CMD+Shift+C to Copy Merged. Paste this copy on a new layer”
Can be accomplished with the CMD+J (for jump!) command. Select the layer in the Layers panel and press CMD+J to make a copy of current layer. Saves you a second or two and keeps your clipboard unused.
CMD+SHIFT+J lets you jump a selection to a new layer.
Parabéns pelo artigo, muito interessante e útil! ;-)
Absolutely fantastic. Thanks.
Very interesting effect using the offset of the polygons. I also like the final colors of this poster. Great tutorial!
Nice tutorial, I love the vintage look, usage of random shapes to make a nice overall piece.
Thanks Chris! I was looking for something like this! It seems easy this way. Let’s see if it works in my hands…
absolutely fantastic,Chris..
Hi, I have a question.
How can u use lazo tool on both levels to cut them together? Did u merged them?
This looks so awesome!
I appreciate your effort and this will be helpful for many guys as like me.
Great tutorial. Very nice result too. There are soo many cool functions in PS that it can get overwhelming lol.
Are there any video tutorials for this one?