This post was originally published in 2010
The tips and techniques explained may be outdated.
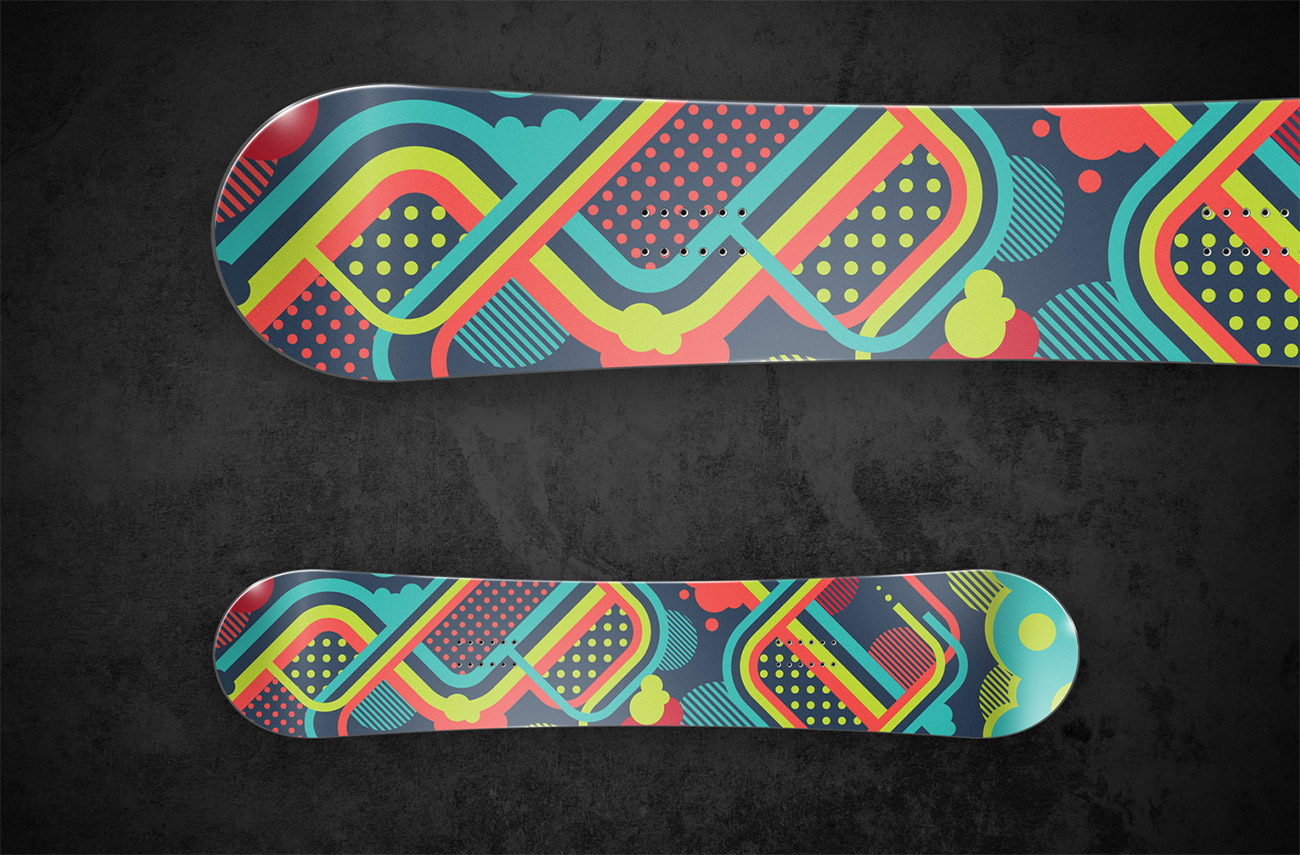
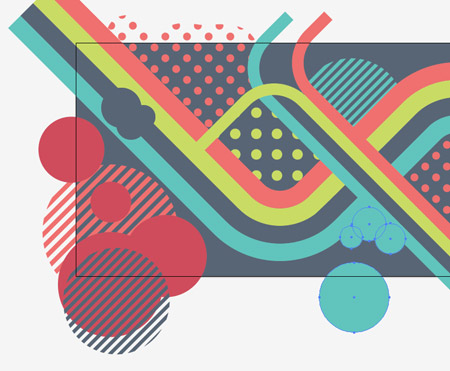
Follow this Adobe Illustrator tutorial to create a cool snowboard illustration. We’ll build up the design with an array of bright shapes, trendy lines and patterns to produce a bright and funky vector composition. The final design will then be mocked up on a handy snowboard deck template to show off the design in all its glory.
View large scale snowboard design
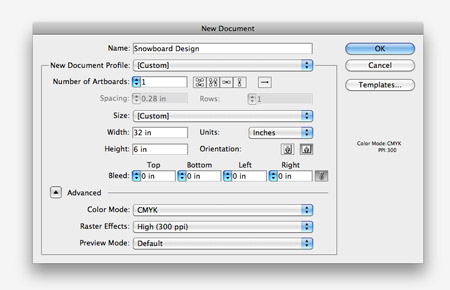
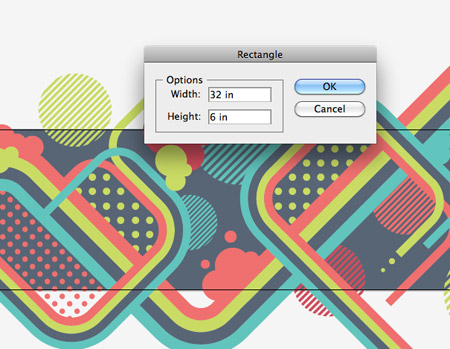
A typical snowboard deck comes in at 64x12inches, but with the design being created in vector format we can easily scale this to 32x6inches to ease the strain on our processors. Create a new Illustrator document at the appropriate dimensions and select CMYK for the Color Mode.
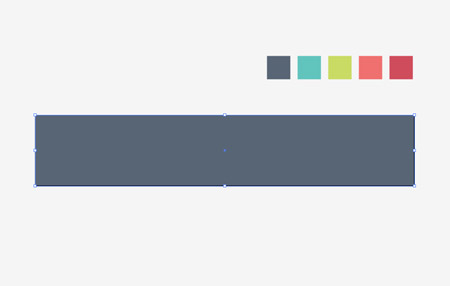
One of the first steps is to plan out a colour scheme for the design. I’ve picked out this cool palette from ColourLovers which has a good mix of bright tones as well as a dark blue which would work perfectly as a background. Select the rectangle tool and click on the artboard. Enter the dimensions of 32x6inches and align the rectangle with the Align palette. Press CMD+2 to lock this element to avoid accidentally selecting it.
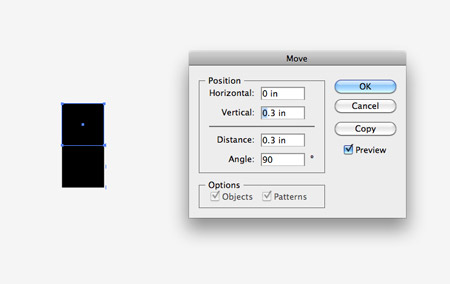
Elsewhere on the document create a small square, note the dimensions, then Copy (CMD+C) and Paste in Front (CMD+F). Hit the Enter key to bring up the Move options and input the same value as the square’s height in the vertical field. Press the Paste in Front shortcut then CMD+D to repeat the move transformation until you have a row of four squares.
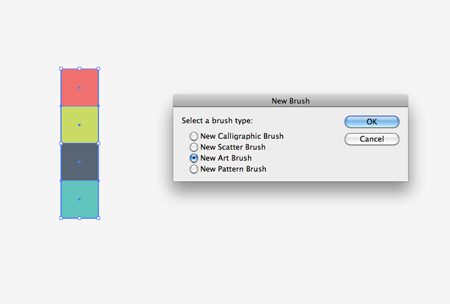
Fill each of the four squares with a swatch from the colour palette, then with all four squares selected click the ‘new’ icon at the bottom of the Brushes palette. Select New Art Brush in the subsequent options box.
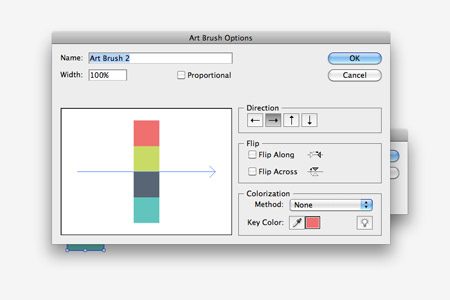
Make sure the direction arrow is flowing across the squares, then click OK to create the new brush.
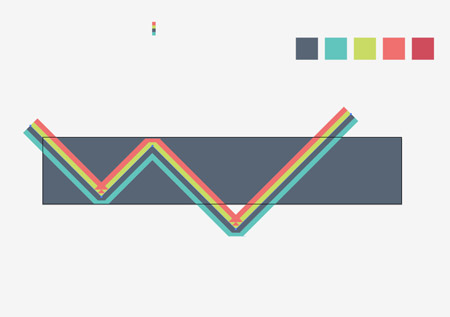
Use the Pen tool to draw a zig-zagging path across the design. Hold Shift to constrain the angles to 45 degrees. Add the newly created brush as the path’s stroke.
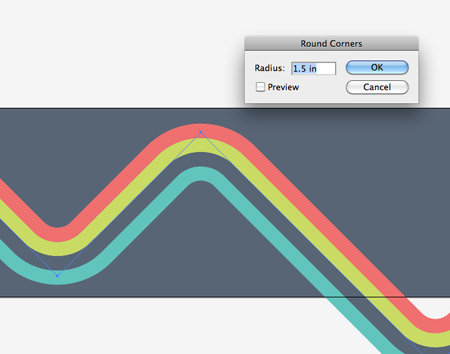
With the path still selected, go to Effect > Stylize > Round Corners. Enter a Radius of around 1.5inches to transform the angles into smooth bends.
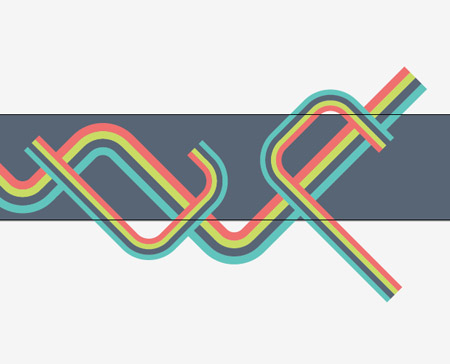
Continue drawing a couple more lined paths with the same round corner styling. Decrease the stroke weight to create thinner paths.
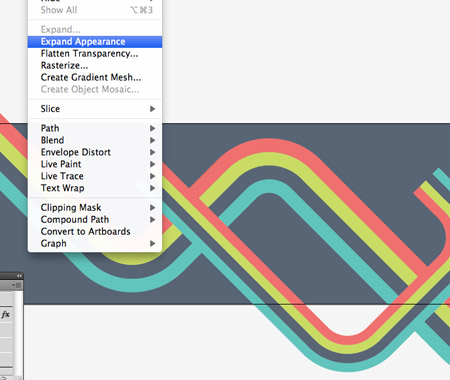
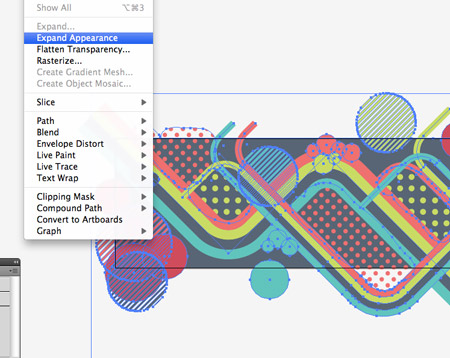
To transform the paths into solid and editable shapes, select each one and go to Object > Expand Appearance.

Use the Direct Selection Tool to tweak the edges of each coloured strip so each one ends at a different point. Keep the Shift key held to constrain to that 45 degree angle.
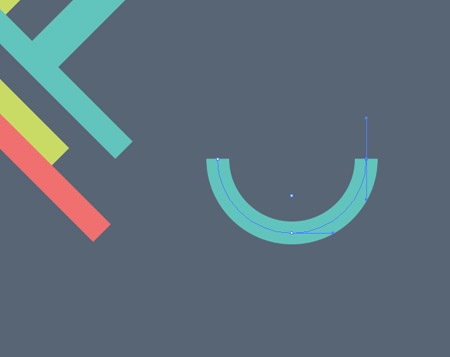
Draw a circle on the artboard and add a thick stroke. Aim to match the weight of the stroke perfectly with the size of the coloured strips. Use the Direct Selection Tool to delete out the top and right points to leave a quarter-circle.

Zoom right in and match up the curved strip with the straight strips. Extend the straight edges after the curve by continuing the path with the Pen tool.
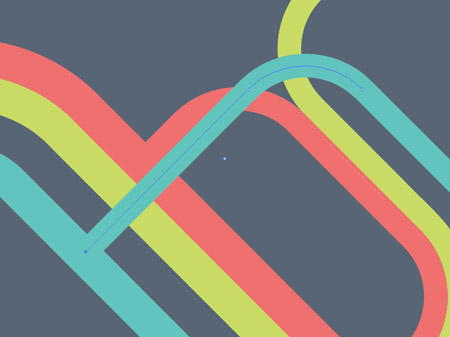
Cool effects can be created by varying the stacking order of each strip, and overlapping the colours so they seem to seamlessly flow between each path.
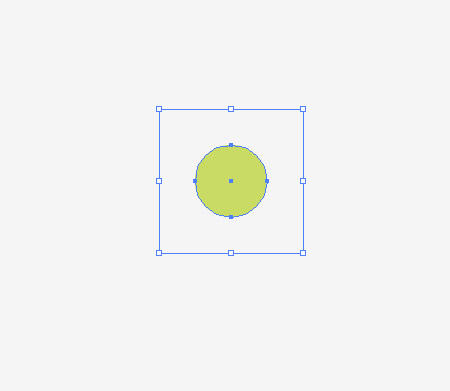
Elsewhere on the document draw a small circle and fill it with a colour from the design’s colour scheme. Draw a slightly larger blank square around the circle and align the two perfectly. Select both objects and drag them into the Swatches palette.
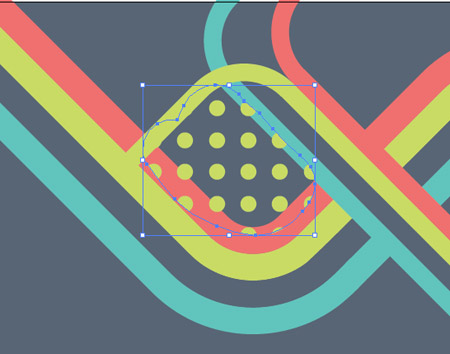
Use the Blob brush to fill a selection within a closed area of the design and add the newly created swatch as a fill. The swatch will repeat to create a repeating pattern swatch. Repeatedly press the shortcut CMD+[ to send the pattern underneath the linework.
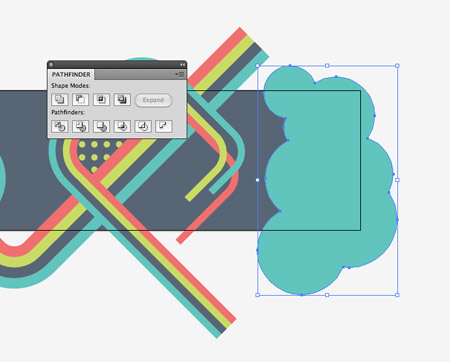
Draw a series of filled circles on one end of the design and merge them all together with the Pathfinder tool.
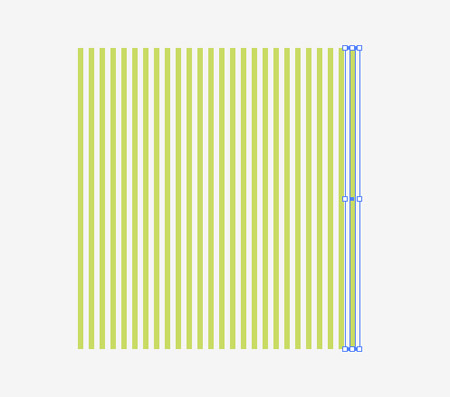
Draw a long thin rectangle elsewhere on the artboard, then duplicate it by dragging while holding the ALT and Shift keys. Press the shortcut CMD+D to create a series of lines.
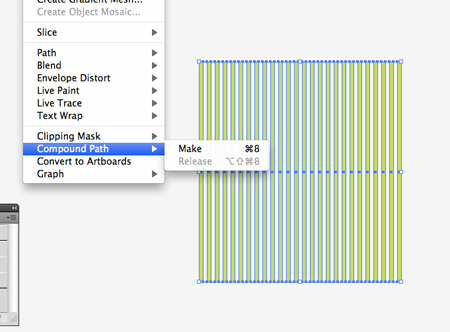
Select the series of rectangles and go to Object > Compound Path > Make. This allows them to be used with the Pathfinder in the next step.
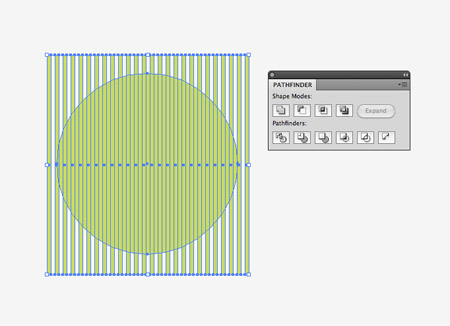
Draw a circle in the centre of the rectangles, then use the Intersect option from the Pathfinder to clip the rectangles to the confines of the circle.
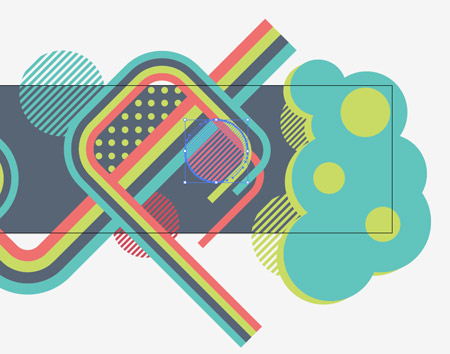
Use copies of these circle graphics in various colours to decorate the design. Alter the stacking order using the shortcut CMD+[ to allow the circles to creep in from behind other objects.
Study the design for blank spaces or gaps and fill them with various shapes and graphics. A few simple circles overlapping over areas of the same colour can create a cool effect.

Sticking to the simple 5-colour palette will allow same colour elements to blend together and balance the design with the same series of colours flowing across the whole board.
When the design is complete, group all the elements together. Don’t forget to press CMD+Alt+2 to unlock that background rectangle. Add a blank rectangle over the design and align it centrally with the artboard.
Select the group of elements and go to Object > Expand Appearance to convert any remaining paths and strokes to solid objects.

Select both the group of elements and the blank rectangle then hit the Crop option from the Pathfinder palette to trim everything down to size.
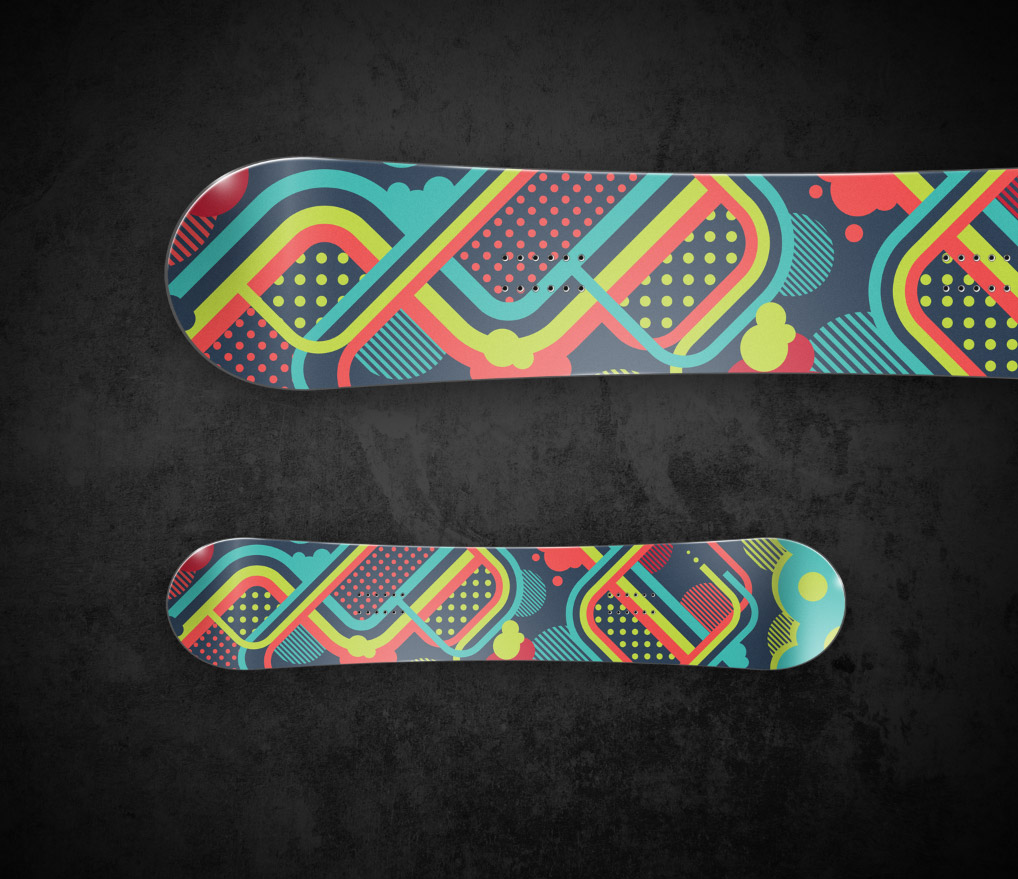
That leaves one completed snowboard deck design. Paste the design into a template supplied by your printer to finish off the artwork as a print ready file. In the meanwhile, we can mock up the design using the handy Snowboard template from Nunosk8.
Love this design? Get the t-shirt!


Great tutorial! Love the color! Thanks!
This is sick Chris! Similar to some stuff I’ve seen on Burton decks. Would love to strap that to my feet and shred some gnar!
Yeah, gnar shredding is great fun!
excellent work in this professional tutorial. thanks
Fantastic Design. Should be a real board!
Nice one Chris! I was not aware of such trick of art brush and its implementation. Thanks for it.
Great tutorial, thanks!
Thanks for great tut :D
Great, professional, quick and easy steps!
Awesome tutorial Chris! :D Many great tips, thanks!
Beautiful one there Chris!
I need help, why my line only have the round corner in the outside and the inside no? is round corner problem? http://s3.subirimagenes.com:81/privadas/previo/thump_1208294untitled1.jpg
Quality design Chris, should get some of these designs made up
Great tut, I’m in the process of designing some paintjobs for a guitar I’m modifying and this has inspired me to use illustrator to draft some ideas and I guess there’s nothing stopping me making that in to full-size stencils/templates to use to help me do the actual painting. cheers!
Hey, Chris! I loved this creation, but I missed some things in your tutorial that may help all fellas here.
You could put the icon image of the current tool that you’re gonna use, like Blob Brush, and in the beggining of the tutorial, the version of the software.
Tks!
This post is very helpful for me, thank you so much for sharing quality information.
Cool tut Chris. Ever send any of these to board companies? Maybe they’d use one of them. You never know.
Great tutorial Chris, I think I’m going to do this one later in the week, as I really need to get to grips with Illustrator more.
sweet tutorial.
nyce.
Awesome illustration :)
great piece of inspiration. Thanks Chris.
Some great techniques. I don’t think I’ll need a snowboard design but will definitely use some of the styling in other jobs. Great tutorial many thanks.
A very detailed illustrator tutorial. Thanks very much…many possible applications, snowboard is one of them.
Cheers
Egidius
This reminds me of a lot of your old Geometric tutorials, oh nostalgia. Very nice, good use of colour as well. :D
Enjoyed the tutorial as always. Inspiring, clear and informative—what else should it be. Oh yeah, a hell-of-a-good resource… You Rock!
Epic tutorial as usual, makes me want to go out and buy illustrator…
Anyway the snowboard template was a really handy link, thanks!
This was a great tutorial chris! Another rocking tutorial
Love the passion of your color. Great pattern! I wanna draw the lines on the other stuff like tshirt.
Hi Cris !
Are you still single ?? if yes I will apply for a visa right away just to marry you lol .I’m totally struck with your work…
Brilliant. Very impressive!
thank you for the tutorial, I love the vibrant colours and the design!
This is awesome. I love boarding and would love to get this done on mine.
Great tutorial, except a couple parts aren’t clicking with me. I am using CS5.
When I “Expand>Appearance” and then select (trying both the general and direct selection arrow tools) an individual line to make longer than the others, either the entire line scales (is made larger, breaking out from the other lines) or only one side of the line expands (I think this is with the direct tool), resulting in a point.
Any ideas from anyone on what I am doing wrong that I am unable to just extend an individual line out a little more from the others?
I think your problem is that your lines are still grouped together so when you try to select one with the general select tool it picks all of them (to un-group the lines just right click the object and click un-group) when your trying to use the direct select tool you have to select the two end points together or just move either end separately. Hope that helps.
Great tutorial.
Soon there will be a link to it in my blog.
There are other posts that are already there.
Check it out at http://bee-trees.blogspot.com/ and let me know your opinion.
awesome tutorial.. easy and very… easy to understand… thanks 4 d tip ya.. gonna try n do some design on by skateboard.. yeahh.. keep it up
hey.. thx for the tutorial.. i don’t use illustrator.. just cs n corel.. but this is nice.. and it’s easy too.. thanks
Мне очень понравилось. Вы молодец!!! Спасибо.
hi.how are you?can you help me?for learn illustrator?thanks
im from iran .i like learn illustrator.thanks help me
Loooooooved.
i used it, here is the result.. =P
http://phoenixdow.deviantart.com/art/Play-Snowbord-182437400
@Rock Photo Star
I had the same problem, took me a bit to figure it out but it’s simple:
Direct select the line segment you want to lengthen. Go to the pen tool and make sure BOTH anchor points are white (able to be manipulated). Go back to the direct selection tool and click on the end of the line and drag (hold shift to maintain angle).
sick! I wonder what the bottom looks like… you know you can design your own board over at Burton? I was going to do it, but didn’t have enough confidence. I would totally use this design, good job!
Great Tutorial dude i like it!
This is a great tutorial, I really love experimenting with vector shapes to create designs. I really like the overall look, its simple and still intricate. I also really like the colours used, they work really well together.
Great~thank you for your info
This Tutorial actually sucks pretty bad. You leave out a lot details that would help the design process.
very clear with multiple useful tricks. thanks.
Great tutorial! I love playing around with Illustrator!
This is a great tut for beginners like me! One of the few I could finish without getting lost or confused – thanks dude.
Muy buenos tutoriales, gracias por compartilos, buen trabajo!
That is fantastic! Thank-you for sharing!