There’s been a lack of monsters in recent posts here on Blog.SpoonGraphics, so here’s another vector monster tutorial for all you designers learning Illustrator to get stuck into! Use Illustrator’s basic shapes to form the outline and structure of a cute baby monster character, before adding colour, gradients and effects to bring the design to life.

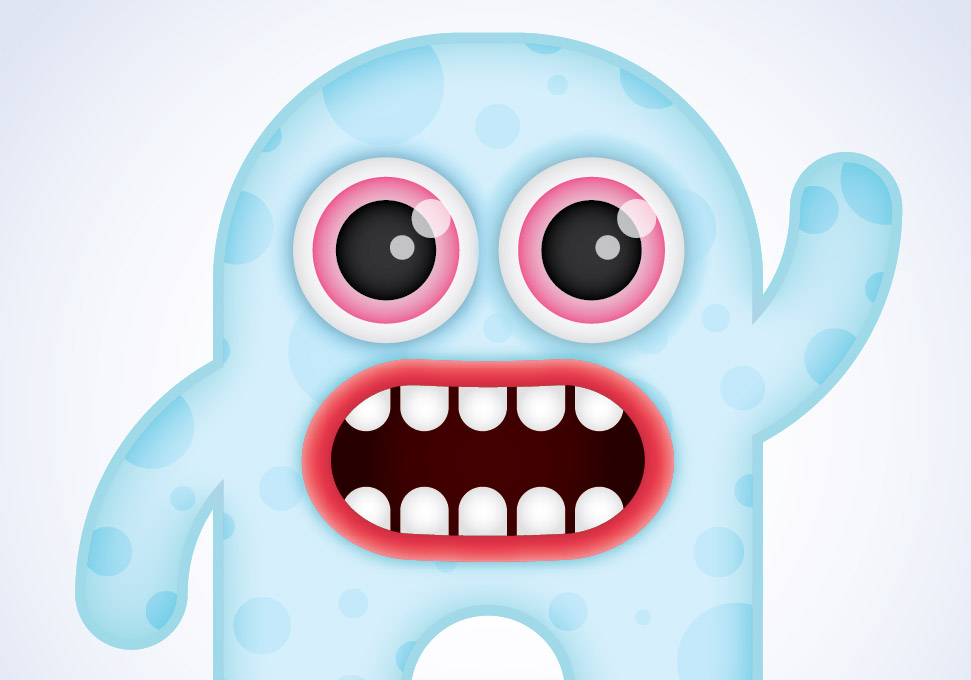
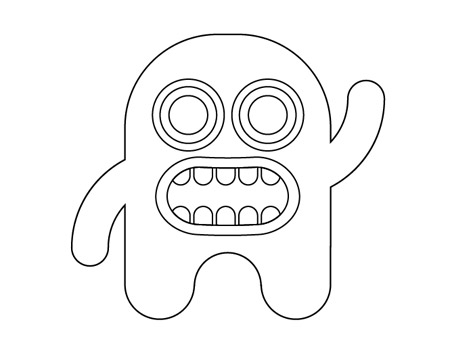
Here’s the character we’ll be creating this week. The soft rounded edges, large wide eyes and large forehead all combine to give the impression of a cute and friendly personality. The soft baby blue and pinks also tap into the common colour schemes related to babies and infants.
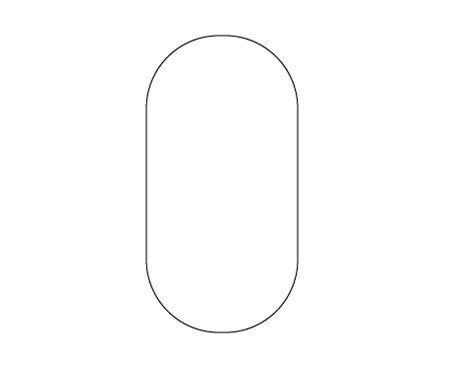
Open up Adobe Illustrator and create a new document. Grab the Rounded Rectangle tool and begin dragging a shape onto the artboard. Press the right hand cursor key to maximise the corner radius before releasing the mouse.
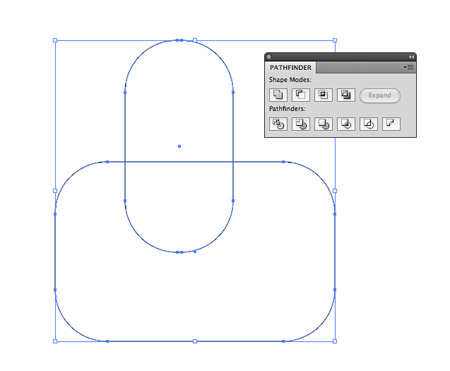
Draw a random rectangle over the previously created shape, ensuring that the lower curves are intersected by a straight edge. Use the Pathfinder Minus Front option to punch out the excess.
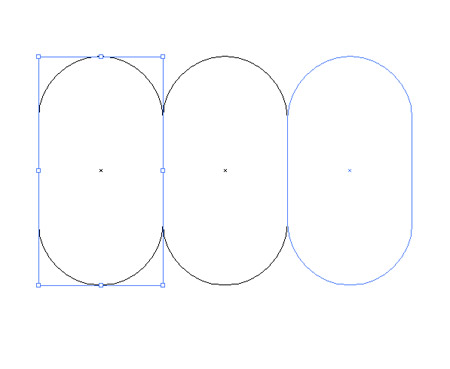
Elsewhere on the artboard, draw a smaller rounded rectangle. Copy (CMD+C) and Paste in Front (CMD+F), then drag it horizontally until the edges are aligned. Press CMD+Y to enter outline view for higher accuracy. Repeat the process one more time to give three aligned rectangles.
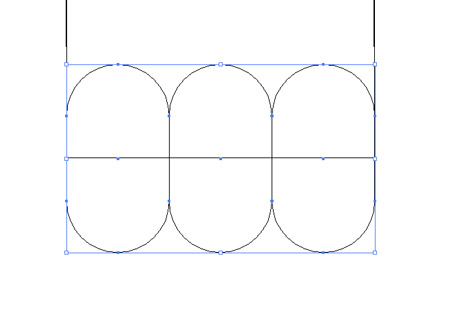
Select the group of three rectangles and scale the down (hold Shift) until they’re in line with the width of the larger rectangle.
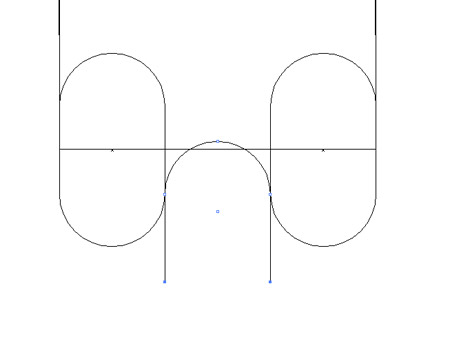
Select the middle rectangle and move it vertically until the start of the upper curve is aligned with the start of the lower curves of the other two shapes. Use the Direct Selection Tool to select and delete the points of the lower curve and sides.

On the other two rectangles, use the Direct Selection Tool to delete the upper curves and sides.
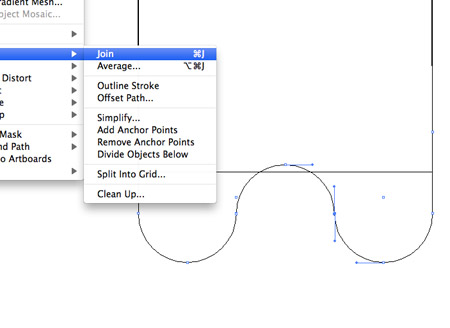
Drag a selection between the two open points between the left, right and centre rectangles, then press CMD+J to join them into a continuous path.
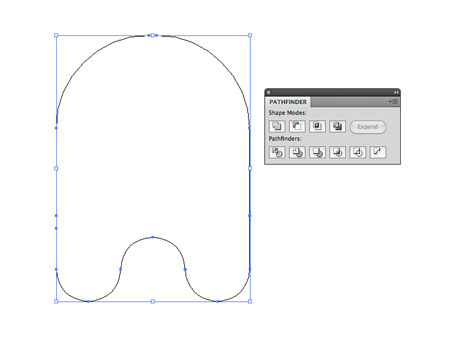
Select the lower portion, and the main upper body rectangle, then click the Unite option from the Pathfinder palette.

Draw a perfect circle elsewhere on the artboard. Use the Direct Selection Tool to delete the right hand and lower points, so leave a quarter-circle.
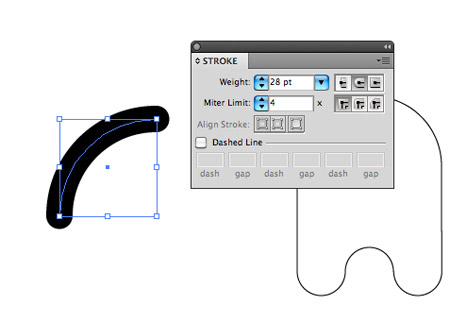
Increase the stroke of the path to around 28pt, and select the Round Cap option.
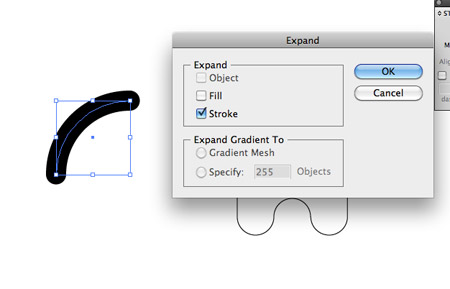
Go to Object > Expand, and select just the Stroke option. This will convert the stroke into a solid shape.
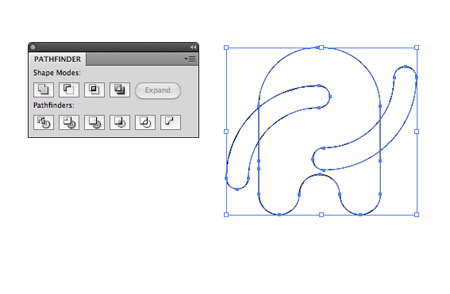
Move the quarter-circle shapes into place as arms of the monster. Rotate one to give the appearance of a waving hand. Unite these shapes with the body using the Pathfinder palette.
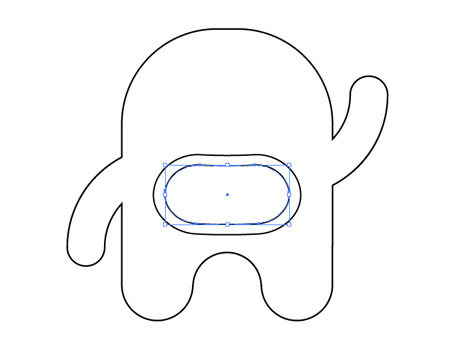
Use the Rounded Rectangle tool to draw a mouth shape, then go to Object > Path > Offset path to create a larger shape running parallel to the original.
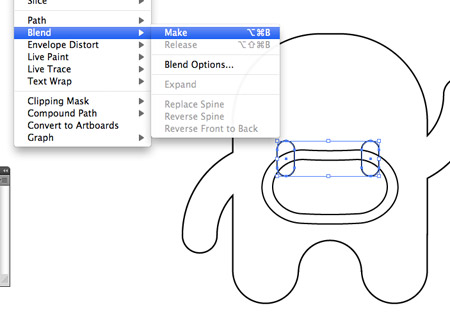
Draw a small tooth-like shape with the Rounded Rectangle tool, duplicate it and move to the opposite side of the mouth. Create a blend between the two shapes (Object > Blend > Make), then edit the Blend Options to Specified Steps with a value of 3.
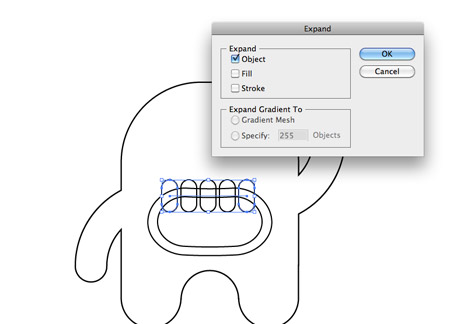
Go to Object > Expand once again, but this time select the Object option to convert the blend into individual shapes.
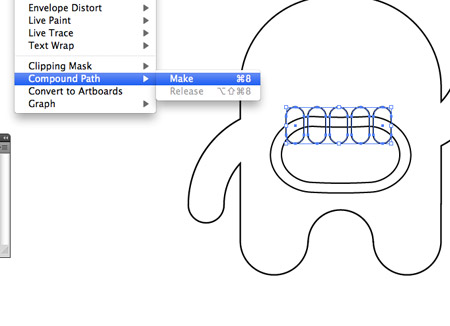
Ungroup the row of teeth, then go to Object > Compound Path > Make. This groups the shapes together in a way so that they can be used together with a Pathfinder command.
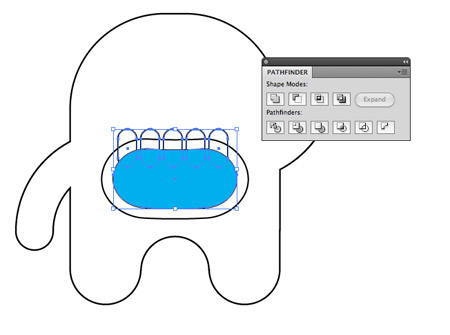
Ungroup the two mouth outline shapes and duplicate the inner object. Use this duplicate as a tool with the Pathfinder to clip down the teeth, using the Intersect option.
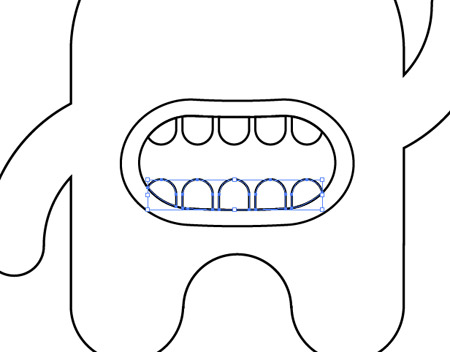
Copy and Paste the row and teeth, flip vertically and move into place to create a set of lower teeth.
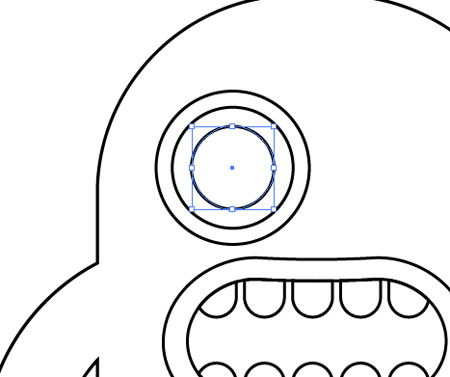
Draw a range of circles to form the structure of an eye. Paste in Place (CMD+F) each copy and scale while holding Shift and Alt.
Once the basic structure of the monster is complete, we can begin bringing it to life with colour and depth.
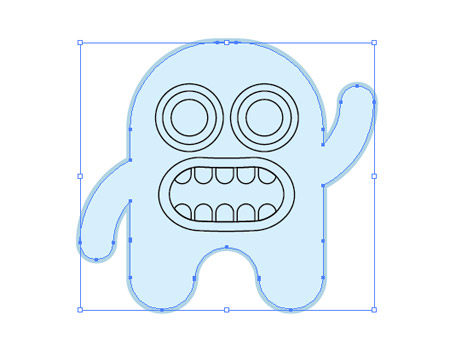
Start by adding colour to the body, I’m using a baby blue fill with a slightly darker stroke to give definition to the monster’s outline.
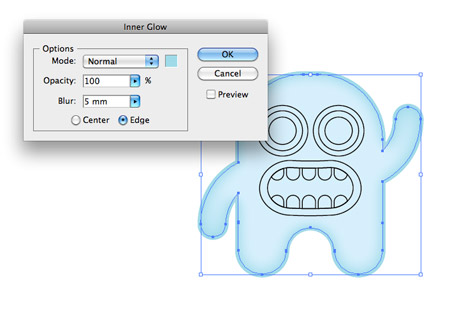
Add some depth by adding an Inner Glow (Effect > Stylize > Inner Glow). Select a slightly darker blue to the fill and blur by 5mm.
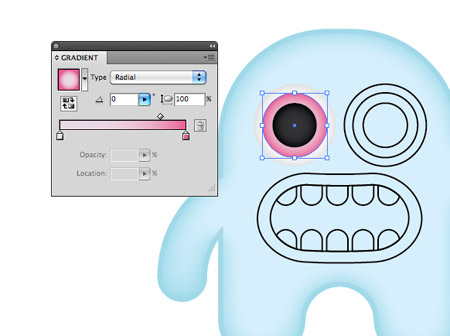
Give each of the circles that form the eye a relevant fill. Subtle gradients will help add extra levels of detail and depth. A bright pink iris colour draws in the attention against the contrasting blue body.
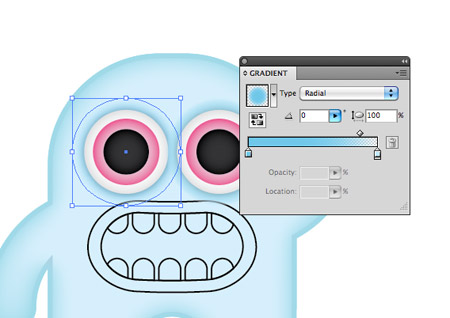
Draw another circle around the eye and fill it with a blue radial gradient. Choose a subtle blue at a slightly darker shade than the body to frame the eye and help it pop from the screen. A subtle drop shadow on the outer eye graphic also helps give more prominence to the eyes.
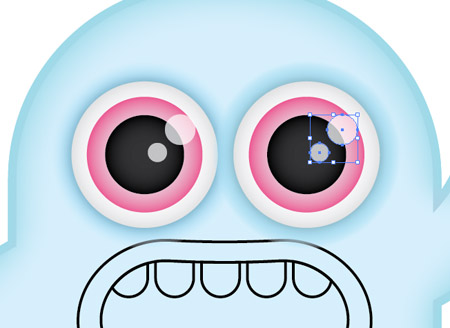
Draw a couple of specular highlights over the eyes and reduce the opacity to 70%. These simple circles do wonders in adding realism to a character.
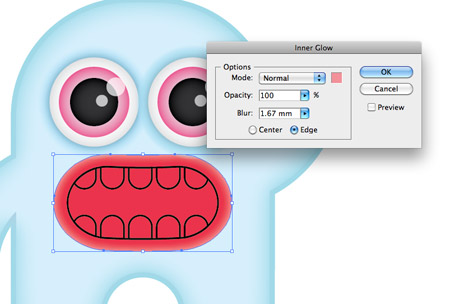
Fill the lips with a bright red, then add a pink Inner Glow to give a rounded appearance.

Add an Outer Glow to the lips using the same darker blue colour used on the eyes.
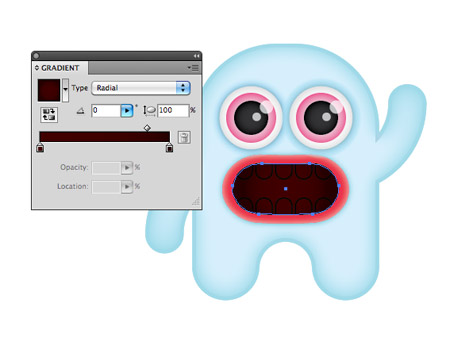
The inner mouth can be given a soft gradient between two very dark shades of red.
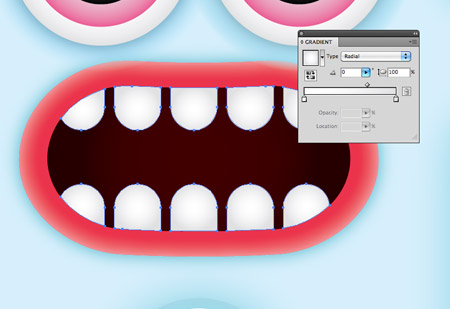
Add a subtle grey to white gradient to the teeth, adding a touch of depth that reinforces the rounded appearance.
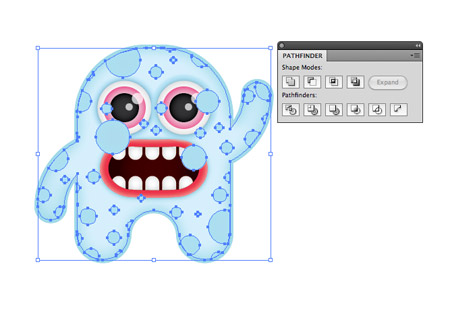
Draw a collection of random circles over the whole body of the monster. Copy and Paste a duplicate of the body outline, then use this along with the Pathfinder to trim down the circles. Tip: Go to Select > Same > Fill Color to easily load the selection of all the circular shapes.
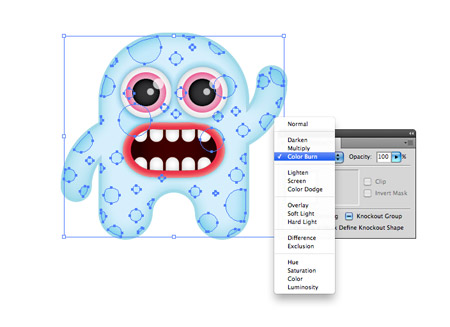
Adjust the stacking order of the shapes using the CMD+[ command so the circles don’t overlap the facial features of the eyes or mouth. Then change the blending mode to Color Burn to allow the fill colour to interact with the gradient fill of the body.
This renders our cute baby monster complete! Draw a selection over the final character and group together the individual shapes into one unified object.

Tutorial added to the web tuts
Tutorial added to the web tuts
As soon as I saw this I thought ‘oh my god someone needs to make a monster alphabet’. There’s the alphabet posters around with G and a picture of a giraffe, C and a cat, etc. At least with monsters the monsters can actually be the letters. I mean this monster already gives us a very cute A.
Great idea, I’ll have to add that to the to-do list!
Thanks for being a great resource!
Very nice lovely character Chris. Thanks!
Fantastic tutorial Chris. Will be having a go at this for sure :D
Excellent Tutorial!
Nice one Chris, thanks !
Hey Chris, I had some problems joining the bottom half. Can you send me a email maybe explaining what to do, this would be a big help, thanks! and The rest of the tutorial is great!
Make him smile! He’ll be even cuter!:)
Chris – you are like the Jim Henson of the vector world. I love all your characters!
Haha that’s great! Thanks for the tutorial.
Fabulous tutorial Chris…thanks for sharing…
First detailed vector tut I’ve seen here. Sometime, your tuts are hard to follow, but this one is great at all.
I love your monsters Chris :)
Good tutorial and a very likeable and believable finished character.
Muchos Gracias!
Nice job! I’d be interested in seeing the whole process, not only how you work in Illustrator! Thanks
Awesome Tutorial.
nice! (though all your article is nice)
Good tute !
How bout these monsters
ohhh sooo cute! cool tut: )
Cool tutorial cant wait to give it a go :) keep the monsters coming.
great tutorial Chris, love the monster, will create my own monster and put it on my homepage soon. [Will send over to say hello once he is living! ;) ]
Thanks for all the work you do, your site is very inspiring also. Pam
Here’s my result. http://sandbox.dridgett.com/tutorial-results/monster-birthday/
I started it at work, and then finished it on the train without any internet, so I had to ad-lib it a bit towards the end.
I felt the need to jazz it up in Flash a bit, so I had to dumb down the graphics a little.
Nice tut as always Chris. Your illustrator tuts are top notch.
Thanks!
Wow! Nice!
this is wonderful tutorial .. i read it 3 times and get a fantastic results and sure i put a
copy of this lesson on my here http://www.learnanyway.blogspot.com
Nice tutorial. I’ll have to try this one. Thanks!
Haha, this is so cute! Thanks for the tutorial, I enjoyed it. :)
I’ll definitely give this a go when I get time. It’s about time I tuned up my skills with illustrator. Looks well set out too!
Thanks.
man you monsters are so cute. is there anyway you can make them real? so i can cuddle with them?
You’ve inspired me!
http://destinationdevelop.wordpress.com/2010/05/06/vector-based-creature-fun-time/
Hey nice tutorial, chek muy result http://ht.ly/1HUm0
nice tutorial, i will add it as my next tutorial project.
reminds me of the octupus tutorial (i think it was on this site too).
I’m totally charmed by your blog, work, all!!!
Great tutorial! My result: http://bit.ly/cWi36q
Cute and scary! But easy to do. Thanks for showing!
A nice tutorial for illustrator maybe his evilness would be cuter with pointy teeth XD
Great tutorial. Thanks for sharing.
Thanks for share!!!!
Thanks for the kind comments everyone, glad to hear you’re all enjoying making your own monsters!
well i have probloms making the dam body sooooooooooo HELP
hmm.. simple and easy, good job!! i like this tutorial..!!
I am loving these tutorials. This one and the furry monster have kept me busy this avo.
Chris you the man… :)
Nice to meet you. There are a rut in the living in Japan and a question.
It was a lot and was impressed learning though It was ..blog.. wonderful. I also was working as a designer.
This character is nice though the character is drawn by the blog because it likes character illustration. It used or [a;] also served as a reference to wonderful about [irare]. Thank you.
d
thumbs up man! its a gr8 illustration.
Nice graphic tutorial, I like the idea and adapted it creating a logo for my mail.