
This post was originally published in 2007
The tips and techniques explained may be outdated.
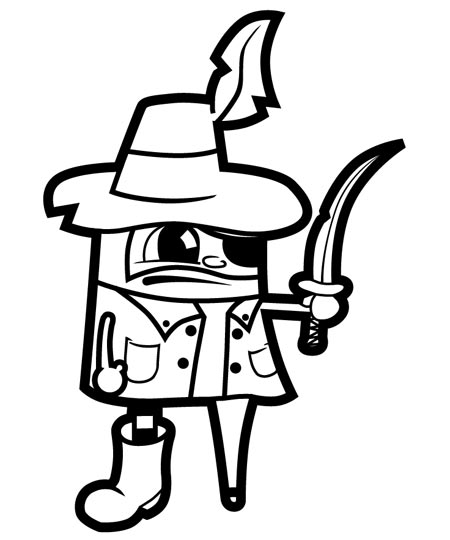
By firstly using the power of pen and paper a character design is created, which is then scanned into the computer to use as a base for tracing with Adobe Illustrator. The final outcome is a colourful cartoon character in vector format!
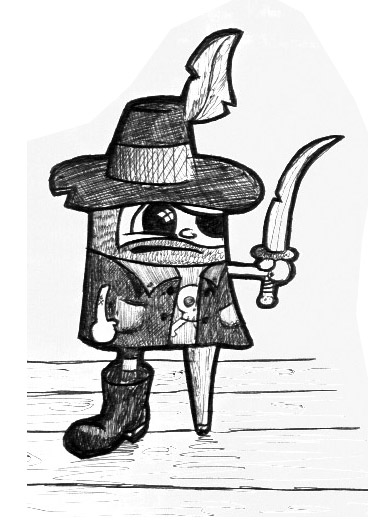
The first step in the creation of the Pirate is to sketch out your ideas for the character onto paper, once you are happy with your design scan the page of your sketchbook into your computer. 150dpi resolution will suffice as the scan is used solely for reference.
Those who don't feel they are the best artists may want to simply save my sketch of Captain BlackSpoon to their computer for use with this tutorial.
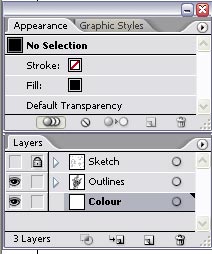
Open up Adobe Illustrator and place the scan onto the artboard (File > Place), set the opacity down to 20% or so and lock the layer.
Create a new layer and drag it below the scan layer. Use the Pen Tool to follow the outline of the sketch, then add a stroke of 8pt. When using the Pen Tool it is helpful to use the CTRL and ALT keys to toggle between different tools.
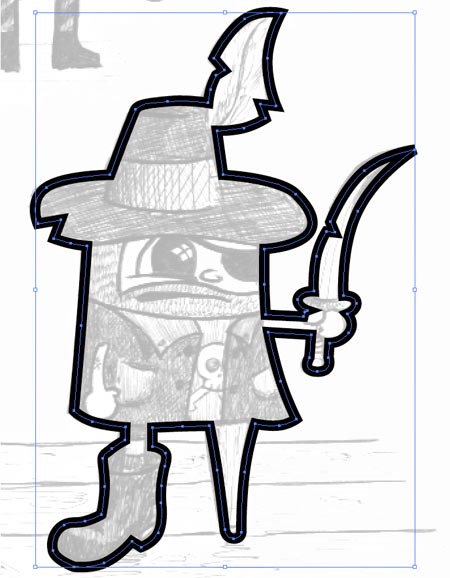
Once the outline is complete, use a smaller 4pt stroke to trace the detail lines such as the edge of the hat, beard line, coat outline etc. Zoom right in to position the stroke to give a fluid line from the thicker outline.
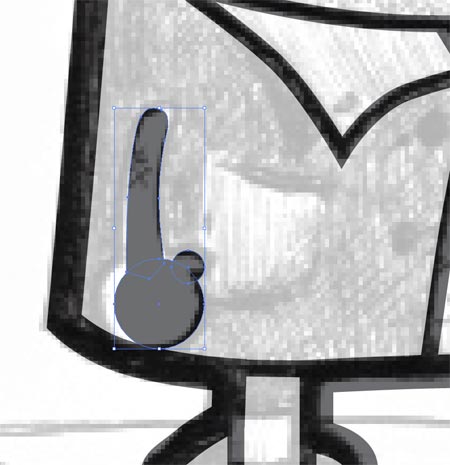
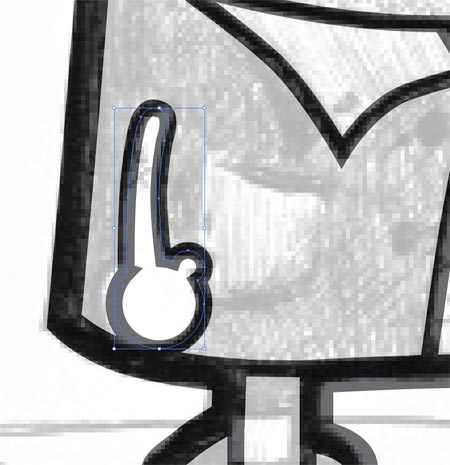
When you get to the arm, the character has a stylised hand, the simplest way to trace this is to draw two circles as shown, and draw the arm shape with the Pen Tool (complete the shape). Fill all these shapes with black, then use the Add To Shape Area within the Pathfinder window to join the shapes together. Swap the black fill to a 4pt outline.
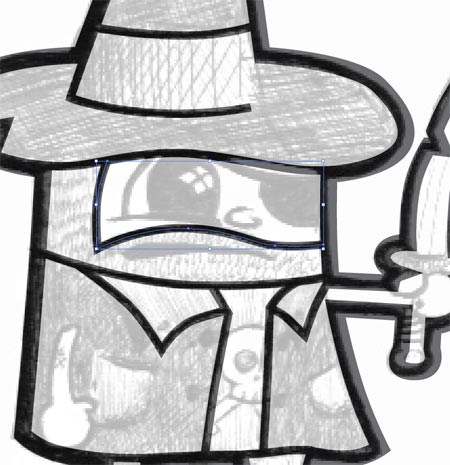
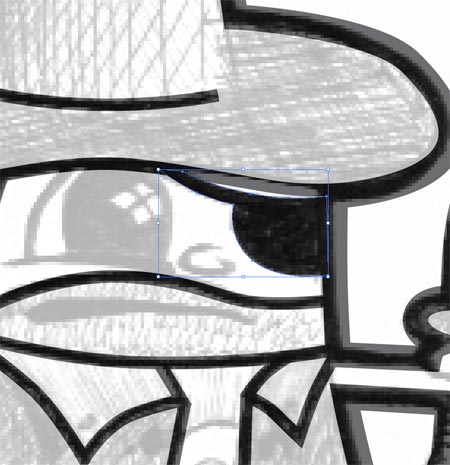
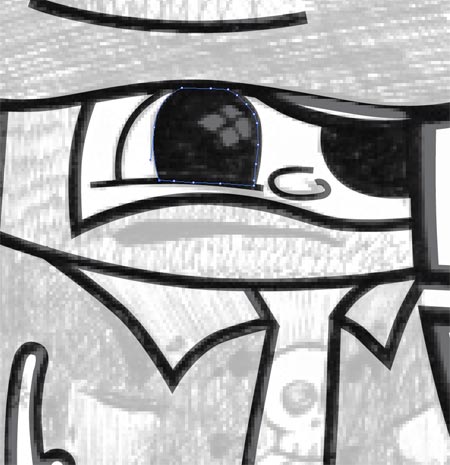
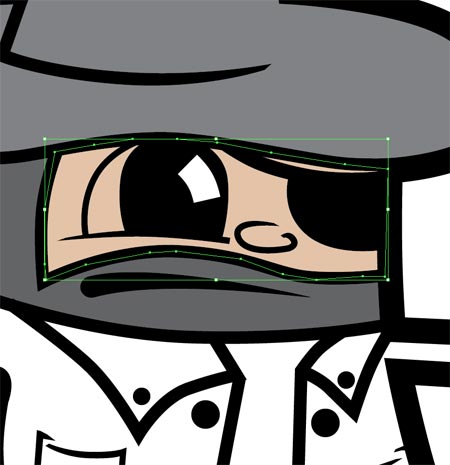
Create the shape of the eye patch and fill with black.
Use an even smaller 2pt stroke to outline the finer details on the face such as eye and nose.

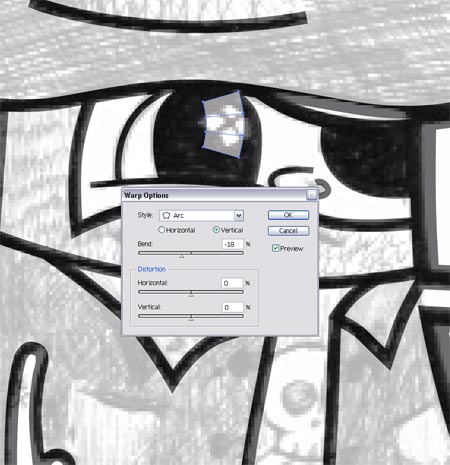
Fill the eyeball black, then create a small white rectangle as the highlight. Give this a curved shape by heading to Object > Envelope Distort > Make With Warp and choose the settings; Arc, Vertical, -18%. With the object still selected head to Object > Expand and select the Object checkbox.
Scale the highlight and rotate into position.

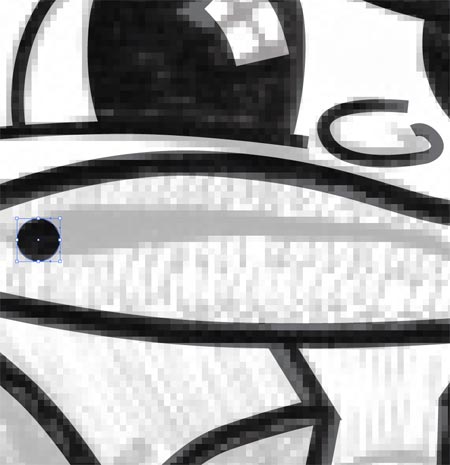
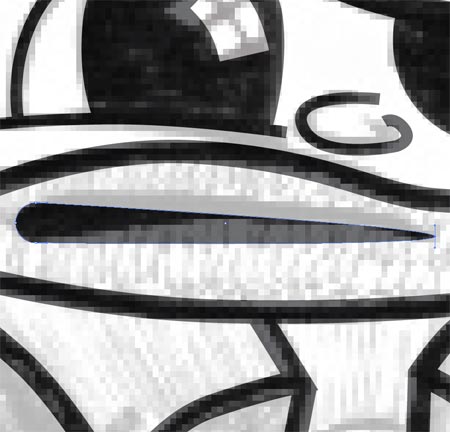
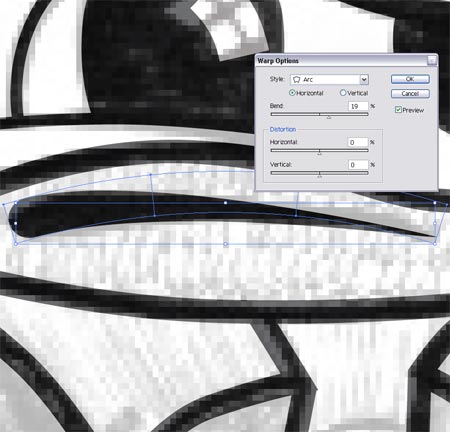
To draw the mouth, create a small black circle to the left of the mouth opening, then use the Direct Selection Tool to select the single point on the right. Drag this point to the opposite side of the mouth. Use the Envelope Distort function again to give a curved appearance, with the settings; Arc, Horizontal, 19%.
Trace the rest of the finer details on the character with the 2pt stroke, including sword handle, pockets and boot. Add buttons to the coat with small black circles.
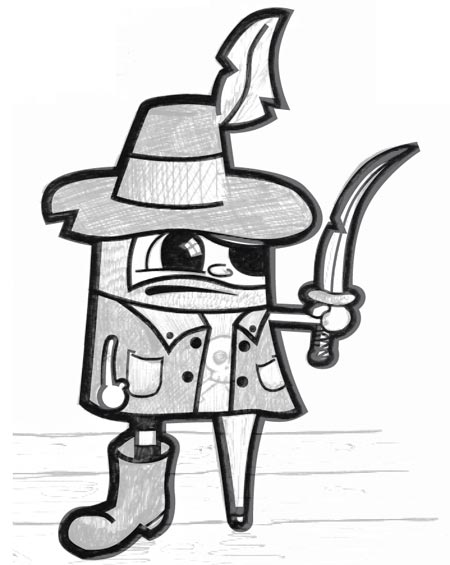
Once the character has been fully traced uncheck the visibility of the sketch layer and make any adjustments you deem necessary, on my example I made the arm larger than the sketch and scaled down the boot slightly.
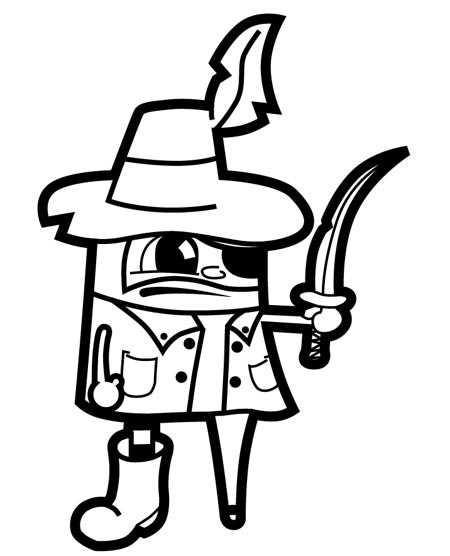
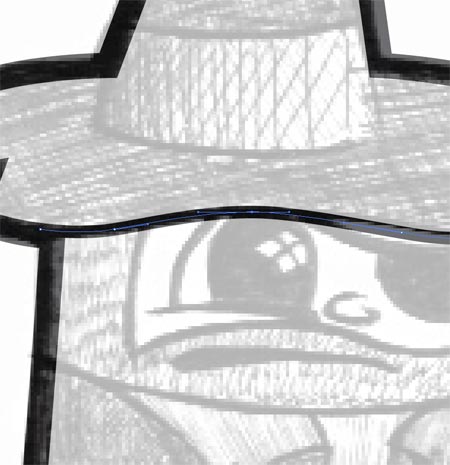
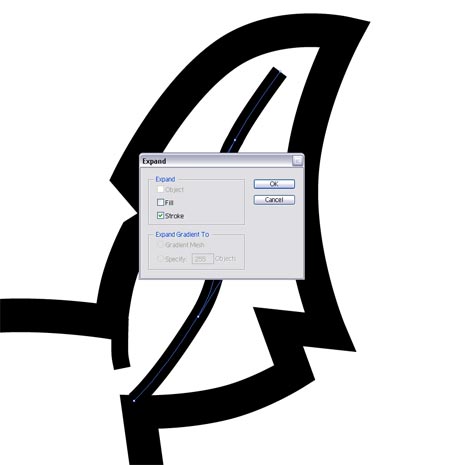
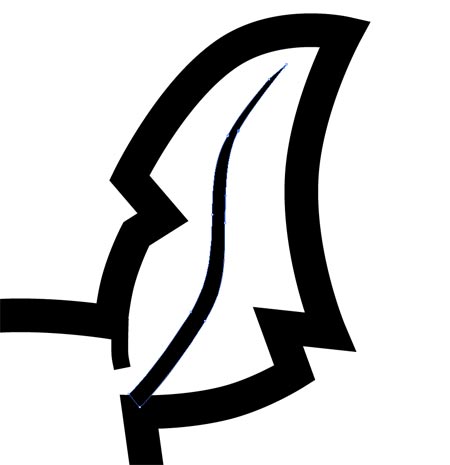
Remove the square edges of some of the traced lines, such as on the feather and facial features by zooming in and selecting the stroke. Click Object > Expand and select Stroke, then use the Direct Selection Tool to nudge individual points into position to achieve a pointed shape.
Create a new layer and position under the stack. Select a grey colour swatch and roughly follow the shape of the hat without straying from the black outlines.
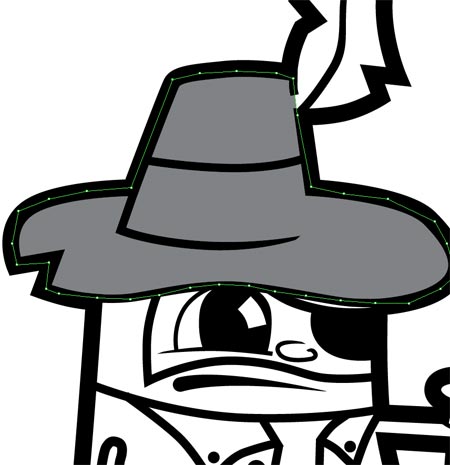
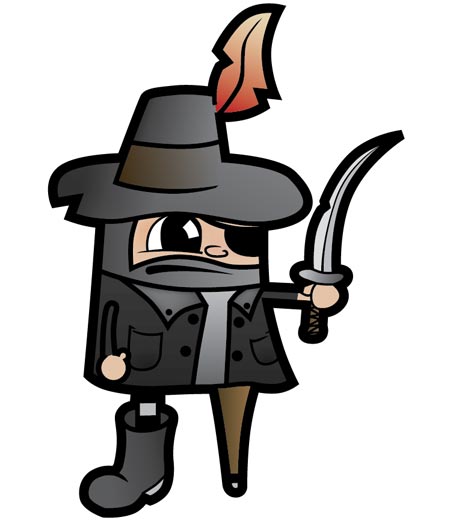
Repeat this process with the rest of the character, and fill each block with the appropriate colour.
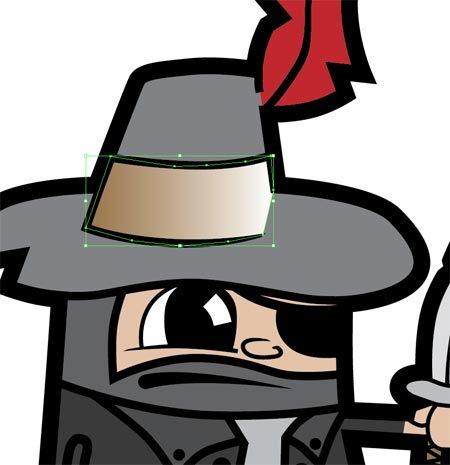
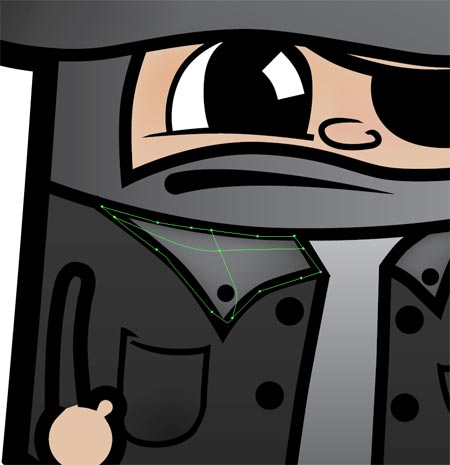
Zoom back to the hat and draw a shape outlining the stripe as shown. Fill this selection with a brown to white gradient then change the Transparency Mode to Multiply to render the white transparent.
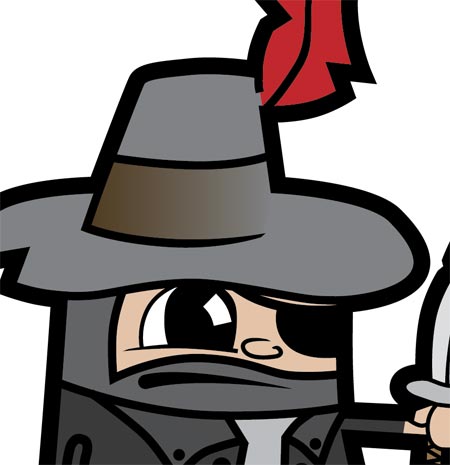
Go through each block of colour and add gradients to give depth to the character. Using the Gradient Tool and the Gradient Mesh tool from the toolbar can help at this stage.
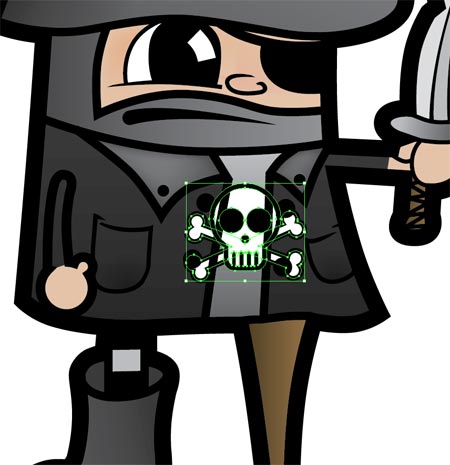
Add a final detail by downloading the SpoonGraphics Punk Vector Pack and copying the skull and crossbones graphic. Paste this graphic into your pirate and use the CTRL/CMD + [ and CTRL/CMD + ] shortcuts to arrange the graphic under the coat, but above the undershirt.
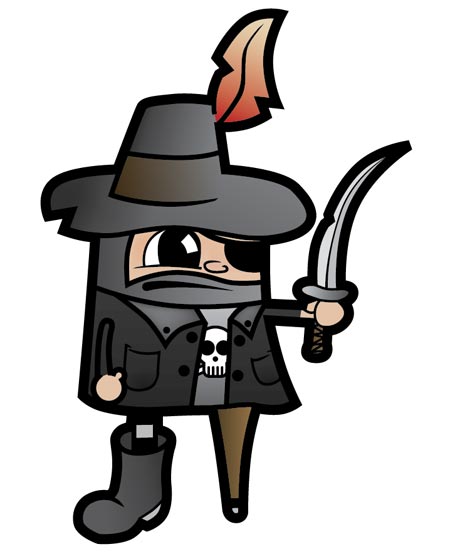
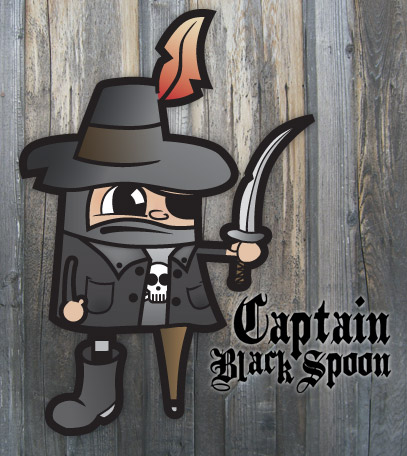
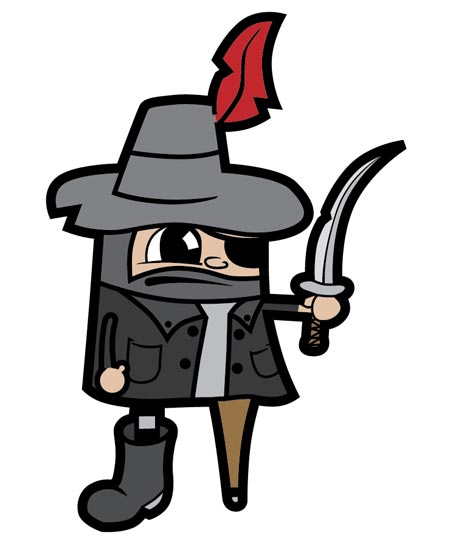
Compose your final piece in Photoshop by pasting the complete vector character onto a background texture and giving him a mean and ruthless pirate name!

Yaaarrrrr mateys!
Beautiful outcome! I need to learn Illustrator :(
Meow, nice tutorial!
beatiful example,thanks.
Amazing.
Be Bam Bam Bam! Very cool I think I have some homework now ;-)
Great tutorial! I learned so much!
Thank you!
Thank you so much, really helped me with my character design skills and process! Shiver me timbers Great work!
It is a nice tutorial. I learnt how to trace a scanned image in Illustrator using pen tool and color it. Tanks for this valuable tutorial. your site design is also very good….congrats…
Thankyou that was great gave me a better understand of basic character design, big help
Awesome tutorial, I do this exact method except my drawings are way too much, I love this one you did! :)
Only question I wonder is if there is a way to live paint the areas since you don’t connect that hat as one object, I’ve honestly never used live paint XD
-Jesse
waw..great
This is simply a great tutorial. I love it. But you could have told us more about the gradient mesh thing.
wow badass’ness great tutorial!
Cool info!
Plain sailing
Argh…nice bit of knowledge thar matey!
it’s good but sketching is not fair
Live paint anyone?
i think there would have been some problems with the gradients though, how would you get around that issue?
Im new to your site, but ive plowed straigt through BittBox’s site, and both of you guys have some great lessons! i love these little comic guys! eventually i would like to make a blog myself on how to apply all this fun stuff to architecture (since thats what i do).
this is really amazing…i must learn this
That is a cool little vector character tutorial. I like a good cartoon style to things.
There is a post over on Illcraft that you might find interesting. It discusses some issues with line quality in Illustrator vs. Photoshop for cartooning. http://www.briandenham.com/2008/01/20/whats-the-vector-victor/
Thanks I really like it! I like how you went from sketch to vector instead of vectoring something already on the web. I have a similiar post to this but its on drawing cartman from southpark.
http://solidtutorials.com/vector-art-drawing-cartman-in-vector-part-1.html
I must say though yours has a lot more detail :D
Great tutorial!
please, could you have told us more about the gradient mesh thing.
Holly cr … man this is good!
Nice tutorial. I am a new user on illustrator. Very helpful this tutorial for me. Thank you :)
Nice very nice thank you very much
great tutorial for create movies or cartoons with animation characters.
thank you.
ps. : i am new on illustrator but i want to be a professional.
I tried it!! –> http://flickr.com/photos/patoroco/2277959287/
Great work!
very nice cartoon :D
i just starting to use Illustrator
normaly i use Photoshop , but is time to learn Illustrator :))
good cartoon!
Oh , really expert tutorial , thanks to share your idea with others :) . Your tutorial gave me a good idea to design my new website header with this great technique .
Great tracing job. Looks good.
nice work. thanks
Hi All,
just wanna add, that instead placing the scanned image and setting the opacity to 20%, you can also place it as a template, you just have to tick the box in the browsing window, when looking for the image. It does the same job straight away.
Wow just amazing. Please do more of this type of tutorial
I am a beginner at vector drawing. Your tutorial looks great. I have been looking into a good vector program. I like the work you have done with Illustrator.
Awesome Awesome Awesome xD
I really love your tutorial, thanks a lot for the big share :)
Please, If you want to become an affiliate with my site, i’ll be glad :)
my site
http://www.q8ieng.com
you have my email *in this form*
:)
Very nice tip , thanks for sharing with us.
The process couldn’t be easier if we were to use a graphic table ?
this good project its very good.
Wow! its amazing.