This post was originally published in 2008
The tips and techniques explained may be outdated.
One of the subscribers here at Blog.SpoonGraphics recently emailed me asking if I could create a tutorial on how I produced the wavy ribbon shape as seen in one of my personal works; Retro Kicks. I was happy to oblige so here we have a simple walkthrough on how to create a colourful abstract ribbon shape in Illustrator, which can then be used as an element in your designs.

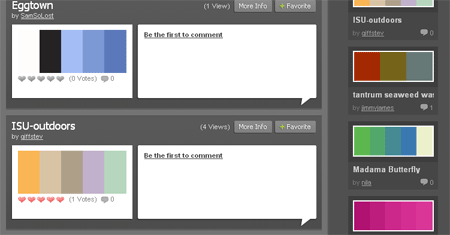
First of all, select your palette of colours. Maybe like me you have just bought a new belt with a cool combination of stripes that you can pinch the colours from, otherwise head over to ColourLovers and pick out a trendy selection.


Create blocks of your chosen colours in Illustrator to eye drop the colours from later.

Draw a long thin rectangle on the artboard and fill with your first colour swatch.


Duplicate the rectangle and butt the copy to the bottom of the original. One quick method here is to Move (Enter Key) the shape vertically using the same number as the height of the shape. Then Copy (CTRL/CMD + C), Paste in Front (CTRL/CMD + F) then Transform Again (CMTL/CMD + D) to repeat the movement. Replicate this last step over and over with each new shape until you have a block of perfectly aligned stripes.

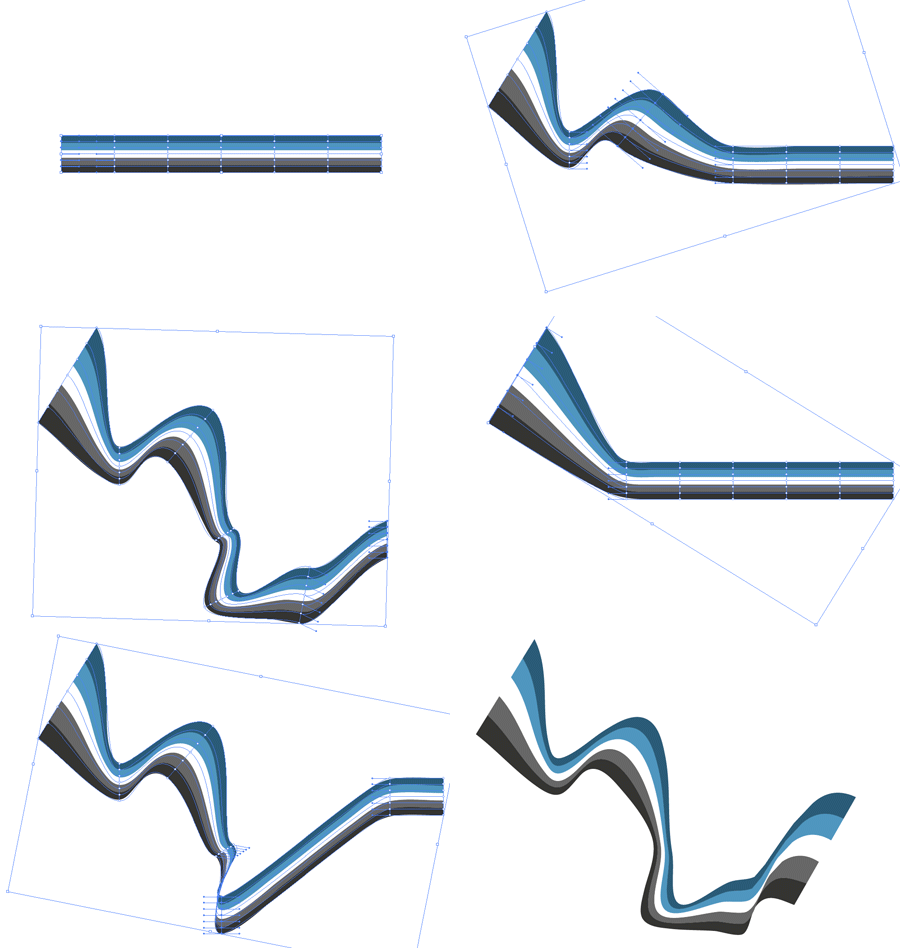
With all your stripes selected go to Object > Envelope Distort > Make With Mesh.

Enter 4 in the Rows and Columns boxes, you may want to experiment with higher numbers to allow more complex shapes.

Use the Direct Selection Tool to select a vertical line of points from the Mesh, use the Scale Tool whilst holding Shift to enlarge the end points proportionally.

Use the Rotate Tool to add an angle to the line of points.

Repeat the step on the next set of points, this time scaling down slightly.

Onto the third line, use the Direct Selection Tool to move the points around as well as Scaling and Rotating them. Aim to generate flowing curves without any tight kinks.

Fine tune each line of points in turn with all three tools to finalise your abstract stripes.

Now you have another vector element ready to Combine with Pixel and Produce Striking Artwork!

Go ahead and experiment with more Rows and Columns in the Envelope Mesh options, here you can see the process using 6 sets of mesh points.


really thanks for sharing .
Help me a lot i can´t buy a drink but I give a big Kiss
thank´s again
Makes us great
I have a question, were can I download Adobe Illustrator CS2? email me to angel_wings@live.com thx ^^
Thanks a million! Great tutorial — there are so many options in Illustrator that the possibilities seem endless.
thank you, to you for this tutorial. all my respect has.
nice tutorial, step by step, pictures help much
thanks
i like this site. this options wonderful tnk u tnks so mch
Viry Nice Gr8 tutorial…. Thanks a lot
muy chevere el tuto… y facil
This tutoriel is good
But i can’t seem to move the points in a curve, When i do it moves the whole block
What have i done wrong?
SO much lovely man!
Flo: you need to use the direct selection tool (white arrow). first click off any selection, then use that tool to draw a rectangle around where the points are that you want to move. with it still selected, drag it around. hope that helps.
Hi there,
As a fan of your blog, I admire your work. I wanted to share with you how I used your tips for the first time in my work … hope you like it!!
http://www.flickr.com/groups/719916@N21/
Hallo. Great tutorial man, I’m loving the knowledge!!
Do you know any way of creating an animated version of this using after effects… ?
Also I laid a simple b&w gradient over the stripes and changed the blending mode to Difference to achieve a almost shaded effect.
Keep up the good work.
omfg, thank you so much, now i understand HOW those masters has been playing with lines for years. Uncredible!!!
Thx for sharing
NICE TUTORIAL
THANK YOU
Hey Chris ….so simple and nice tutorial…thats great man!!!!!
I’m having a little trouble figuring this out. I can’t get any of the tools to work the way they do in the tutorial. :(
im having a little trouble with this tut many getting a vertical line of points,i can only select to at a time, am i missing something?
thank u very much
great tutorial
:)
thank you soooo much
THANK YOU! Thank You! Great tutorial and HUGE help!
Best design . I like it Very much
Thanks for sharing the Knwledge.
Hi There,
Nice tutorial! Very detailed! Guess what I made some guesses where you ask us to copy the color bars. I just pressed ctrl+alt+down arrow key and got a new bar.:)
So it was quite easy after that!
Thanks
When I click WARP WITH MESH, I can’t see a grid!
I love this tutorial! I am trying to do as many Illustrator tutorials as possible to learn the program! The only issue I seem to be having is my colors become all pixely and unpretty…any ideas why?
Never mind, I figured it out! Great easy tutorial! I’ve never used Illustrator and it was quite simple! Thanks!
Nice, thanks for sharing the wealth!
When I use the scale tool, it scales the entire thing. >.<
cool!! thnx :-D
how can i separate the lines from the ribbon, if i need to do so? is there any way?
Cool overview… cool Designs.
This works wonderfully but I have a problem:
Once I alter the shape of the envelope I can’t ungroup the envelope and return the individual rectangle objects (i.e. the stripes). I need to be able to change the colours of these individual rectangles that made up the envelope after I’ve altered the shape as the colours will not be finalized until much later.
Any ideas? Aside from finalizing the colour…
Thanks!
Very useful tutorial! I surely use this one ^^. Thanks
Once again, great tutorial !
Thanks a lot !
I agree! Thanks for the tutorial.
This is great! Thank you! I always wondered how to manipulate lines with ease in Illy…
Great tutorial, this can really expand anyone’s playing field
This is a really cool tutorial! I was able to follow it through in no time. Thanks again!
Hey, great tutorial, love trying stuff out in illustrator, photoshop and the likes. First year student in a multimedia course, sometimes it all gets a little scary! haha!
Love the site, Thanks again.
very very good tutorial, easy to understand
this site is pretty good :) thanks for the help
HI! Thanks ,, la verdad q me encanta este blog, sigan asi, es de mucha ayuda gracias.
I like the tutorial. I also remember the design you did with the shoes in it. Really cool. thx.
Can you do this with Photoshop ??
ITS GREAT BUT I HAVE A PROBLEM!!
WHEN I MAKE THE MESH AND MOVE THE POINTS, I CAN’T MAKE CURVES I ROTATE THE POINTS AND SCALE BUT ALWAYS IS STRAIGHT AND THE CURVES ARE NOT FINE.
SOMEBODY CAN HELP ME???
THANKS A LOT!!
I SEE NOW THE PROBLEM!!
if someone grouP the rectangles sure have my problem!!
NOT GROPU THE RECTANGLES!!
ITS MY FAULT!!
THANKS FOR THE TUT!!
HI THERE. THAT’s AMAZING :D i just wanna know. can i make these curves run around a picture for example maybe in a fashion shoot. Where I’d like to mix illustrations with pictures. Should I import the picture into illustrator and work from there or is there some other method?
I love you I love you I love you!!! Ok so I’m being a little over the top but seriously you are my hero! So happy you wrote this tutorial and boy it didn’t take you long after I made the request :).
Awesome!!!
Chris you have no idea how happy you’ve made me!! I’ve been wanting to know how to do this for the longest. I really want to donate but I can’t use paypal :(. Is there any other form of electronic payment you accept? Or maybe I can just snail mail you?
Thanks for the comments everyone;
Kafe; You can produce a similar effect in Photoshop using the Warp tool.
Sean Hodge; Thanks! I’m hoping to find time to sit down and produce a little more personal work, really helps develop the old skill set!
Red Henry; Glad you fixed the problem, good work on finding the solution!
Raithology, take a look at the How to Combine Pixel and Vector Tutorial, I think you’ll find some useful info there.
Elli, feel free to simply share/bookmark/digg the page to show your appreciation!
Chris
Oh Man! U’ve made my transition from freehand to illustrator easier
Great Tutorial!!
Amazing tutorial!!
Yesss, this is amazing! Thanks for that!!
I’ve already used this idea in a school project I’m working on. Thanks!
nice tutorial
i like it very much
keep it up
thanks
Pure gold.
Great tutorial!
Easy and simple process.
thanks!
tha´ts gooood tutorial
Great Tutorial!
good one. definitely im gonna use this in future projects. thanks!!
Piece of cake! Excellent tutorial!!
Thnks!
great tutorial..
can be done in just a minute!
thanks!
Nice :) thanks for information.
Can this be done with an art brush?
This is such an excellent tutorial! Thank you so much. Nice blog too!
The other option is to convert the color stripes u ve made to Illy’s brush stroke. Then just draw any lines and select the brush stroke that you ve made. It should work too, but maybe not as nice as this 1.
Havent try. (^_^)